


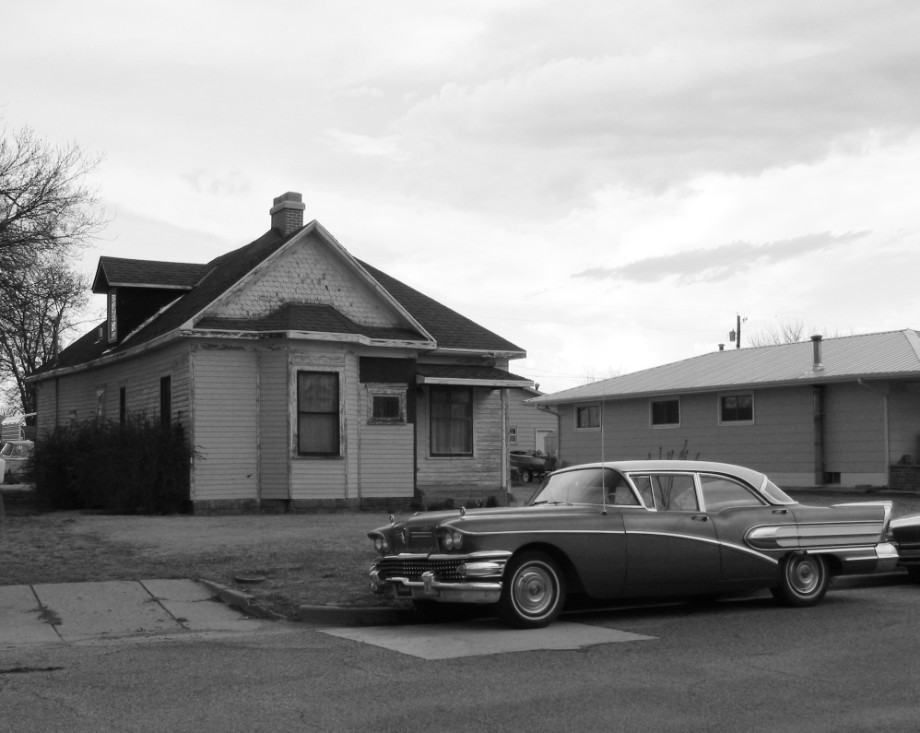
 G.G. lives in what I would call a classic Southern bungalow cottage — an enduring American style that was built, I think, well into the 1950s and 1960s — like this favorite St. Louis time capsule house. He recently completed an exquisite bathroom renovation — and was kind enough to share lots of detail with us. One of the things I like about stories like this, is that you can really see the level of intensity required to do a period renovation — this is not for the faint of heart. Also, as G.G. points out, thank the retro decorating gods for the internet. Doing the research to pull this off before the advent of www.world-at-your-fingertips.com was excrutiating. Well done, G.G.!


“Pam,.I have been a great fan of your site for a couple years now – You have one of the 3 or 4 blogs I check first thing every morning. I wanted to share some information about and photos of my recent bathroom renovation with you. I know you like to focus on postwar interiors and my bathroom is more late 1920s style, but I though you might like to see it anyway..My house is a 1908 bungalow – Stylistically it is primarily colonial revival , but with some arts and crafts touches. It was originally built for the town doctor – he and his family lived in the house until the mid 1930s. The second and third owners were a local farmer and his bachelor son. The son, a WW I veteran, inherited the property in 1945 and lived in the house until his death in 1985. By this time the house had grown quite dilapidated. The 1985 appraisal lists the value as $5000 for the property and $0 for the house. The only advantage of this is that the house had retained almost all of it’s original features.
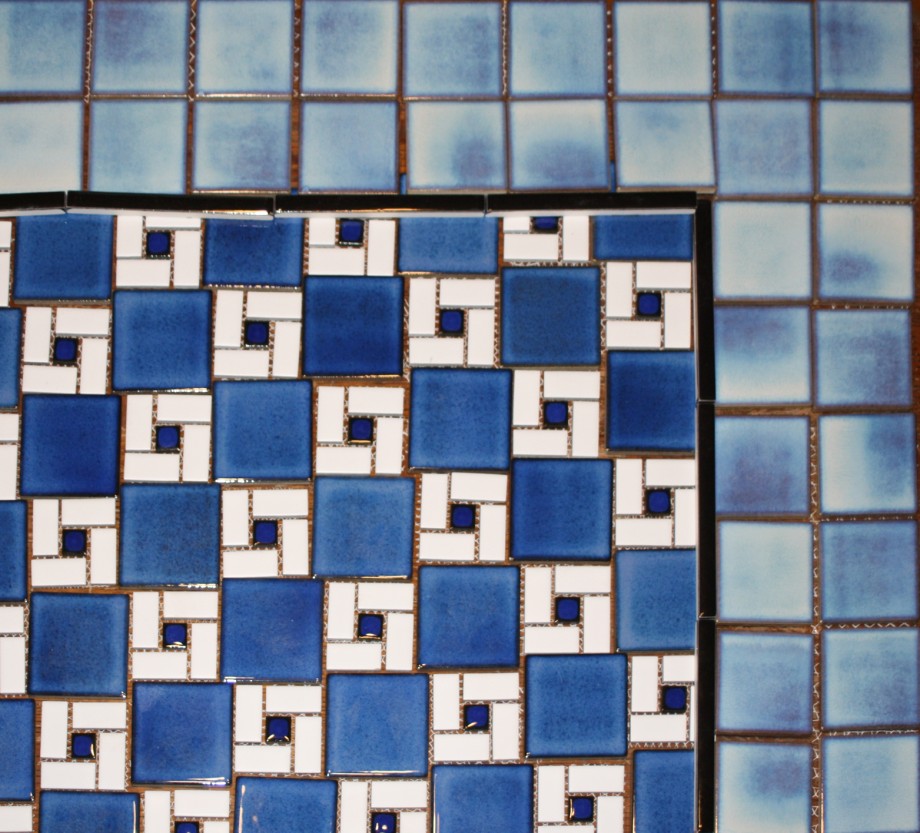
.The next owners, from 1985 to 2006 did a lot of work on the house. Thanks to them it now has new wiring, insulation, new plumbing, and a new roof. They were very respectful of the original features; they kept all the original woodwork and windows, some with diamond pane leading. Their renovation of the house was not complete when they moved, so I have spent the last 3 years constantly renovating different areas of the house. When I bought the house I knew I would redo the bathroom at some point. Functionally it was fine, and it did still have the original cast iron pedestal sink and claw foot tub, but the floor was vinyl and the wainscoting was just plywood paneling painted white..I lived with the bathroom as it was for 3 years until this spring when the seal went out in the toilet and flooded the floor. Figuring that I might as well redo the rest of the bathroom as long as I was tearing up the floor, I went to work. I am certainly no expert; this was a learn-as-you-go project for me. Before this project I had never tiled anything nor done any plumbing..First I had to get the fixtures out – the toilet and sink were not big deal, but the tub required some help- luckily I found a sucker … er … friend … to help me move it. It was heavy enough, and we were lazy enough, so we only moved it into the next room over. Consequently I had a claw foot tub as the centerpiece of my library for the next 3 months! After tearing up the vinyl flooring with its masonite substrate and the plywood wainscoting I laid down backer board on the floor and 5 ft up the wall..Now came the process of finding some tile sufficiently authentic that I liked and I could afford. Originally I was planning on doing a c. 1920 white bathroom with 1” hex tile on the floor and white subway tile on the walls. However after reading your blog for a while and buying the terrific book “Bungalow Bathrooms” by Jane Powell, I was inspired to redo the bathroom as a mid 1920s colored bath. While this would bear little resemblance to the bathroom that had actually been in my house in the 1920s I wanted to make a design that looked as though it could have been an untouched vintage bath rather than a modern recreation. I printed off dozens of reference photos and spent several weeks going through them trying to determine an appropriate color scheme. Retro Renovation and its associated flickr group were very helpful with this aspect of the project. I ordered several different tile samples from different manufactures..Eventually I narrowed down my choices and created some 3D computer models to get a better feel for how the tile would look in real life. The blue black and white color scheme won so I set to work buying components. The majority of tile came from American Universial’s Contempia II series. I was very happy with the visual interest provided by the variation in the glaze of this tile. In the end my order from American Universal cam to over 700 Lbs of tile. It wasn’t cheap; This one order of tile cost more than my car! I used three shades of blue 3×3 tile in the bathroom- 430 medium blue for the main wall tile, 470 light blue for the boarder on the floor and 450 dark blue in the main floor checkerboard pattern. Other tile obtained from American Universal included the 3×6 black tile used to make the baseboard and the black quarter round used to transition between the wall and the floor. The rest of the tile I used came from Home Depot. The mosaic tile used on the floor is Merola Tile Blue & White Spiral and I also got quite a bit of ½” liner tile to make up the trip strips. Since the American Universial Contempia II tile has a fairly pronounced bevel I could not use the very thin grout lines typical to an early 20th century bathroom. Luckily there is a precedent for the wider grout lines in arts and crafts tile installations. Several of Frank Lloyd Wright’s 1920s textile block houses have similar tile installations that helped lead me to my eventual decision to use wider grout lines.
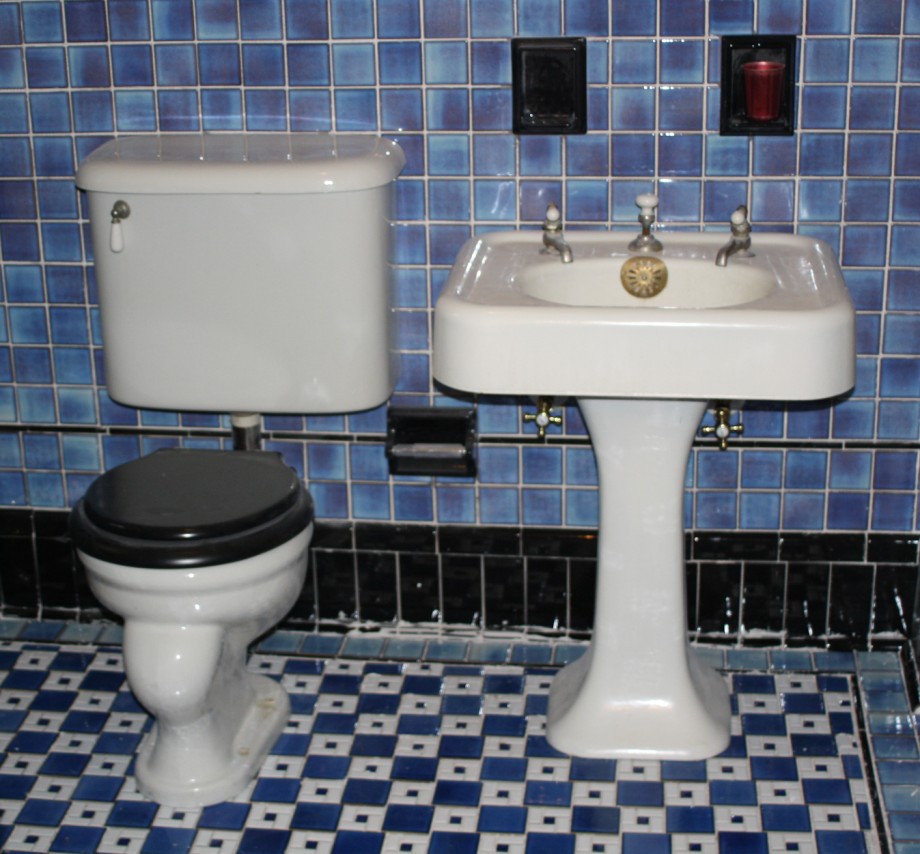
.One feature of my tile project I worked very hard to make work was the tile baseboard. I built out the backer board behind this tile so that It would be an actually 3-dimensional feature- I sized this to match the 8” baseboards in the rest of the house. The quarter-round tile at the intersection of the floor and the baseboard also matches the shoe-molding in the rest of the house. I initially planned to make the floor a straightforward checkerboard pattern alternating the dark blue 3×3 with sections of the spiral patterned mosaic. However when the tile arrived I realized that this would not work because the tiles were actually different sizes. I ended up laying the floor in a skewed checkerboard pattern that nicely accommodated the multiple tile sizes and had the secondary benefit of helping to hide any irregularities in the pattern due to my eye-balling the tile spacing. I applied all the tile with adhesive mastic and then used the darkest grout I could find. This dark grout also helped provide the visual illusion of an old-style mud-in tile job. Laying the tile actually went much faster than I thought it would. It only took me about 5 evenings worth of work to get everything placed. Grouting then took a similar time. The tub and sink are both cast iron American Standard units from the mid 20s- They came with the house and were in great shape so I knew all along that I would be re-using them. A claw foot tub is probably not strictly historically correct for this type of bathroom, but I had it and I was going to use it.
 My house is a 1908 bungalow – Stylistically it is primarily colonial revival , but with some arts and crafts touches. It was originally built for the town doctor – he and his family lived in the house until the mid 1930s. The second and third owners were a local farmer and his bachelor son. The son, a WW I veteran, inherited the property in 1945 and lived in the house until his death in 1985. By this time the house had grown quite dilapidated. The 1985 appraisal lists the value as $5000 for the property and $0 for the house. The only advantage of this is that the house had retained almost all of it’s original features.
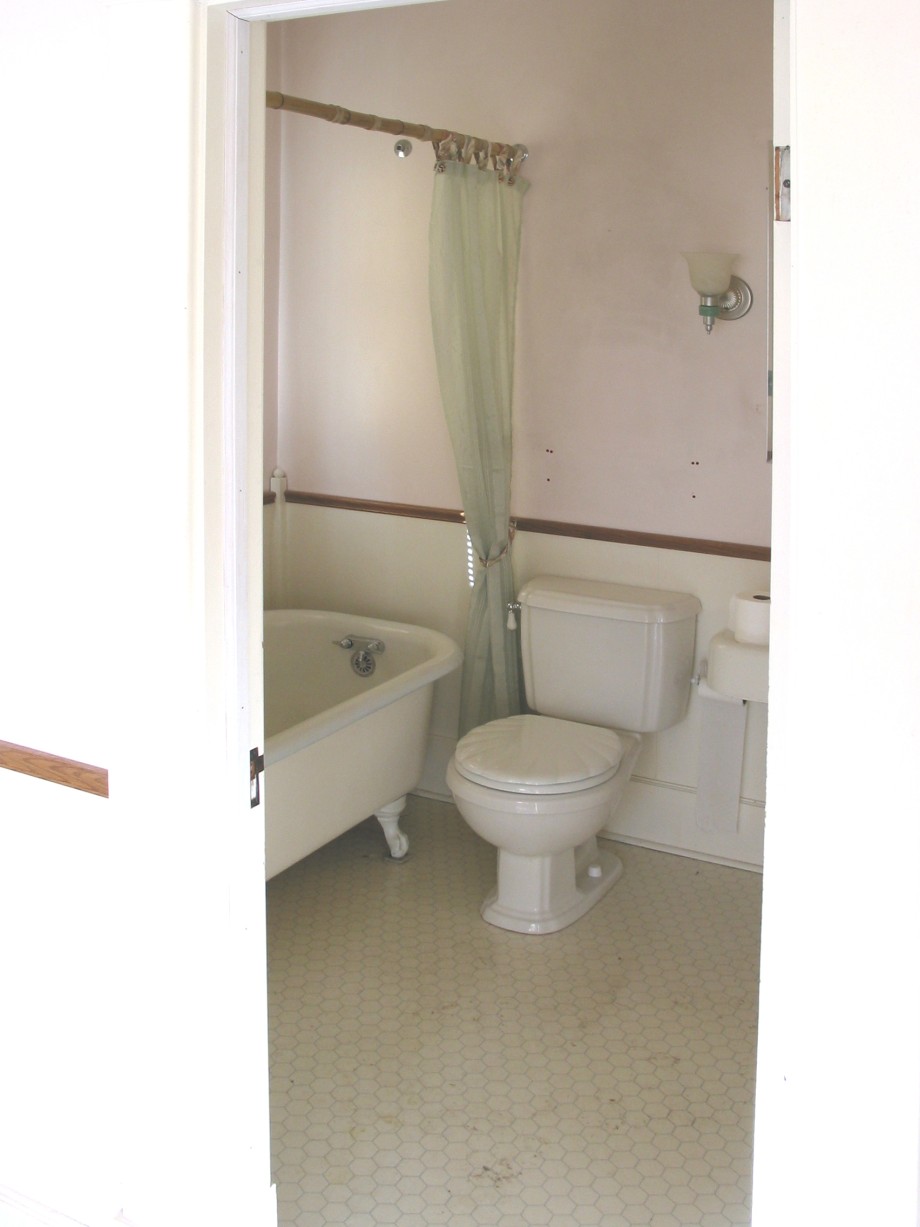

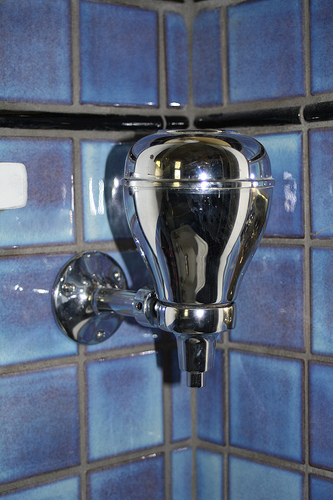
- The plumbing for the shower is a discontinued kit I got for about 1/3 of the normal price from Van Dykes Restorers website.
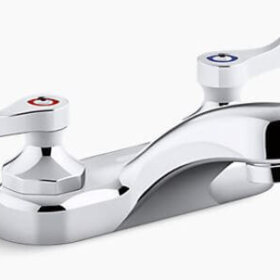
- The sink faucets are antique times from a junk shop that I refurbished.
- The water Supplies for the sink are discontinued sale items from Bathroom Machineries [ aka deabath.com ]
- The water supplies for the tub are discontinued sale items from Van Dykes Restorers.
- The toilet is a antique low tank model made by the Okolona Vitroware Co. I obtained this at a local architectural salvage place and then replaced all the flush and fill valve parts with reproductions from Bathroom Machineries. The seat is also a reproduction from Bathroom Machineries.
- The tile-in accessories are all antique salvaged items that I obtained over the internet from Historic Houseparts and Bathroom Machineries.
- The medicine cabinet door and mirror are original to the house, and still located in their original position. I trimmed out a replacement casing around the door to match the woodwork in the rest of the house.
- The bathroom was very dark originally so during my remodel I added two additional light fixture locations to brighten it up. All these light fixtures were obtained locally- the ceiling fixture from a local second hand store and the three wall sconces around the medicine cabinet were obtained from family members. I added Push Button Light Switches and other vintage accessories to help set the feel of the room.
This project would have been much harder, if not downright impossible without online resources. 90% of my components were bought online and the planning of the project was absolutely dependent on online sources showing me authentic 1920s and 30s tile jobs. Overall I am very happy about the results of this project: If I could change anything I would spend the extra money to eliminate the brass finished fixtures and get everything in chrome or nickel. The next big project on my renovation list: my kitchen. I am aiming for a target year of 1948 (the age of my stove) The Kitchen design will include the original 1920s cabinetry and farmhouse style sink. Appliances will rounded out with my 1934 GE Monitor top fridge in it’s arched top alcove. The flooring will be checkerboard Marmoleum click tiles and I will be adding a linoleum top with chrome edging to the cabinetry.
.Suppliers:Home DepotBathroom Machineries (aka deabath.com).From – G.G.


Shane Walp says
Does this man drive a ’58 Buick?! LOL
How do you measure for, and install those ceramic Built-Ins? Do you butter the sides w/spackling and stick it in the hole? How much bigger than the ceramic piece does the hole need to be?
Lawrence Bill says
You should be applauded for your persistence and perseverance to stay historically correct. Not many have the patience or respect for the original to do this. Looking forward to seeing how your kitchen turns out. By the way, is that a ’58 Buick parked out in front of your house? Very cool.
Andrea says
G.G., this is stunning! I love the rich colors, and the tile, which is gorgeous, is complemented beautifully by the yellow/buff color on the walls, a great choice. Adore the ceramic/milk glass light fixtures, so emblematic of the period. I think you did an amazing job, and like a previous commenter, thought for sure you hired a mega-bucks professional to design and execute this jewel! I also love that you kept/re-used everything you could from the original. Congratulations on a job very well done, indeed!
gab18481 says
Love that you did something in the spirit of the period of your house but put your own touches on it. Can’t wait to see what you do with the kitchen!
Gavin Hastings says
Beautiful! and so much work, lovingly done.
I admire the button switches (click/click) and the nice touch with the dispenser.
You created a room “as it could have been” without going OTT. Once again: if a homeowner listens to their house; it will tell you what to do… Congratulations!
Kay says
G.G.
You did a really great job on that bath. I think that Jeeves and Wooster could be quite at home in your house!
About those brass fixtures…have you thought about having them chromed by a metal refinishing company? I currently have my steel kitchen fan grate out to be chromed as part of the “refreshing” of my 1948 original kitchen. Refinishing the metal would probably cost a fraction of the cost of replacing those items in another finish!
G.G. says
I’ve considered it – It’s not in the budget right now but maybe down the road later.
Maria Stahl says
The new bathroom is lovely, but I have to say, I would have had a horrible time saying goodbye to the old one. All that hex tile… Argh.
G.G. says
It wasn’t real hex tile, it was sheet vinyl with hex tile pattern- I wouldn’t have torn out the real stuff.
BungalowBILL says
Love the rich color and the addition of the ventilator on the wall. Looks great. Congratulations on the successful completion of your hard work.
denised says
it looks GREAT! WOW! Your hard work paid off.
I am particularly fond of the push button light switches (brings back memories every time I see these) and the fact that you didn’t shine up the face plate.
Can’t wait to see the kitchen re-do, I’m sure it will be as awe inspiring.
Thank you Pam and G.G. for sharing.
John says
Hi G.G.,
Your bathroom looks wonderful and I originally thought you had it professionally done since it looks so amazing. You did an amazing job of researching and installing and are an inspiration to me and other home restorers!!!
Thanks for sharing and I can’t wait to see your kitchen renovation.
Peace, John aka Atomichipster