


Disclosure: Rust-Oleum paid for my transportation, lodging and food to attend this special event in New Orleans, where I could test this new product and hear directly from their company experts. There was no promise of news coverage. Opinions are my own.
Repainting your kitchen cabinets has historically been one of the most thankless home renovation projects. I say “thankless,” because in my experience, even after cleaning, sanding (argh), priming, then repainting — the doors still get chippy and the cabinets can still look kind of chalky and blah. It’s a lot of work with iffy results. Now, though, it seems like the folks at Rustoleum have come up with a new DIY painting system — Rustoleum Cabinet Transformations — that promises at least four major benefits: (1) No stripping, sanding or priming required, (2) excellent paint adhesion, (3) high-quality looks, and (4) a price tag less than $150. With this product, the company seems to be making a major move on today’s kitchen renovation market — which, in the wake of the Great Recession, is about working with what we have — especially what we have is existing, functional cabinetry. Of course, people still want an updated look, and Rustoleum is aiming to deliver it — in this cabinet-painting kit. My prediction: This product has all the makings of a huge hit.
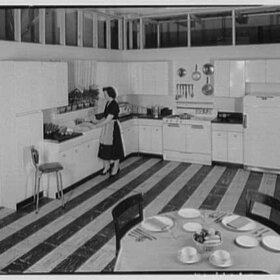
Last week, I was one of 10 home renovation and design bloggers invited by Rustoleum to see and experience this new product.
")
Another benefit of Rustoleum’s new system is that everything you need comes in one kit, except for brushes and gloves. Before you start, remove and number the doors and set them up “assembly line” fashion for efficiency. If you’re going to change your cabinet pulls, this is also the time to drill new holes and fill the old.
5 steps to repaint your kitchen cabinets
Step #1 is to use their special solution to clean the cabinets. Their cleaner is formulated to remove grease and grime and to bring up the “tooth” of the wood, so that you don’t need sanding. Oh, and let me properly introduce you to Ashley Lehrmann, pictured throughout playing the role of DIY painter. She is Senior Brand Manager, Rustoleum — and this product has been her baby for the past two years.

Steps #2 and #3 — Paint the kitchen cabinets using the tinted “bond coat” paint provided. Two coats, dry between according to instructions. I’ll talk more about colors in a moment. No noxious fumes (read more on the website), in fact, they tell you to close all your windows while painting to avoid dust and such from ruining the finish.

Step #4 — Optional — Add glaze, also provided. You apply the glaze… then wipe it off to get the effect you like. For example, you can only do the beaded areas for slight antiquing. The glaze helps emphasize the wood grain. But, you can leave the glaze off altogether for a solid color look.
![]()
Step #5 — Apply clear top coat (oopsy, no photo)…. and you’re done and ready to reinstall your doors. You’ll be painting both sides of the doors. And, you’re also going to paint the inside of the cabinet (no glaze, typically.) Of course: Read all the instructions on the box — and be sure to check out the Rustoleum Cabinet Transformations website, which should win an award for its presentation and thoroughness in today’s digital age. Nicely done.
Where to buy Rustoleum Cabinet Transformations
Pricing:
- $79.99 for the small kit — enough to cover 100 s.f.
- $149.99 for the large kit — for 200 s.f.
Where to buy:
- Check the website… but retailers include big box stores like Home Depot, Lowes and Menards… and there are smaller, more localized retailers, too.
Etc:
- Good on laminate and melamine, too.
- And yes: It will work on metal cabinets, too. Although you will get a satin finish, not a high-gloss enamel. Plus they said scuff up the metal and prime it, too. (Precautionary Pam reminds: Test for lead paint, consult with pro’s re proper safety and environmental precautions.) That said — they offered to talk to me further about other potential DIY solutions for our beloved steel cabinets. Stay tuned.

If you are super duper cost conscious, I think that you *could* do this project for less money, by using the “tried and trued” tools of sandpaper, primer and paint. But, I was convinced this $80-$150 expenditure looked well worth it, for a number of reasons:
- Rustoleum is a company that is all about “surfaces.” From their presentation it certainly seemed that they recognized the need for a paint system that combined excellent adhesion with professional quality looks. You DON’T want your painted kitchen cabinets to chip! I guess, like a 10-year-old car, we’ll see if their reassurances hold up, but from the look of the finish in person, I’d tend to think it will.
- In the same vein, the quality of the finish appeared to be excellent — the cabinets were beautiful. The two coats of color went on like liquid butter — there was both opacity and smooth flow. No lumps, nothing like that. I’ve spent many hours poking around kitchen stores looking at kitchen doors, and these looked like ringers to high-end painted-glazed kitchen doors to me.
- They had me at “no sanding.”
![]()
Retro kitchen cabinet colors
So now, let’s talk colors — vintage, retro, mid-century colors. There are 35 kitchen cabinet colors in the Transformations line right now, add glaze and they offer 70 looks in all.
![]()
In terms of the solid colors offered, I thought that a few — including a yellow, some of the blues, some of the whites, and even a Brady Bunch orange — had potential for our mid century kitchens. Except for the whites, the blue above, and the avocado green, though, none of them were what I’d call “retro”. Alas.
![]()
They also had a bundle of wood tones. I believe we were told that the Kona was selling like hotcakes. Again, though, nothing jumped out at me a “perfect” retro woodtone. In fact, I thought lots of the colors had a strange orange cast. I believe Rustoleum when they said they had consulted with professional color marketers and forecasters. I admit, I am out of touch with what’s popular “today” — I need to get me to a kitchen store to prowl around. To be sure, Rustoleum is aiming for the heart and soul of the mainstream, and that ain’t us, I guess… although, I certainly see “Retro” as an revival trend right now. Ummm, they had Greige, of course.

Yes, alas, no aquamarine, and wouldn’t it be fabulous to have, say, Mamie pink, sunbeam yellow, maybe a Ming green. The good news, though, is that the paint in the kit is tinted at the store when you buy it. So, it’s not an impossible thought that new color formulations could be developed — and they certainly know that Retro Renovation wants retro colors. I’ll keep in touch with Rustoleum about it… Meanwhile, if you are really hot to trot to freshen your cabinets, I’d for sure to out at look at the options available with this system.

On the use of glazes for mid century kitchen cabinets: Yes, I have seen marketing materials that indicated glazes were used on wood cabinets back in the day:

For example, these 1959 Fashionwood cabinets, above. Okay, maybe this is not “glaze over paint” — this may be a stain — but I think you can get the same basic look with the Rustoleum Transformations. The “avocado” color I mentioned before is achieved with a glaze.

As a reference for midcentury woodtones, here is another post I did about wood stain colors for television cabinetry from 1956.
 And, here is another reference post — color combinations for wood kitchen cabinets from 1953. Of course, we have a gazillion more images all over the site and in the Galleries that show vintage kitchens with their original finishes.
More stories about mid century paint colors and kitchen cabinets
Point is, I have a number of resource references for retro kitchen cabinet colors on the blog:
- All my paint color palettes for mid century homes.
- All my stories about kitchen cabinets for mid century homes.
- And if you’re looking to design a retro kitchen, be sure to read my complete Retro Kitchen “get started” page here!
Many thanks to the team from Rustoleum, along with their media agency, Empower MediaMarketing, for the excellent preview event. Tomorrow: Photos of some of the fun.
![]()


Jen says
Boy…I wish this had been around when we spent WEEKS sanding down and re-painting the oak cabinets our home came with! Will keep it in mind, though…Have to say I prefer a crisper white. Is the white on the cabinets nice and bright, or is it sort of pickled? It looks a bit pickled in the pictures.
pam kueber says
There is a glaze on this particular door. The glaze is optional – they had several whites to choose from.
Jen says
This is good to know, Pam, thanks. We have more cabinets to repaint…long story!
Gavin Hastings says
Do I dare try this on tongue and groove panelled walls?
Lynn Waller says
I use several Benjamin Moore products for cabinetry for my clients, and I really am abit leary of no sanding involved- it goes against everything I have learned in regards to painting. There are some great new waterborne alkyds such as Advance by Benjamin Moore, and also the Aura Satin is very durable with Stays Clear as a low-lustre clearcoat that does not yellow.
I am going to have to do some reading on this product –
Heidi says
One quick question if you don’t mind. How orange was the Brady Bunch orange color? We are about to do a small redo in the kitchen and I am considering orange cabinets but want a true 70’s orange. (My husband will have a heart attack……)
pam kueber says
haha. i think you need to go online and find an episode! hulu?
Heidi says
Opps, no, I meant in this line of paint! You mentioned a “Brady Bunch” type orange and I was curious if it is a true orange? I found the product at my Home Depot but they didn’t have any color charts or samples that I could find.
But looking up old episodes of The Brady Bunch isn’t a bad idea. It was my favorite show as a kid! 🙂
pam kueber says
I like to call the color of the Brady’s kitchen countertops “brady bunch orange” – or at least that’s how i remember it! you can see all the colors on the Rustoleum Transformations website…I think I also posted a photo of the one I thought was orange-y.
TappanTrailerTami says
Hi Pam,
That looks pretty cool……..question though. All the samples look like they applied the finish over oak, which has a relatively open grain and less likely to show brush marks etc.
Did you see this applied to a really smooth surface or tightly grained wood?
Thanks!
Tami
pam kueber says
Sorry, Tami, I did not. Hmmm. Maybe as soon as I could get some time free, I could do a test. In any case, though, I have worked with lots of paint before, and the “viscosity”(I think you call it) seemed pretty darn good.
Denise Cross says
Word: Japanese, not Janapese.
Denise Cross says
I know exactly what you mean about vintage wood colors. This Rustoleum “system” is very similar to the ThermaTru fiberglass door, “primered wood” & color “system”. I almost achieved the 50’s ‘blonde’ but not quite that same beautiful yellow that we remember. I may have read it here?, that the formula, additional tint, would be Janapese ochre added, and your Sherwin Williams or Dunn Edwards expert could do it and get authentic, desired color. I thought the hardest part about turning a primered surface into a “natural wood” surface was just trusting the process itself. You can’t visually tell what you’re doing, until it’s done. Practice makes perfect on this new technique.
pam kueber says
This Rustoleum achieve the wood-stain look because the glaze accentuates and calls out the existing wood grain of the underlying cabinet… I think that’s what you’re saying also, Denise, about the ThermaTru door — the door has a steel/wood grain texture… paint it then glaze it and it looks like real wood grain… ?
Tikimama says
I’m really interested in this product, because I have original, wood-grained late 70s laminate cabinets in my mobile home. Trust me, they are just ugly. I’m confused on the paint tinting, though. If you have to have the paint tinted at the store when you buy it, why couldn’t Home Depot or whatever just match a color chip the way they do with regular paint? Obviously, I’m missing something or just dense this morning.
I’m going to look into that laminate countertop paint, too (not the granite one!), because mine are butcher-block wood pattern – ugh.
pam kueber says
Rustoleum: Can you respond re HD doing custom tinting? But Tikimama, my understanding is that custom tinting CAN be done. There just are no formulas for the exact proportions of universal tints provided for this by Rustoleum. (Each paint manufacturer’s base is different… while there are universal tints, each manufacturer provides different secret sauce formulas for how to use them in their particular bases.) If you find a retailer/store that is willing to fuss with you, it’s do-able. And as I suggested in the original post, I am in contact now with Rustoleum — maybe I can work with them to come up with some instructions for a few retro colors, though, so everyone does not have to randomly experiment. I just don’t want to over-promise…
Rust-Oleum Cathy says
I work for Rust-Oleum and can help with that question! The current color tint formulas that you see on the kit have been specifically tested for hide, meaning you can go from dark original cabinets to light with 2 coats. If a custom formula outside of our available 35 colors is used, we cannot guarantee the coating will hide in 2 coats. I hope this helps! – Cathy (aka Rust-Oleum Cathy)
dale says
The reason the finish is on the flatter side is probably because this is essentially a heavily tinted primer, hence the need for two coats to even out the color. I don’t think there is such a thing as a magic bullet. Wash your cabinets well with TSP (or TSP substitute if TSP isn’t available in your state). The TSP will clean, degrease and knock the gloss off. Prime with something like Fresh Start or Kilz and topcoat with two coats of your favorite enamel. And if you have several coats of paint built up already, things will flake or chip.
The countertop paint interests me, but if it’s epoxy based, it will be pretty smelly.
Addrienne says
I was also wondering if it could be used on already painted cabinets since in the demo it looked like an un-painted sample. I have laminate cabinets that I sanded, primered, and painted but they are already chipping like crazy. I wondering if I could use this product over the existing paint.