

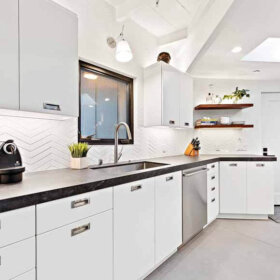
 My stories on repainting old kitchen cabinets with Rust-Oleum Cabinet Transformations continue to be among the most popular on the blog. Clearly: A lot of people are looking for products that make it easy to revive their old kitchen cabinets. Now, responding to folks with nice wood cabinets who want to keep the wood but just freshen it up (not paint it), Rust-Oleum has introduced their Rust-Oleum Wood Refinishing System. The video above shows how it’s done. Retail price is $69.97 and will cover a kitchen with about 40 linear feet of cabinets.
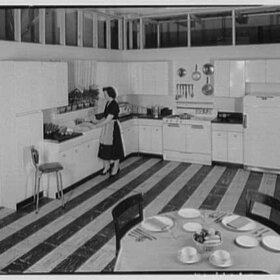
I asked the team at Rust-Oleum whether this product would work to revive the finish on older maple and birch cabinets — the kind that were ubiquitous in 1930s, 1940s, 1950s and 1960s kitchens — and they replied:
There should be no problem using the Transformation Wood Refinishing System on older maple cabinets.
I also asked if it could be used on wood paneling — I get lots of questions about bringing wood paneling back to life. They said:
It should also work well on real wood basement paneling, as long as its properly cleaned — but beware of trying to use it on paper wrapped or laminate paneling. It’s formulated for use on real wood only.
Re basement paneling, I’ll also add that you are going to go through 100 s.f. of product really fast — this may not be an “affordable” solution for an entire man cave. Rust-Oleum’s entire press release and FAQ are below. You can also read all about it on the Rust-Oleum Wood Refinishing System web page.
Read on for Rustoleum’s complete news release and FAQ on their new Rust-Oleum Wood Refinishing System:.
Rust-Oleum News Release:
The rich, warm beauty of natural wood has made it a popular choice for kitchen cabinetry. Unfortunately, wood cabinets can become faded and discolored due to normal wear and tear, grease and household cleaners – making both the cabinets and the entire kitchen look tired and outdated.
But now there’s an easy, affordable way to renew the original color of worn, faded wood cabinets and bring them back to their like-new condition – Rust-Oleum® Cabinet Transformations® Wood Refinishing System. The do-it-yourself refinishing kit rejuvenates the color of old cabinets without stripping or sanding. It conceals marks, scratches and water stains associated with daily wear and tear. Plus the tough, durable finish protects the surface for years.
“When we introduced our original Cabinet Transformations kit, many homeowners expressed an interest in a product that would rejuvenate their faded wood cabinets without completely changing the look,” said Rust-Oleum senior brand manager Ann Gearty. “The newest addition to our Transformations line, Cabinet Wood Refinishing System, utilizes state-of-the-art technology to make refreshing wood cabinets so easy, most projects can be completed in just one weekend.”
Cabinet Transformations Wood Refinishing System restores wood cabinets without stripping or sanding in three easy steps:
Step 1: Apply the Wood Cleaner with a cleaning sponge and wipe down the surface.
Step 3: Apply two coats of the Protective Top Coat. It’s that simple!
Step 2: Brush on the Color Enhancer and wipe-off with the Lint-free Cloth.To ensure homeowners find the best match for their existing cabinetry, Cabinet Transformations Wood Refinishing System is available in six tintbase color ranges. Simply pick the color group that best matches your cabinets: Pickled, Light, Medium, Dark, Light Red and Dark Red. Formulated for all types of wood, it’s also ideal for trim, interior doors, vanities and other wood furniture providing superior stain and scratch resistance with tack-free durability. It offers a permanent long-lasting solution and eliminates the need for continuous maintenance. The low odor formula cleans up easily with soap and water.
The Cabinet Transformations Wood Refinishing System kit comes complete with Wood Cleaner, Cleaning Sponges, Lint-free Cloths, Color Enhancer, Protective Top Coat and Stir Sticks. It also includes step-by-step instructions (in both English and Spanish) and an instructional DVD to make the wood refinishing project even easier.
Rust-Oleum Cabinet Transformations Wood Refinishing System is backed by a 100% Satisfaction Guarantee and is available in the paint and stain aisles of major home centers and hardware retailers. A dedicated Product Support line is also available for assistance with projects, if needed.
Frequently Asked Questions — Rust-Oleum® Cabinet Transformations® Wood Refinishing System
Note, this FAQ is as-of Jan. 4, 2012 — to see any updates, see the Rust-Oleum homepage for this product.
Q. Does Cabinet Transformations Wood Refinishing System work on laminate, metal or melamine cabinetry?
A. No, Cabinet Transformations Wood Refinishing System only works on real wood cabinetry that is stained in natural wood colors.
Q. Can I use Cabinet Transformations on damaged cabinets?
A. Yes. Holes and nicks can be filled with plastic wood filler. When the filler dries, sand the area until it is even with the surrounding surface. Once repairs have been made, follow the normal application process.
Q. Can I use Cabinet Transformations Wood Refinishing System on surfaces other than kitchen cabinetry?
A. Cabinet Transformations Wood Refinishing System is not limited to cabinetry. It can also be used to transform all woodwork including: islands, bath vanities, interior doors, and more.
Q. Can Cabinet Transformations Wood Refinishing System transform dark cabinets to a light color using the lighter tint base color?
A. The Wood Refinishing System is designed to restore the original color and beauty of your wood stained cabinetry. To completely change the color of your cabinets, the original stain color would need to be removed by sanding down the surface to bare wood, and then refinished with a traditional wood stain and polyurethane protective top coat.
Q. Can Cabinet Transformations Wood Refinishing System be used on new bare wood cabinetry?
A. No, Cabinet Transformations Wood Refinishing System is designed specifically for use on previously stained wood finishes, not new bare wood.
Q. Do I have to strip or sand the surface as part of the preparation?
A. Stripping and sanding are not necessary with Cabinet Transformations Wood Refinishing System. Simply use the Wood Cleaner and sponges provided to prepare your cabinets prior to applying the Color Enhancer and Protective Top Coat.
Q. How does room temperature and humidity affect the application process?
A. Higher humidity will cause the coating to dry more slowly while lower humidity will cause the coating to dry more quickly. Apply when air (ambient) temperature is 50 to 90 degrees Fahrenheit (10-32 degrees Celsius) and relative humidity is below 60 percent.
Q. How do I refinish around stoves, sinks, and other appliances?
A. Simply mask the sink, stove or other appliances with smooth painter’s tape. Be diligent about pressing in the edge to ensure none of the coating will bleed through. Place drop cloths over countertop surfaces and floors.
Q. Do I need to remove cabinet doors and hardware?
A. For the best results, removing cabinet doors and all cabinet hardware is recommended. It will be easier to get a smooth finish when coating the doors while they are lying flat.
Q. What can I use to prop up my cabinet doors during the application process?
A. Drive two drywall screws into a two by four. Set two of these on your worktable to support each door and to make the sides of your doors easier to coat. Please reference the instructional DVD for further details.
Q. Should I finish the inside of my cabinet frames or drawers?
A. It is recommended that all cabinet frames, doors and drawers be coated with two even coats of the Protective Top Coat. There is not, however, enough Protective Top Coat included in the kit to cover the inside of the cabinet frames or drawers. To ensure a clean, even look, tape the insides edges of each cabinet frame with smooth painter’s tape. Be sure all edges are pressed down to ensure that none of the coating will be able to bleed through.
Q. How can I avoid potential appearance problems?
A. Start by thoroughly cleaning the surface with the Wood Cleaner and rinsing well with clean water and a sponge. Be sure to remove the Color Enhancer with lint-free cloths in the direction of the wood grain. Finally, use a new or clean premium quality brush to apply two coats of Protective Top Coat.
Q. Can I spray or roll on the Cabinet Transformations coating?
A. It is not recommended to spray or roll on the Color Enhancer. The Color Enhancer needs to be worked into the surface with a foam brush, and removed with a clean lint-free cloth. The Protective Top Coat has been formulated and designed for optimal application with a brush, but can be sprayed with the proper equipment. To spray the Protective Top Coat, reduce up to ten percent water and use a HVLP sprayer at 35 psi. Ideal spray temperature and humidity conditions are 78 degrees Fahrenheit with 35 percent humidity.
Q. How long should I wait before installing my cabinet doors, drawers, and hardware after using Cabinet Transformations?
A. Cabinet doors, drawers, and hardware can be installed as early as 12 hours after the final coat of Protective Top Coat has been applied. Keep drawers and doors ajar until the Protective Top Coat is completely dry. The Protective Top Coat will be completely cured after 24 hours. Dry times will vary depending on your weather conditions.
Q. How do I safely maintain my Cabinet Transformations surface?
A. Caring for your resurfaced cabinets is easy. To clean the surface, use a damp cloth or sponge and a mild soap or detergent. Avoid using cleaners on new cabinetry for seven days.
Q. How long will Cabinet Transformations last?
A. With normal use and proper care, your refinished surface will last for years.
Disclosure: Rust-Oleum is currently an advertiser on the blog. This story isn’t part of the deal or anything, though. See my Disclosure policy (how I make money by writing this blog) here.


Danielle says
Will this product work on birch cupboards and paneling in my RV Trailer. They are real wood, and haven’t been touched since the trailer was built in the late 60’s. The wood has water stains on it and sun fading, but some areas like the ceiling look Brand New still. Can the product help with that?
TappanTrailerTami says
Hi Danielle,
For your vintage trailer interior, I *really* recommend Howard’s Restore-A-Finish. I did the entire interior of my trailer (not birch, but real wood paneling that had water stains and fading/dryness also). It worked wonders. You’ll need to get the right color for your cabinets, and also some very fine 000 steel wool and go to town on it following the directions on the Howards can (steel wool WITH the grain, always). Depending on how horrible the water stains are, you may need to go over it a couple of times. After that, wipe on some Howard’s Feed-n-Wax, and you’ll be AMAZED at the difference.
Have fun!!!
Ann-Marie Meyers says
Anyone who is into vintage wood should know about Howard products. They really work! I got years of smoke grime off a set of Conant Ball American Modern dressers and desk that no one else even bid on at an auction because they looked so awful. They cleaned up beautifully and now are my pride and joy.
Jeanne says
I’m eager to see the results on this! My kitchen cabinets SO need a sprucing up and this looks like it might be perfect. I don’t have the time right now and will probably make it a summer project. I did just use Restore-A-Finish on an old Lane walnut end table hand-me-down and it did a really nice job! It didn’t get the cigarette burn mark, but I can live with that.
Rita@thissortaoldlife says
I’m jealous. Wish I had the original wood cabinets in our kitchen so I could try this product. We have white laminate-type things that were likely installed in the 90s. And all the wood trim has been painted white. Trying to love the house I’m in, but that’s hard when it’s been deformed!
pam kueber says
🙁
Patty says
Why does their website say it works on laminate — yet their FAQs here say no to laminate?
Patty says
http://cabinets.rustoleumtransformations.com/how-to-guide.php
Laminate is ok according to this.
pam kueber says
NO — that faq is for the Painting system — not for the Wood refinishing. Please take care which page/product you are looking at!
pam kueber says
NO — that faq is for the Painting system — not for the Wood refinishing. Please take care which page/product you are looking at!
Lynz says
Yes! I need this. I am still in the middle of my kitchen mess currently without counter tops and 1/4 of the flooring. Our whole room is wood; trim, cabinets and paneling. I planned on painting the walls but like the wood cabinets yet they are dull in the middle and around the handles. I wonder if it will work on baseboards also…
Melissa says
So neat! I want to try this on our cabinets, can’t do the trial, won’t be able to get it done anytime soon but excited to see the results of the trial. I also have a bathroom cabinet that is in bad shape that would be fun to see if it improved it
Kate H says
I have two pieces of furniture that need to be spruced up: a dining room table, which has a few water marks and other dings on the top; and a side table. The side table was in a storage unit in the summer, with a seat cushion on top of it, and the pattern of the cushion fabric marred the surface of the table. I was thinking of refinishing both of these, but would the Rustoleum product do a better job?
Susan at Rust-Oleum says
Kate – The Transformations Wood Refinishing is an alternative to traditional wood refinishing if you want to keep the color of the wood the same. Overall, we would recommend this for any furniture that WILL NOT encounter heavy wear and tear. Always make sure to follow the directions in the kit for the best results. Here are a couple of “insider tips::
For harsher marked or worn areas, apply a second coat of the Color Enhancer by lightly feathering into the surface and let dry WITHOUT removing with a lint free cloth.
For extra protection, apply two coats of the Protective Topcoat for added durability. There will be enough Topcoat in the kit to apply two coats.
clampers says
Very very neat. I don’t need to do my kitchen cabinets but the trim work around doors and windows could sure use a facelift in my house. I did a little research a few months ago and found out that Howard’s Restore-a-Finish is also a good option. The president of the company (and, I think, a Howard son) even emailed me back with all kinds of tips and tricks on how to use it effectively for wood trim around your house.
Much better option than painting white, which is what I see on a lot of DIY home improvement blogs these days…
Heather S says
Wow, I wonder if this would clean up and brighten the knotty pine cabinets and panelling in my 1954 ranch that I just bought? I can’t WAIT to see how the results turn out!! Excited about this…
pam kueber says
Heather, I’ve asked Rust-Oleum if they want to monitor questions and respond… Meanwhile, I am concerned re knotty pine — which I tend to think was often sealed in amber shellac — a huge part of what gives it its distinctive yellow-orange glow. Wouldn’t want to harm that! Sometimes “original” patina is super important to preserve…. Rust-O, can you comment.
Susan at Rust-Oleum says
Heather & Pam,
We checked with our lab and they said that if the knotty pine cabinets were finished with shellac, the Transformations Wood Refinishing System will not change the amber tone. However, the clear Protective Top Coat included in the kit has a satin sheen, not glossy like shellac. If you want to retain the glossy sheen, this product is not recommended.
Also, knotty pine is a bit unique. Even though the cabinets may be old, there still may be pine sap in the knots that could ooze out during refinishing. Fortunately, the Protective Top Coat in the Wood Refinishing kit re-seals the knots, so you don’t have to worry about possible oozing. Good luck with your project!
Dena says
We are in the process of renovating or kitchen we want to keep are 1950s cabinets but would love to spruce then up. Here is a picture of our kitchen currently we just added the counters and white backsplash.
http://i3.photobucket.com/albums/y74/denamarie/1e038221.jpg
We’d love to test out the kit if you want.
Paula Webb says
Dena-Are the tiles behind the stove new? If so where did they come from? I am looking for something similar for a project I am starting.
dena says
the stainless steel are original to the home, the white tile we ordered from lowes.com, they were VERY reasonably priced!
Sheree says
My SIL and brother live in the home I grew up in and they still have the original kitchen cabinets from 1963. They sure could use this kit. The cabinets were good quality when my parents built the house and remain in good shape.
Thanks, Sheree