

Can you believe Chris did this all himself?
He shares his complete Resource List!


Reader Chris caught Pam’s attention right away when he posted a few photos of his recent bathroom remodel on the Retro Renovation Facebook page. When Pam asked me to write up Chris’ bathroom story, I too was blown away (holy tile work!), especially when I found out Chris did all of the work himself — from demo to tiling to building his own custom vanity. What’s also awesome about Chris’ bathroom is that much of the material he used for the renovation was salvaged — he has some great hunting and gathering skills.
Chris’ awesome bathroom remodel is inspiring — but he was also inspired by Pam’s bathroom series on Retro Renovation.
Chris says:
Your blog has been a great source for inspiration and materials. Your bathroom videos were so helpful, and you’ll notice some elements that are familiar from Pam’s own renovation.

Chris’ remodel was a huge project — with lots to ask about. Chris was a super-helpful with the Q&A:
Kate: Can you provide us with some back story about your house?
Chris: The house was built starting in 1948, but the occupancy permit wasn’t issued until 1950. The city directory lists the house as owner-built, and also lists the owner variously as a carpenter, bricklayer and handyman depending on the year. Having had the pleasure of re-working much of his work, I’m not sure he was overly skilled at any of those.
The major components of the house are built from recycled materials (the walls are solid brick from the 1880s or so, the joists are 3×10” nominal beams with marks from square nails and lath, and the floor boards are 5/4 tongue and groove pine with square iron nails still sticking out of the bottom from when they had previously been installed elsewhere. My guess is that the material is from an old factory that was demolished. There are also decorative granite rocks that look very much like they were taken from the river at the end of the street, and the mortar is made using what appears to be sand from the “beach” along the river as well.
The house is basically a 1940s Cape Cod that’s infused with elements of 50s ranch and 30s deco. The upper floor appears to have been one large attic initially, then divided into rooms — as wallpapers and shag carpeting run under the walls. In the 80s the house became a student rental, then just a rental until the city came and condemned it prior to my purchasing it.
To say it was in rough shape would be an understatement.
Kate: What made you decide to renovate it?
Chris: The second floor bath is the principle bath as the bedrooms are upstairs. The original bath was adjacent to the larger bedroom and was 54” wide and 12 feet long and positioned entirely under the sloping roof of the Cape Cod. The bathtub was positioned on the outside wall because the space was too narrow for it to be the other way. This meant that the wall side of the tub was 48” floor to ceiling. The “shower head” was positioned at a point where the ceiling height was 56”. I’m 6’-3”.
The one structural change to the space that I’m very pleased with is — after working with the building inspector — we decided to raise the ceiling height to match the rest of the upstairs, since for some inexplicable reason it was originally framed at six-and-a-half-feet. You also had to physically climb over the pedestal sink in order to get to the toilet, as the space between the sink and the wall that constituted the traffic path was 18” wide. Finally, the walls had been covered with pressed MDF patterned to look like tile that had then been texturized with stucco and then had been painted sunflower yellow. The floor was peel-and-stick vinyl tile applied directly to the subfloor. I gutted this space and it’s now the Master closet. The third “bedroom” upstairs had been converted to a kitchen during the rental days in the 80s. It wasn’t overly large, but it became the space for the bath.

Kate: Why did you choose a retro style?
Chris: The house has a great location, and the factory-sized bones means it was structurally strong. The goal was to give the house a cohesive architecture that was period appropriate to the era of the exterior. Only one room remained original and able to be restored. The rest had either been remuddled badly or had originally been simply drywalled boxes (such as the dining room), so the entire project is a gut and re-create. The focus is thus WWII-era, though admittedly, the quality of the materials are from a higher price point than originally used because the neighborhood has evolved in the past 60 years.

Kate: How did you choose the color scheme for your bathroom?
Chris: The color scheme is more practical than anything. I expect to be transferred sooner or later and may need to sell the house. I like 50s bright baths as well as the 40s mint greens, but a black/blue or mint/black combination doesn’t appeal to everyone. If I knew I was staying put for an extended period, I’d go with one of those color schemes anyway, however, the reality of my situation makes going neutral a better choice, and there are still plenty of examples of classic black/white originals from the era. The slate grey wall color was a mis-tint at Home Depot and was only $5 for the gallon, hence the wall color choice.
Kate: Did you do the work yourself?
Chris: Yes, though keep in mind I’m an engineer with a background in architecture which might help slightly with the permitting process, electrical and plumbing.
Being a precise and detailed person — he’s an engineer, which sure is handy for a home renovation! — Chris put together a detailed explanation and list of his materials:


Resource List: Tile
Chris says:
The white subway tile and the black subway tile laid in soldier course are both generic tile from my local store. They are made in Asia with no specific manufacturer noted. The black subway tile is used in place of proper base tile because, it was 10x the cost to use proper base, and also because the floor is not level so each tile could be cut to match the slant of the floor at the bottom and keep the rest of the tile perfectly level and therefore fool the eye into thinking the floor is also level. In reality the base is almost an inch higher on one end than it is on the other but you don’t notice it. The black chair rail tile is from the same generic series.
The black pencil tile (aka liner tile) ran above the base as well as on either side of the accent tile came mounted to one-foot square sheets for use as kitchen back splashes from the local big box. The tiles easily peeled off the mesh sheets and for the cost of $10 per sheet, you got 32 accent tiles rather than paying $1.98 each to buy the standard ½”x6” pencil tile. [Pam interjects: BRILLIANT IDEA!!!!]
The accent tile is (in between the two pencil/liner tiles, as shown above) a 2″x8” glass tile from Home Depot. It has a ribbed or “reeded” pattern that matches the privacy glass in the window. It is actually called white, but the glass makes it read blue-green against the white porcelain. Again it was super inexpensive being I think about $5 each.
The Floor tile is brand name and is Keystone mosaic from daltile. I choose it because it came in an off-white unglazed tile that is both safer when wet and more closely resembles vintage tile than the glossy white version sold most places. It was also important that the manufacturer sold 1×1 in the same colors further making daltile one of the few choices. The plain white fills as well as the black borders are made from tiles cut from 12×24” sheets of 1×1 tiles in both white and black. I ran a continuous 1×1 black tile against the base all the way around the room to further the give the feel of the proper 50s coved base tiles. Doing this also allowed me to break up the white of the floor from the white of the tub, which didn’t look that great together when they touched. The grout is ‘dark charcoal’ which has worked out well and tones down the field of white since the floor white differs from the wall’s glossy white finish. I used epoxy grout in the shower which doesn’t require sealing and you really don’t notice the difference between it and the standard non-sanded grout used in the rest of the bath. Epoxy grout uses a different installation method than standard grout, but once you understand it, I didn’t find it any more difficult to work with (keep it iced – it’s an exothermic reaction).
I splurged and installed electric tile heat under the tile, and admit it’s fantastic to have a warm floor to walk on in the mornings. I haven’t noticed any impact on my electrical bill from it either. The electric warming mat is made by Warmly Yours.


Resource List: Plumbing
Chris shares:
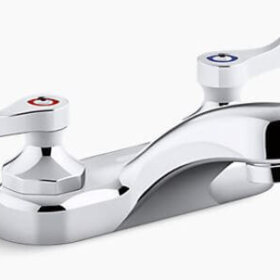
Toilet, sink: Kohler Memoirs Stately Collection, with the original Kohler flush lever swapped out for an American Standard Town square one to match the taps (rework was needed to do that).
Faucets: I used your suggestion for 8” centers on the taps (American Standard Town Square Collection) so that it’d be easier to clean. Diverter valve in shower Kohler Memoirs (American Standard didn’t make one in the Town Square series). Handheld is by Delta as I wanted one that was square, and for some unknown reason the American Standard Town Square one has a very rounded handheld that in my opinion doesn’t look anything like the rest of the series. The drop elbow is from Pfister, as again I wanted the square one and both Kohler’s and AS were round. Body sprays are from Grohe. I also included a cubby area (with the sill set at a 5 degree slope to drain water) in the shower like you suggested.
The towel warmer is the Infinity model from Warmly Yours. (Keeps towels from smelling musty allowing them to be used multiple times, and as a bonus makes them nice and warm as you wrap them around yourself coming out of the shower).
Resource List: Doors

Chris’ list:
I’ve noticed on a number of homes of the 30s/40s era that they have built-in mirrors on the back of the bathroom doors. Masonite actually makes a mirrored back door, but it doesn’t come in the two panel door pattern used in my house, and the mirror itself isn’t beveled like the traditional ones. Therefore, I made my own by buying a stock door, cutting the back panel out, stuffing the door with plywood and then ordering a custom mirror with 2” bevel from a glass shop. The doors have applied moldings added to match the originals. Glass shower doors are the same local company.

 Resource List: Vanity


From Chris:
I custom built the vanity myself from maple furniture plywood since none of the ones available from home centers had the correct dimension to match my installation as I have the full-length window only 16” from the corner (The shallowest side drawer units I could get were 18” and I needed 15″). The vanity doors and drawer fronts are from Conestoga. I realize the vanity should be painted white to reflect the time period, however I was feeling that too much white would overwhelm and also I tend to like stained wood. I figure a future owner can paint it white in an afternoon if they want to. The mirror over the vanity started its life at a Sears Outlet store as a bedroom dresser mirror, and then I ran the wood frame through the table saw to match the slope of the ceiling. Buying a bedroom dresser mirror from a furniture outlet proved to be way less costly than a similarly sized bathroom mirror elsewhere.
 Resource List: Lighting


Chris da bomb say:
All the lighting is from a 1938 mansion that was being demoed (which I rewired). I used a three-way switch at the door for the vanity lights so that you can turn them off and on from both at the door and at the vanity and not have to walk back and forth if you forget. The lights themselves are rewired 40s antiques from Re-store (Habitat for Humanity) The ceiling exhaust fan is also on a timer as you had suggested.

Chris — all I have to say is WOW. You have gone above and beyond to remodel your bathroom in a way that hugely upgrades its functionality, makes use of salvaged materials, historically fits the era of your home and is just downright wonderful to look at. Kudos to you for completing — and doing it well — what must have been a long and exhausting project. With my own bathroom project looming, you’ve given me a whole bunch of ideas — that heated floor must be awesome — and I’m wondering if I might be able to build my own vanity too. (I’m no engineer, but I went to art school and know my way around the power tools.)
Thanks for inspiring us Chris, and for giving us such and in depth look at your fantastic bathroom remodel!


BMcG says
Chris,
Saw a picture of your bathroom on the HOUZZ website and loved it!. We’re redoing our bathroom and are planning on copying some (lots) of your ideas, hope you won’t mind. We particular like the floor and the black and while subways. We’re also scraping our only tub for a shower, you had a great idea.
Peggy Miniard says
Its so nice…no cookie cutter bathroom here….love it!
Lee says
Chris,
Please share pictures of the rest of your home. It the rest is like this bathroom it must be awesome!
Lynda says
Concrete hand saw?? You mean you cut the marble with something non electric? How did you start the initial cut for the sink? Did you use an electric sander? Did you use wet dry sand paper for the final finish?
Again, just amazing. I have heard it is easy to DIY soapstone counters.
Chris says
Concrete saw and hand saw.
I used a 5″ electric diamond-blade wet saw (basically a skill saw with water) to cut the basic shape, but as the blade is round, it doesn’t cut squarely into the corners for cuting out the sink and cutting the notches for the set-back portion of the vanity. A regular hand saw for cutting wood works (though very slowly and expect to pitch the saw when you’re finished) to cut the rest of the marble to square up the corners.
For the sink cut out I just started the saw and carefully lowered it onto the middle of the cut for each side. The sink overlaps 1.5″ so it didn’t need to be perfect.
For sanding, it was 60, 120, 220 grit dry on my electric palm sander, then 600 and 800 grit wet.
lynda says
Thank you. Very helpful information.
TappanTrailerTami says
Hi Chris – beautiful, beautiful job on your bathroom! It turned out great, and I like seeing an actual vanity cabinet paired with the retro 30’s ish look, rather than the standard pedestal sink.
A couple of questions:
Is your door hardware original to the house, or did you put in reproduction knobs/backplates (from where)?
What material is your vanity top?
Are you single? Haha…..I think there are 4 women ahead of me though, based on the current posts!
Thanks!
Chris says
They are all reproduction. I bought a box of 12 of them deeply discounted from VanDykes (http://www.vandykes.com/) – before the recession they used to carry an amazing assortment of products now I find they’ve greatly reduced their selection to common things you can get any where.
The vanity top is a piece of solid marble. It’s real, not the 70/80s composite “marble” despite the color being similar. It was a 6′ x 2′ slab I got from the same demolition as the lighting. I wish it had the grey undertones to like the marble I used elsewhere but it was free and isn’t quite as beige in reality as it reads in the photos. I used a concrete and hand saw to cut the shape and then lots of sanding at various grits to polish the ede to the final dimensions.
Valerie C. says
Not mentioned in the resource list and by studying the fantastic pictures; Chris used the original TUB?!?! It is especially impressive considering how the previous surroundings would tend to make one chuck it all ^_^ As might daughters would say So Pretty!
Chris says
Yes, it’s the original tub. It did take a long time to get the years of badly applied caulk, paint spatter, and staining off. I did sand and acid etched it before spraying it with two-part tub epoxy paint. I don’t think refinished tubs wear particularly well but it’s mostly decorative any way as the shower is the fixture I use and therefore I wasn’t overly concerned about the long-term wear of the refinished tub.
Lauryn says
Holy Guacamole, this bathroom is amazing!! Just gorgeous. Having limited DIY skills, I am so incredibly impressed and just a bit jealous. Our bathroom has most of the original tile, but some of it was replaced by the previous owners, who did a dreadful job. I know it will need to be addressed in the not-so-distant future and, while daunting, this bathroom is so incredibly inspiring. I will most definitely be referring to this post! Congrats, Chris. It’s incredible!!
Trouble says
When I was house hunting 6 yrs ago, we looked at a typical ’30s era 2-story. The kind that is skinny and looks like a “L” with a porch filling in the open part of the “L”. Anyhow, the main bath was upstairs and the shower was also against the outside wall with that same angled ceiling!
I’m 6′-2″ so that (and the fact it was in the ghetto) was the big turn off. I don’t know what people are thinking when they have to lean sideways in a shower every morning!
Miked says
Nice work sir! I can very much appreciate all the blood, sweat and tears you put into it. Your making me feel bad hiring out some of the work in my current bath remodel.
How long did the whole project take?
Congrats and I am sure you have a great sense of satisfaction
Lynne says
Beautiful. Such attention to detail really pays off with the end result. I think I would have painted the vanity black.