

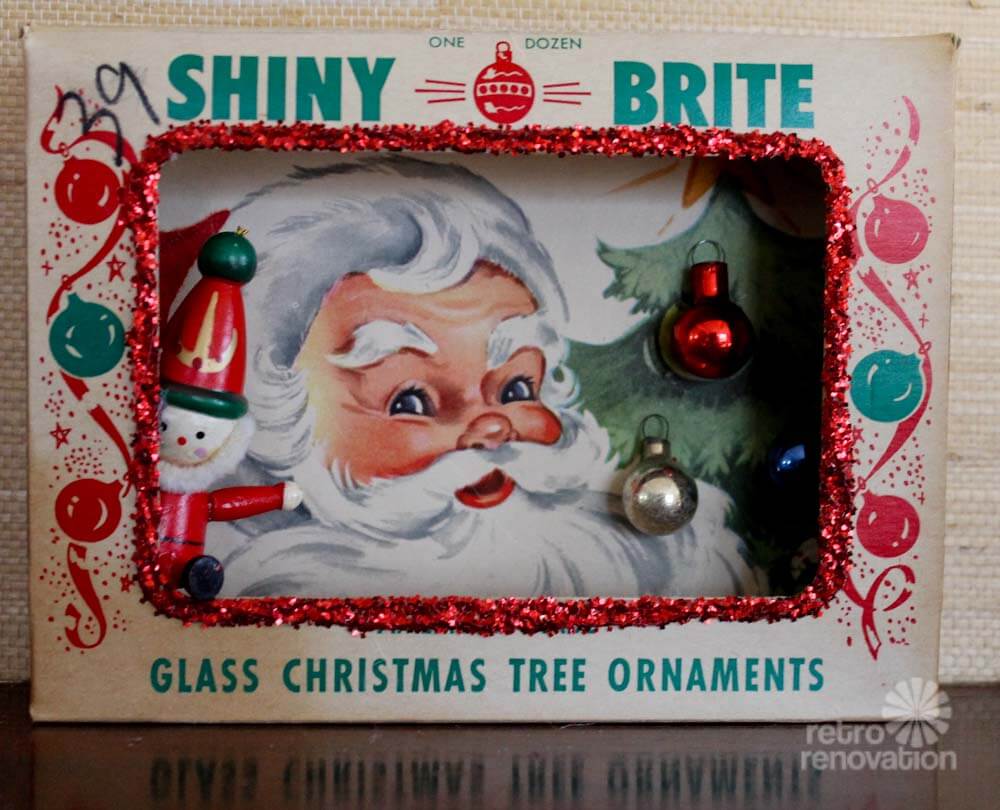
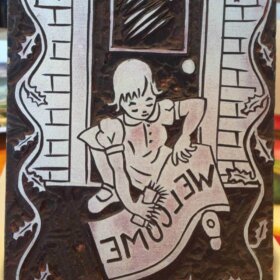
 Will the Kitschmas Krafty Kraziness never end, here on Retro Renovation? What can I say: It’s a blog, so it tracks my obsessions. And right now, I am a Massachusetts elf living on a diet of hot cocoa and brownies, on an insane sugar high enamored of vintage Christmas ornaments. Today: Another idea from the epic Georgia Peachez: What to do with all those empty vintage ornament boxes once your wreath is made? Use them to create shadowbox dioramas. Krafty Kate has brought out my competitive streak (I am a first-born), so I am super proud of the three dioramas I made — including the little Shiny Brite box diorama above. Santa approves.

Supplies required:
- Vintage ornament boxes with cellophane windowed-fronts.
- Vintage Christmas ornaments and other small decorating its and bits: Packages, pine cones, greenery from floral picks, candy canes, bows, bells, etc.
- Lining paper — Christmas wrap, Christmas cards, sheet music, etc.
- Glitter or glitter glass.
- Sparkle snow or puffy cotton like snow stuff.
- Adhesives. For my dioramas I used all three: A hot glue gun, Elmer’s School Glue, and a large glue stick.
- Brush to paint on the Elmers to adhere the sparkle snow or cotton.
My tips to make a vintage ornament box diorama:
- Use boxes that are not too beat up. If there are innards — those little crate-like separators glued inside — carefully remove them. Carefully remove the cellophane in the ‘window’; I had no problem doing this, the old adhesives were all quite brittle and the cellophane peeled right off.
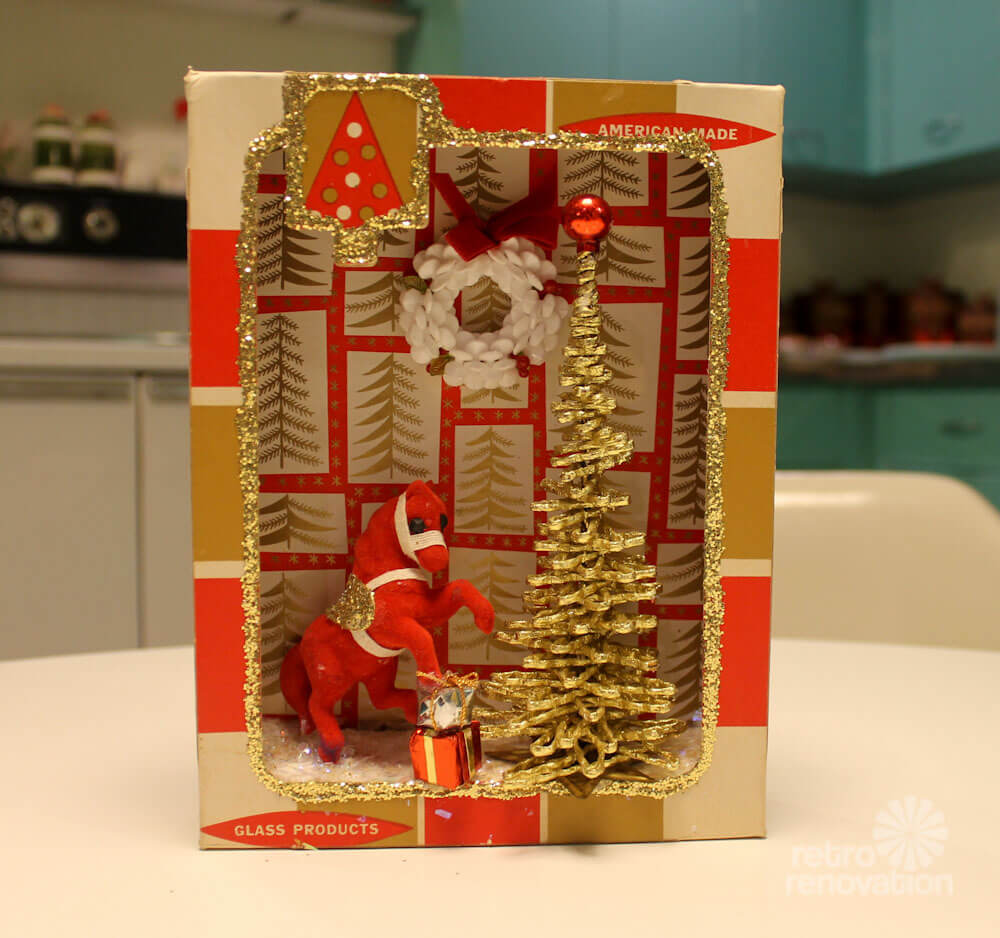
- Before you even think about gluing anything, you will want to play around with the box, papers, ornies, greenery, etc. to finalize the elements of your scene. To do this, I found I had to continually put the front of my box — “the window” — over various papers and ornies to get the right combination. I would dilly dally with this for an hour even! Once I had all the elements of my plan decided, I was ready to start gluing… Tip: I found that sort of ‘matching’ the ornies to the paper thematically worked to create a pleasing diorama. That is: Trees on your paper — put a tree in your diorama. Candy canes on your paper — find candy cane and peppermint sticked ornies to include. Examine my dioramas, and you will see what I am talking about.
- Decide if you want to decorate the front of the box with glitter. I used Elmer’s school glue straight out of the orange tip to create a nice juicy bead of glue, then sprinkled the glitter on liberally. Let set a wee bit, then shake off excess. Let set overnight to harden so that you can then handle the box without fear. You could use a hot glue gun for this step, but with hot glue you need to move so quickly… and for decorating the front of the box, I think you want more control of that bead of glue. That’s why I think Elmer’s is the way to go with this part of the project. But plan ahead, because you cannot start decorating right away — that Elmers takes a long time to harden properly — which needs to happen before you start handling this important front part of the box. You could “risk it” and move faster — but I found that once I started placing my diorama ornaments inside the box, I kept testing how it looked by putting on the front of the box. If you touch that glitter part before it’s dry, you risk smudging it, and then it is a real mess — you could wreck the front of your box.
- Meanwhile, plan your interior: Using a fat glue stick as my adhesive, I lined the inside of each box — the back and all four sides — with either wrapping paper or pages from a children’s Christmas book. You could also use old Christmas cards or sheet music or… what else? Note, for my bicycle-built-for-two diorama, I used a vintage style wrapping paper currently available from Target.
- Decide if you want to add any sparkle snow or glitter or cotton or whatever along the bottom of your lined boxed. Above, in the bicycle-built-for-two diorama: I added plastic sparkle snow to great the illusion of a snowy roadway. I even found the sparkle snow at the Salvation Army! To adhere the sparkle snow, I brushed on Elmers pretty liberally and then sprinkled on the sparkle snow — I did not want to flatten the sparkle snow, I wanted it to be fluffy, so don’t press it down.
- Use your Christmas ornaments, greenery, baubles, packages, etc…. to make a little scene inside the box. Think 3-D. For example, I tilted the candy cane light pole inside the bicycle diorama so that it doesn’t lay flat — the top angles out. The packages on the left also protrude into the shadow box space. And the Santa and Mrs. Claus bicycle ornament also is not flat. I used hot glue to adhere all the ornaments. Hot glue is super strong — and hardens fast. Note: I tried not to use too much hot glue — not too much, not too little, just right. I did not want hot glue glurp showing glurping out from under the ornaments. So far — and note, I just started working with hot glue for the first time this season — that you don’t need a lot of hot glue to get good adhesion. Experiment to get the feel.
- If you like, add some greenery or another bauble to the outside of the box — the front, side or top. Again, don’t overglurp the hot glue.
- I counted and on all three of my dioramas, I used four ornaments + box + paper + glitter. I didn’t “plan this” as a “formula” or anything — but I think it might work as one. These dioramas are small works of art — you don’t need to crowd them. That said, Georgia Peachez’ dioramas are more complex — and spectacular — made possible by the fact that she has years of practice. She is a pro. I am a mere amateur with far to go, so I tend to take it slow.


- Once my diorama was complete, I hot glued the side pieces closed so that the sides don’t bow out and the entire piece stays six-sided flat.
- Finally, paper the back — for this, I used a fat glue stick. Papering the back is a really nice finishing touch. Hey, you’ve gone this far — take it all the way home.


Rick g says
These are great !! – new project – coming up !!
Rita says
I have been making the wreaths from the tutorial you posted a couple of years ago… Now the dioramas will be my new project! Still making wreaths , but this will be so awesome
Pam Kueber says
These are very fun to make — and you get to use all your leftover boxes!
Alexia says
This is a marginally related comment, but — where did the article on buying NOS sparkle snow go?
pam kueber says
I took it down because a number of readers were expressing concerns about the potential for respiratory issues if mica is inhaled. Reader, please do your own research to determine of you want to use this stuff and if so, how.
Mary Elizabeth says
Fabulous idea. You could do the same thing with old Christmas card boxes. And what about using ornament boxes to frame collages of all those wonderful Christmas photos we get each year of families, children and grandchildren? I can never bear to throw them out, and I’d like to find a way to display them the next year–when a whole new batch comes in loaded on the mail carrier’s back.
tammyCA says
Too cute…I’ve seen the ornament box dioramas on pinterest before and loved them but I never come across cute ornament boxes at the thrift stores. I’ve found some vintage ornaments but the boxes are always plain & pretty dirty.
Instead I am converting a cute box that held chipboard letters from the 99cents store, it has a front window. I’m such a re-cycler & crafter fan that I can’t throw anything into the bin…there are so many great usable things from product packaging.
vintigchik says
Yea!! Now I have a reason to not feel bad about keeping empty shiny brite boxes I just couldn’t bring myself to throw away 🙂 Glad to know there’s a support group for people like me!
pam kueber says
A “support group” is one way to put it… codependent enablers, another!