

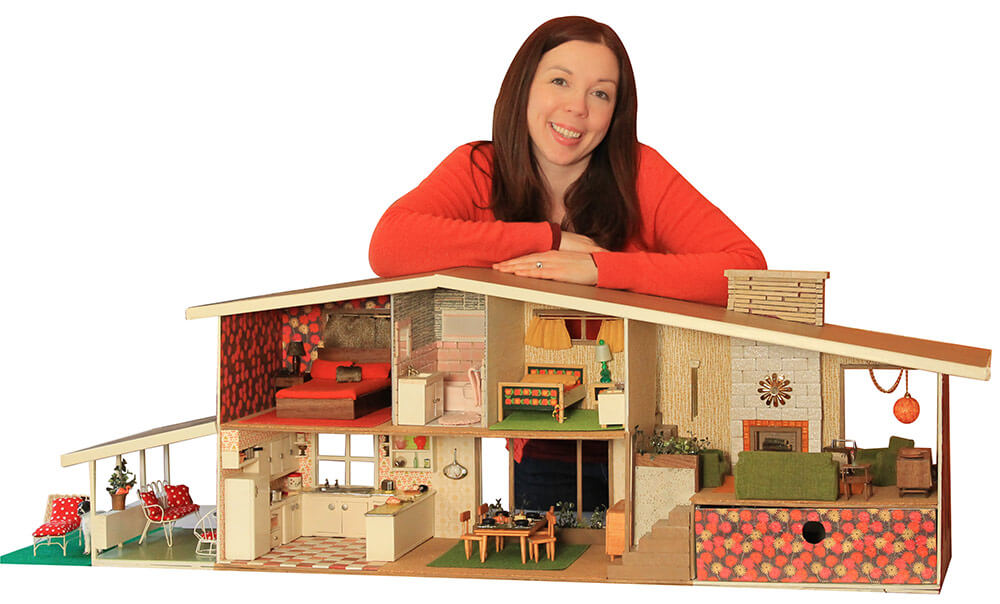
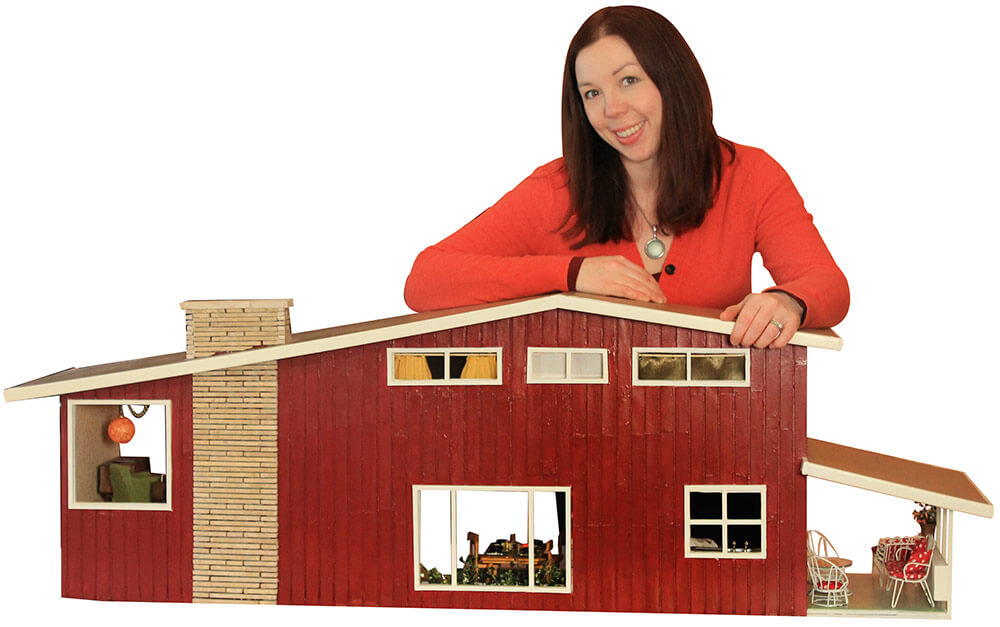
 It has been five months since I began work on my built-from-scratch 1955 Betsy McCall DIY Dollhouse — a project that has been labor of love and one that I didn’t realize would take me so long to ‘finish.’ I say that the dollhouse is ‘finished,’ but in reality, it will probably always be a work in progress. With that said, it’s time for the grand tour, which I know many readers have been awaiting. Let’s take a look, shall we?
 I can’t begin to estimate the total amount of hours that I’ve spent working on bringing this dollhouse to life. The hours were spread out over many weeks. Some days I worked on it all day and others for only an hour or less. And, I did suffer a bit of dollhouse DIY burn out shortly after finishing the kitchen cabinet build and install, necessitating a few weeks off from the project for a break before I felt I could begin building furniture for other rooms in the house.
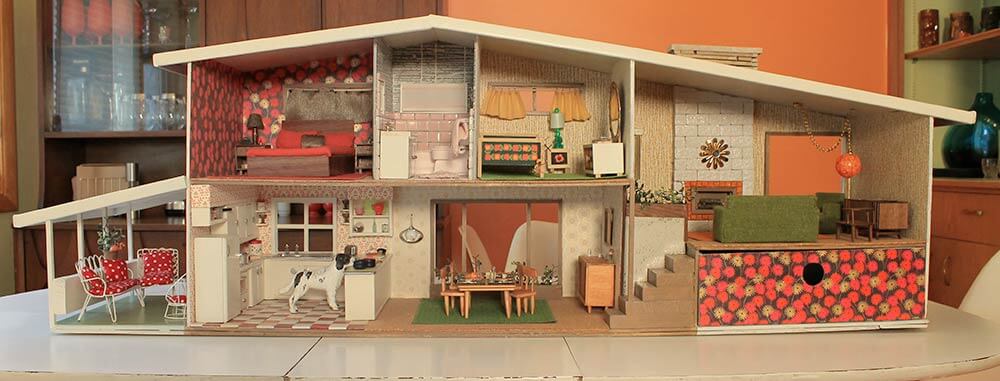
To say I’m in love with this midcentury split level dollhouse would be an understatement. Not only is it adorable, but it is peppered with treasures — both new and old — from the items that my Mom and I played with as kids to the vintage wallpaper from Pam’s collection and Hannah’s Treasures.
The dollhouse has become much more than a child’s toy — it is a work of art build with blood, sweat, tears, memories and the kindness of those who have donated their time, materials, skills, and enthusiastic words of encouragement during the five months that I’ve been building and decorating this house. Now without further delay, let’s take the tour!
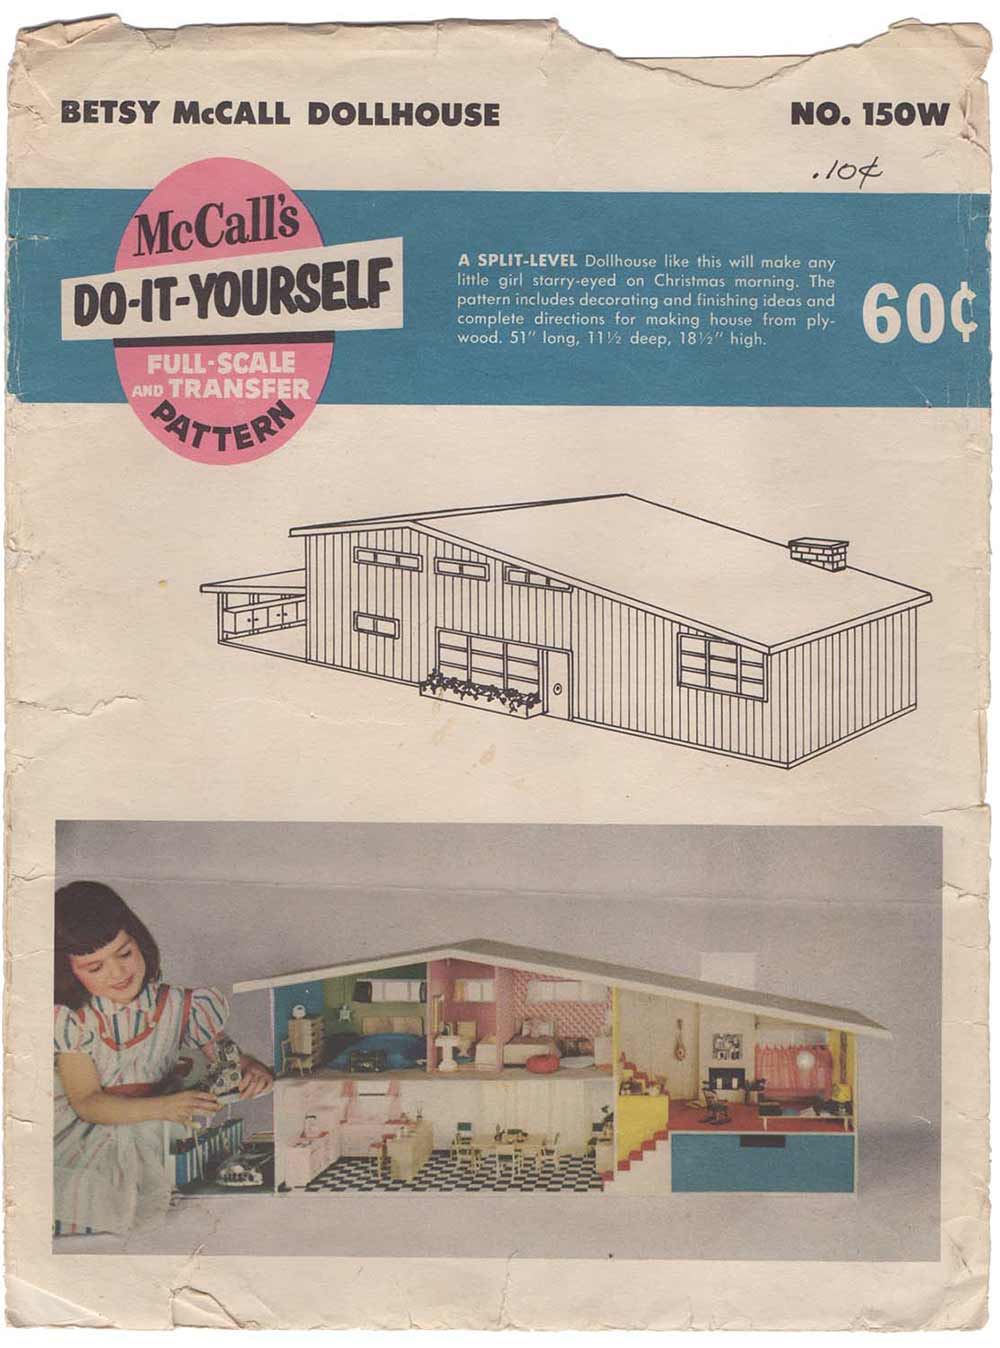
Porch/Carport
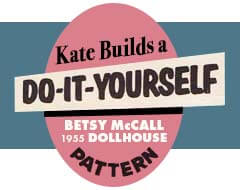
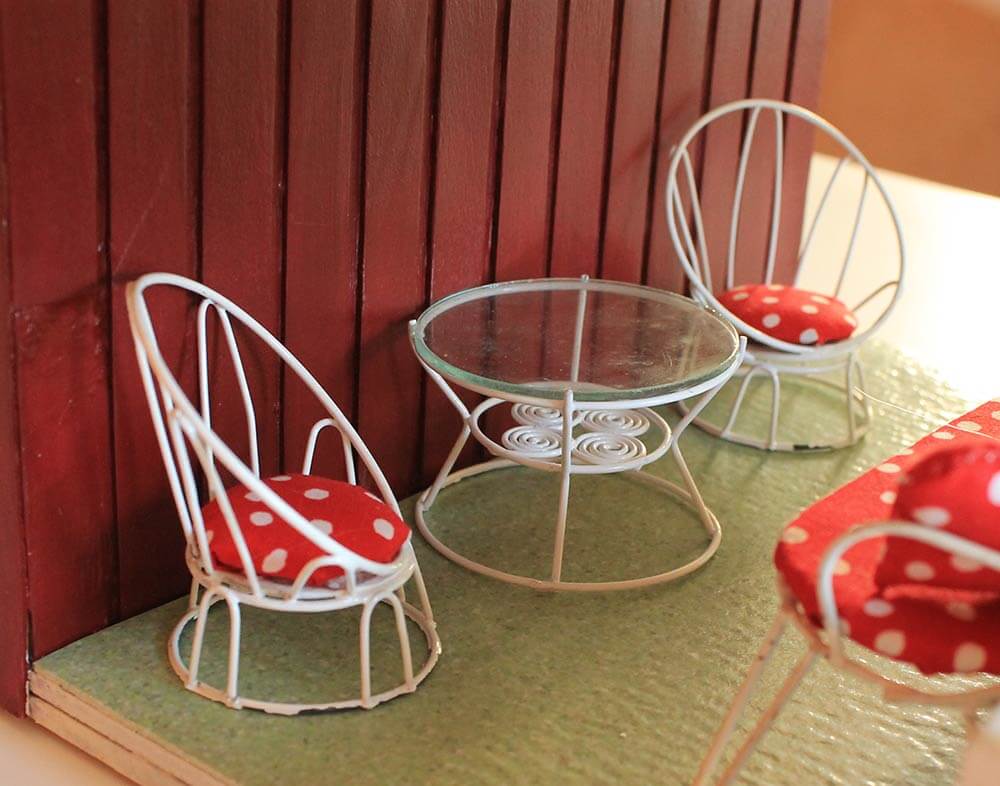
 In the plans for the dollhouse, this area of the house is supposed to be a carport, however I found some too-cute-to-pass-up patio furniture that needed a proper place in the dollhouse. Not to say that I couldn’t park a car in there if the right one made itself available, but I do like it as a patio space.
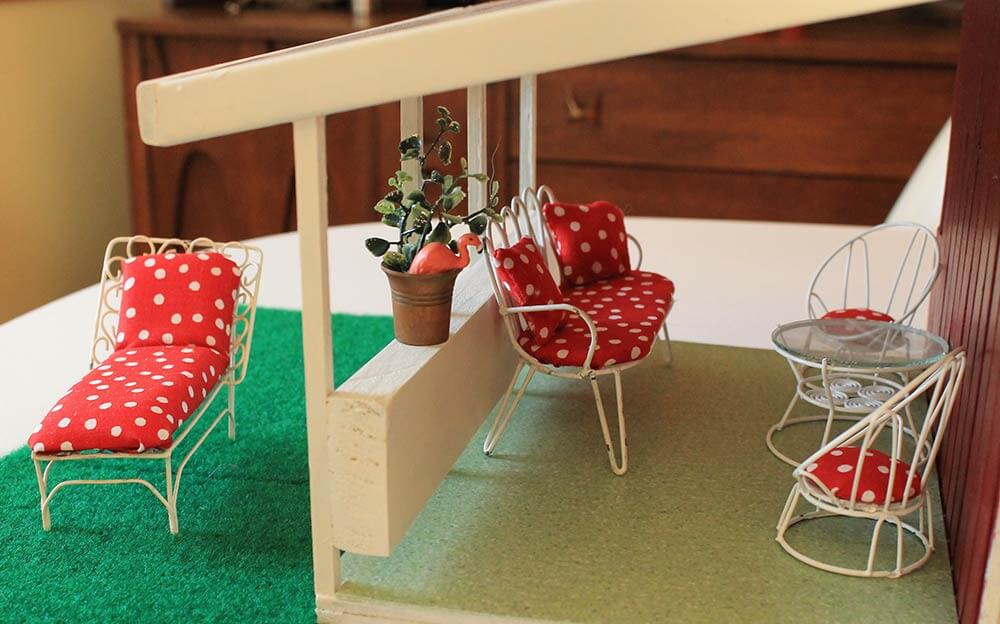
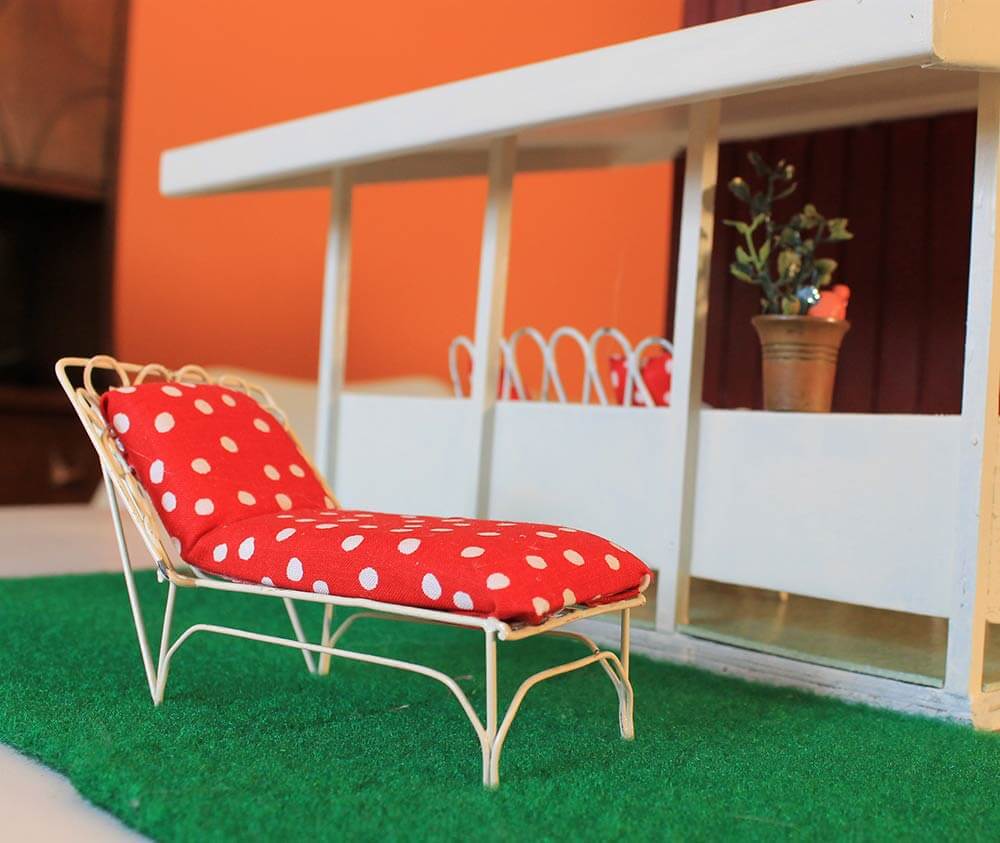 You’ll notice that I’ve added one more piece of patio furniture since I shared the furniture budget breakdown a few weeks ago. This little chaise lounge chair popped up in an ebay search recently and even though I was already $8 over my furniture budget for the house, the chaise perfectly match the rest of my vintage dollhouse patio furniture, making it irresistible. Oh and the patch of ‘grass’ the chaise it is sitting on? It is a few free sample squares indoor/outdoor carpet I found at Menards.
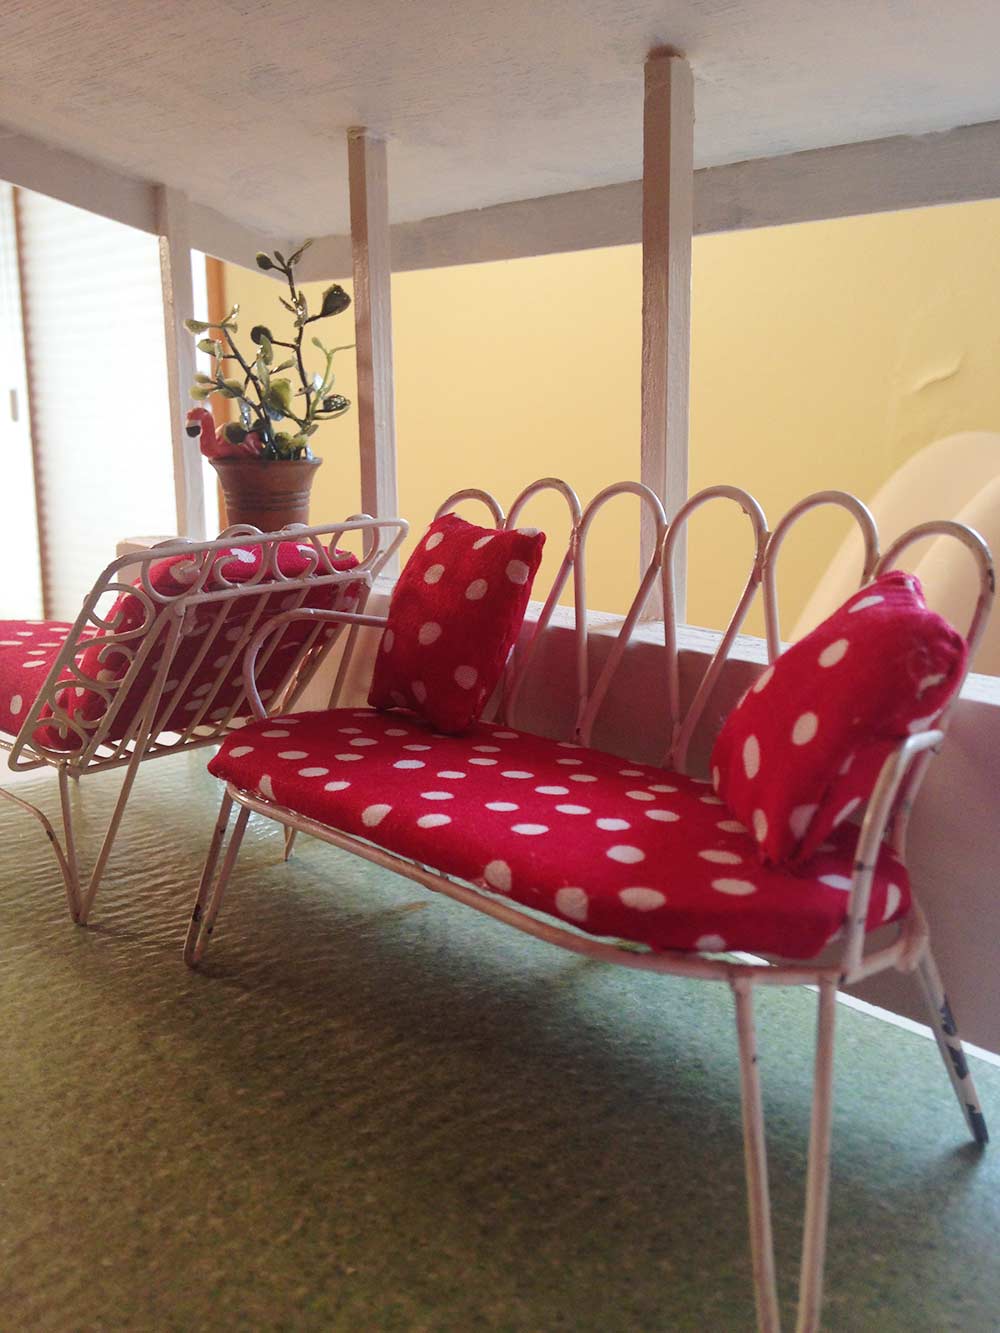 All of the original upholstery on the patio furniture pieces was in iffy shape, and I wanted all of the pieces to feel like a matched set, so I used some red and white dot fabric that was left over from the cafe curtains I made for my kitchen a few years back. I even made some tiny pillows for the bench. That potted plant in the background was made using a vintage brass dollhouse-sized crock that was my Mom’s from when she was a kid. The pink flamingo peeking out of that pot was something my Mom recently found at Michael’s and sent my way.
 The floor of the porch is a sample piece of vinyl flooring that I had laying around. It reminded me of those epoxy floor coating kits you can use to jazz up concrete floors.
Porch resource list:
- Chairs and table set, vintage from ebay
- Bench, vintage from local antique mall
- Chaise lounge, vintage from ebay
- Flooring, vinyl floor sample
- Grass is indoor outdoor carpet sample from Menards
- Brass potted plant, vintage from my collection with new plastic greenery
- Flamingo, new from Michael’s courtesy of my Mom
The Kitchen
 I’ve already covered the kitchen in depth in these two posts:
- A vintage + custom kitchen for the Betsy McCall Dollhouse and
- Adorable vintage dollhouse accessories from reader Janet and my Mom
But here’s another quick look:
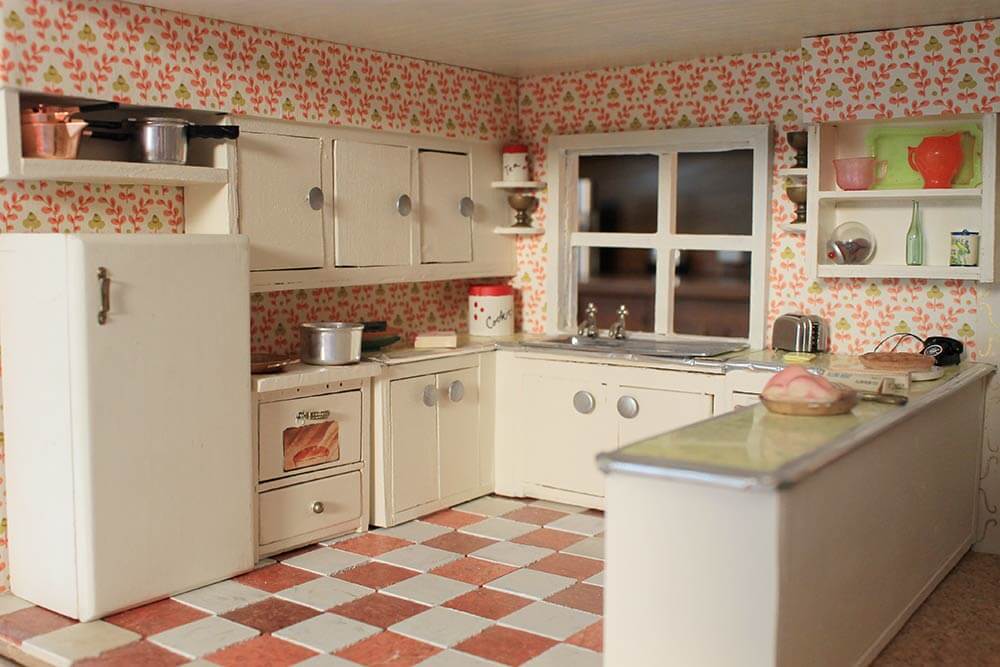
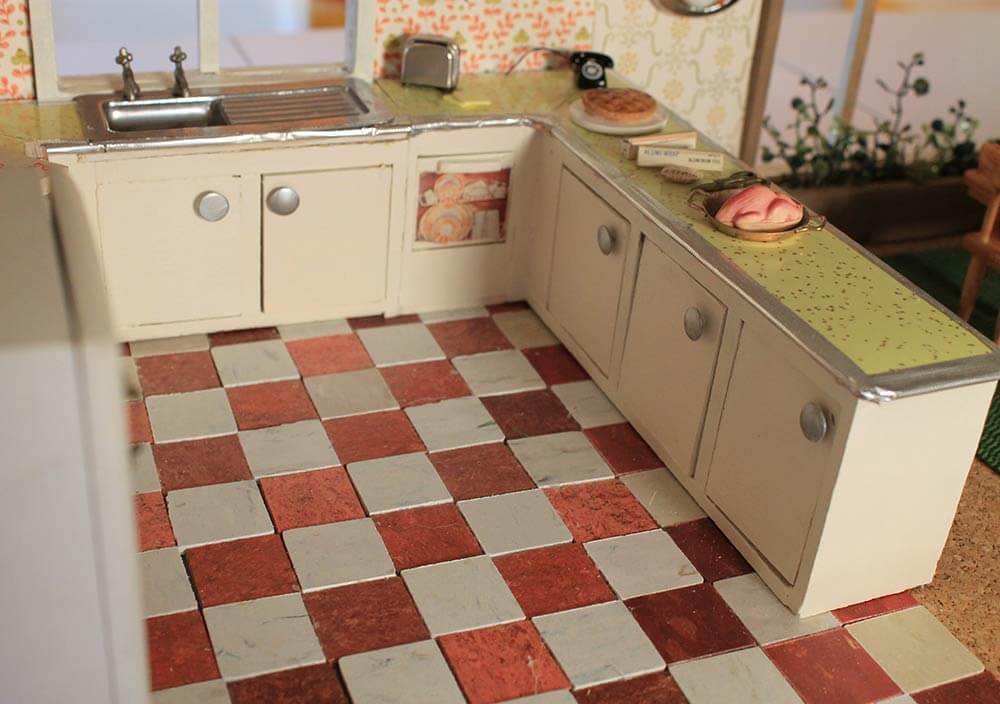 My favorite parts of the kitchen are: (1) the flooring made out of several different colors of white and red VCT flooring samples, which I think I like more because of its imperfections… (2) those vintage yellow sparkle laminate countertops that are pretty much perfect for the space…
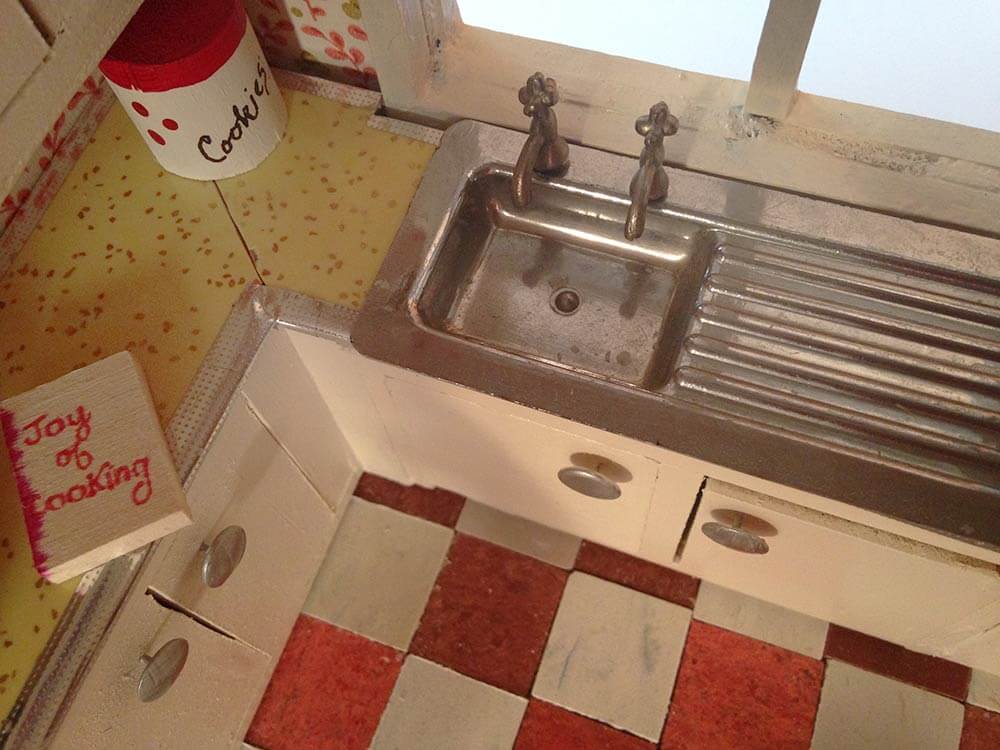 … and (3) the drainboard kitchen sink and the cabinet knobs made out of thumbtacks.
 I added a few more its and bits. For example, I made the cookie and tea kitchen canisters by cutting off a few scraps of dowel wood and painting them. Over time, I would love to add more small dishes, food items and perhaps a few tchotchkes for the shelves by the windows to the kitchen. Another goal — to find just the right fabric to make tiny cafe curtains for the window over the kitchen sink.
Kitchen list of resources:
- Flooring, various red and white samples of Azrock VCT flooring, cut into small pieces
- Wallpaper, vintage from Hannah’s treasures
- Cabinets, sink cabinet, sink and dishwasher are refurbished vintage from etsy, rest of cabinets are made from basswood and scrap pine with thumb tack handles
- Countertops, Vintage formica sparkle yellow laminate from Pam’s stash and edged with silver decorator tape
- Appliances, Stove and fridge are both vintage from ebay and etsy
- Food items, Vintage from reader Janet
- Pots, pans and other dishes, a combination of new, vintage from my collection and vintage from reader Janet
- Cookie and tea canister and cook book, made from scrap wood dowels and pine
- Phone and toaster, new from Michael’s craft store
Dining room
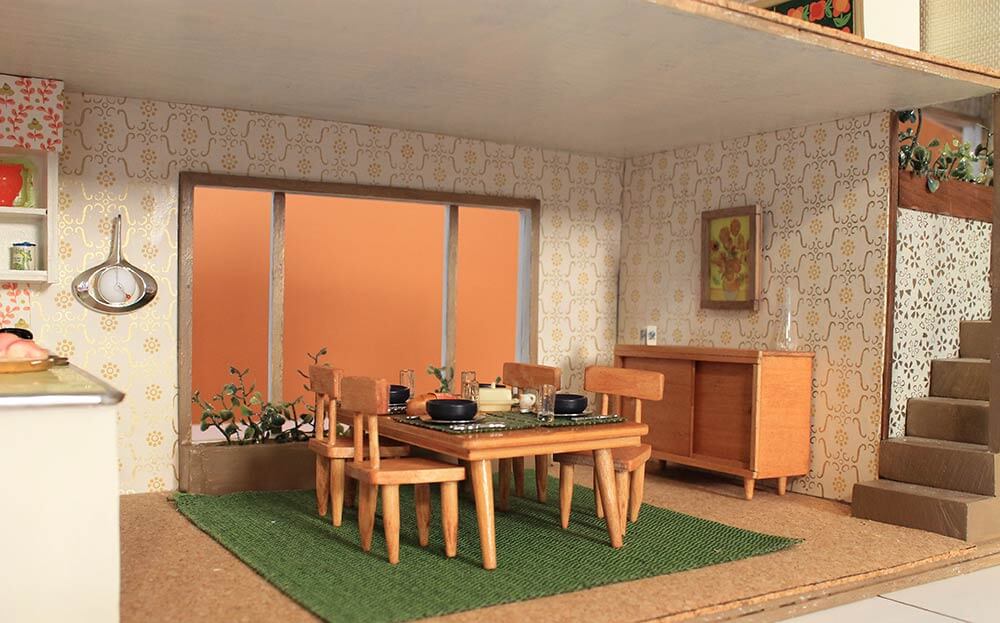 The dining room is mostly complete. All that is missing are a curtain for the picture window and possibly some sort of ceiling fixture, perhaps a UFO style pull-down light centered over the table?
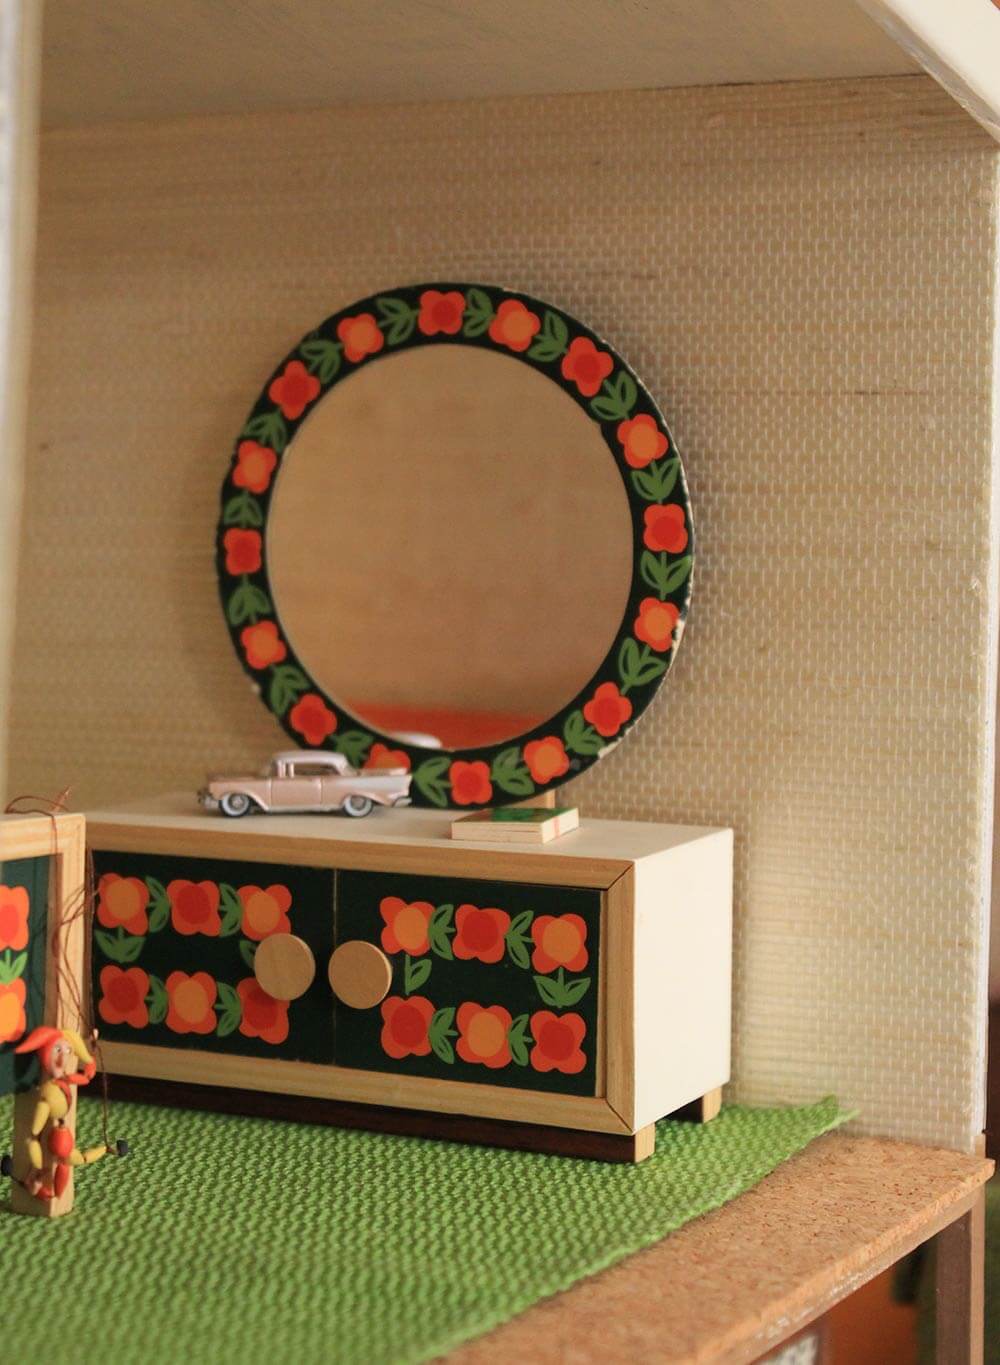
 One of my favorite new additions is the banjo clock that I made from a vintage pendant necklace and a sewing pin. Most of the wall art — including the framed painting, clock, doorbell chime and mirror — are all attached to the wall with Velcro, so they can be removed and rearranged as needed.
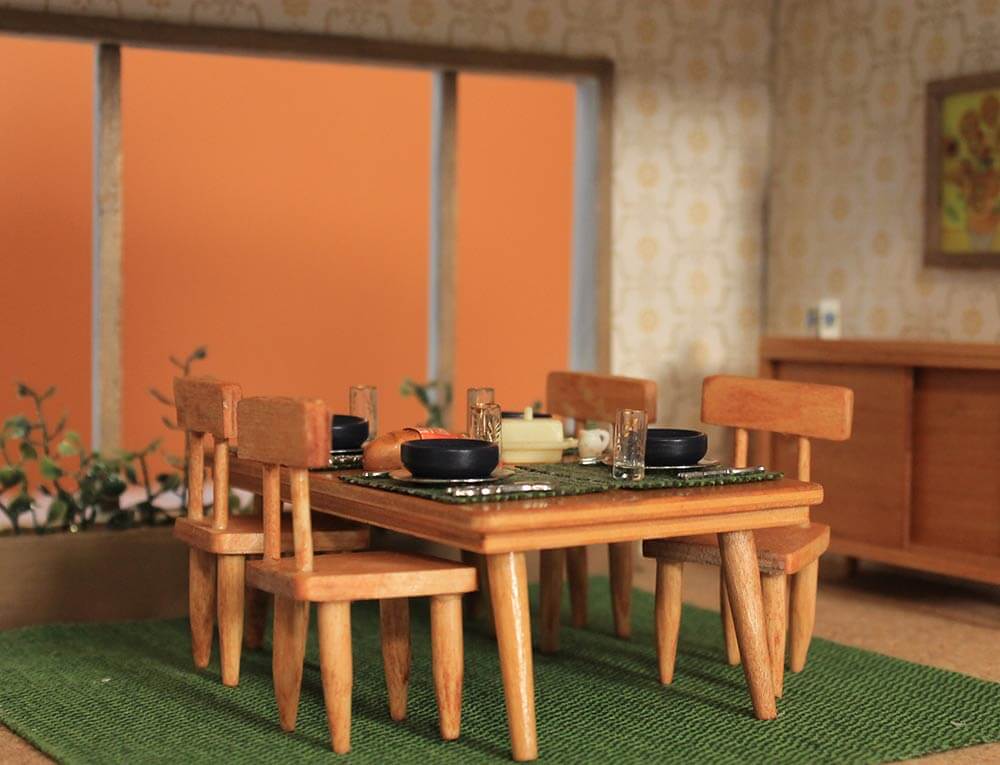
I love the little table setting!
Since I wrote about the table setting from reader Janet and Mom, I found four navy blue vintage buttons that are curved upwards and resemble tiny bowls, so I added them to the table.
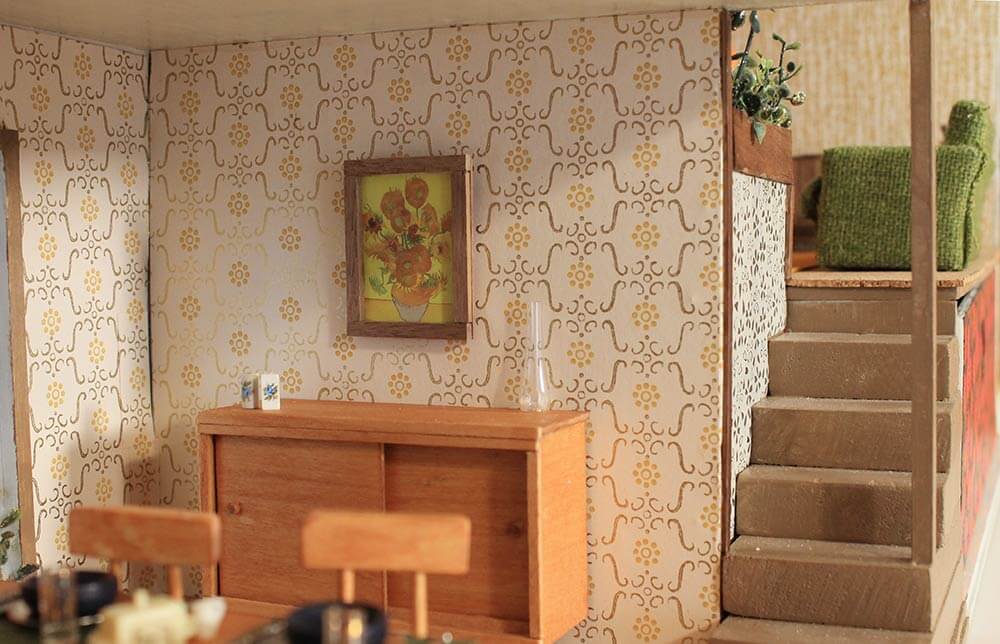
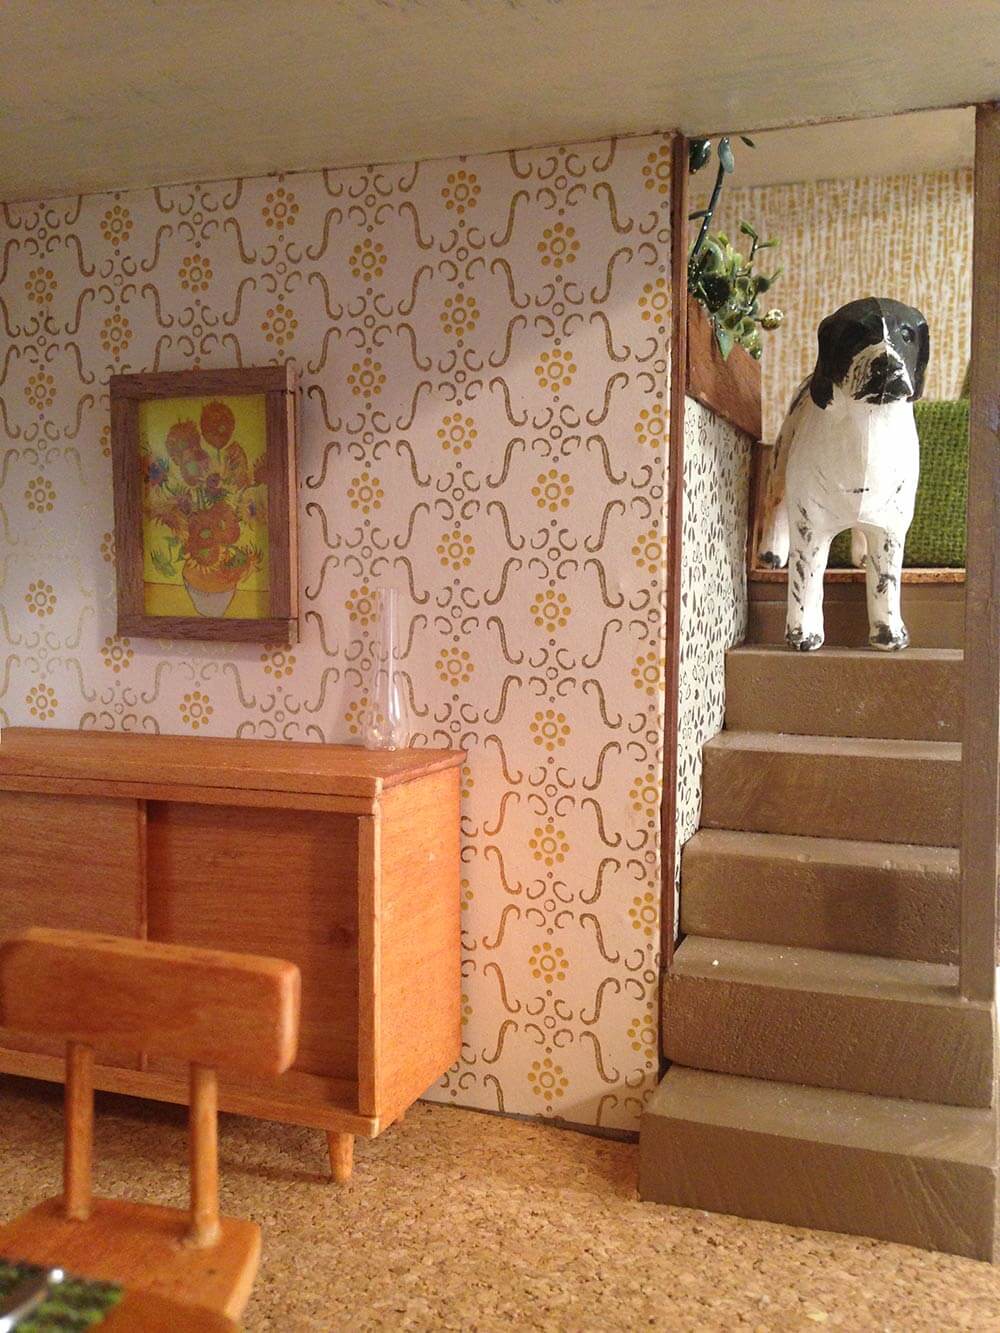
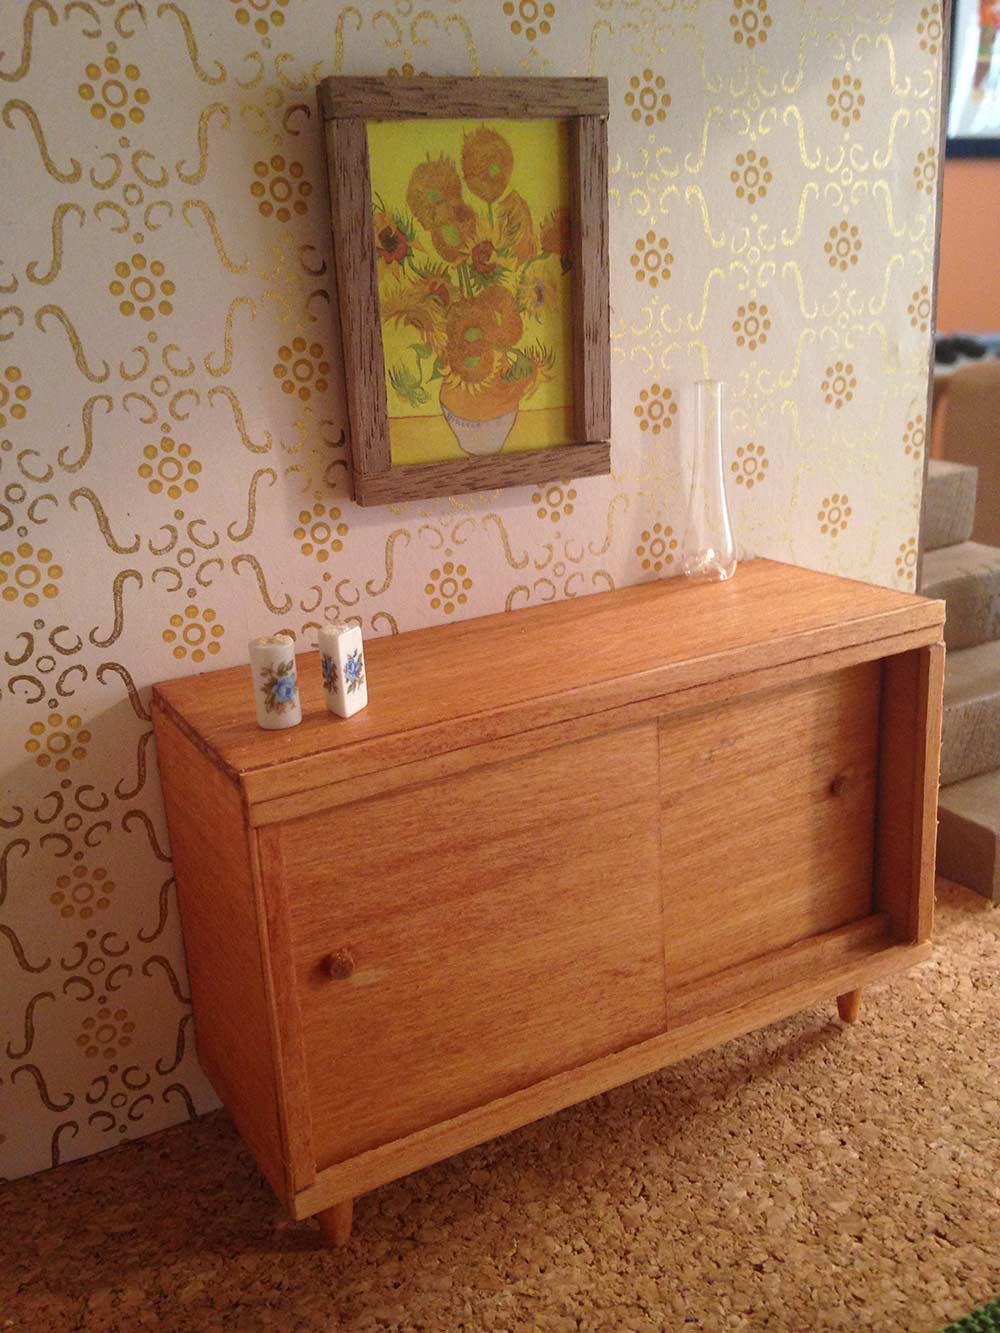 I felt like the credenza needed something hanging over it so I made a tiny framed print using an art sticker of VanGogh’s Sunflowers, and framed it with the remaining walnut wood scraps.
Dining room list of resources:
- Wallpaper, from Hannah’s Treasures
- Flooring, cork from Pam’s stash
- Rug, a scrap of upholstery fabric
- Table, vintage Strombecker that was my Mom’s as a kid
- Chairs, made with basswood and wooden dowel rods
- Buffet, made from basswood and wooden dowel rods
- Plates and cutlery, new from Hobby Lobby thanks to Mom
- Glasses, rye bread, butter dish, vase, candles vintage from reader Janet
- Bowls, vintage buttons
- Placemats, scrap of upholstery fabric
- Wall art, VanGogh Sunflowers sticker and scrap wood
- Wall clock, vintage pendant necklace and a sewing pin
- Built-in planter, scrap wood and plastic greenery
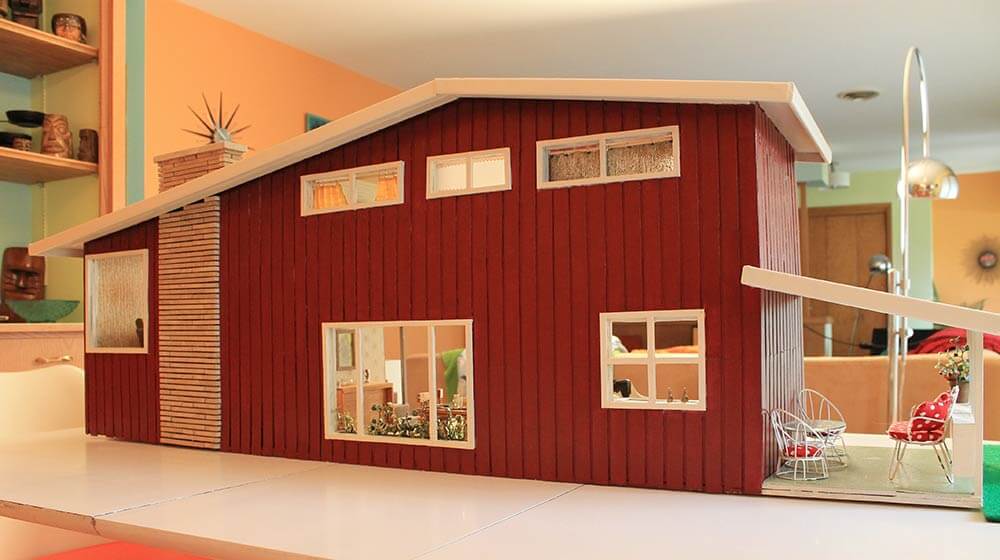
The Living Room
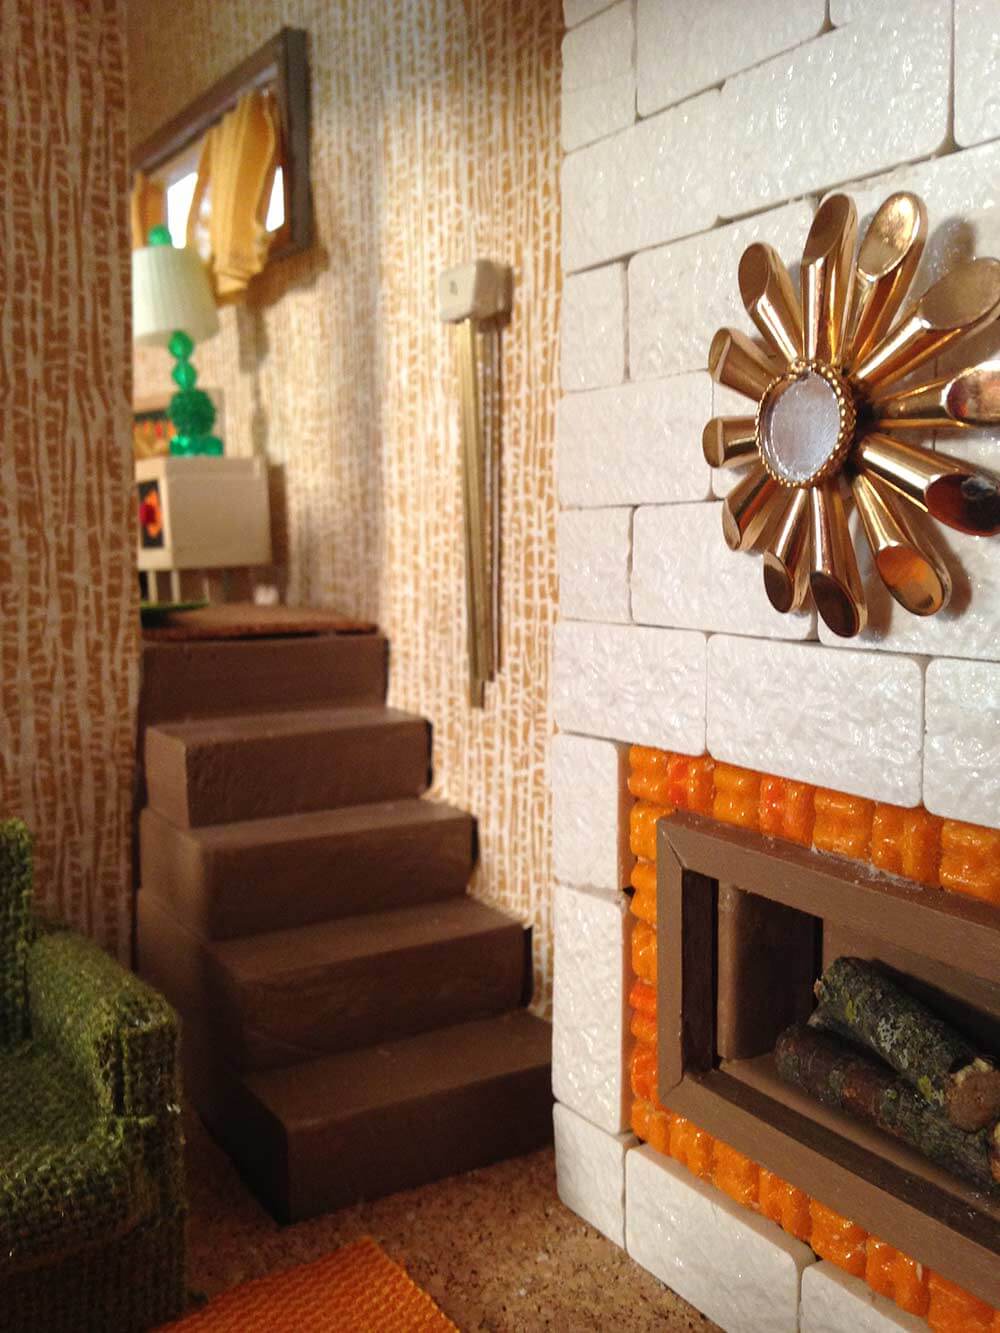
 This is a split-level house: From the dining room, you walk up a small stairway to enter the living room. Note another built-in planter!
The living room is mostly complete, except for needing curtains, some coordinating throw pillows and maybe some painting for the walls that are still bare.
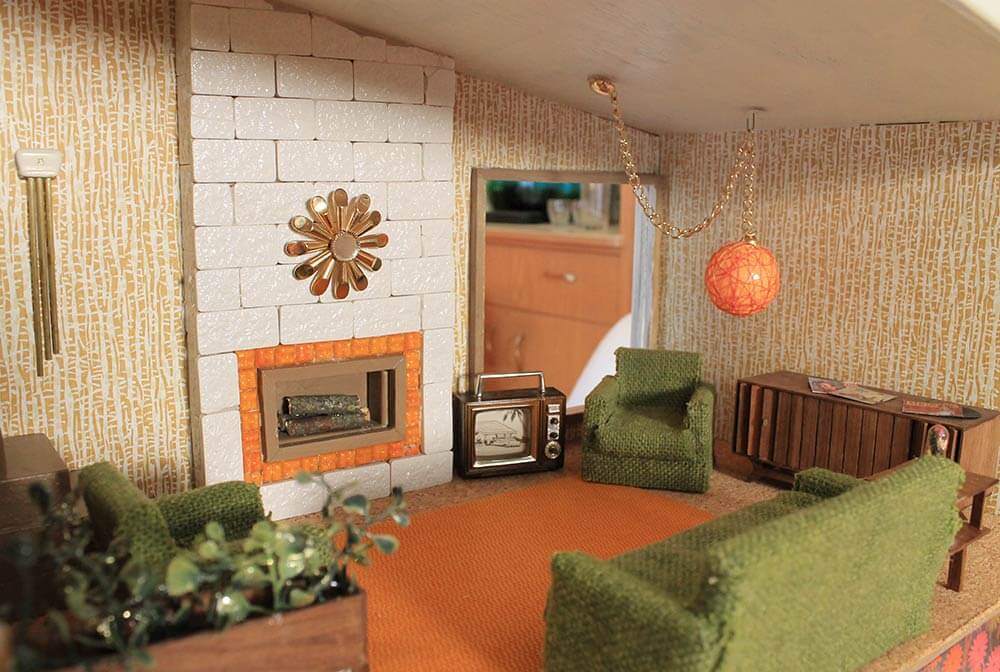
 First of all, let’s talk about the focal point of the room — the fireplace — which I tiled using two different kinds of vintage mosaic tiles that Pam found at World of Tile’s going out of business sale and nabbed specifically for this dollhouse project. She believes the orange tile is Venetian glass! The fireplace tiles provide some great texture for the room.
The logs are cut from a stick that came from my backyard.
I love the gold starburst mirror — it is made from a pin that Pam found in her stash of vintage costumer jewelry. She saw its potential to transform into a starburst mirror and indeed, all I had to do was remove the pin back, glue on a small circular mirror and wrap the edges of the mirror in gold cording for a finished look.
I took Robert of Electrachime’s suggestion to hang the doorbell chime on the wall half way up the stairs in the living room. Robert thought that this point would be a good spot to ‘install’ it so that it could be heard throughout the whole house. I agree!
A video of the dollhouse doorbell in action — be sure to watch til the end!
- Ding dong, dollhouse! A working doorbell — and tiny hi fi to hide the sound module
- Don’t have a dollhouse but want a chime doorbell for your full-sized vintage home? Electrachime makes ’em
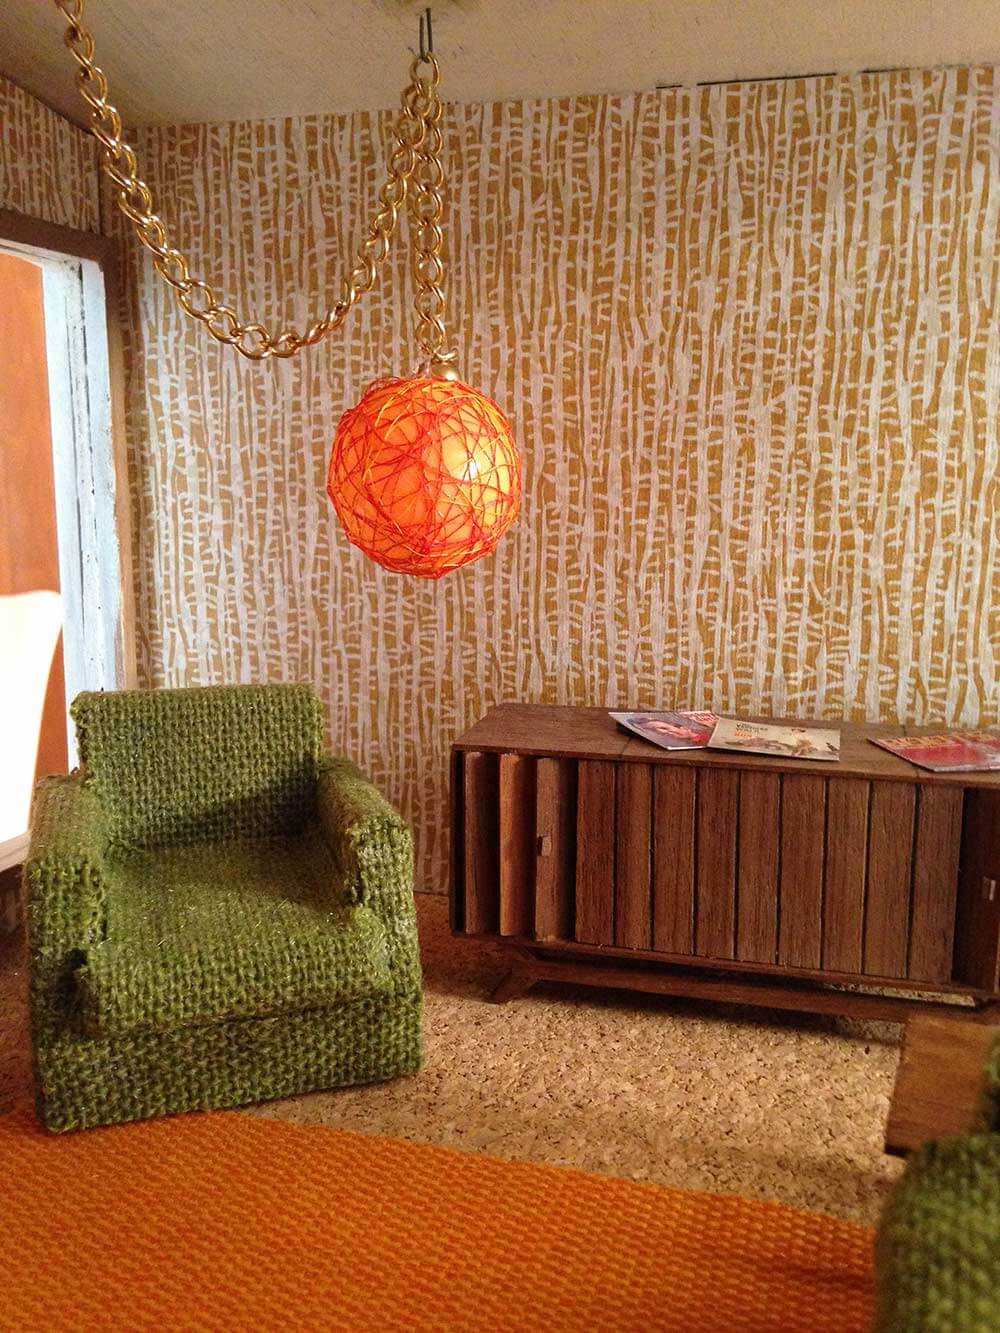
The original instructions for making a Betsy McCall DIY Dollhouse suggested using a ping pong ball on a string as a light fixture in the living room. I took that idea one step farther. Using an orange ping pong ball, glue and a few different colors of orange thread, I created a spaghetti-style light fixture, which attaches to the ceiling by a swagged chain supplied by Pam.
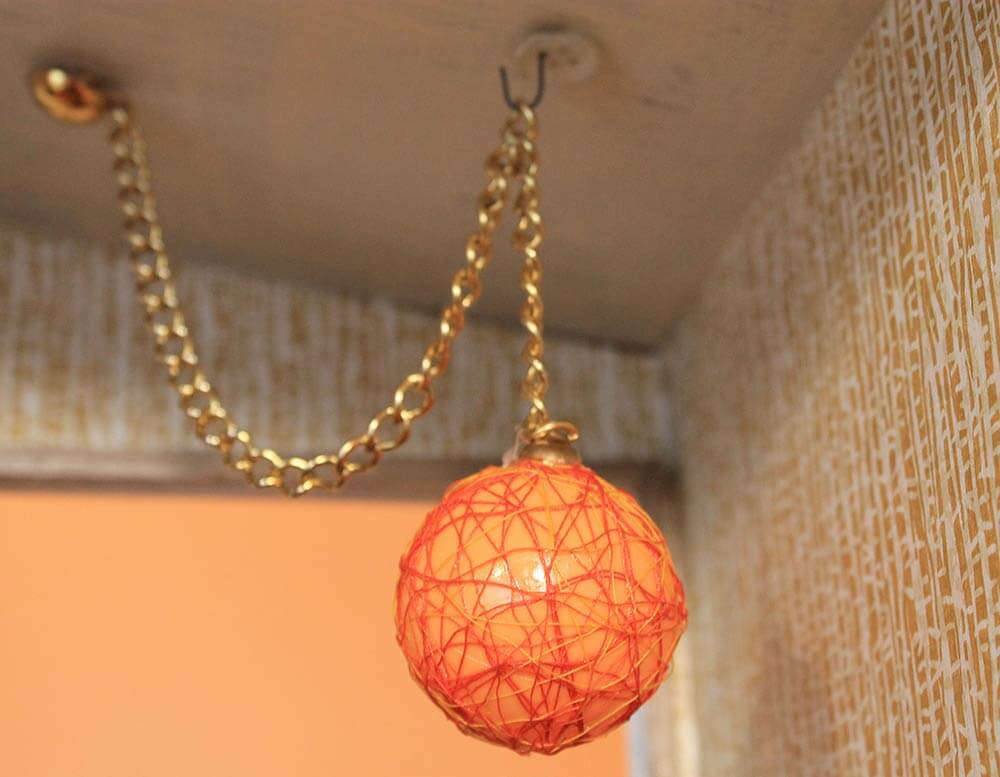 The trickiest part of making this lamp was figuring out how to attach the chain to the ceiling and the spaghetti light shade.
I ended up using a gold button to attach the ‘wired’ end to the ceiling, then I made a wire hook out of picture hanging wire and fed it through a white button — for a more finished look — and glued it to the ceiling. Finally I attached the fixture to the chain with the gold half circle that I pried off of the starburst mirror flower pin prior to installing the mirror, to act as the connector to the shade.
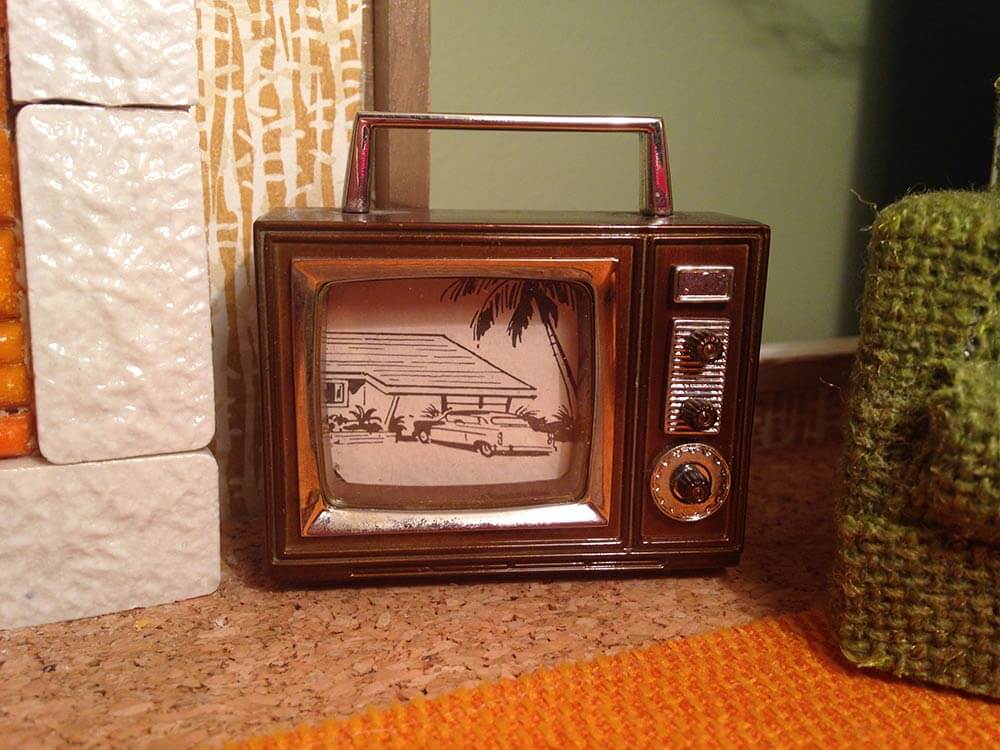 I had a novelty clock in the shape of a television set kicking around my house for several years, and I realized that by taking out the clock mechanism and replacing it with a clipping from a vintage magazine, I could create the perfect TV for the dollhouse!
 While I used my good camera to take most of the final dollhouse shots, I did use my phone to take a few shots from angles where it would be impossible to fit my full sized DLSR camera — like this view from the center of the room looking up the stairs into the first bedroom.
Living room list of resources:
- Wallpaper, vintage from Pam’s collection
- Flooring, cork from Pam’s collection
- Rug, upholstery fabric sample
- Tile for fireplace, mosaic tile from World of Tile, Pam’s collection
- Sofa and chairs, vintage from Ebay, recovered with vintage upholstery fabric
- Hi-fi and records and miniature doorbell chime, made courtesy of Electrachime
- End table, made with leftover walnut wood sent by Electrachime
- Hanging spaghetti light, made with: buttons, wire, chain, ping pong ball and sewing thread
- Starburst mirror, made with vintage flower pendant from Pam’s collection, mini circle mirror and gold cord
- Firewood, twigs from my back yard
- TV, repurposed novelty clock
Child’s bedroom
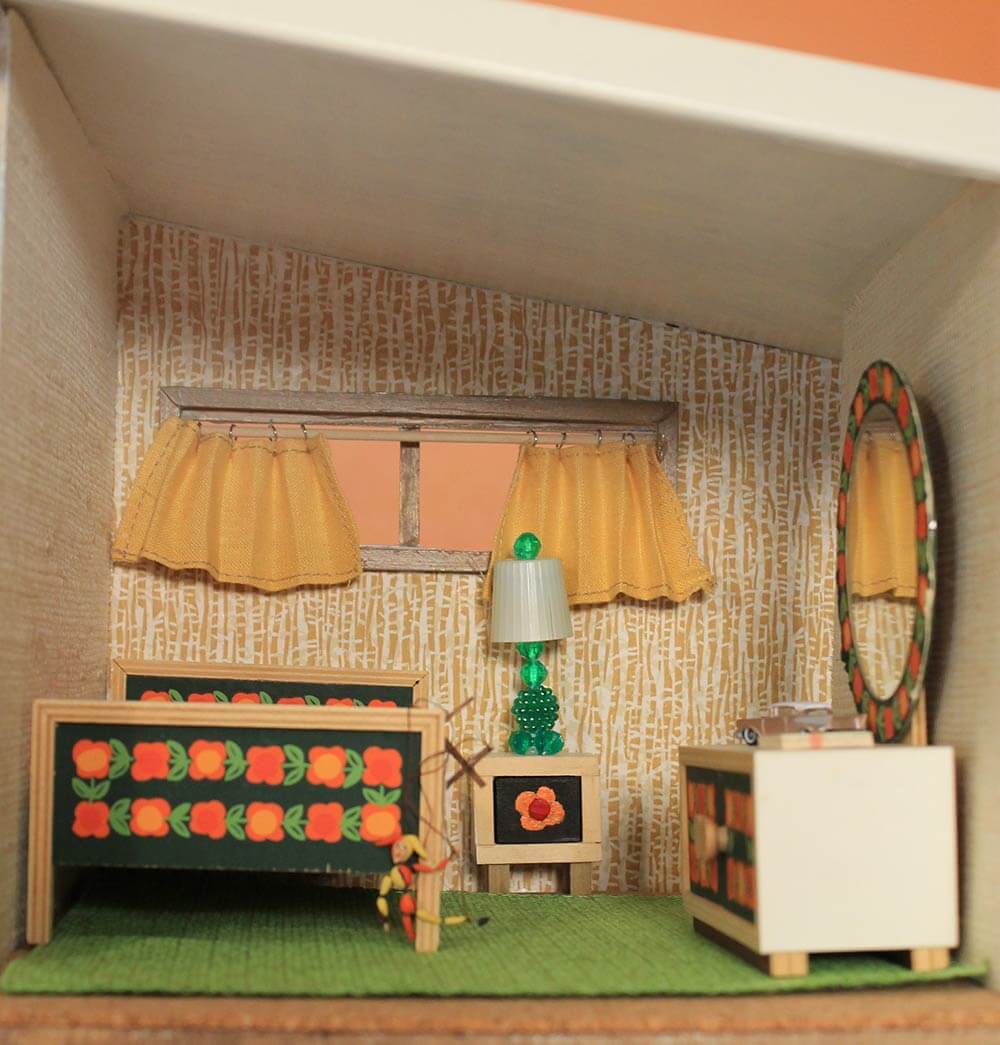 The child’s bedroom is a fun and funky space. This is the first room that received window treatments, since I had a solid yellow linen fabric scrap that coordinated well with the gold wallpaper and the yellow in the furniture. I used a small dowel rod and some small metal rings — meant to be used for jewelry making — as the curtain rings. These curtains can open and close and are oh-so-cute!
 I also made a matching yellow pillow for the vintage bed.
The lamp is made of beads and one of those coffee creamer containers that you sometimes see in restaurants. I bought it at a craft fair when I was a kid and it just so happens to be the right shade of green to work in this bedroom.
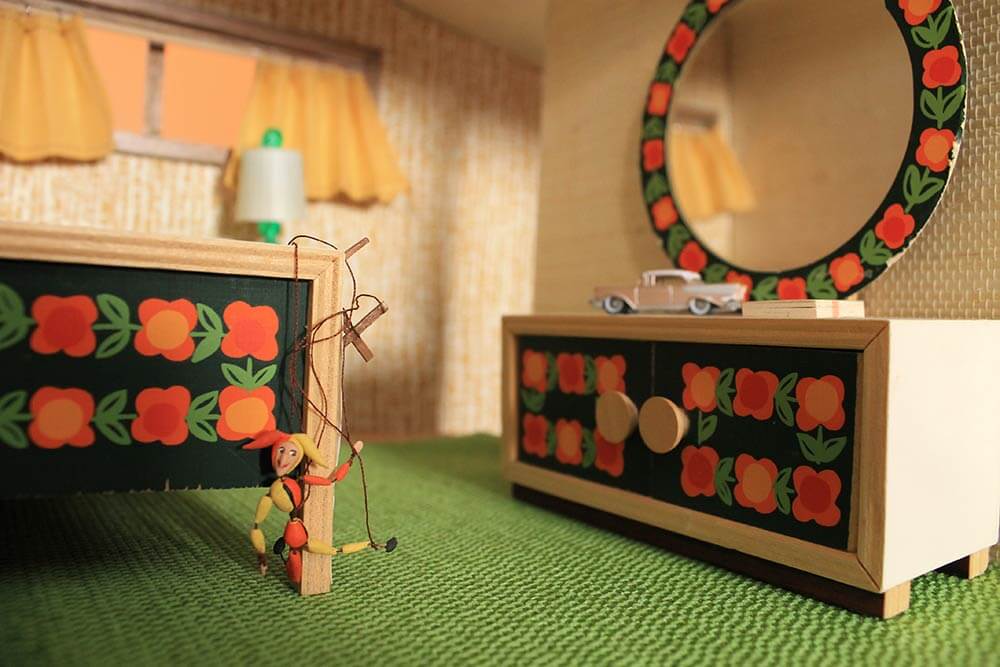
A kid’s bedroom needs at least a few toys, right? Here we have the marionette and Captain America book sent by reader Janet along with a vintage ’57 Chevy miniature car toy donated by my Mom.
 It would be nice to add a few more toys to this room over time and maybe a piece of art on the wall over the bed, but for the most part, this room is complete.
Child’s bedroom list of resources:
- Wallpaper, vintage and newer grasscloth from Pam’s collection
- Flooring, cork from Pam’s collection
- Rug, upholstery fabric sample
- Window treatment, made from scraps of yellow linen fabric, dowel rod and necklace clasp loops
- Bed and dresser, vintage ‘Made in Germany’ from ebay
- End table, made from painted scrap wood to match other furniture
- Table lamp, from my childhood dollhouse accessories
- Mini toy car, gift from my Mom
- Marionette and Captain America book, from reader Janet
Bathroom
I’ve covered how the bathroom was constructed already in this post:
Still, it is always fun to take another look.
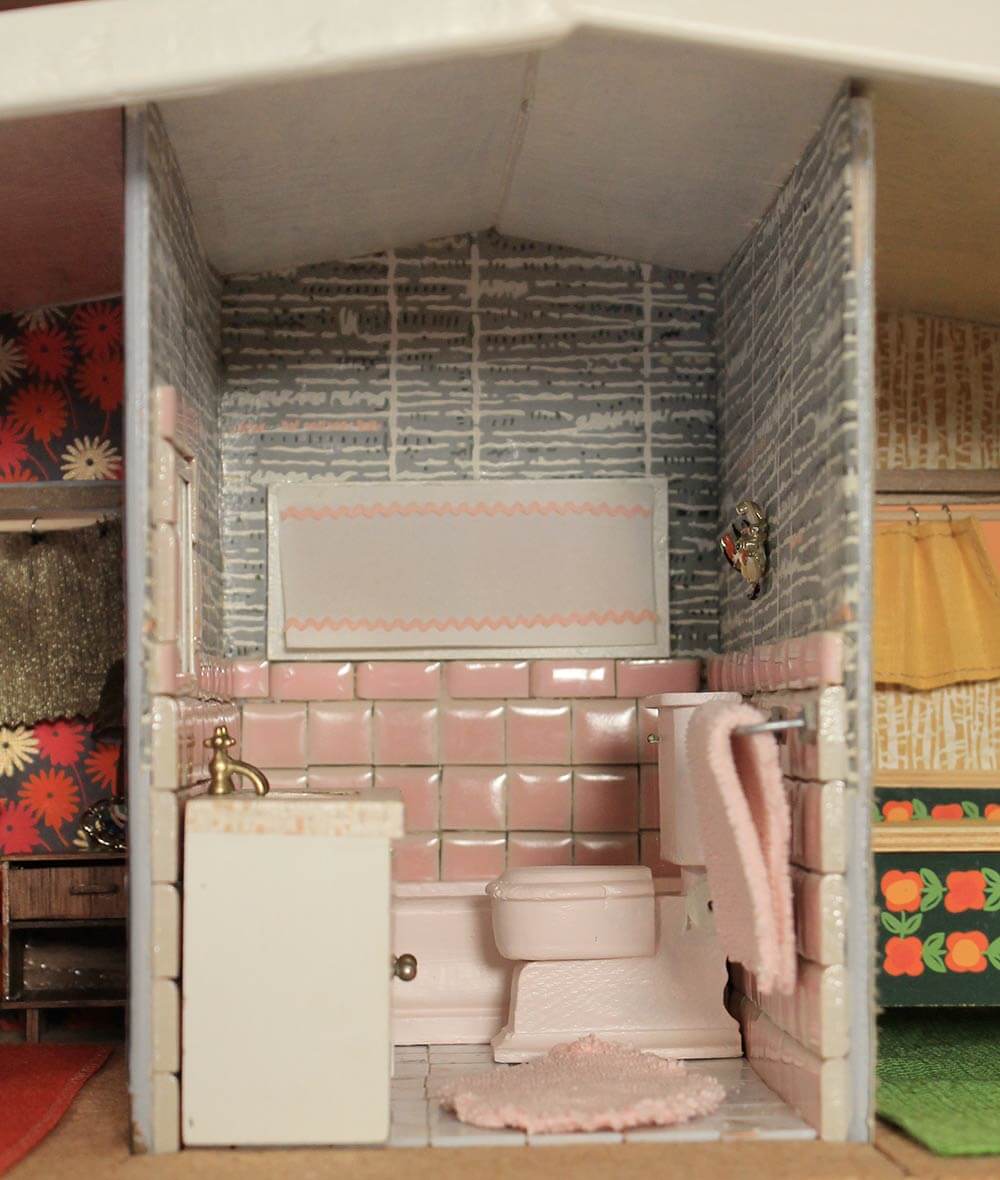
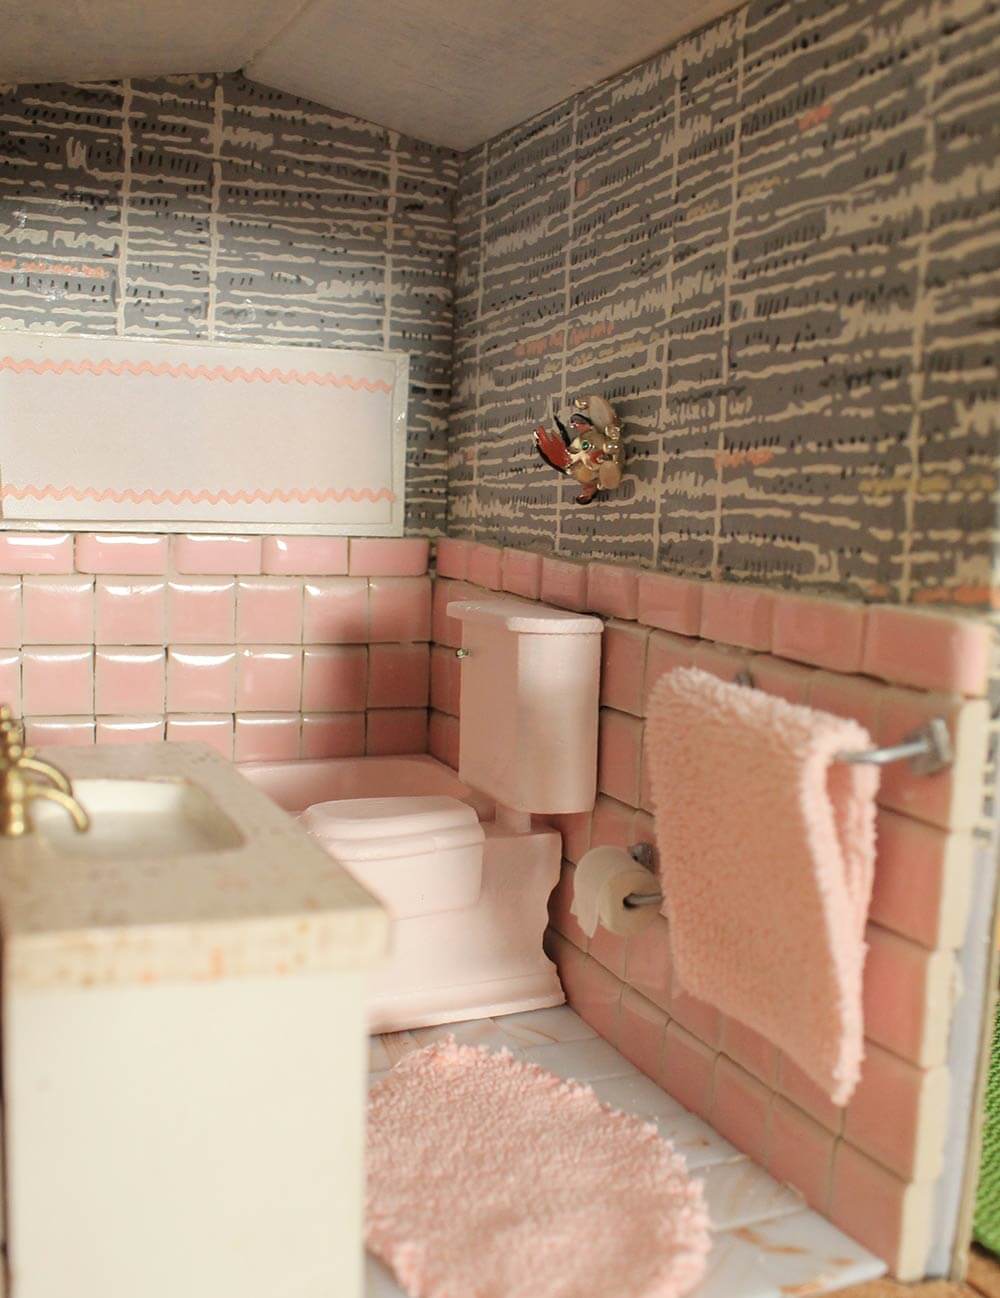
 I’ve only added two more things since you last saw the vintage pink dollhouse bathroom. The first is the roller shade — aka Holland (!) — window treatment. It doesn’t roll up and down, but I only glued the top, so you can flip it up to peek through the window. I made the shade from a piece of vintage, silky wide bias tape with two pieces of small pink rick rack glued onto it. Both sewing notions were from my Nana’s sewing stash.
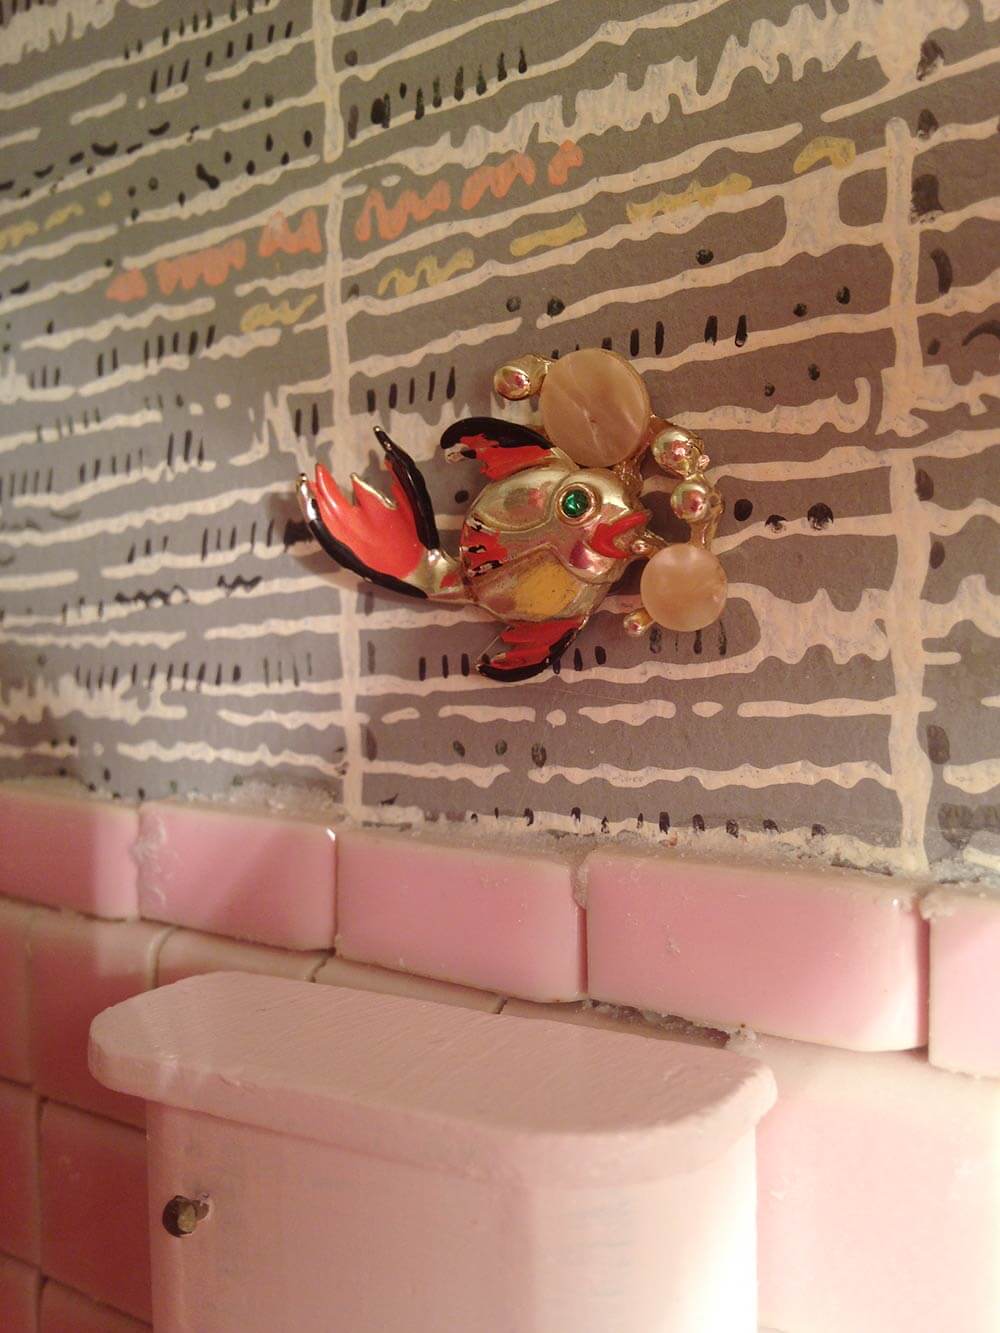
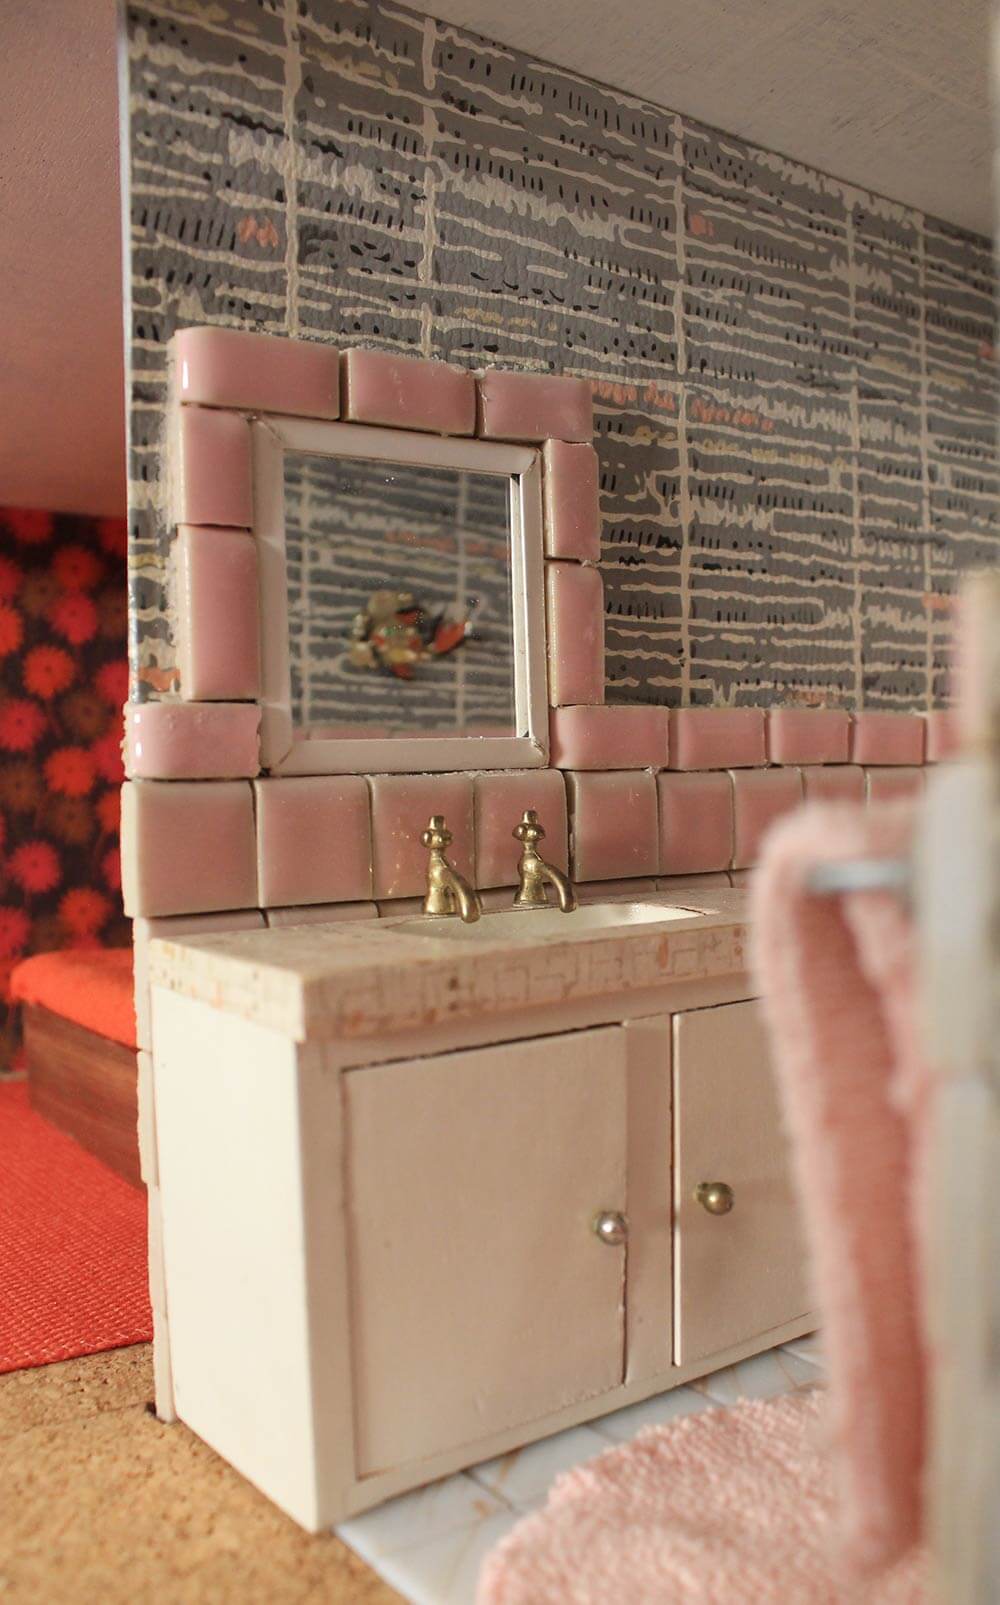 The other new item in the room is a bathroom fish wall plaque — made from a vintage pin that Pam sent from her collection.
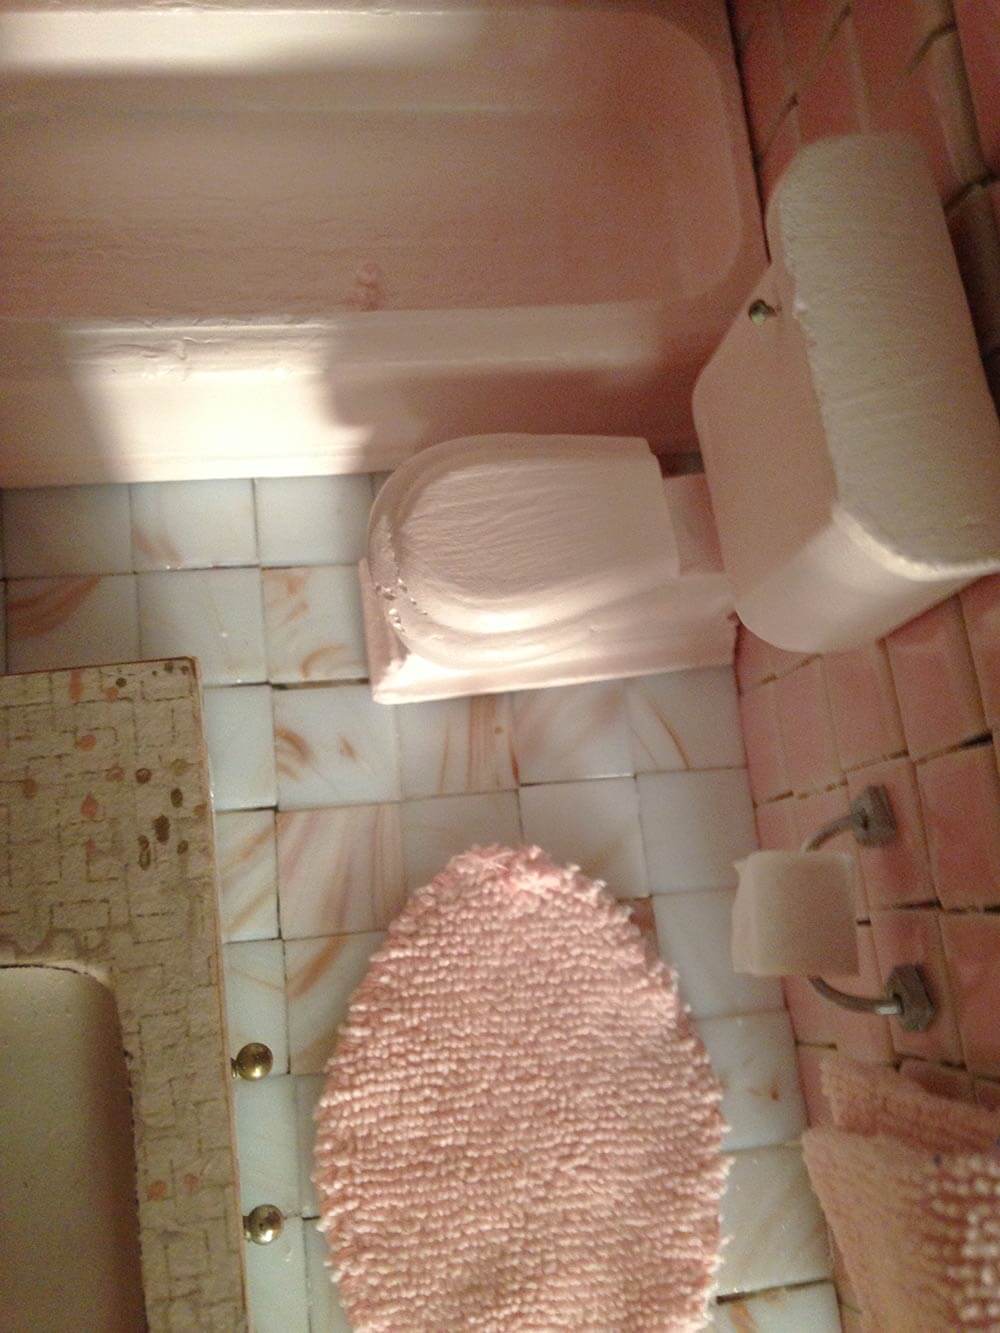 I used my phone to take photos from a few different angles, like this overhead shot that shows off the vintage alabaster World of Tile flooring tiles.
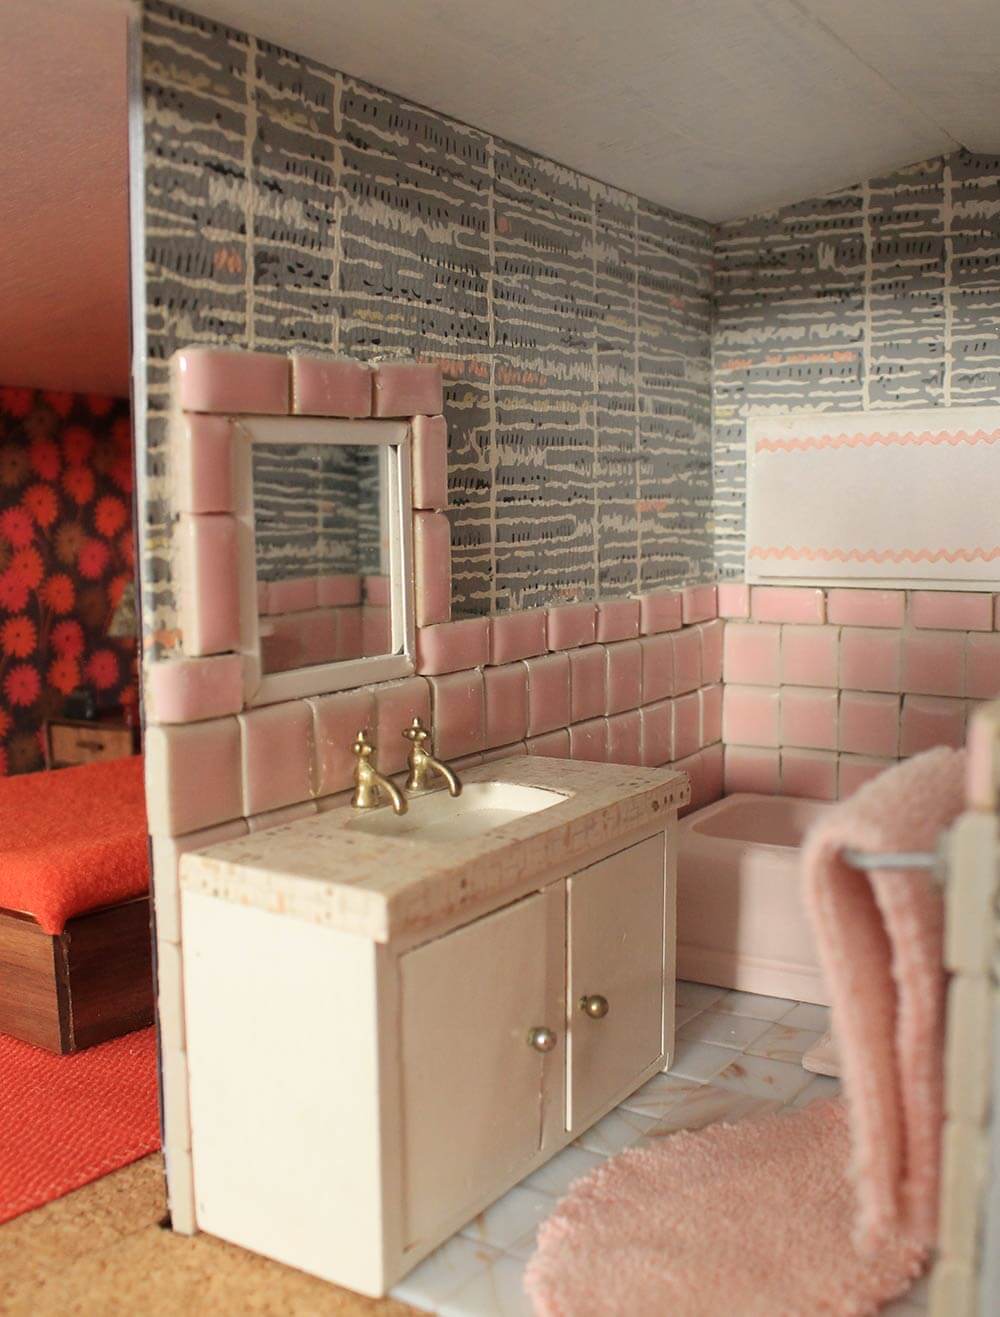
 The bathroom could still use a light fixture or two, and perhaps some accessories like a tissue box, toothbrushes, soap dish, etc. Otherwise the room feels ready for an itty bitty pink potty party to me.
Bathroom list of resources:
- Floor and wall tile, vintage mosaic from World of Tile, Pam’s collection
- Wallpaper, vintage from Pam’s collection
- Tub, toilet and sink, vintage from etsy and ebay
- Countertop, vintage wallpaper from Pam’s collection
- Bathroom mirror, pocket mirror free from the dentist
- Towel and bathmat, pink microfiber cloth
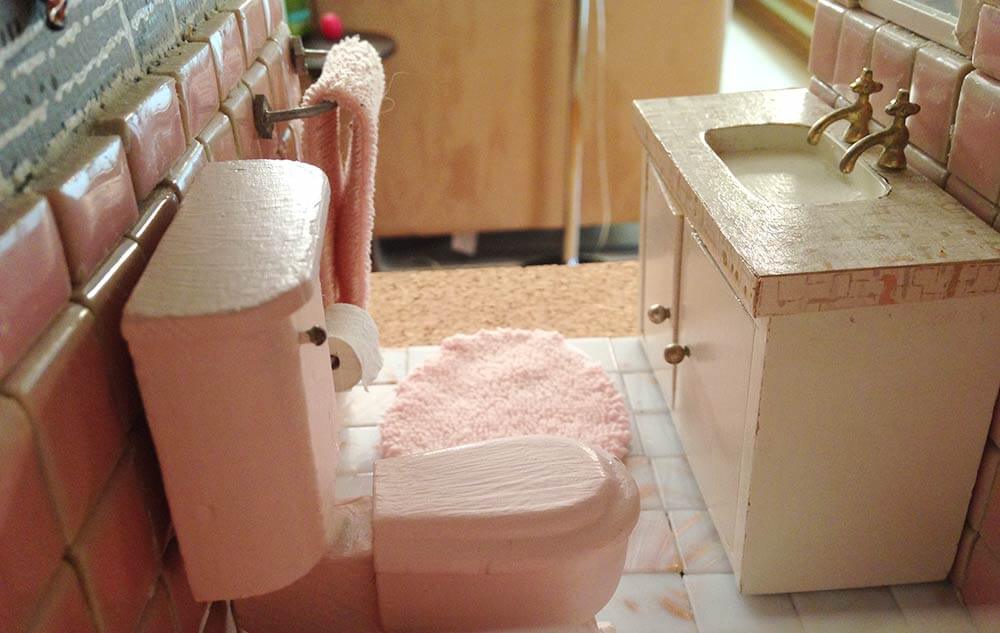
- Towel bar and toilet paper with holder, made from wire, wood, dowel rod and white cotton fabric
- Window treatment, made from vintage wide bias tape and vintage mini pink rick rack
- Wall fish, vintage pin from Pam’s collection
Master Bedroom
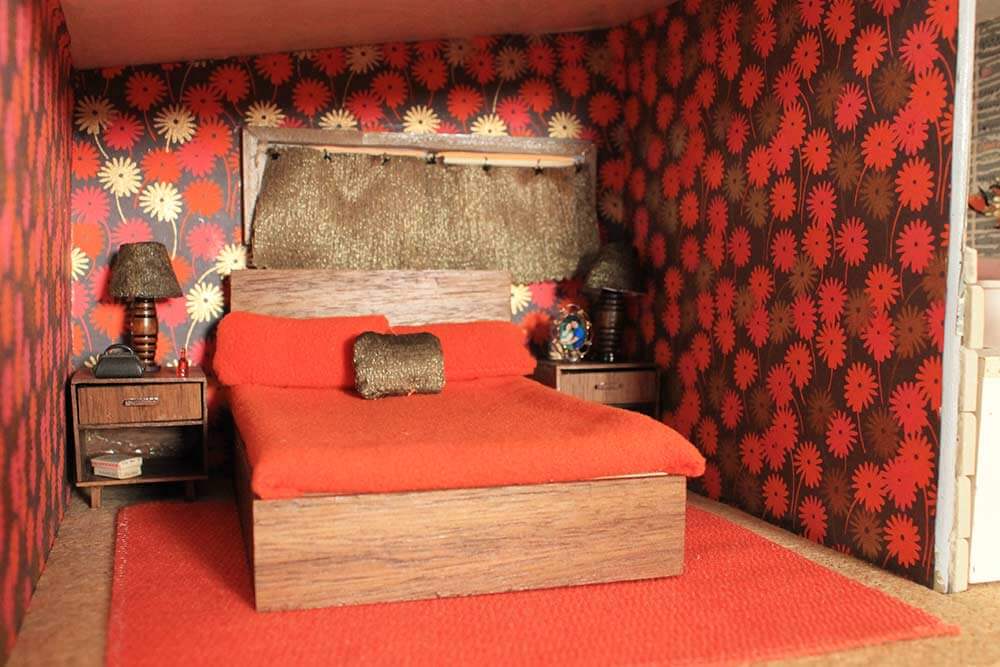 The master bedroom feels quite a bit groovier than the rest of the house. Why? Well, I think the home was built in 1955 and fully decorated then, which explains the vintage kitchen and bathroom. However, as the 50s came to an end and the 60s stretched on, Mom wanted to do a little redecorating to show the family was “with it,” so she put up new, flower power metallic wallpaper in the master bedroom and added a few other groovy touches to the rest of the house — thus the orange spaghetti lamp in the living room.
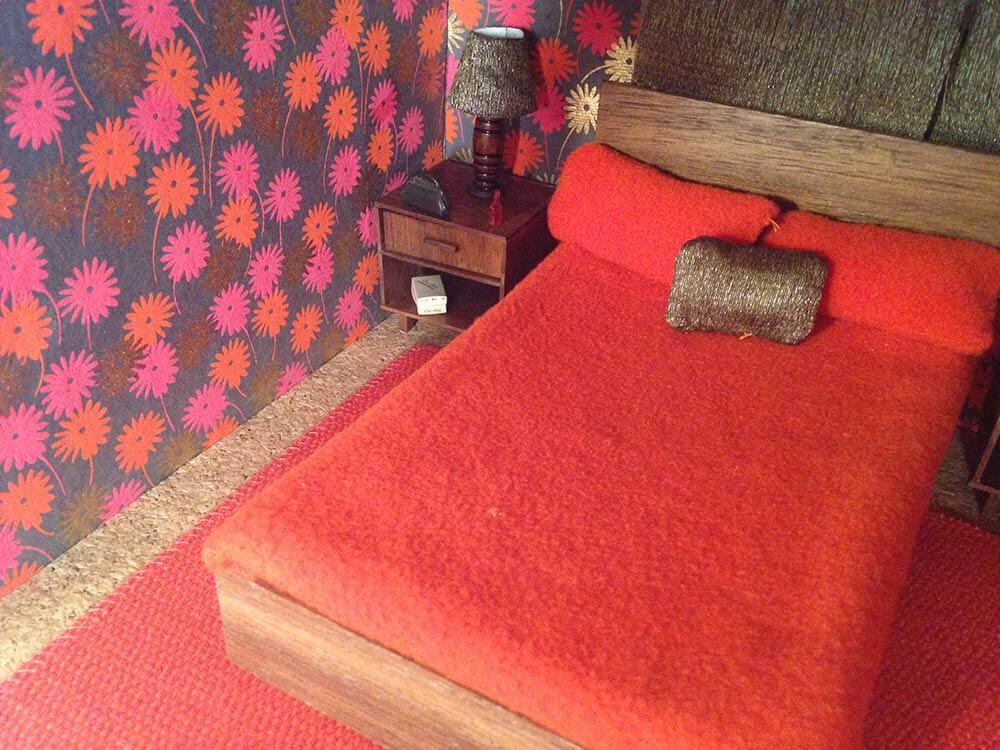
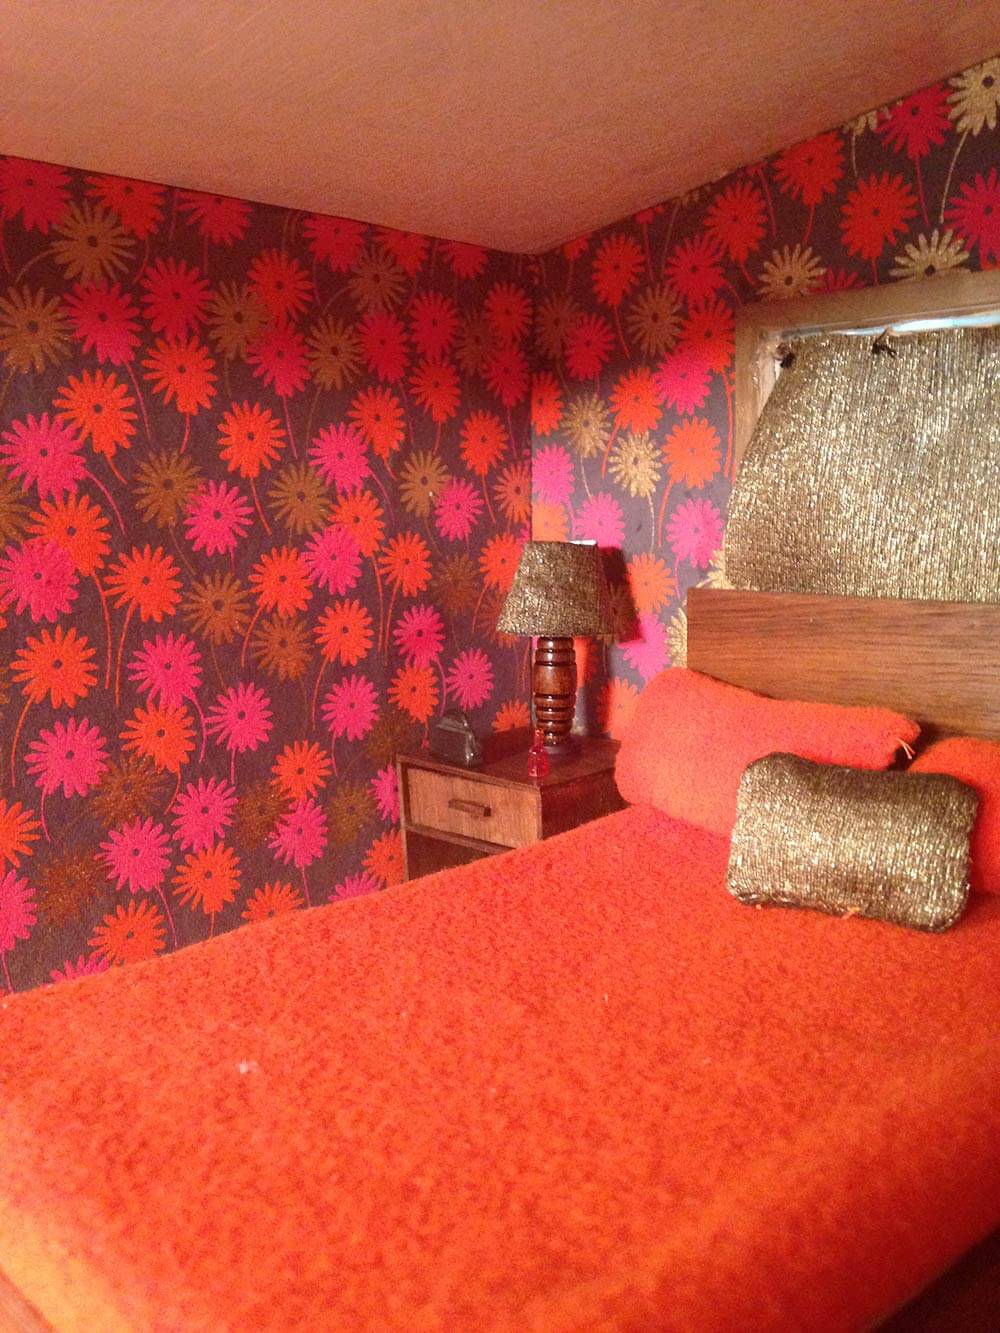 The touches of gold on the window treatments, throw pillow and lampshades mirror the gold in the wallpaper pattern.
 The Mr. of the house thinks that the bedroom is a bit over the top, but you know the saying, “happy wife, happy life,” so he wisely keeps his objections on the new decor to himself.
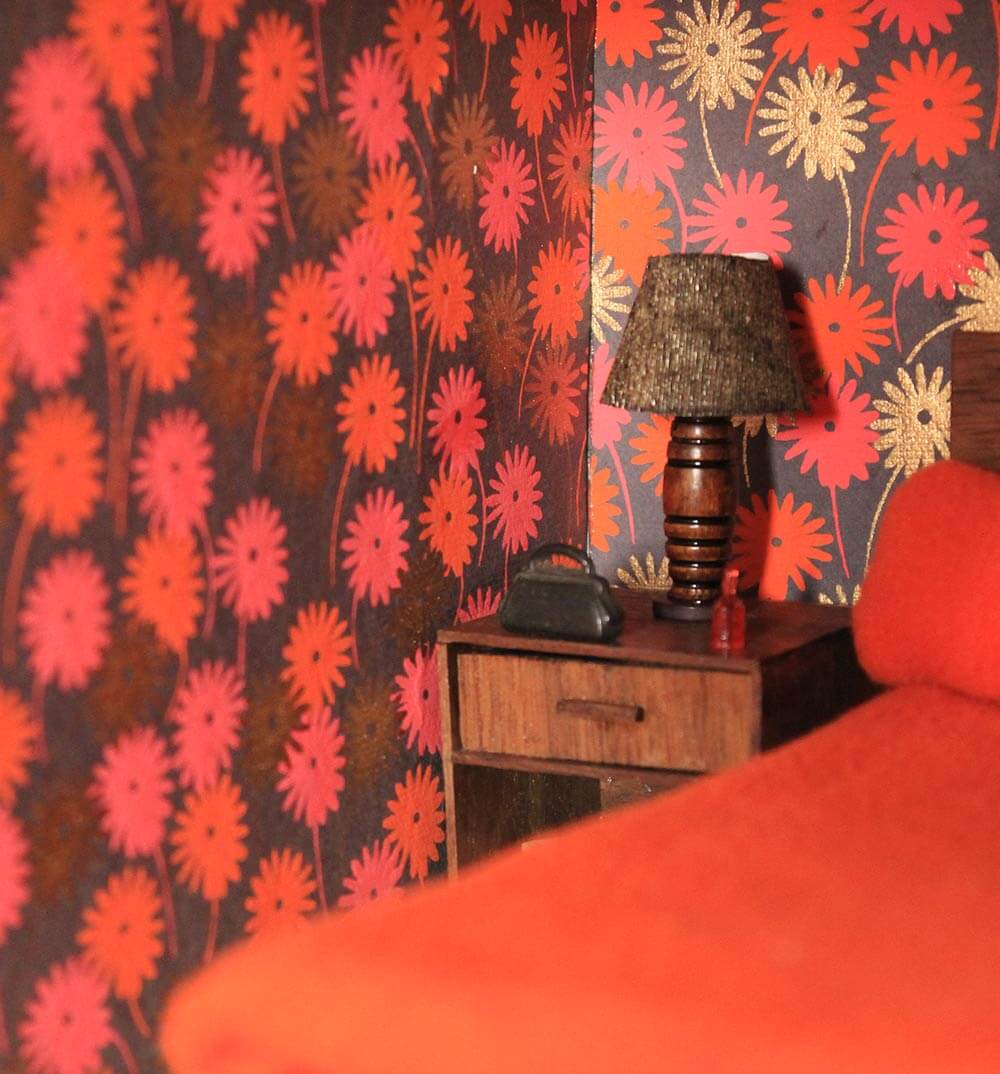 Those matching bedside lamps are made from vintage buttons — one standard black button for the base and a wood toggle button for the lamp body — topped with a fabric covered shade.
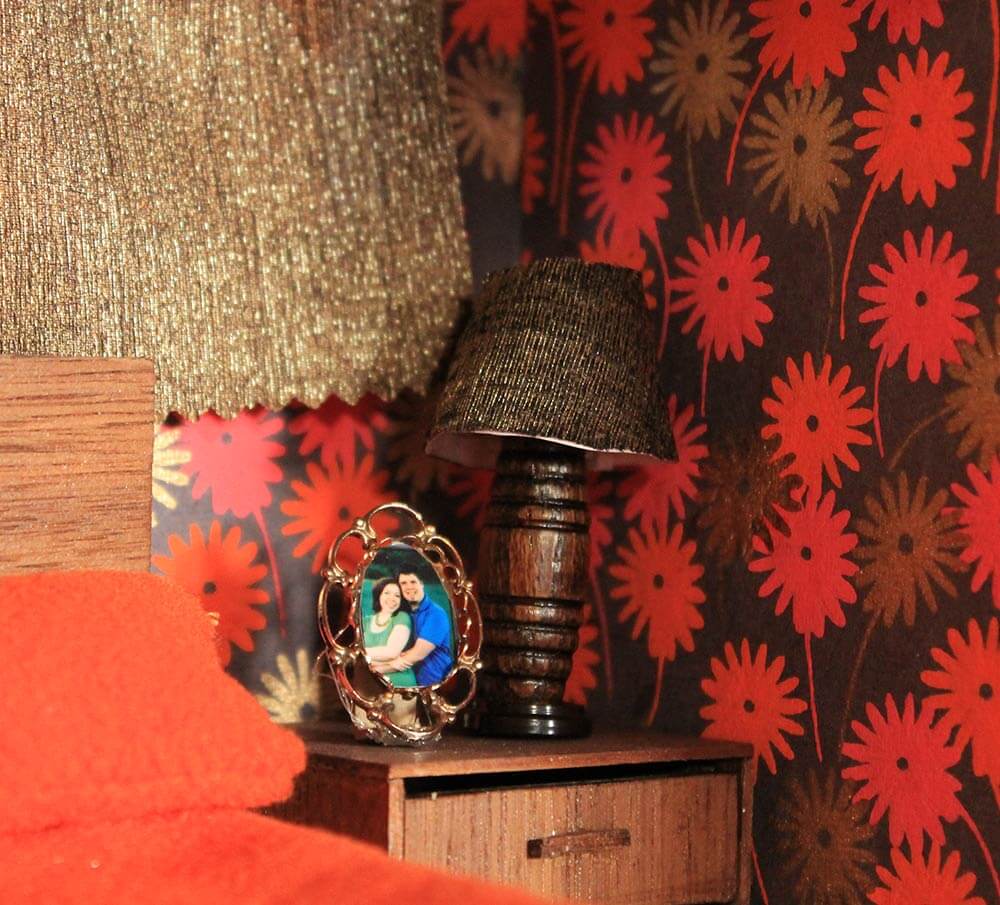
There’s a framed photo of the happy couple on the nightstand! And yes, that is my husband Jim and me. I made the frame out of a broken vintage pin that was missing its stone, sent by Pam with the notion of using it to make a photo frame. The tiny photo is from a contact sheet of our engagement photos that I found as I was working on my journey with stuff. Oh, the timing.
Master bedroom list or resources:
- Wallpaper, decorative paper from Paper Source
- Flooring, cork from Pam’s collection
- Bed and end tables, made from walnut scraps sent by Electrachime
- Bedding, scrap orange fleece
- Rug, upholstery fabric sample
- Window curtains and decorative pillow, fabric sample sent from Pam, dowel rod and necklace fastener hoops
- Lamps, wood buttons glued to plastic black buttons, topped with shades made using a pattern via Dollhouse Miniature Furniture Tutorials
- Picture frame, broken vintage pin from Pam’s collection and mini photo of my husband Jim and I from the photo contact sheet of our engagement photos
- Purse, perfume bottle and shoe box, vintage from reader Janet
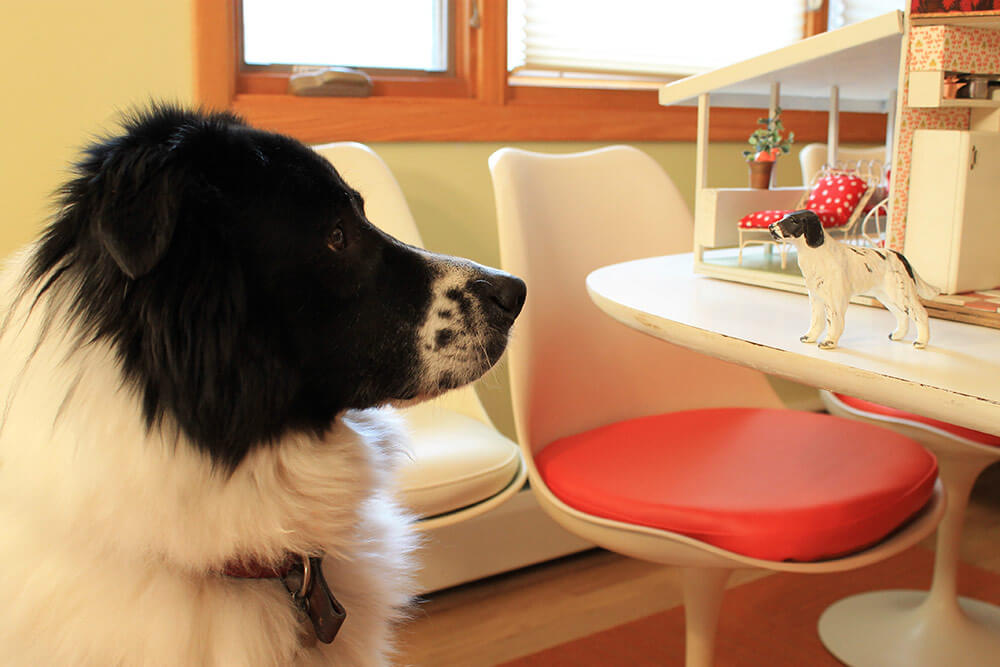
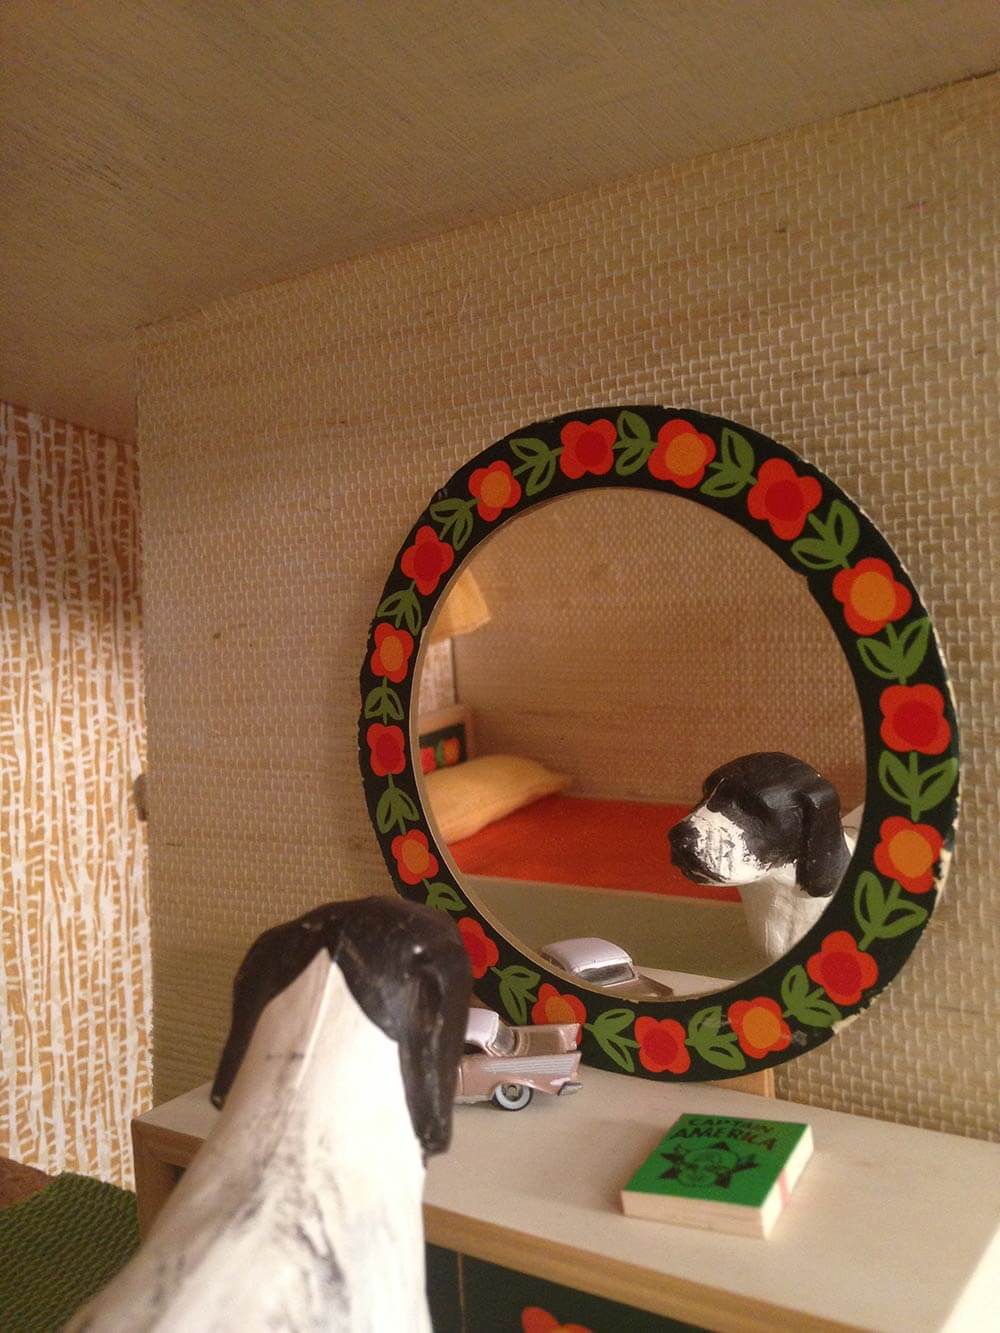 As of this moment, I have only one resident for the dollhouse — the family dog — whom I affectionately call “Little Leo.”
 Little Leo enjoys walking around the many rooms of the house, testing out all the furniture and sniffing the plants.
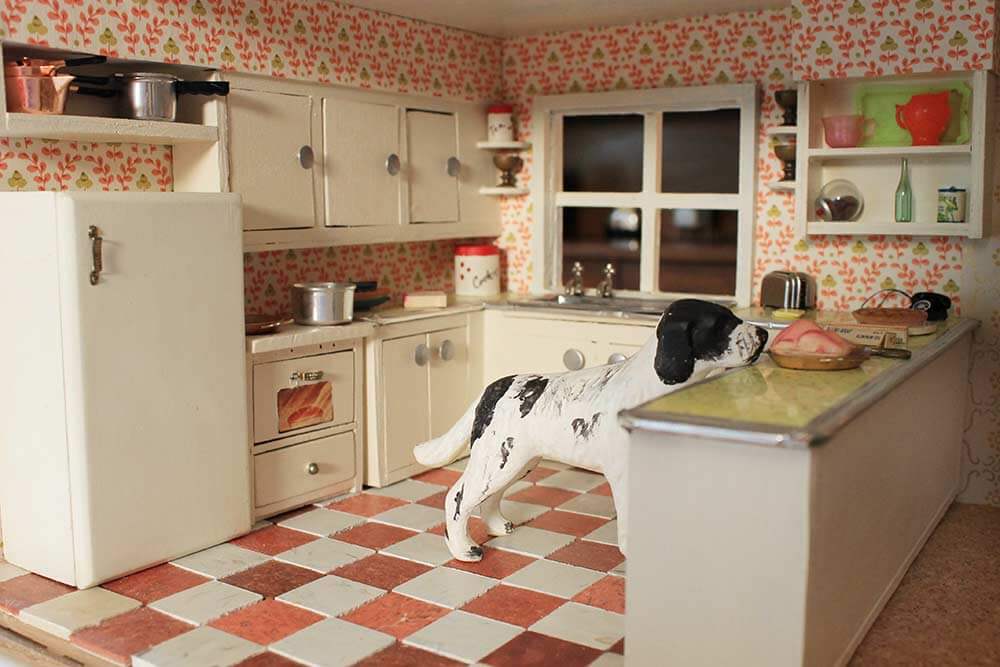 His favorite room — the one I find him hanging out in most often — is the kitchen.
I think this has something to do with all of the food he finds in there because just like his real-life counterpart, little Leo seems to have a thing for roast turkey dinners.
 What do you think about “Little Leo,” Leo?

Touché.
I now have my kitchen table back
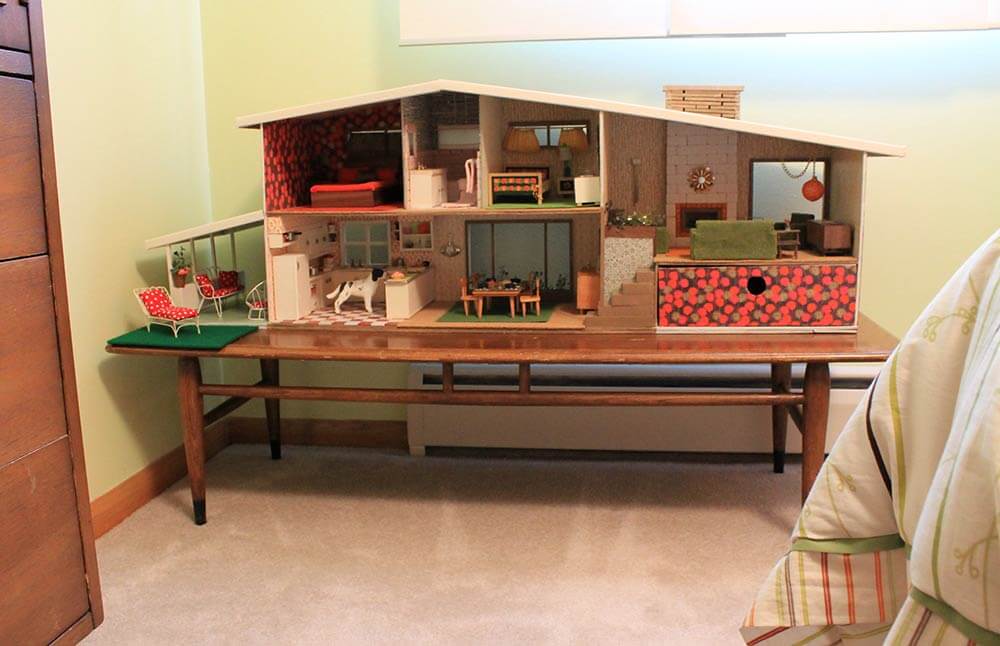
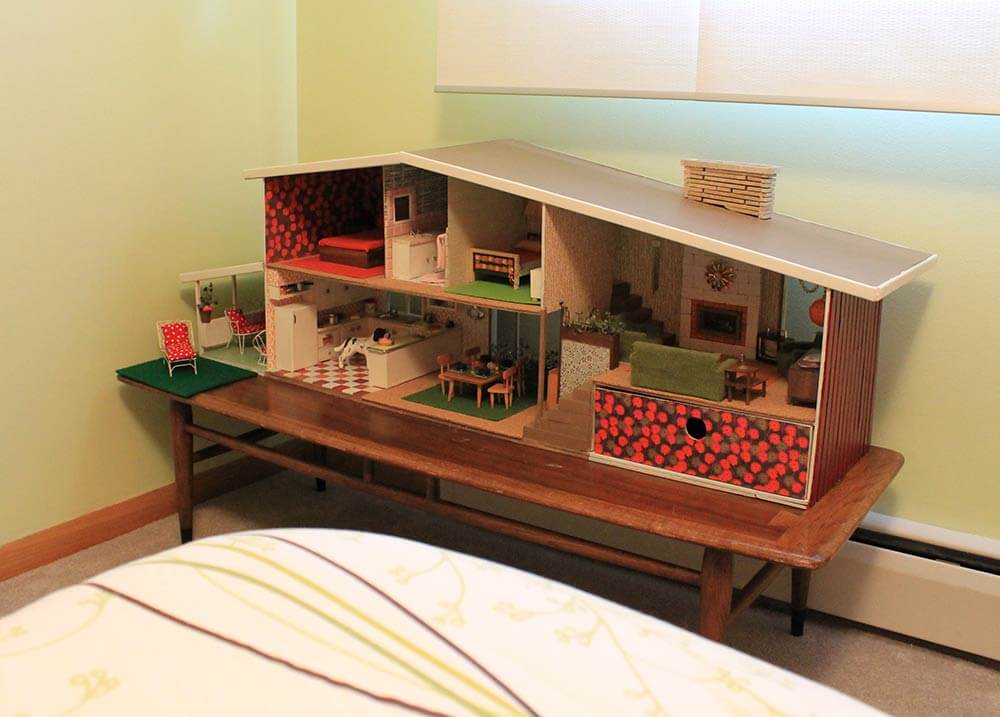 I’ve had a few friends and family members over during the process of building the dollhouse — it was hard to miss as it has been living on my kitchen table for the last five months — and they always ask me the same thing: “Where are you going to put this giant dollhouse when it is done?” I’m not going to pretend I knew the answer to this question back when I started construction, but since I’ve been rearranging my stuff and making room in the house during my “tidying up” project I realized that the vintage Lane coffee table that belonged to my husband’s grandparents was the perfect size for the Betsy McCall Dollhouse. I carved out a corner in my guest room where the dollhouse can live and be enjoyed buy visitors without worry that it will meet the peril of an ‘earthquake/tornado’ caused by an overly waggy dog tail.
 Well that’s a wrap, folks! Thanks for sticking with me throughout five months of dollhouse building — and a special thanks goes out to everyone who contributed time and materials to the dollhouse — Pam, Electrachime, Hannah’s Treasures, reader Janet and my Mom. I couldn’t have done it without you guys!


GlenEllyn says
Simply amazing! The working door chime is simply wonderful, and I love the ping pong string light! I had to go read your previous post on your pink bathroom because I had to know (of all things) about the tiny roll of toilet tissue! Genious ideas!
Wouldn’t it be nice if you could sprinkle a little water on it, give it some sunshine and it would grow into a house you could live in? 🙂
Kate says
That would be cool! 🙂
Sandra says
My neighborhood has carports just like that one, although they’re a little wider, and most of them have been enclosed to become small double-car garages. They were built in 1954. By 1956 when mine was built, double car garages came standard (along with attics and insulation, instead of flat roofs).
The homes that retained the carports do indeed seem perfect for outdoor living–I’m guessing they resemble homes in “the Pacific” (Hawaii to Japan), and were influenced by places seen in WWII. California architecture and landscape design are strongly influenced by Japan from that era. On a hot day, you get a breeze and shelter from the sun by parking on the street or in the driveway.
Donna K Kasper says
Wow! I’ve gone back in time! Now all you need for the living room hifi is a bunch of glass grapes everyone had in the 60’s ours were blue green but many people had orange brown.
love your detail. and your talent.
Way to go!
Laura Clemens says
this is awesome. i’ve always loved this decade. Being born in 1953 and growing up through the 60’s and 70’s. Awesome time of life. We used to own that Lane Coffee table you have your house sitting on. When I saw it, I was like that looks like ours. We have the step type end tables that match it. Great job. Love it. Love and hard work reaped great rewards. 🙂
Diane in CO says
LOL over “Little Leo” and his adventures around his swanky new home! Not only are you talented in the design/build field but, Kate, you bring great humor to your posts!
This entire article is charming to the enth degree! Over the top, magnificently done. I have thoroughly enjoyed the tour!
Kate says
Life is just better when there’s something you can giggle at, right Diane? Glad you enjoyed it — I had a lot of fun putting it together. Plus, my husband was totally laughing at me when I was playing with Little Leo. 😉 Big Leo was just confused…
Alice says
It is no surprise to me that Katie would do something as creative as this
Your ideas were great You can help me decorate my home anytime
ElectraChime says
Seeing the total dollhouse really does it justice! You are the MacGyver of Miniatures. The Tiny House Whisperer. Dances with Dollhouses!
The Spaghetti Lamp, the Starburst Mirror, the Banjo Clock are all inspired hand made details. If I had to pick a favorite it would the framed print of that beautiful couple in the Master Bedroom. Great personal touch.
And I am impressed with the reader engagement you created for the best renovation blog on the planet—documenting a retro-dollhouse build! Positively brilliant.
And I am especially happy the family meals can be saved from the curious jaws of Little Leo!
pam kueber says
ahhh, you are so sweet! Thank you, Chief Ding Dong!
ElectraChime says
That’s MISTER Chief Ding Dong OFFICER to you (wink-wink).
Kate says
hehehe awww thanks ElectraChime! 🙂 Yes, the doorbell is a great way to scare little Leo away from the turkey dinner! 🙂
Robin, NV says
Probably my very favorite detail is the green table lamp in the kid’s room. So perfect! Also love the flower power master bedroom. Here’s how the “big reveal” goes in my mind:
Mrs: Honey, come look at what I did with the bedroom.
Mr: Uh, wow. Well . . . it certainly is . . . jazzy, isn’t it?
Mrs: Isn’t it great?!
Mr.: Yes dear. [heads back downstairs, grumpily ducks under the spaghetti lamp to sit in his reading chair, flips open the paper, and listens to the soothing tones of Pat Boone.]
Kate says
hehehehehe that’s exactly how it went — I’m sure of it! 🙂
Laura says
Also: What is in the little drawer under the living room?
Kate says
That is storage for extra stuff. Right now there is the beginnings of some holiday decor in there, some extra scrap fabrics and other odds and ends. My plan is to put any materials I find for additional “projects” like fabric for curtains and such in there until I have the time to make them. 🙂
Mollye says
Wow! This is fantastic and such attention to detail. Little Leo is a great touch! Will we see a little Kate and little Jim?
Kate says
I’m on the lookout, but 1:12 scale dolls (about 5.5 to 6 inches tall) are hard to find! 🙂
Mary Elizabeth says
Here is the perfect family:
http://www1.macys.com/shop/product/melissa-doug-kids-toys-victorian-doll-family?ID=1130391&pla_country=US&cm_mmc=MSN_Bing_Seasonal_PLA-_-PLA+-+Bing_General+PLA-_-3211303190_-_-_mkwid_sRb2Qx2d|dc_3211303190|-|sRb2Qx2d
They would fit into the dollhouse perfectly, and their clothes are kind of ambiguous as to century. (The woman is wearing a skirt almost identical to the one I had in college in the late 1960s.) If you don’t want the baby (no nursery, no room for a crib in the master bedroom, doesn’t fit the family’s lifestyle), you can put it up for adoption on the forum. 🙂