 Kate has been so retro crafty lately that, I admit, I got kinda jealous. I can be retro crafty, too! Really! I was a Girl Scout for like 9 years, in the 1960s and 1970s — the crafting nirvana heyday. Pretty much the only five things we did at Girl Scouts, in order of time spent, were: (1) Craft, (2) Craft, (3) Craft, (4) Sell cookies, (5) Go camping. Notice the emphasis on crafting. There were only three TV channels. There were no video games or cell phones. We kids rode our bikes, we did crafts, we read books. Now there. Don’t I sound like the old fart. Still, yes, alas, I recognize that I will never compete with Kate’s native talents. Nonetheless, I craft on, best I can, another poster girl for womankind who ain’t so great at crafts but still keep on tryin’. I have long had the idea in mind for this craft: Drill a hole in a vintage metal souvenir plate and insert a handle thingie — everything purchased from the Goodwill, of course. It was easy — even the drilling part. The drilling part was Exciting.
Materials to make a showy handle souvenir platter:
- Vintage metal souvenir plate. You could also use glass. The prospect of drilling through glass scares me. But I may give it a try soon.
- Some old server-thingie from the thrift store with a threaded handle up the middle. I found what looked to be some kind of relish holder for $1.79 at the Goodwill. It had no particular aesthetic gravitas as designed. I chose it for the handle and its decorative screw thingie with wood bobeche up the middle design.
- A drill that can operate on low speed.
- A special drill bit that can go through metal (or glass). My special drill bit had instructions how to drill — including how to keep the whole thing “cool”. Follow the instructions that come with the drill bit on how to use it on metal.
- Clamps, wood, etc. to hold the plate in place to drill… Goggles… All the safety equipment you need to drill safely. Do your research to make sure you’re using your equipment safely.
- Measuring tools and marker to mark the middle of the plate.
- Tool to unscrew the old-server-thingie, then to re-assemble it use the vintage souvenir plate instead. Looks like my tool was called a nutdriver / brand name “The Claw”.
- Level. I ended up needing a small level — to help me ensure I had the metal plate seated level.
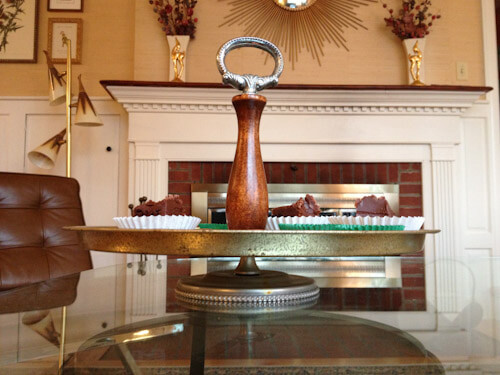 The video is a quick one. Drill. Disassemble. Re-Assemble. Adjust as required to get the tray to sit level. In my project, it turned out that the relish thingie was never level. So my plate did not want to sit level. I bent it to get it level. Obviously, this kind of solution is risky. But it worked, the souvenir plate had enough give. There may have been a better solution. I really should have tried to figure out the underlying cause of the problem. But I have only so much patience. My Troop Leaders would shudder reading this.
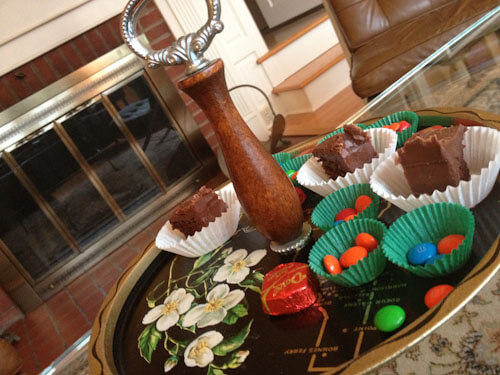
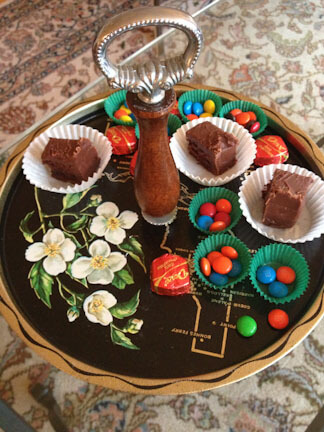 Okay. I now some of you may be *horrified* that I drilled a hole in the middle of a perfectly nice vintage souvenir plate of Idaho. But I thought the whole thing would be even prettier — kind of “showier” — with the handle up the middle and elevated like a cake plate. My assistant for the day — Abby — who is in art school — approved, she even liked the old-timey wood bobeche and the metal finishes of the relish thingie; she didn’t want me to spray paint the whole thing, which is another option. Her mom is a big cookie-baker, so I sent the showy serving plate home with her.
I was so darn proud of myself at how this came out, that I could just bust. Very gratifying.