Kristen’s 7 step-by-step tips to make a pleasing gallery wall
Kate - July 23, 2013, Updated: August 5, 2013
Retro Renovation stopped publishing in 2021; these stories remain for historical information, as potential continued resources, and for archival purposes.
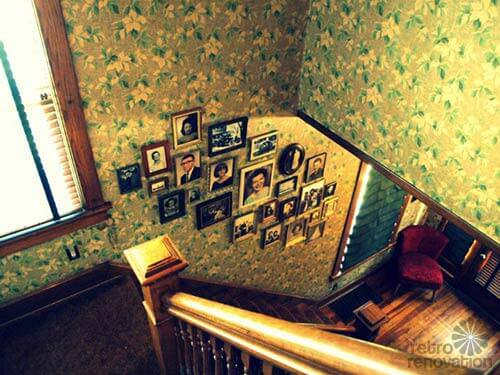
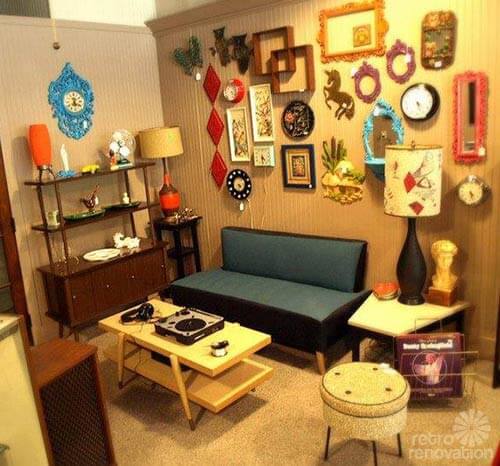
We first discovered that reader Kristen’s talent at making gallery walls when she submitted this photo to our uploader of 306 reader living rooms. So when Kristen emailed Pam to let her know that she had just finished making yet another amazing gallery wall in her home — this time up the staircase wall — we knew it was time to bow down to the master. We asked Kristen to share her tips, and she delivered big time, with lots of ideas and photos from her projects inside her house and for local shops, too.
Kate & Pam… this was kind of hard for me… because I never do this thinking in steps… it is very intuitive for me. I do it without thinking.
One of my vintage decorating books states you should have “something dark, something light, something dull and something bright” and I think that is probably good advice! I don’t like things to look too similar or have too much of the same shape or color going on. You want there to be a variety of things, but they look like they all make sense together. (Basically all items should look kind of the same, but kind of different).
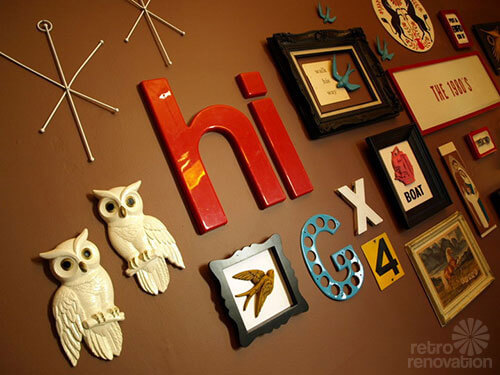
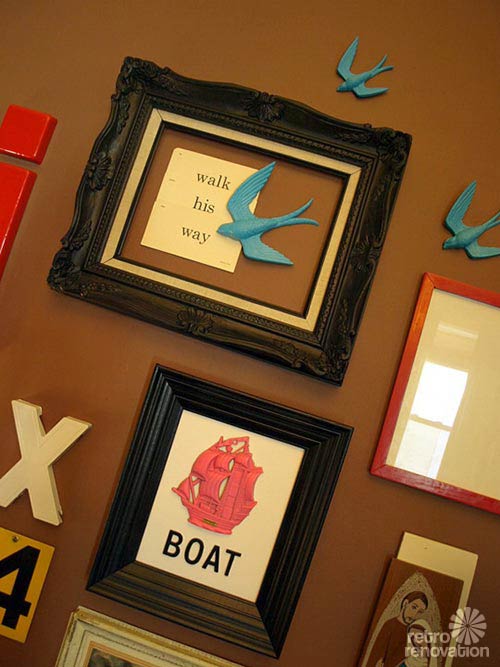
The first step is to find objects for your collage wall. Don’t be afraid to think outside the box. Sometimes, I think it’s too boring to use picture frames only. Try incorporating sign letters, shelving with trinkets, shadowboxes, dishes, mirrors– you can really get creative here. These items seem to add a little 3-D effect rather than just flat framed pieces. Also… don’t be afraid to use kitschy vintage wall art! If it’s not exactly the way you like it… freshen it up with a little paint! Those 70s brass & brown pieces look great & punchy on a wall when you paint them your favorite color!
Use things with a bold graphic impact that don’t get lost in a wall full of images. I like to use things that are simple and bold– but stay true to your own style… that’s going to be what makes it great!
Spend time collecting things! It took me over a year just to find the right photo frames & kitch wall art for my projects. I don’t like to hurry it… I need time to spend with these items to see if I really like them.
Some lesser items really grow on me and end up being my favorite pieces and I decide I really don’t like some things at all. You may not have a year to do this… but at least spend some time (a couple days or a week) with the items laid out in a corner or somewhere you will pass by them everyday.
I usually collect way too many items and edit it down to the very best… not even using some items. I think it’s good not to over design. Not everything you collect will need to be part of the collage. Sometimes it is hard to say no, but you have to think of the look of the overall composition.
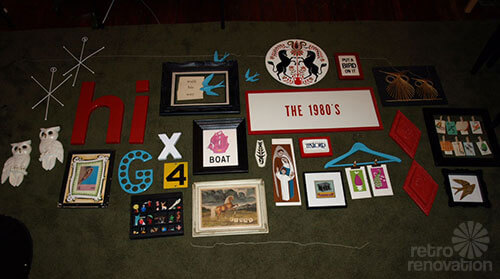
Once you have everything gathered, I like to lay the collage out on the floor and get a preliminary arrangement there before it is permanently affixed to the wall. Then you can rearrange and play with it on the ground until you get it right.
Here are some tips for the actual arrangment process:
Larger items or favorite pieces look good in the middle as central focal points
Stagger pieces for more interesting arrangement
Think about balance. The balance doesn’t have to be symmetrically perfect, but there should be some good visual balance going on (my collages are hardly ever symmetrical, but I like them to look weighted evenly.)
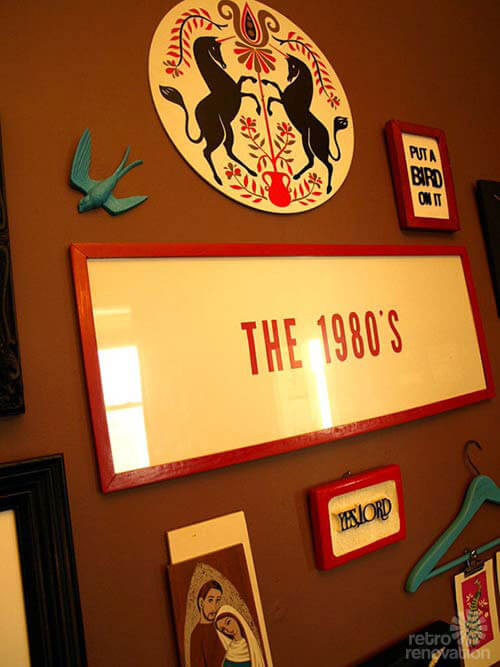
I like to think about what the outside border is shaping up to look like as well as the contents of the inside of the collage. I personally don’t like to have a square outside border (too boring!) I like it when things creep out of the border a little!
There is a certain invisible path that leads our eyes from piece to piece to take into consideration. Consider hanging pieces in a staggared fashion… I think this helps lead the eyes in a fluid fashion rather than art gallery wall style of one right next to the other).
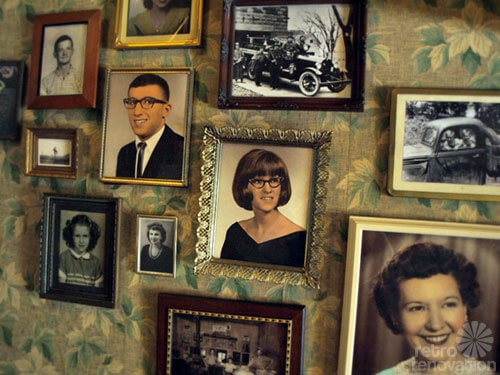
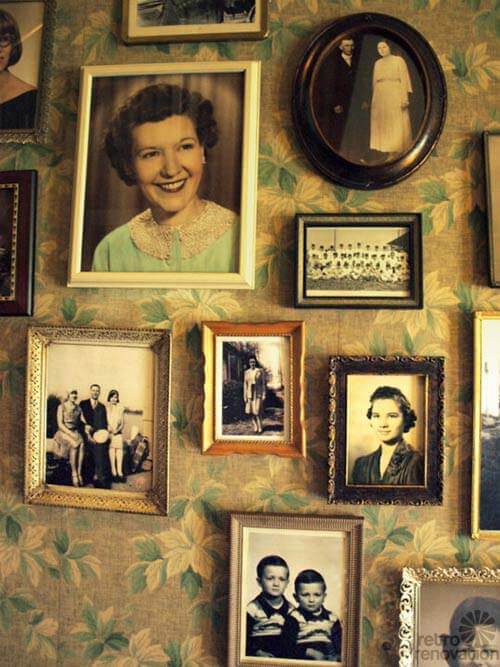
For an authentic look when framing vintage portraits, stay away from too much matte board. From my research, they didn’t matte things too heavily during the mid-century era in modest homes.
You can find terrific vintage frames at thrift stores & yard sales! I have never purchased a new one for any of my projects!
Once you have the layout down, take a photo with a digital camera so you can refer to the arrangement as you are hanging. This is a small step, but rather important if you are a perfectionist like me!
I do a “mock” hanging on the wall. I trace every piece onto construction paper or newspaper, cut it out and hang it on the wall with painter’s tape or a small pin. This allows you to move items around easily and find the center without having to re-nail items over and over. We even mark a dot on each individual paper where the hanging device is to make the hanging process as easy as possible.
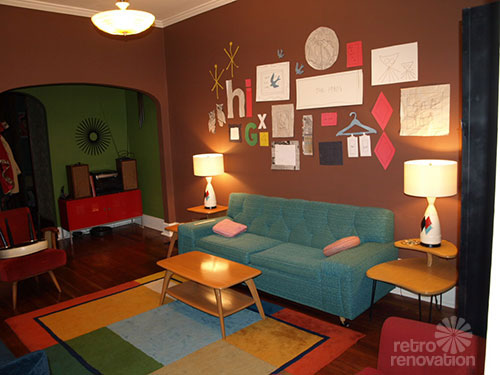
Hang your collage and enjoy it!
One other tip…
If you don’t have time to go to garage sales for a year like me, a lot of Etsy sellers have been selling grouped frames & finds (some are painted and some are not) so you can have items instantly for a collage wall!
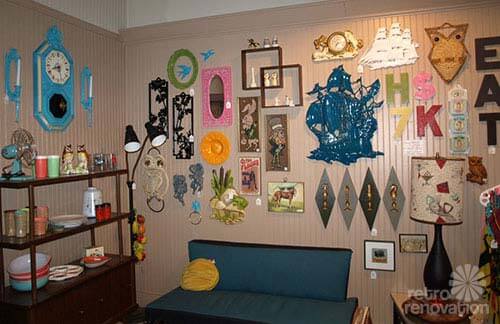
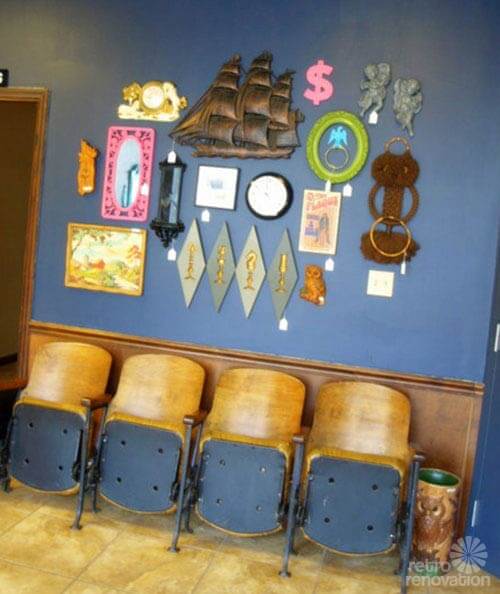
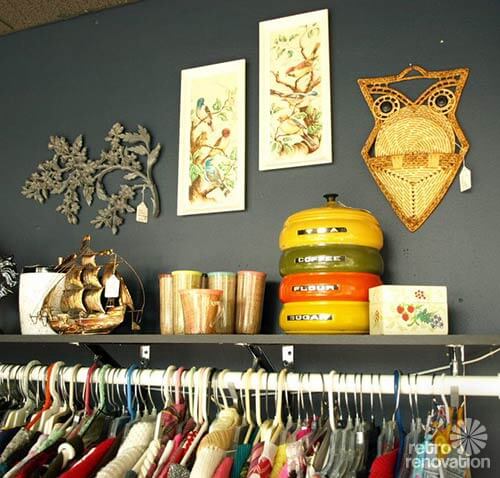
A collage wall Kristen assembled in a local vintage shop.The collage wall had to be rearranged as pieces sold.
P.S. I have also had small vintage shops in town. One partnered with a vintage record store and now currently we are sharing space with a local coffee shop.
I love decorating the retail space — when something sells, I get to re-do the wall! I have included photos of those spaces too.
Kristen, thank you so much for the great tips and tricks to collect, compose and hang a retro vintage gallery wall. You make it look so easy, though I know it takes some luck and a trained eye to find and assemble all of the parts to a successful collage wall.
I’ve summed up Kristen’s seven main tips below:
Steps to make a vintage gallery wall (also known as a collage wall):
Gather art, photos, frames and objects for your gallery wall. Try to choose items that are simple yet bold. Items that are similar in shape or color (yet not too much alike) work well. Try to collect more objects that you will actually need, that way you can edit and use what works for your space and style.
Spend time with objects — trying to look at them every day for a week or so to decide which objects you really like and which are not working for you. Try to think of your overall composition and taste in decor when selecting which items will be used.
Lay out the objects on the floor to get the preliminary arrangement before you affix anything to the wall. Rearrange and play with the composition, paying special attention to the way the objects are balanced and the negative spaces between objects as well as the overall shape of the collage as a whole. Aim for “balanced asymmetry.”
Once you have a composition you like, take a photo so you can refer back to it later.
Trace each item for the gallery wall onto newspaper or construction paper and then cut them out. Make a dot on the paper cut out where the hanger for each piece will need to be driven into the wall. This will make it easy to hang the objects.
Attach the cut out shapes to the wall in the pre-determined composition with tape or tiny pins. This way you can tweak the spacing of the objects without making unnecessary holes in the wall.
Hang your objects and remove the paper patterns. Now your wall is done and ready to enjoy.


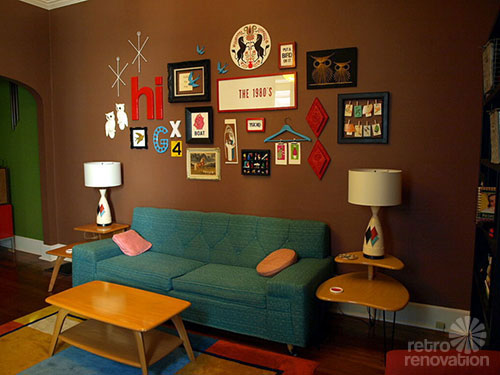 We first discovered that reader Kristen’s talent at making gallery walls when she submitted this photo to our uploader of 306 reader living rooms. So when Kristen emailed Pam to let her know that she had just finished making yet another amazing gallery wall in her home — this time up the staircase wall — we knew it was time to bow down to the master. We asked Kristen to share her tips, and she delivered big time, with lots of ideas and photos from her projects inside her house and for local shops, too.
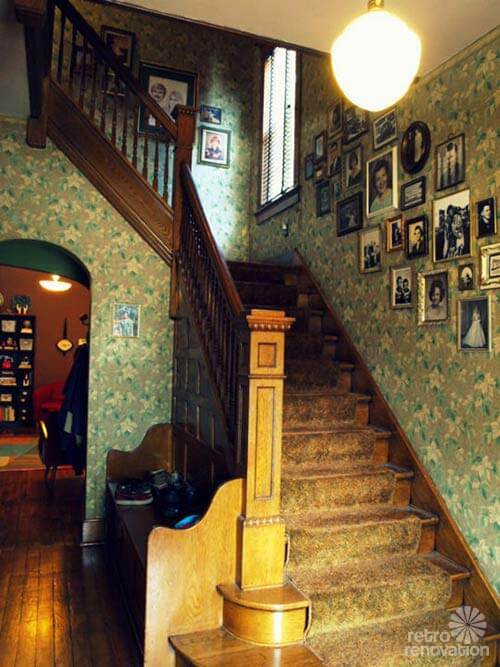
The first step is to find objects for your collage wall. Don’t be afraid to think outside the box. Sometimes, I think it’s too boring to use picture frames only. Try incorporating sign letters, shelving with trinkets, shadowboxes, dishes, mirrors– you can really get creative here. These items seem to add a little 3-D effect rather than just flat framed pieces. Also… don’t be afraid to use kitschy vintage wall art! If it’s not exactly the way you like it… freshen it up with a little paint! Those 70s brass & brown pieces look great & punchy on a wall when you paint them your favorite color!
Use things with a bold graphic impact that don’t get lost in a wall full of images. I like to use things that are simple and bold– but stay true to your own style… that’s going to be what makes it great!
Once you have everything gathered, I like to lay the collage out on the floor and get a preliminary arrangement there before it is permanently affixed to the wall. Then you can rearrange and play with it on the ground until you get it right.
I love decorating the retail space — when something sells, I get to re-do the wall! I have included photos of those spaces too.

 Kristen, thank you so much for the great tips and tricks to collect, compose and hang a retro vintage gallery wall. You make it look so easy, though I know it takes some luck and a trained eye to find and assemble all of the parts to a successful collage wall.