

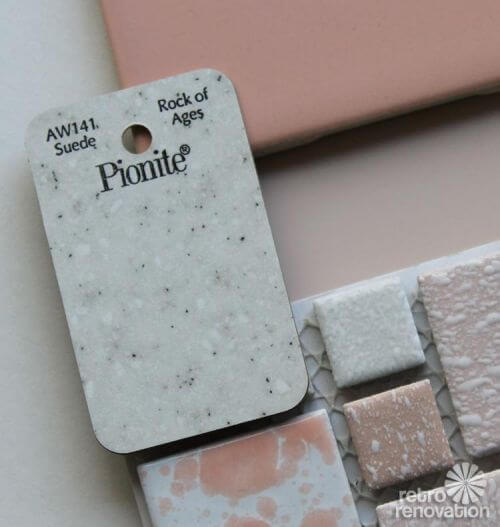
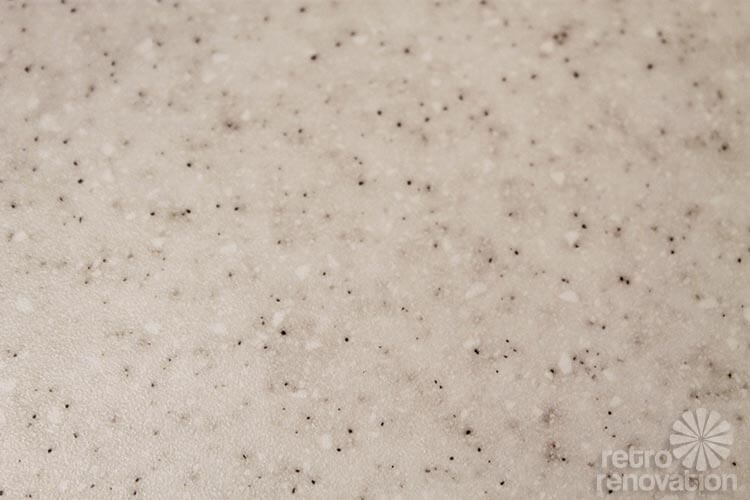
 I visited my local Habitat for Humanity ReStore 12 times looking for a reclaimed piece of vintage sparkle laminate. But boo hoo, no can do, so it was time to start looking for alternatives. Pam’s story about all the places to find laminate was the next place to search, but none of the patterns or colorways seemed right for my bathroom. Feeling discouraged, it was time to search the rest of the laminate world — where I found exactly one laminate selection from Pionite, called “Rock of Ages” that appealed to me for my pink bathroom gut remodel. This particular style reminded me of a sparkle laminate without the sparkle. With my laminate selection made, it was time to get serious about the building and installation process. Laminating a counter top didn’t look too complicated to me — heck, I just built the vanity from scratch — so I decided to do it myself. Now that the project has been completed my verdict is: Laminating a counter top is easy when you have the right tools.
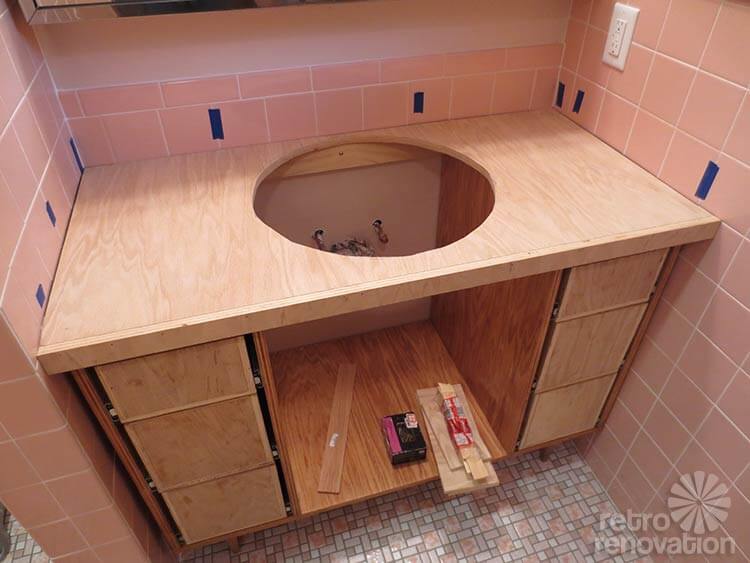 When making your own custom laminate counter top, the first step is building the base — the part the laminate will be adhered to. Using a spare piece of 3/4 inch plywood left over from building the vanity box, I cut the plywood top to size and tested the fit. After making a few adjustments (cutting off a little material in one spot to ensure a better fit), the next step was to cut a 1.5″ strip for the face of the counter top overhang and attach it to the front edge of the plywood using glue and finish nails.
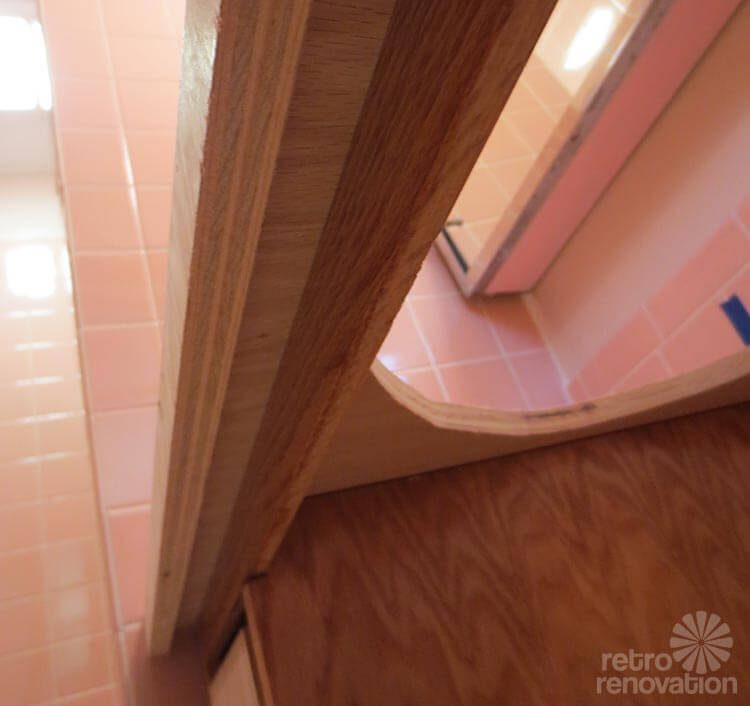 Important — when deciding how thick to make the overhang, remember to allow plenty of space for drawer and door clearance. Next, position and cut the hole for the sink, using a jig saw. Another option is to cut the hole after the laminate is applied, but I wanted to make sure the hole was correct before going to all the trouble of gluing the laminate.
If you don’t have the tools required to build a laminate counter top, this is where you will incur most of the cost.
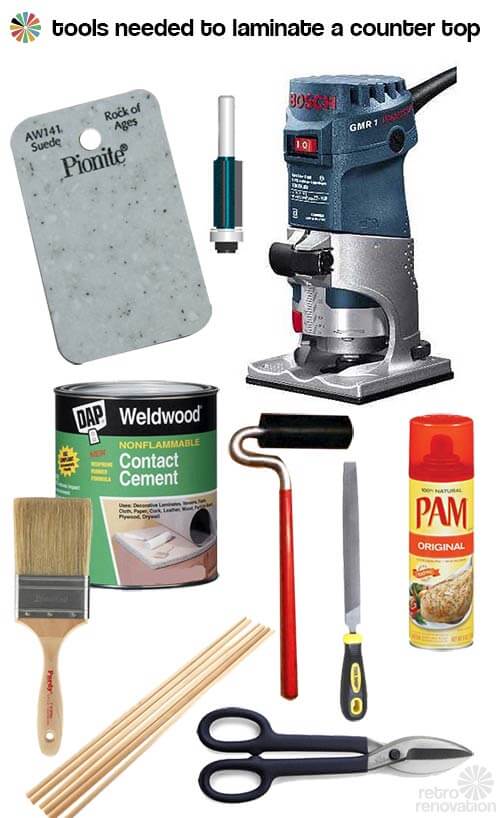
Tools needed to laminate a counter top:
- Laminate sheet that is at least 1 inch larger on all sides than your finished counter top, plus extra for the front strip. I used Pionite Rock of Ages, which was special ordered through my local Menards and arrived at my house in less than four business days.
- Clean wooden dowels or sticks used in laminate positioning
- Contact adhesive — I chose the non-flammable, low odor, water clean up variety
- Router, I purchased this one at Menards, but we also found it on Amazon: Bosch PR20EVSK Colt Palm Grip 5.6 Amp 1-Horsepower Fixed-Base Variable-Speed Router with Edge Guide (affiliate link)
- Router bit — also purchased at Menards but available at Amazon: Bosch 85216MC 1/2-Inch Diameter 1-Inch Cut Triple Flute Laminate Flush Trim Router Bit 1/4-Inch Shank With Ball Bearing (affiliate link) — a MUST for this project
- Paint brush to apply adhesive
- J-roller
- Smooth file, single cut variety for fine work
- Shears to trim laminate into rough sized pieces prior to gluing
- Cooking spray (yes, I chose Pam, tee hee hee) to lubricate router bit
 So why is the flush cut router bit a must have for making your own laminate counter top? It is the only router bit (to my knowledge) that can glide along the front of a soft surface, like laminate, and cut the overhanging piece without damaging the front finished piece at the same time. When this bit is put into the router and set so that just a small amount of the cutting surface is exposed, you will easily be able to trim the thin, overhanging piece of laminate while the rolling guide helps move the router along the counter top edge. The cooking spray helps keep the rolling guide moving smoothly, so it doesn’t catch or become clogged with the debris coming off the cut and also prevents scuffing.
 The laminating process was so quick and easy, that there are no photos to document my process. Just follow the instructions — my Menards had a rack of free how-to brochures near the laminating supplies — to create a custom laminate counter top.
- Cut laminate strips with snips so they are roughly 1″ larger on all sides than the surface they are being mounted to. Make sure the surface is clean and free of debris.
- Begin with the front strip. Brush on a thin layer of contact cement both on the back of the laminate strip and the surface it will be bonded to. Let the contact cement dry completely.
- Apply the thin strip to the front edge of the counter top, making sure to carefully line up the position, then press the laminate onto the counter top edge. Use the J-roller to ensure good contact is made between the pieces.
- Use the router with flush cut bit to trim the excess laminate on all four edges, then use the file to smooth the trimmed edge using only inward motions to avoid cracking.
- Next, laminate the top of the counter. Make sure the surface is clean and free of debris. Apply contact cement to both pieces and let dry completely.
- Place the dowel rods on the glued, dried counter top surface to act as spacers when positioning the large laminate piece. Lay the laminate on top of the sticks and get it into the correct position.
- Starting at one side, remove the sticks one at a time pressing the laminate down as each stick is removed. Then roll the laminate with the J-roller using even pressure to the entire surface.
- Use the router and flush trim bit to trim all edges of the counter top as well as cutting out the sink hole. Spraying cooking spray on the front of the counter, where the router will cut against the finished edge, will help the router move smoothly and prevent scuffing.
- File the edges of the top, always filing towards the material, then wipe off any excess glue.
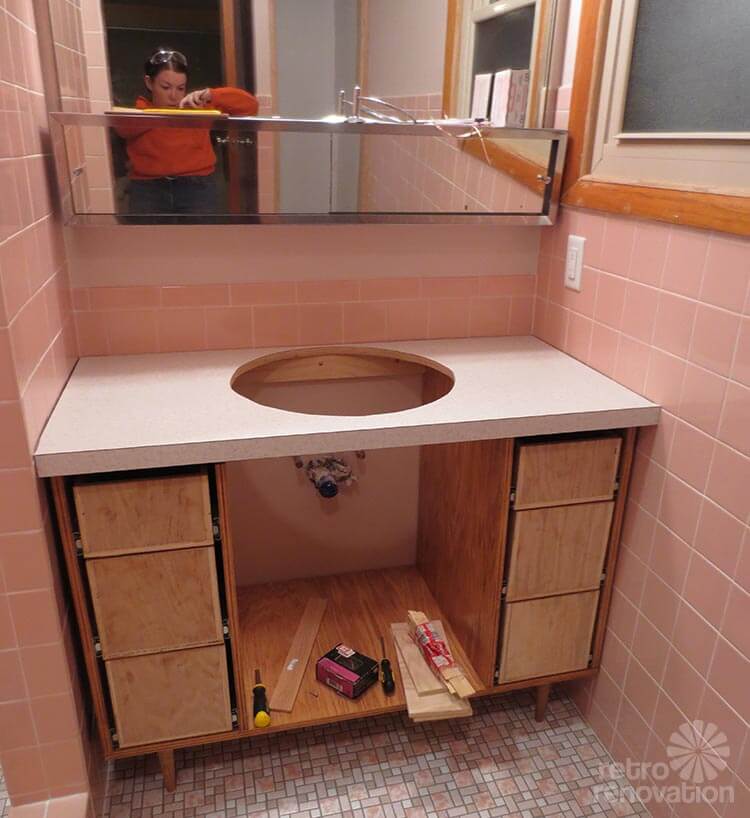 All that was left was to install the new counter top and caulk around the edges where the counter meets the wall. Easy peasy.
 The only tip left to add is this — make a practice counter top with scraps. My lack of expertise with a router made me nervous. Using a small 14 inch by 8 inch piece of leftover plywood and similar sized bits of laminate to practice on first was a good idea. It allowed me to perfect my router skills, adjust the flush cut router bit to the correct depth, test the cooking spray lubrication process and effectiveness and even make sure the filing was going well before attempting anything on my actual counter top.
The longest part of the whole process was waiting for the contact cement to dry. It really was an easy project. The 30″ x 4′ piece of laminate I ordered cost about $46 total, half of which was the shipping and handling cost to get it to my house. Had I chosen a style that was in stock, it would have cost much less. The plywood was left over from another part of the project, so no extra cost there and for tools (including the router) and contact adhesive, another $160 was spent.
Bottom line, if you have most of the tools or plan to do this project (and other DIY projects using a router, file, etc) again in the future, it is inexpensive and easy to make your own custom laminate counter top. On the other hand, if DIY/projects/tool collecting is not your thing, save the money you would otherwise spend on tools and have someone else make the counter top for you. Either way, adding a laminate counter top to your bathroom remodel is an easy, low maintenance and inexpensive.


Camilla says
I have a very tiny bathroom with a 24″ vanity and only a shower. i have an ugly shelf below the medicine cabinet to hold grooming items because there is no room on the vanity. I could have so much more room for my husband’s shaving and grooming adventure if I had a custom made top which expanded outside the sink area more. I am going to buy the tools (I love tools) and do this soon.
pam kueber says
Seems like you could do something like this, but with laminate – https://retrorenovation.com/2013/01/04/vintage-bathroom-sink-with-integrated-long-curvy-counter-top/
Have fun!
Camilla says
That is exactly what I am doing. Your comment sent me off on a wonderful journey looking at the Statler Hilton. I remember this counter setup with a hinge to allow service to the toilet. I will be going in the other direction toward the shower. I need to narrow down to 15″. Then I am using a kitchen wall cabinet 12″ deep as a base next to my vanity and some shallow shelves above the cabinet. Thanks for the inspiration.
Janet Schen says
You’ve done it again, Kate! Great job and I love your dress!
Mark says
Great job Kate. You did a fantastic job. I admire your determination, and it has paid off!
Debbie says
I ordered a sample of Rock of Ages and was disappointed that it had no sparkle, but it looks absolutely fabulous in Kate’s pink bathroom!
pam kueber says
Nobody has sparkles any more.
Debbie says
We need to protest the lack of sparkly laminate. Retro Renovators (in our pink bathroom T-shirts, of course) surrounding the Formica headquarters, holding up signs saying “We want sparklies!” and “Give us glitter!”
I LOVE this blog. Every day I see something new and fabulous. My house was built in 1923, with a kitchen and bathroom update in the late 1940’s. Retro Renovation is truly a goldmine of information for me. Thank you, thank you, thank you!!
pam kueber says
I love the vision you have painted! Thanks for the lovely comments!
Kate says
Yes, sadly no sparkle on Rock of Ages, but it still looks great in a vintage bathroom! 🙂
toni says
I almost picked it a few years ago….and then I didn’t. But I still really like it. Maybe next time.
Jake says
First, I love how the laminate is called “Rock of Ages”. That made me “LOL”.
Thank you for sharing this process. I have been looking into doing something similar with my bathroom.
Susan says
Two tips:
We just laminated a countertop, too, and since we did it on a whim and had all the tools needed except the roller, we used my rolling pin. It is a heavy steel pin with a non-stick surface and it worked like a dream!
The second tip – Formica brand now has a make-your-own-pattern option for their laminate where you upload a design and voila! They print it on laminate and you have your own, awesome one-of-a-kind countertop! (Unfortunately I have not priced it but I have been sorely tempted!) It might make up for losing the multiple colorways of boomerang – or just to do your own thing. Think of the possibilities!
Love you both, Pam and Kate!
Mary Elizabeth says
Susan, you are the kitchen McGyver!
toni says
I can’t find that tool at the Formica site. Can you post a link?
Camilla says
I might buy my router for my husband for “his birthday”. Heh Heh Heh.
Debi Kelly Van Cleave says
I found this blog because I was on your pink bathroom blog looking for ammunition to give someone to try to stop him from ripping out his pink bathroom!
Coincidentally, we just made counter tops for our kitchen. We didn’t plan to do it. We were going to buy them already made and just install them ourselves, a project in itself. But Lowe’s refused to accept our measurements, even though my husband measures for a living (we do flooring) and even though we double-checked our measurements just to put them at ease, and even though we offered to sign something stating that we were responsible if the measurements were wrong. They still wouldn’t order the counters unless we paid $250 for their measuring guys to come out. So we got our butts up, so to speak, and decided to make the counters ourselves. We had quite a bit of counter to fabricate. But with the right tools, like you said, it was pretty easy and they came out great. If we would have had Lowe’s install the whole thing, it would have cost us three grand. Getting them to make it and us installing them ourselves was going to cost $1600. Making them ourselves cost $250. Their pressure tactic backfired and saved us a lot of money!
Kate says
Yikes! Glad you were able to DIY and save lots of $$$! That must be some countertop! 🙂
Debi Kelly Van Cleave says
I think I actually talked my friend into saving his pink bathroom. He even directed ME to this website before I had a chance to direct HIM!
pam kueber says
Yay!!!