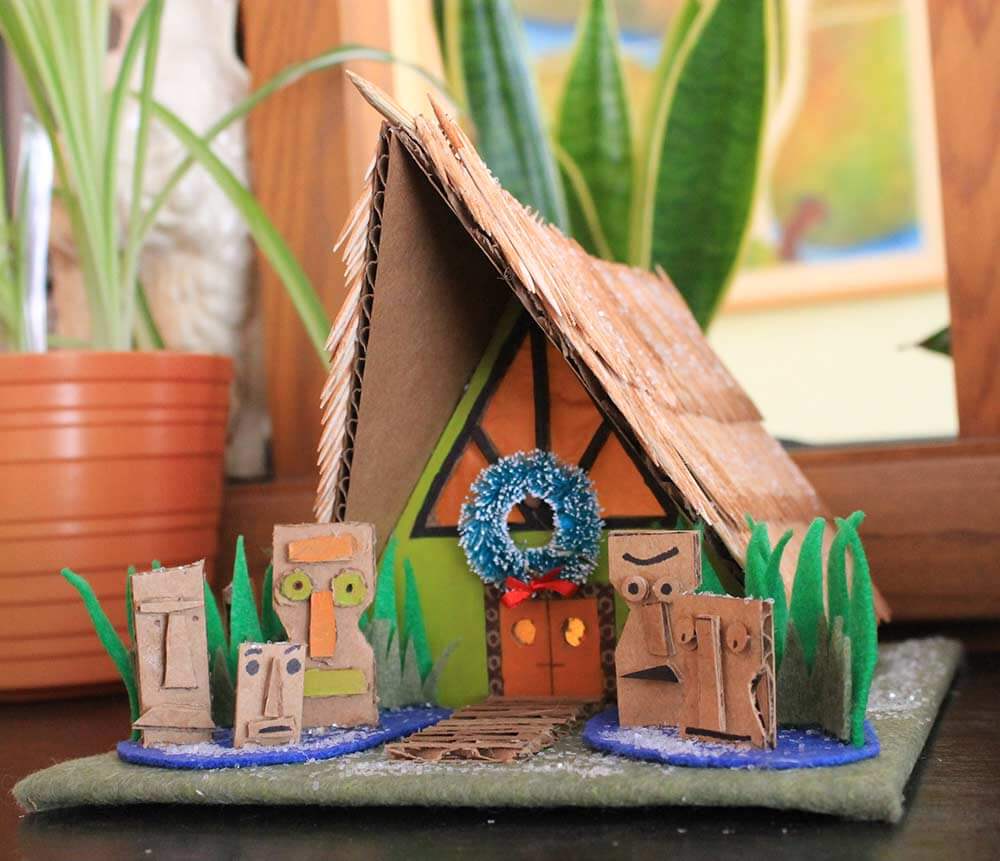
 Our trip to The Hukilau — which immediately transformed both Pam and me into tikiphiles — left little doubt that one of our new Putz house designs would be a tiki hut. The famous Kahiki, the bygone tiki restaurant that once reigned over Columbus, Ohio, was a particular inspiration. The pattern itself is super easy to cut out and assemble, so you can get to the fun part — the decorating — quickly. This tiki hut Putz house can live in a snowy winter climate, or a tropical paradise — you decide!
 Since the roof on my tiki hut is so large, this pattern requires that you join the two roof halves instead of just scoring and folding them like my other Putz patterns.
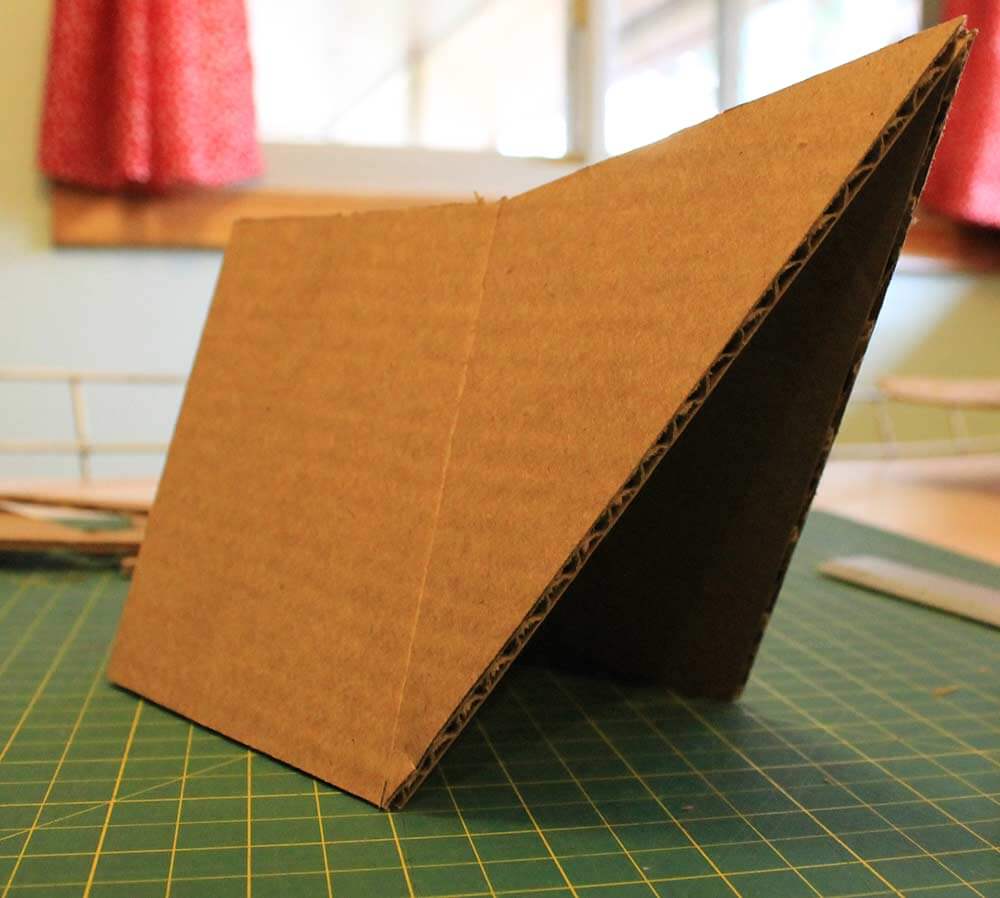 You’ll need to score each roof side along the dotted line on the pattern just a bit so you can fold the roof slightly and get the right angle for the roof peaks to align. For this pattern, I recommend using heavier duty cardboard (I used a cardboard box) instead of card stock — this makes it easier to put together, requires less painting (tiki huts are rustic!) and provides extra support for whatever you decide to use to create roof thatch. Note: If you are using cardboard as suggested, there’s no need to use the roof tabs on the pattern as the cardboard will be thick enough to provide a surface for glue during assembly.
 Speaking of thatching the roof — I used several hundred toothpicks to get the job done. No, I didn’t apply each one by hand — I cut a strip of tape and attached 6-8 toothpicks at a time to the tape, making a strip of toothpicks that I could then glue down to the roof. If you use this method, make sure to use enough glue so that the toothpicks don’t run the risk of falling off later when the tape adhesive dries up.
 Once the roof was attached, (or before if you prefer) I used some watered down acrylic brown paint to “stain” the thatch roof and give it a more realistic look. Since this tiki hut is in a tropical climate, I only gave the overall roof and some of the “ground” a light dusting of glitter for snow.
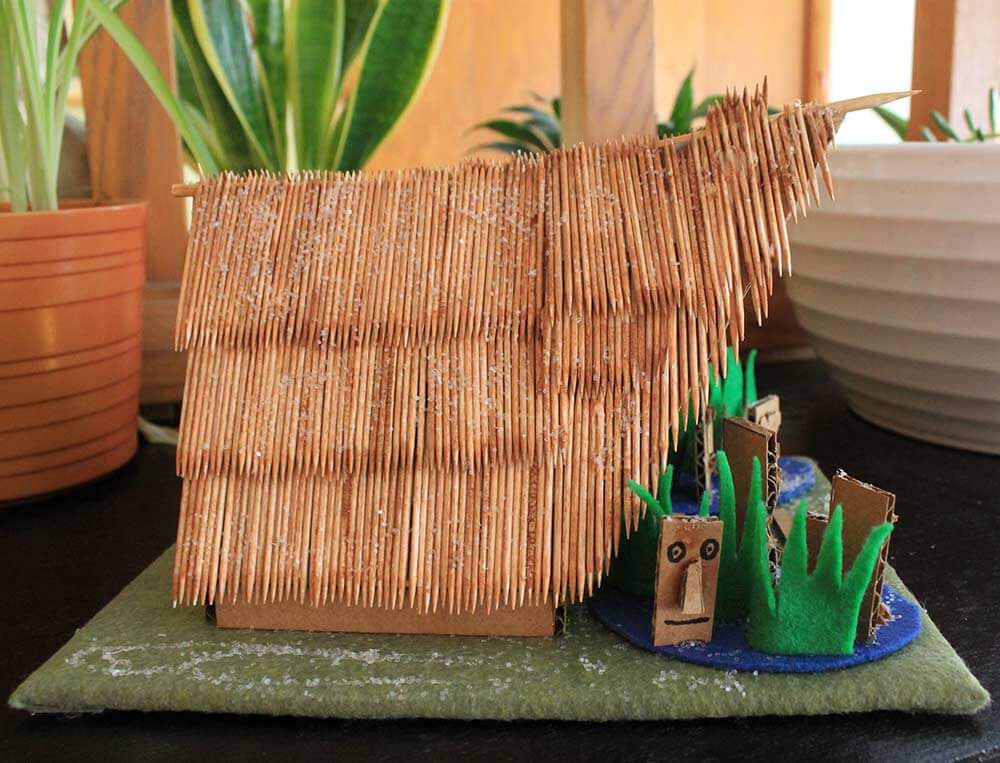 Looks pretty thatch-like to me!
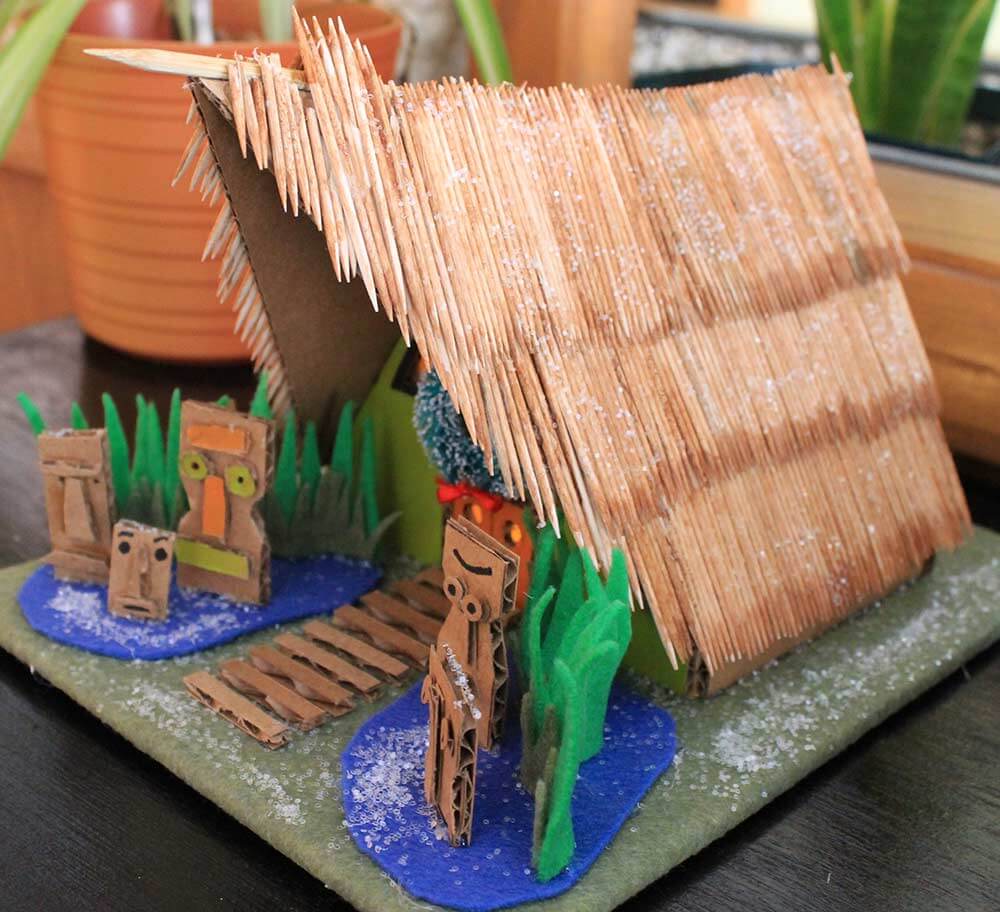 If you are wondering, the larger stick in the roof peak is a shish-kebab skewer. I used small strips of cardboard to create a walking bridge up to the front door.
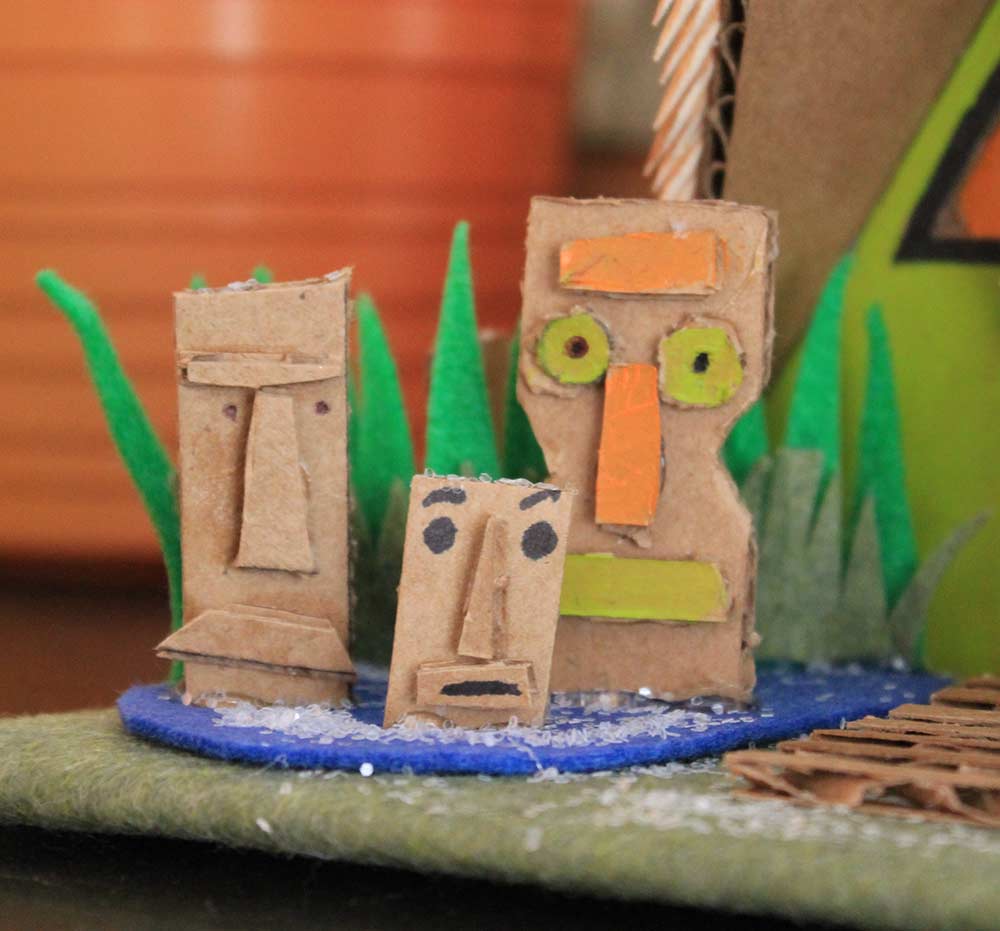 I had the most fun making several ‘tiki carvings’ using leftover cardboard scraps, glue and a black marker/paint. You could also try carving some tikis out of soap and then painting them… or, if you want “real” tikis, small ones are made for aquariums.
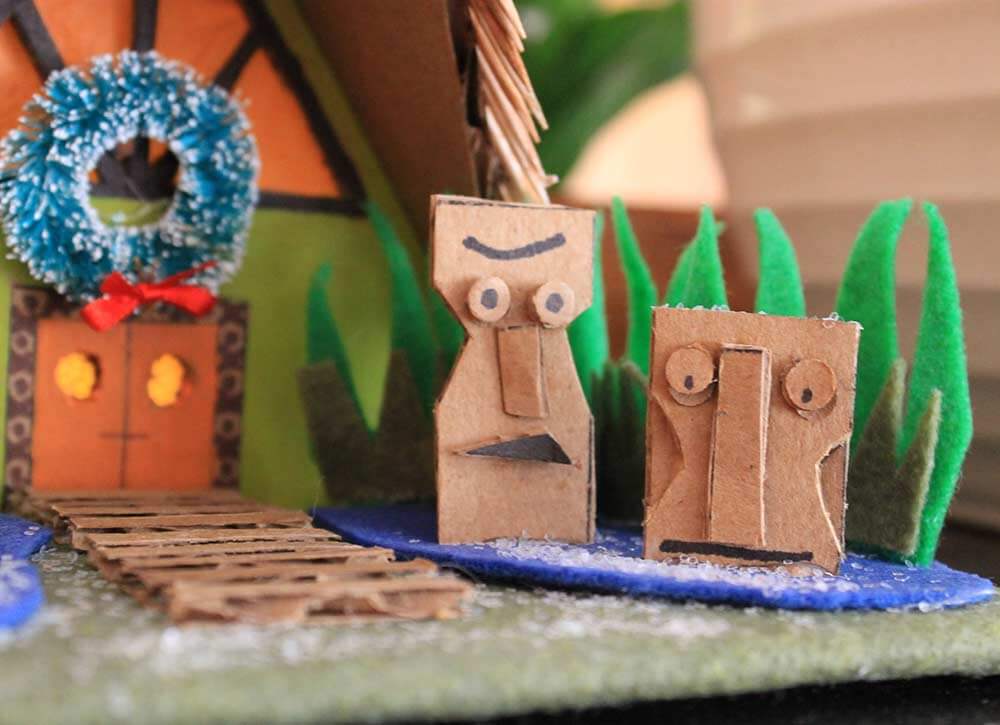 Make sure to create a variety of sizes, shapes and expressions for your tiki carvings.

Get our pattern for this little Putz house:
Click here to download Kate’s free pattern
for Putz house pattern — the tiki hut
- For basic instructions and a list of materials needed for this project, see my first mid century Putz house pattern.
Make more mid century “Putz” style houses:
- See all the designs
- Want to know why these houses called “Putz”? Read our vintage Putz house history and online guide.