 Is time running out — and you still want to try your hand at making a Christmas ornament wreath? This season I made several EZ Wreaths — or polka dot wreaths — as I call them — in a FLASH and with beautiful results. Read on for my six tips to on how to make one of these wreaths, tout suite, with virtually foolproof success.
Being the hostess with the mostess during my Wreath Mania ‘014 wreath-making party, I did not have time to make my own mega wreath then. So instead, I took a stab at making an EZ polka dot wreath — an ornie wreath lite. After they finished making their big wreaths, two of my guests jumped on this second bandwagon, and each cranked out an EZ Wreath, too. They almost couldn’t decide which they liked better — their big wreath or their EZ Wreath!
These wreaths would be much easier to accomplish with a younger crafter (SUPERVISE CLOSELY — BEWARE that high heat hot glue!) … they are great at showcasing a few, precious vintage ornaments… they use far fewer ornaments, obviously… and, they are a great way combine vintage and new ornaments economically.
Make and EZ Wreath aka Polka Dot Wreath:
.
NOTE: Our original tutorial on making Christmas ornament wreaths includes our basic instructions for materials and how to prep your ring and adhere ornaments. Read it HERE for these basics before you get started.
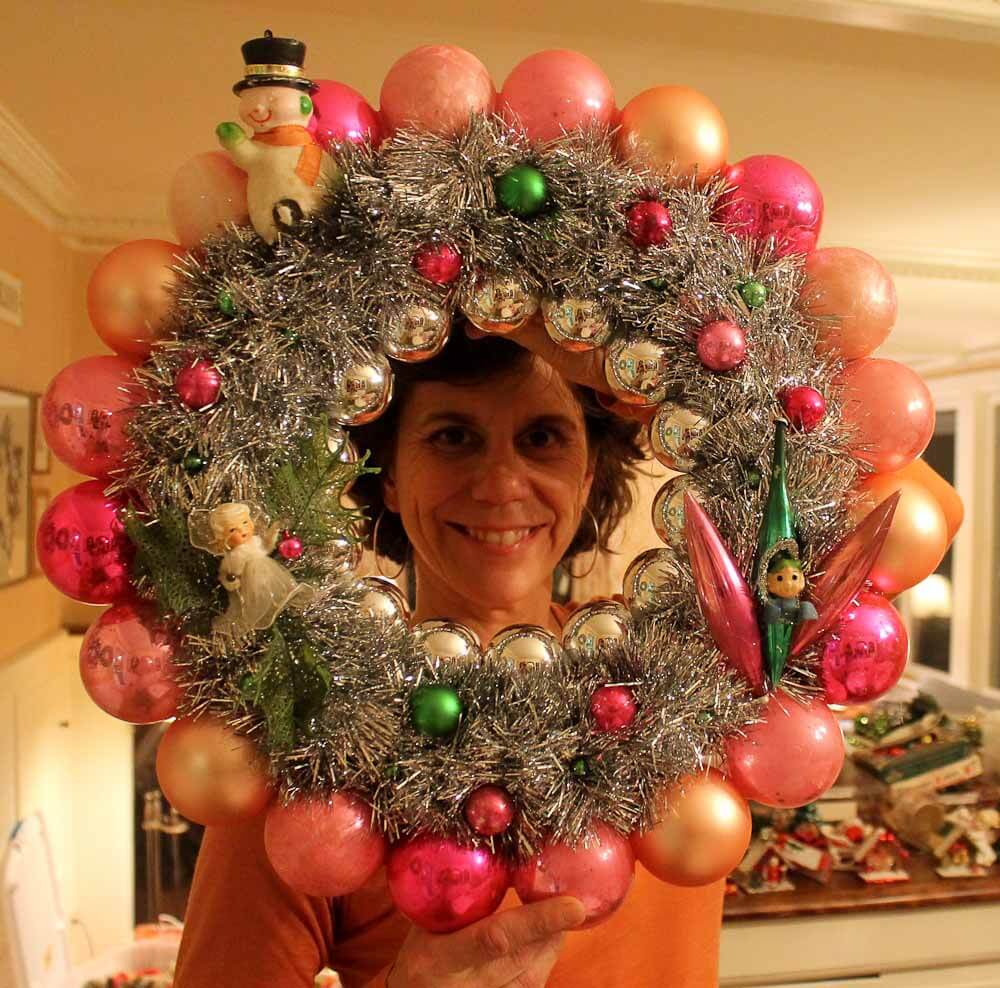
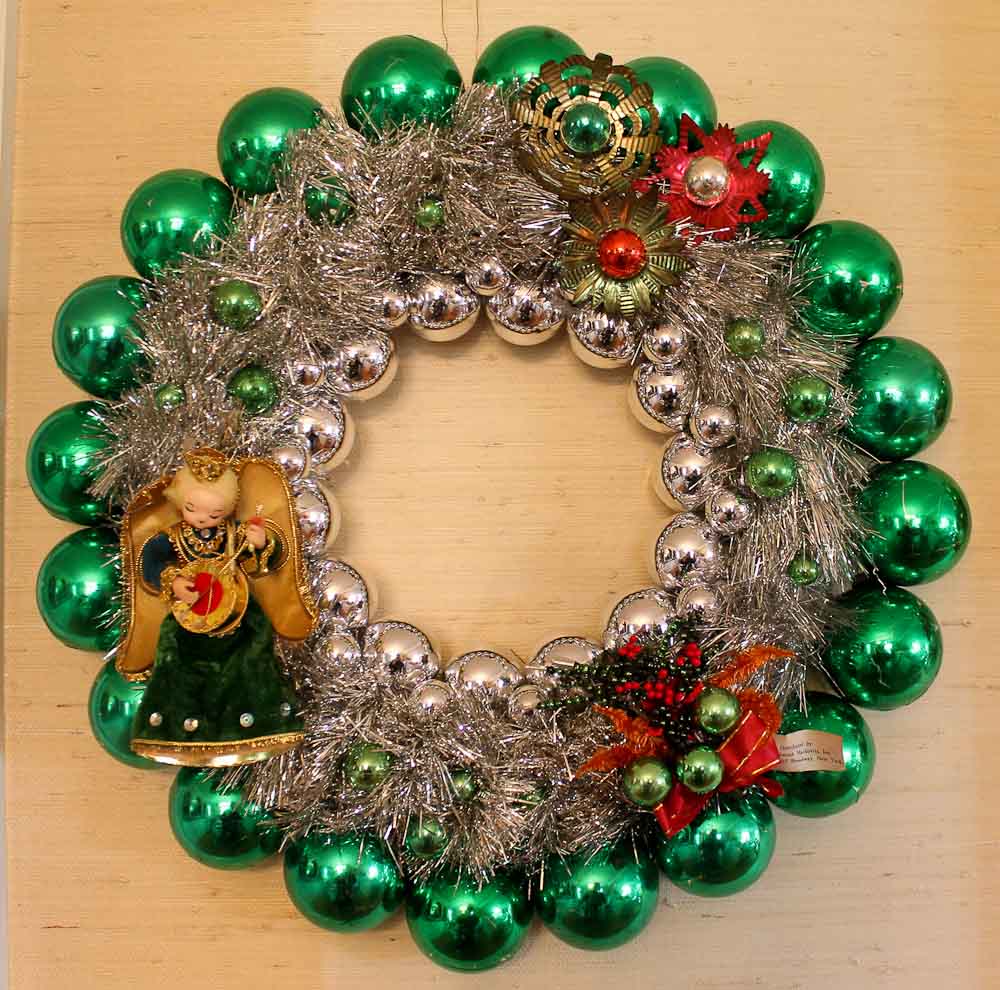
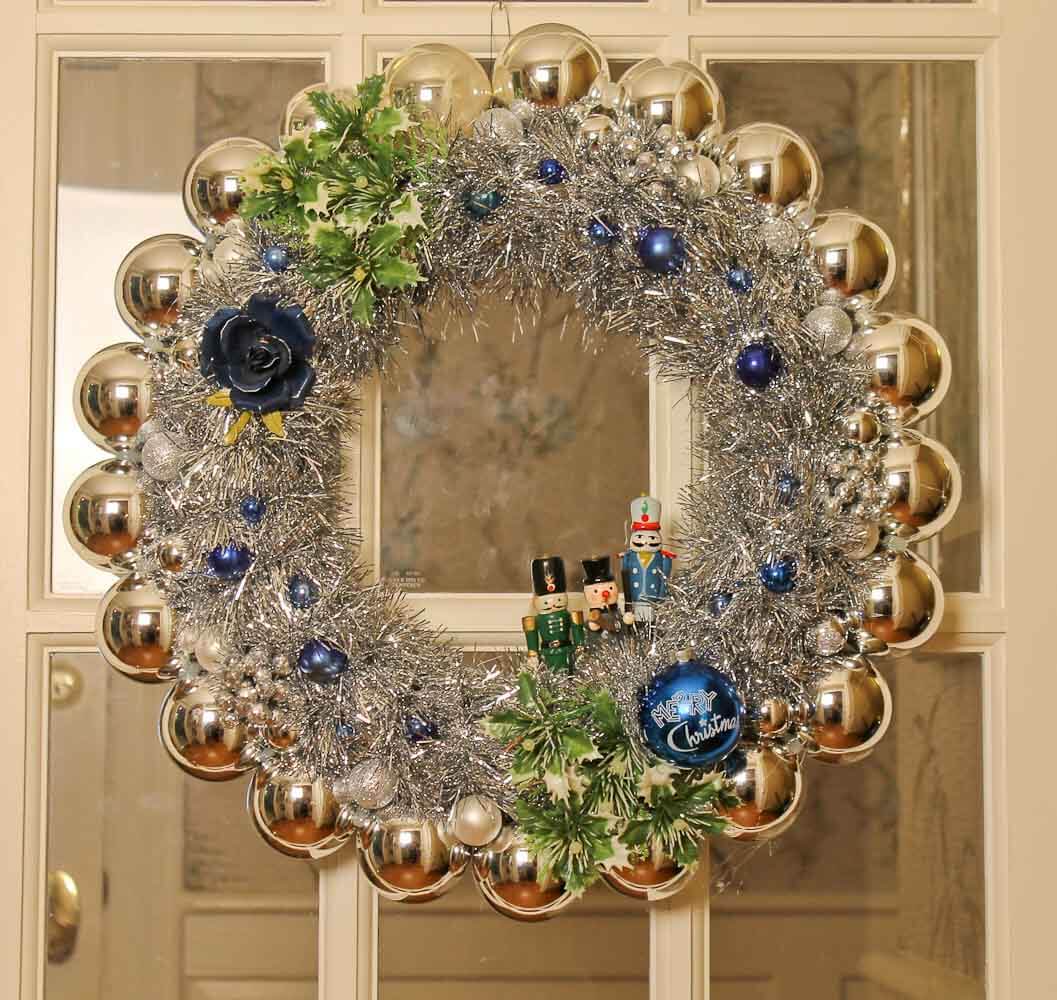
- Prepare your base –Since the tinsel is such a prominent feature on the EZ Wreath, be sure to buy and use rich, long, full tinsel. Wrap it in such a way so that it fluffs up full and nice. Note: I see vintage tinsel at the Goodwill on occasion and usually snap it up — it often seems to be better made than the tinsel today. Note, we used a 14” styrofoam form for our wreaths.
- Outside ring — Glue large ornaments around the outside of the wreath, taking time as you go to make sure the spacing works as well as possible — you don’t want gaps. Note: I’ve begun experimenting with ornaments the next size down for the outside ring, and they look just fine.
- Optional: Inside ring — If you like, glue smaller ornaments around the inside of the wreath – again, taking time as you go to get them to space evenly all the way around. Note, I show examples done both ways — with and without the inside ring or ornaments.
- Three focal points — Add the ornaments or items that will comprise your three focal points. The items you use for these three focal points are the key to making this wreath awesome. These should have both visual weight and contrast – nothing too dinky, or else it will get lost in the tinsel. Note how we put the three items at approximately one o’clock, 5 o’clock and 8 o’clock. This balanced asymmetry will keep your eye moving. Note: Once you grasp the three focal point “rule”, you can break it at will. I tend to like things in threes, though. I recently read somewhere that to humans, items shown in odd numbers are visually appealing, because our brain naturally tries to make pairs. When we can’t make pairs, we look harder. Or something like that.
- Polka dots — Add your “polka dots” – smaller ornaments that will bring additional movement and visual interest to the wreath. These can be bold to stand out… or, they can be the same color as the tinsel, to be subtley reflective.
- Add dimension to inside or outside rings — Finally, stand back and take a good look – if you like, add another layer of small round ornaments nestled in between the inside or outside ring of ornaments. While not a “must,” this may give added dimension and appeal.
Design tips:
- For a fool-proof wreath, if you are a beginner: Keep your color palette simple.
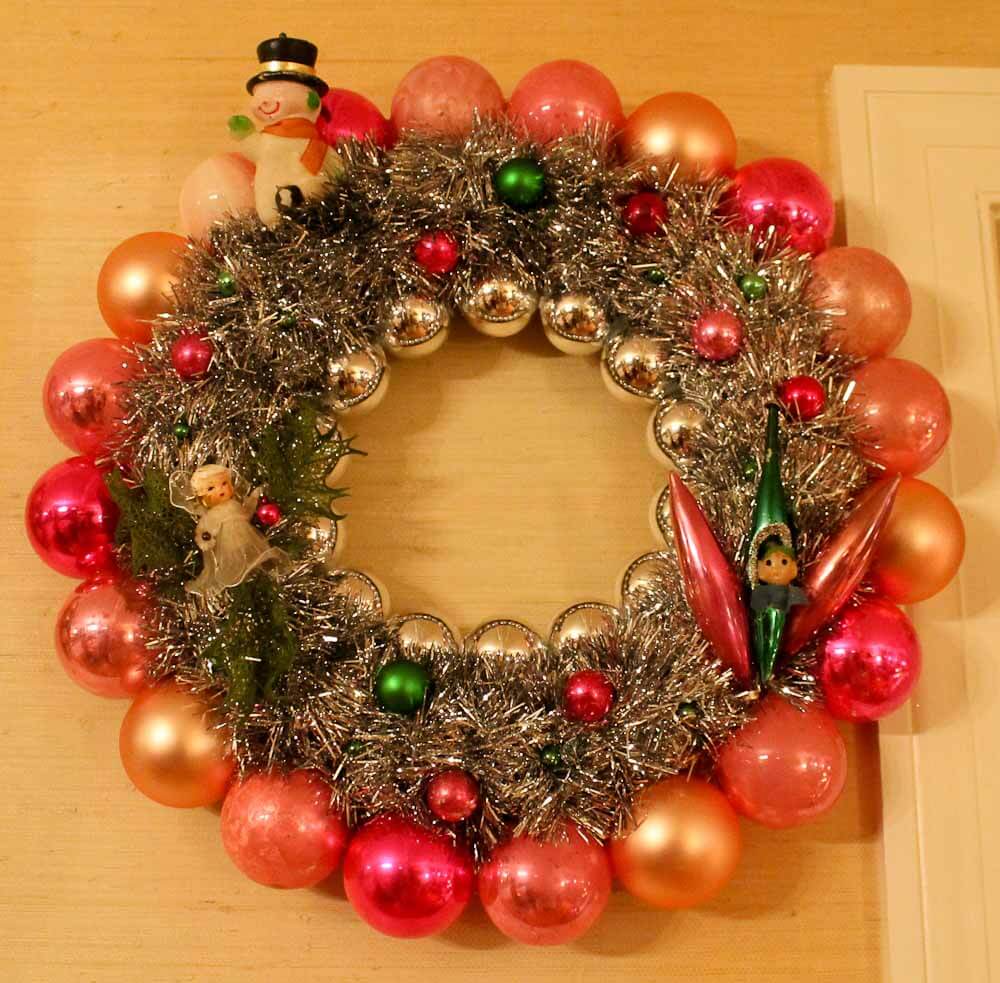
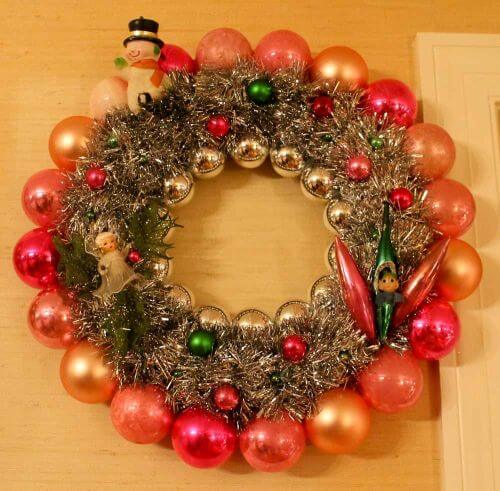 Melanie made this wreath using some favorite family ornaments for the focal points.