

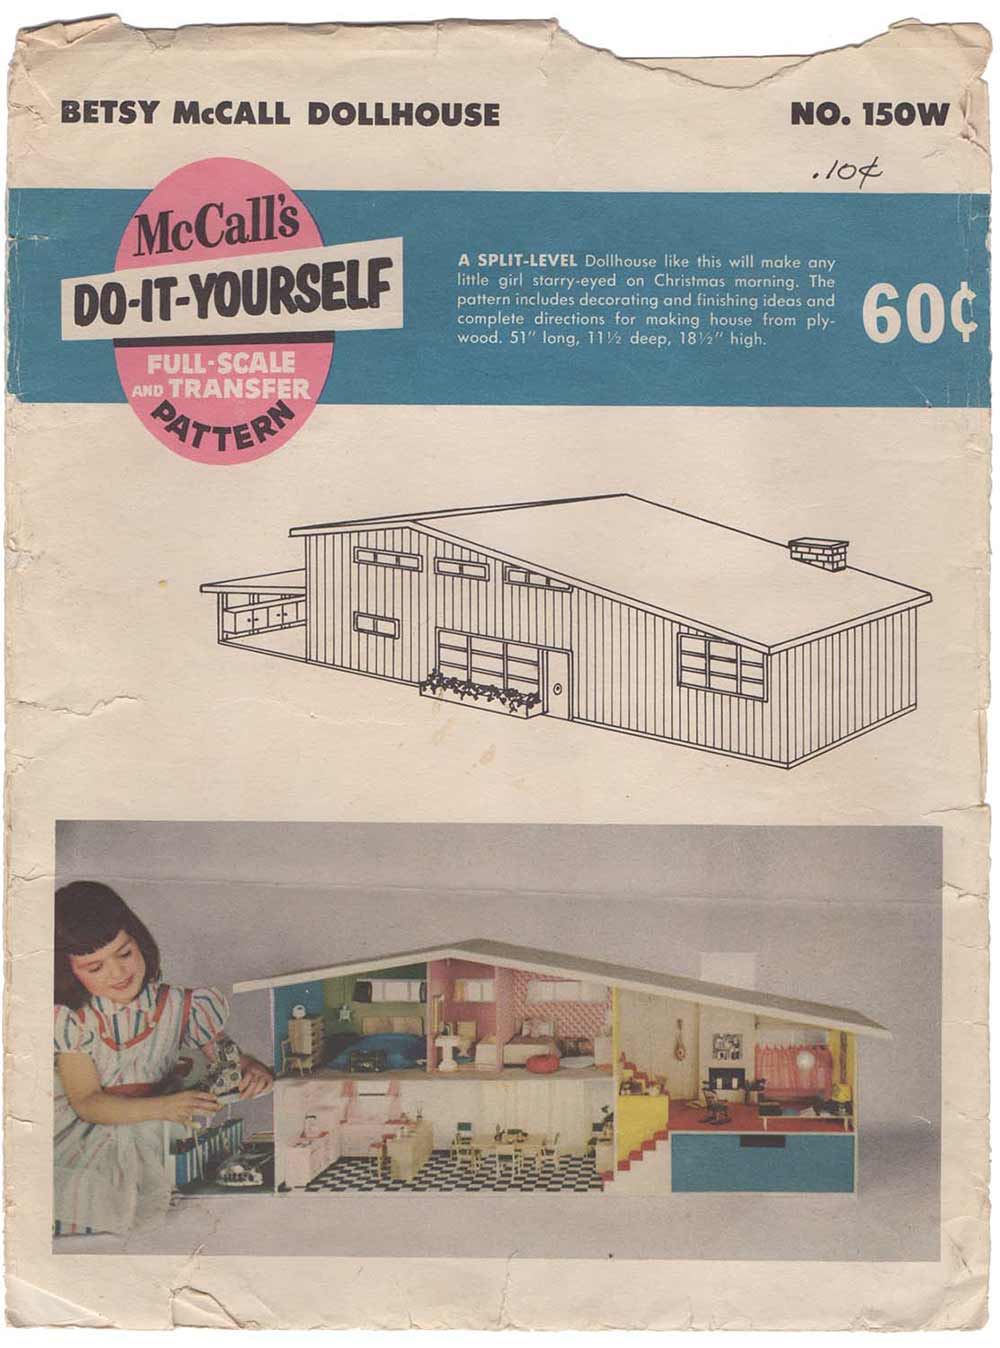
 I’m super excited to start 2015 with a new “mini-series” — literally. Over the course of the next few months, I’ll be documenting the process of building, decorating and furnishing a 1:12 scale, split level, wooden dollhouse — made from an original 1955 Betsy McCall Do-It-Yourself Dollhouse pattern. Is anyone else as pumped as I am about this? I love my job!
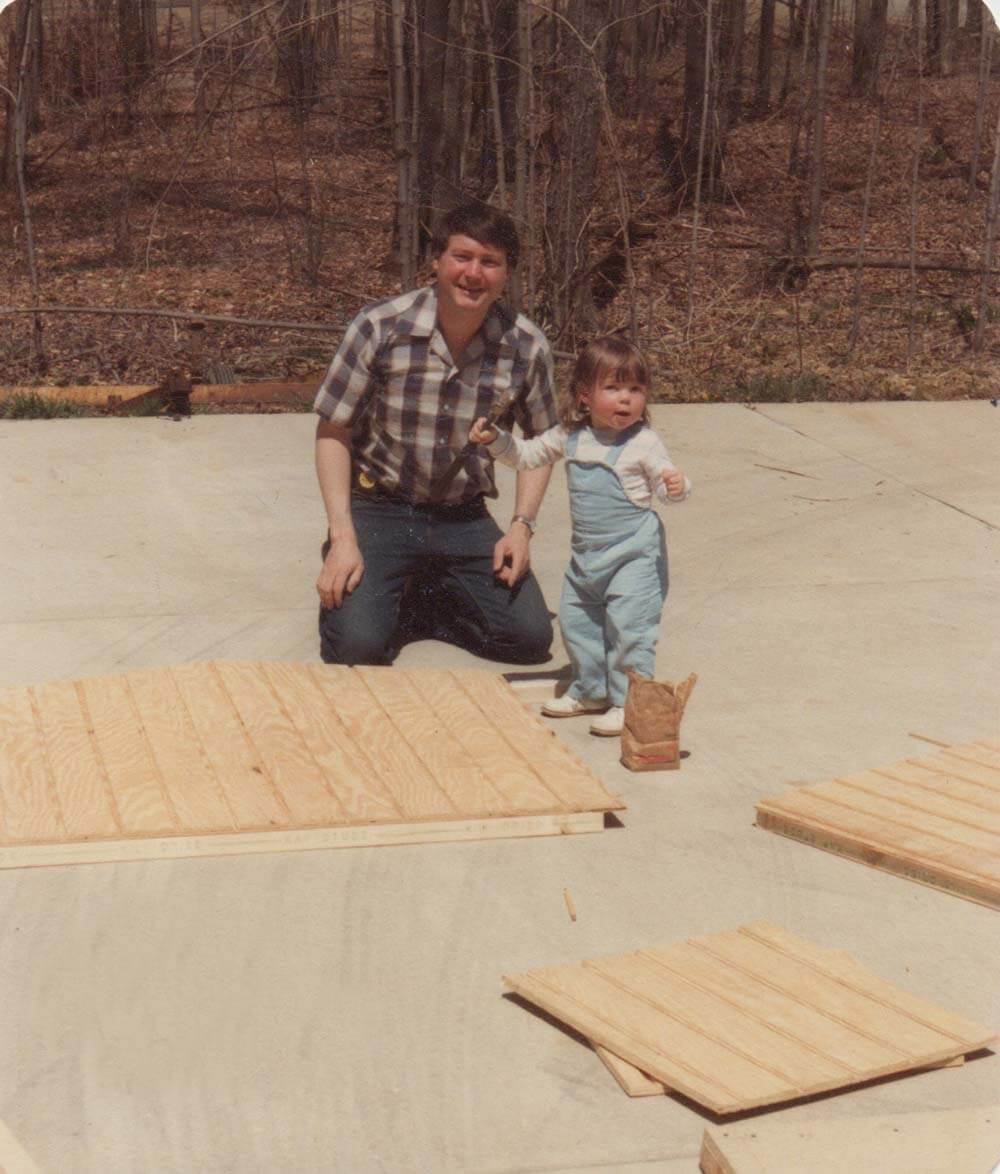
Before we get into the details about the build, let me explain (a) why I am so excited and (b) what made me want to build a dollhouse in the first place. Let’s take a flash back to the early 1980s when I was a kid. My Dad has always been handy — a skill he began sharing with me at an early age — (above) just look at 18-month-old Kate wielding that hammer –watch out world! He had this great idea to make me a little playhouse using some leftover siding and supplies from the 1980 ranch house that he and my Mom built just before I was born. Needless to say, I loved the idea.
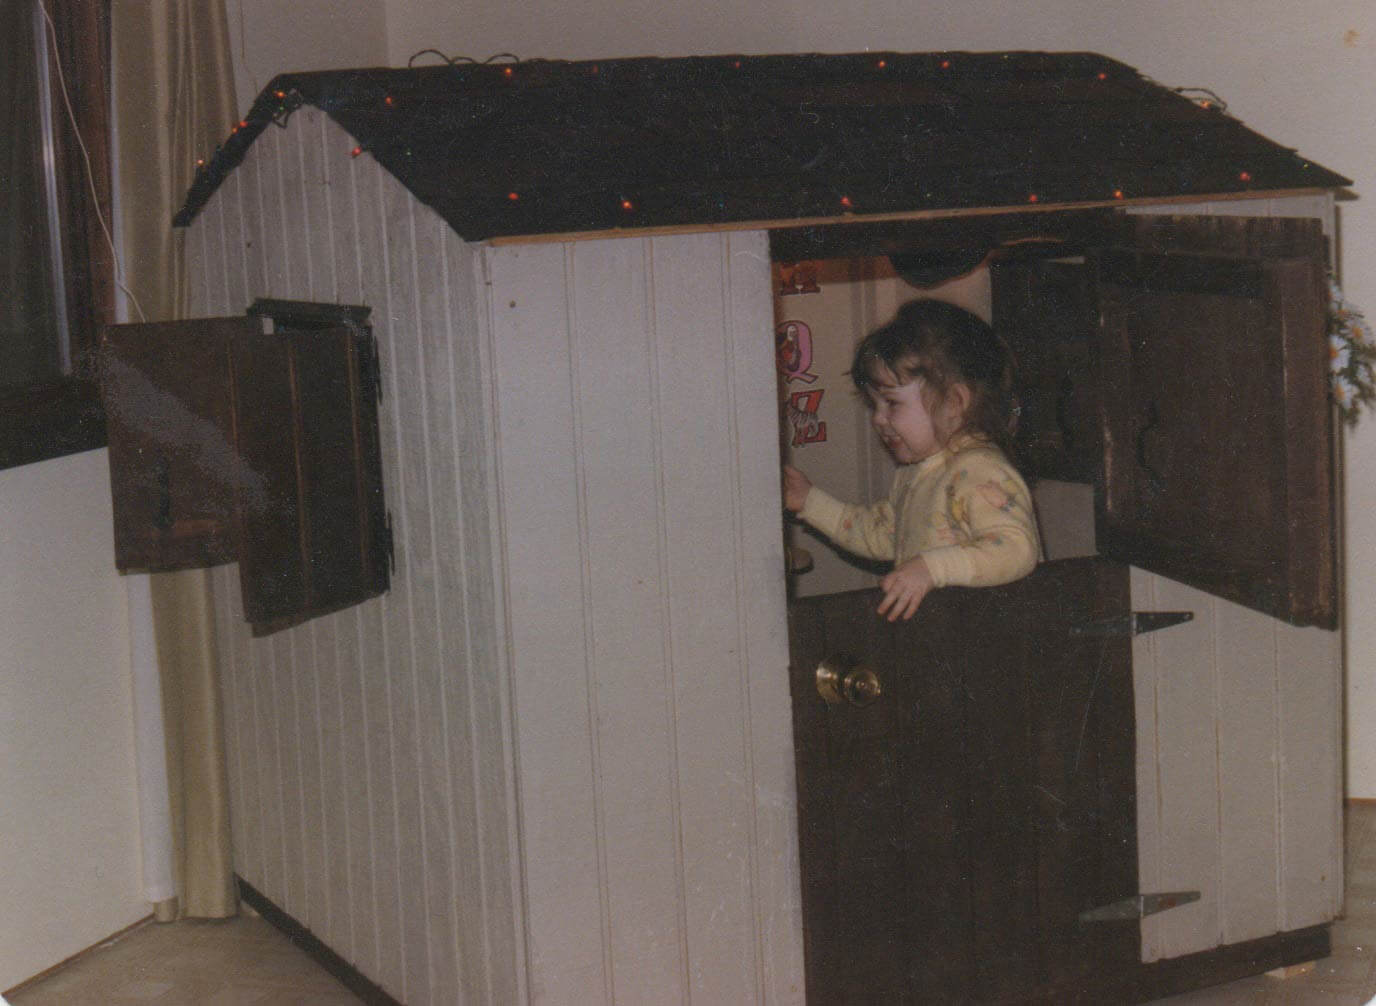 By Christmas, the playhouse was complete, and Dad set it up in our basement so I could play in it all winter before moving it out into the back yard in the spring. I absolutely loved that house, and spent many hours of my childhood hanging out in there hosting pretend tea parties and playing peek-a-boo through the shutters at my Mom. Thus began my love of miniature houses.
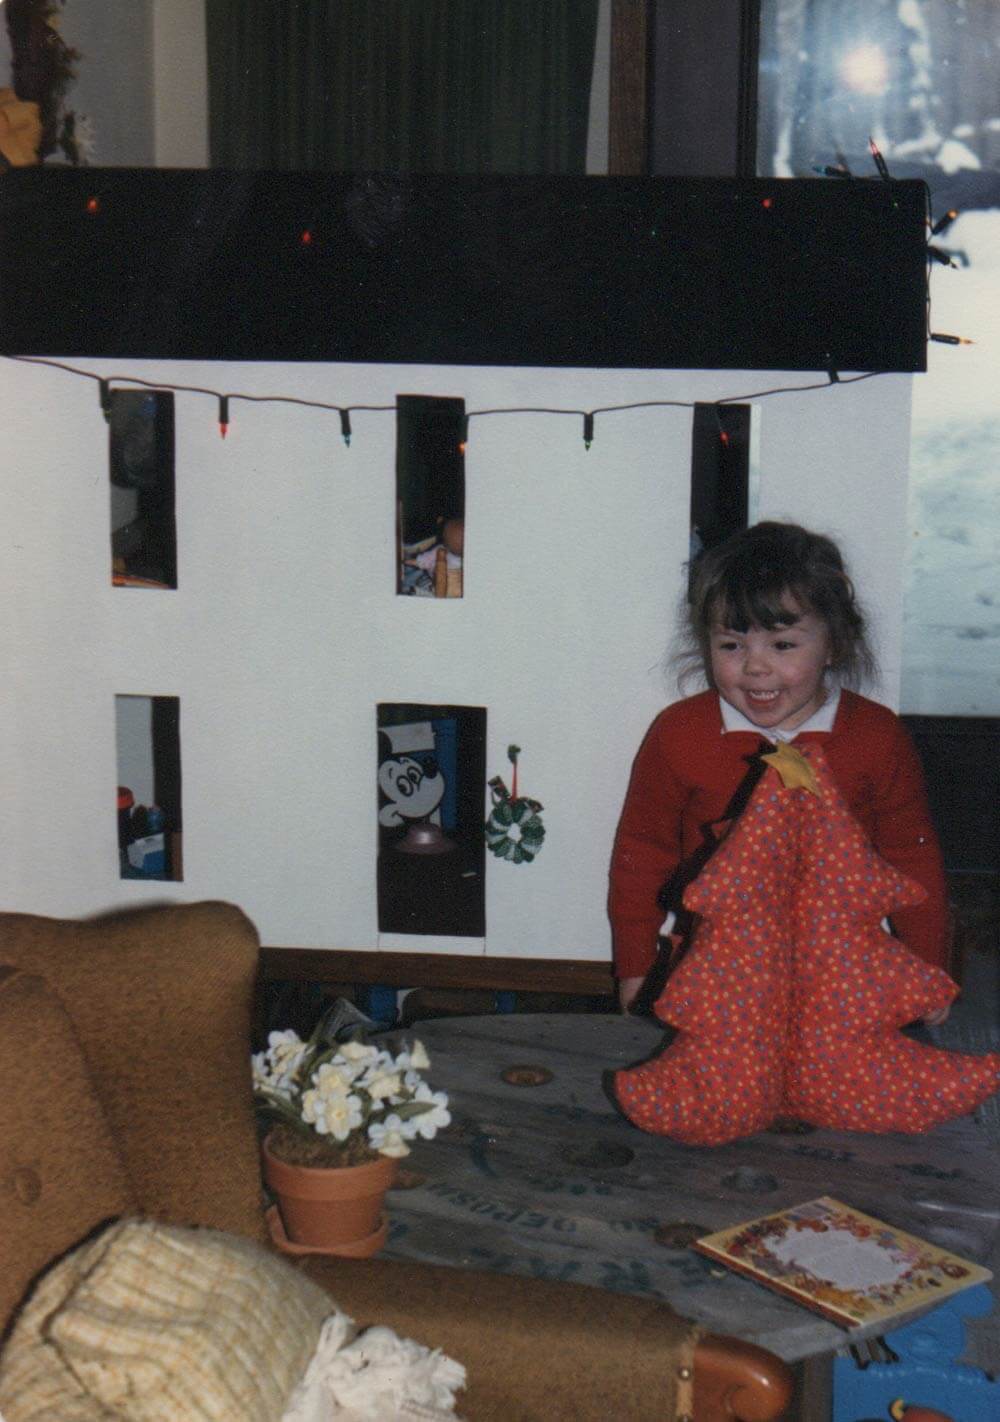 Fast forward a few more years, and yet another tiny house –built by my Dad — found its way under the Christmas tree. To say I was thrilled is an understatement.
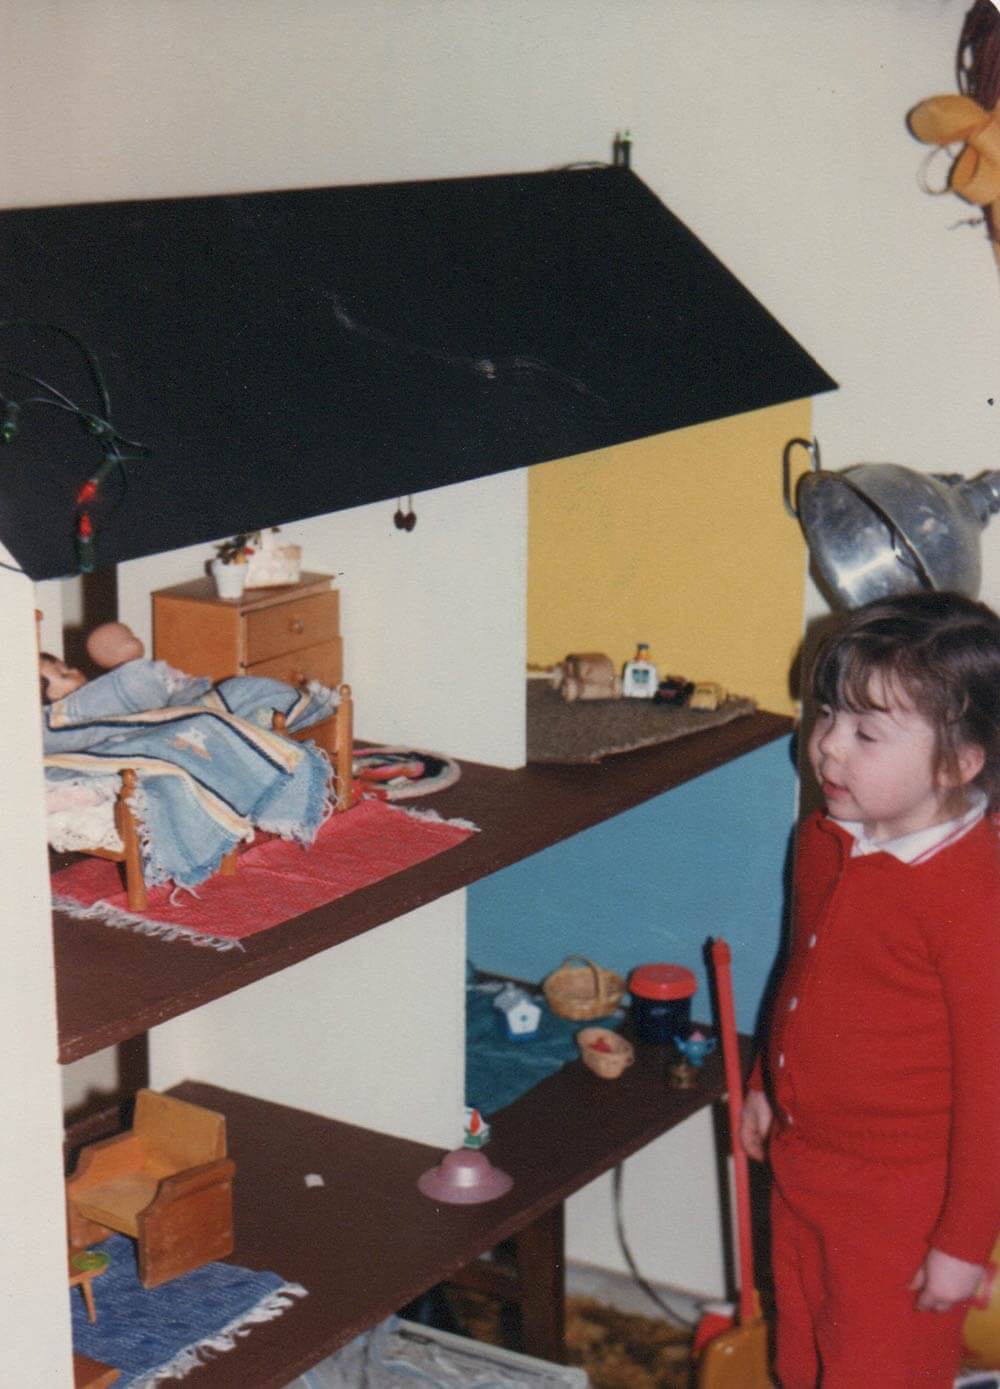 Dad designed and built the dollhouse himself out of 1/2-inch thick plywood. It was furnished with all of my Mom’s childhood doll furniture and various tiny decor items she had collected for me to play with. Mom even sewed me some tiny curtains for the windows. I spent so many hours rearranging furniture, dreaming up imaginative story lines about the Barbie family that lived in the house, and loved every minute of it.
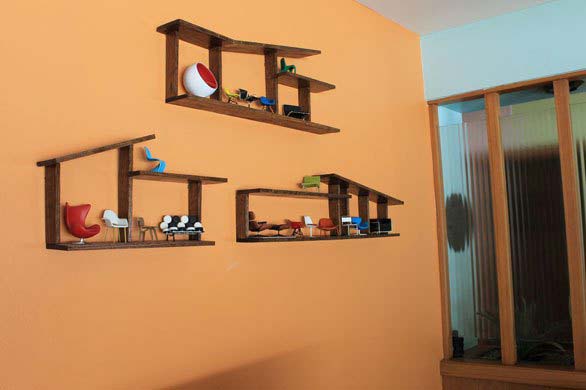 My obsession with miniature houses continued into adulthood, when I found a way to incorporate tiny houses and furniture into my “grown up” decor by building midcentury house shelves for my living room wall to display my miniature chair collection.
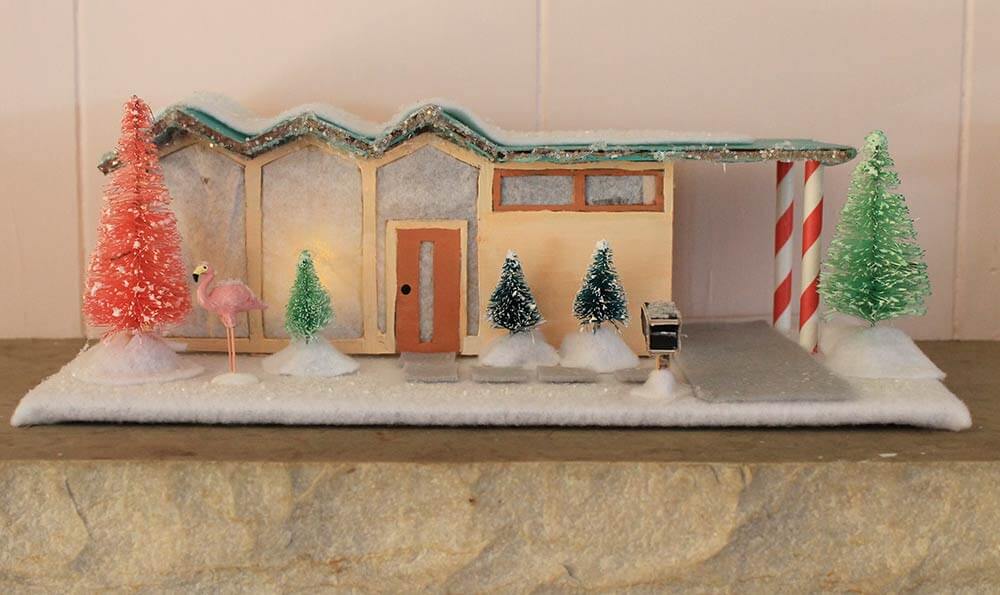 And of course you are all familiar with the midcentury Christmas Putz houses that I’ve been making for the last three years here on Retro Renovation — yet another manifestation of my miniature house infatuation.
 DIY Betsy McCall dollhouse seems to have had a few versions
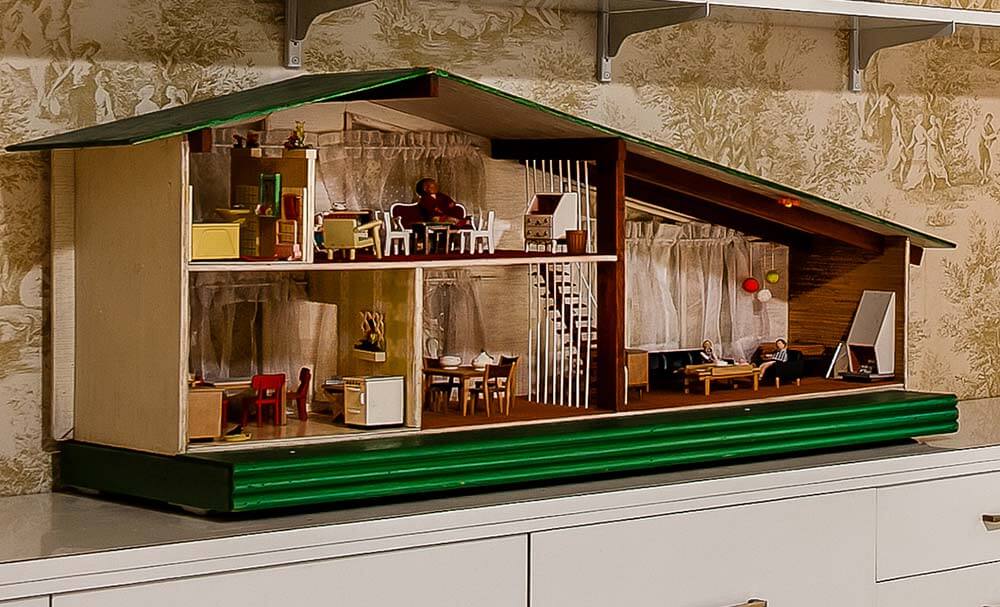
So then, it should come as no surprise that I became obsessed with the midcentury split level dollhouse I spotted in the bedroom of a stunning 1960 Toronto time capsule home we featured late last year. The moment I saw that dollhouse, I knew I had to build one. Thanks to a few of Retro Renovation’s readers, Pam and I learned that the time capsule dollhouse was likely made from a 1950s Besty McCall dollhouse pattern. The dollhouse in the photo above (from the Toronto time capsule) is slightly different than the pattern we found. Are there any dollhouse experts out there who know the model year of this groovy-yet-scary-staired version above?
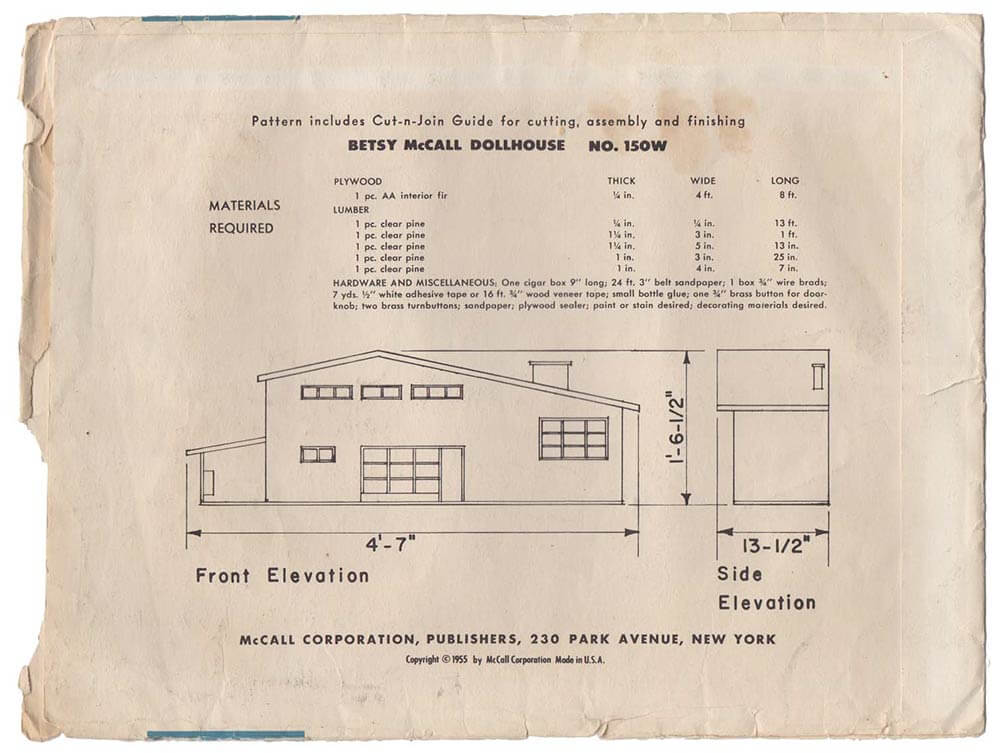 Mere minutes after discovering the existence of the pattern, Pam went into search-and-acquire mode and spotted an original pattern on Etsy. To my delight, she bought it and had it sent to me with the promise that I would build the house and chronicle it on the blog — a task this handy, mini-house loving gal was more than happy to take on. Yes, it is now “my job” to build this dollhouse, documenting the process all along the way.
Making a dollhouse on a budget
Before I began, Pam gave me a few guidelines for building, decorating and furnishing the dollhouse:
- No using any ready-made, new dollhouse parts or furniture in the construction and decoration of the dollhouse — meaning I cannot buy roofing shingles, siding, flooring, etc. that is specified for use in a dollhouse. All such things must be made from materials I can find at the home improvement or craft store.
- All furniture must either be vintage or homemade.
- I have a $100 budget to furnish the house — a real challenge if you know the price of vintage doll house furniture these days.
- Pam sent me a few boxes of goodies from her hoard to help with covering floors and walls.
These rules ensure that I’ll have to be creative and also keep the project true to its humble, homemade retro roots, by repurposing items and using scraps that are already around the house with the goal of spending very little extra money to get the job done. Sounds like a fun challenge to me.

