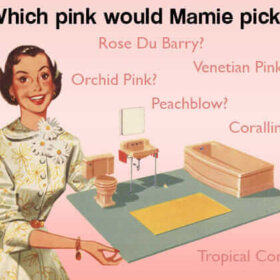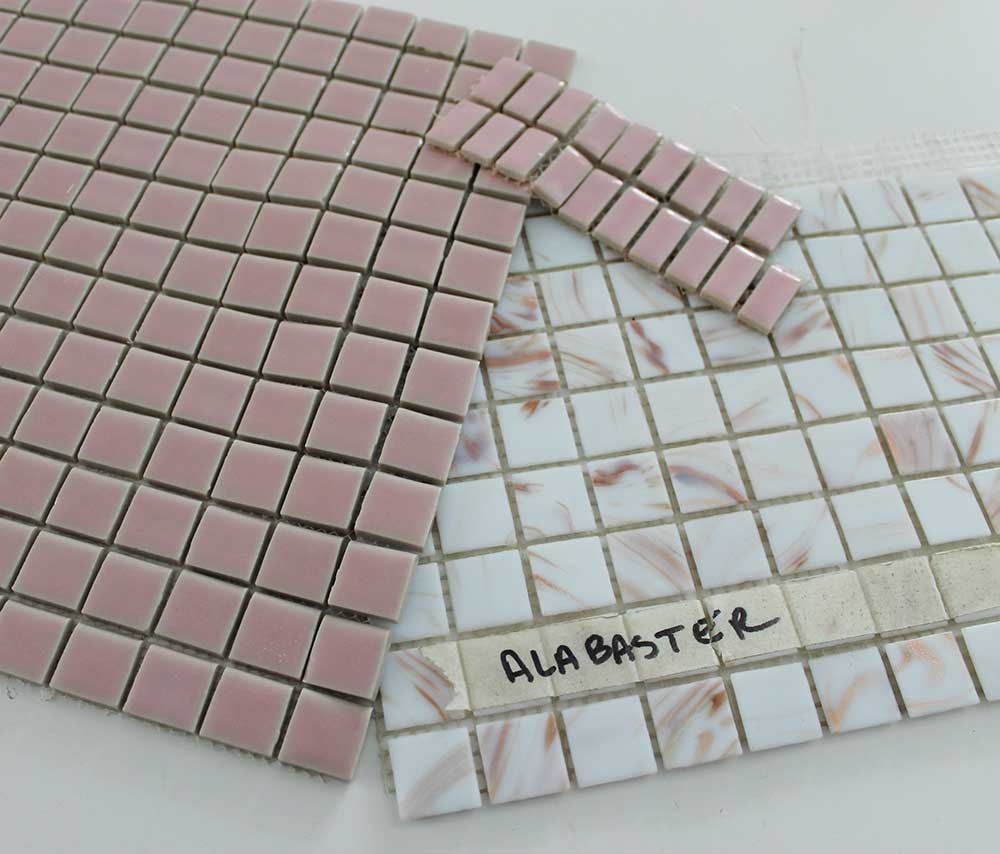
 Having built my own life-sized Mamie pink bathroom, it was no question that my 1955 Betsy McCall DIY dollhouse would get its own pint-sized pink potty. Fortunately, Pam was looking for something she “needed” when she went to World of Tile’s epic liquidation sale — and she picked up a variety of small mosaics for me to consider for various spaces within my dollhouse project. This included several sheets of the perfect itsy bitsy pinks.
 Pam also proudly pounced on streaky, shimmery white alabaster mosaic tiles that she had found. “Wait until you see them,” she told me on the google chat, “you’ll die.” She was right, I was in love, too. They are simply gorgeous.
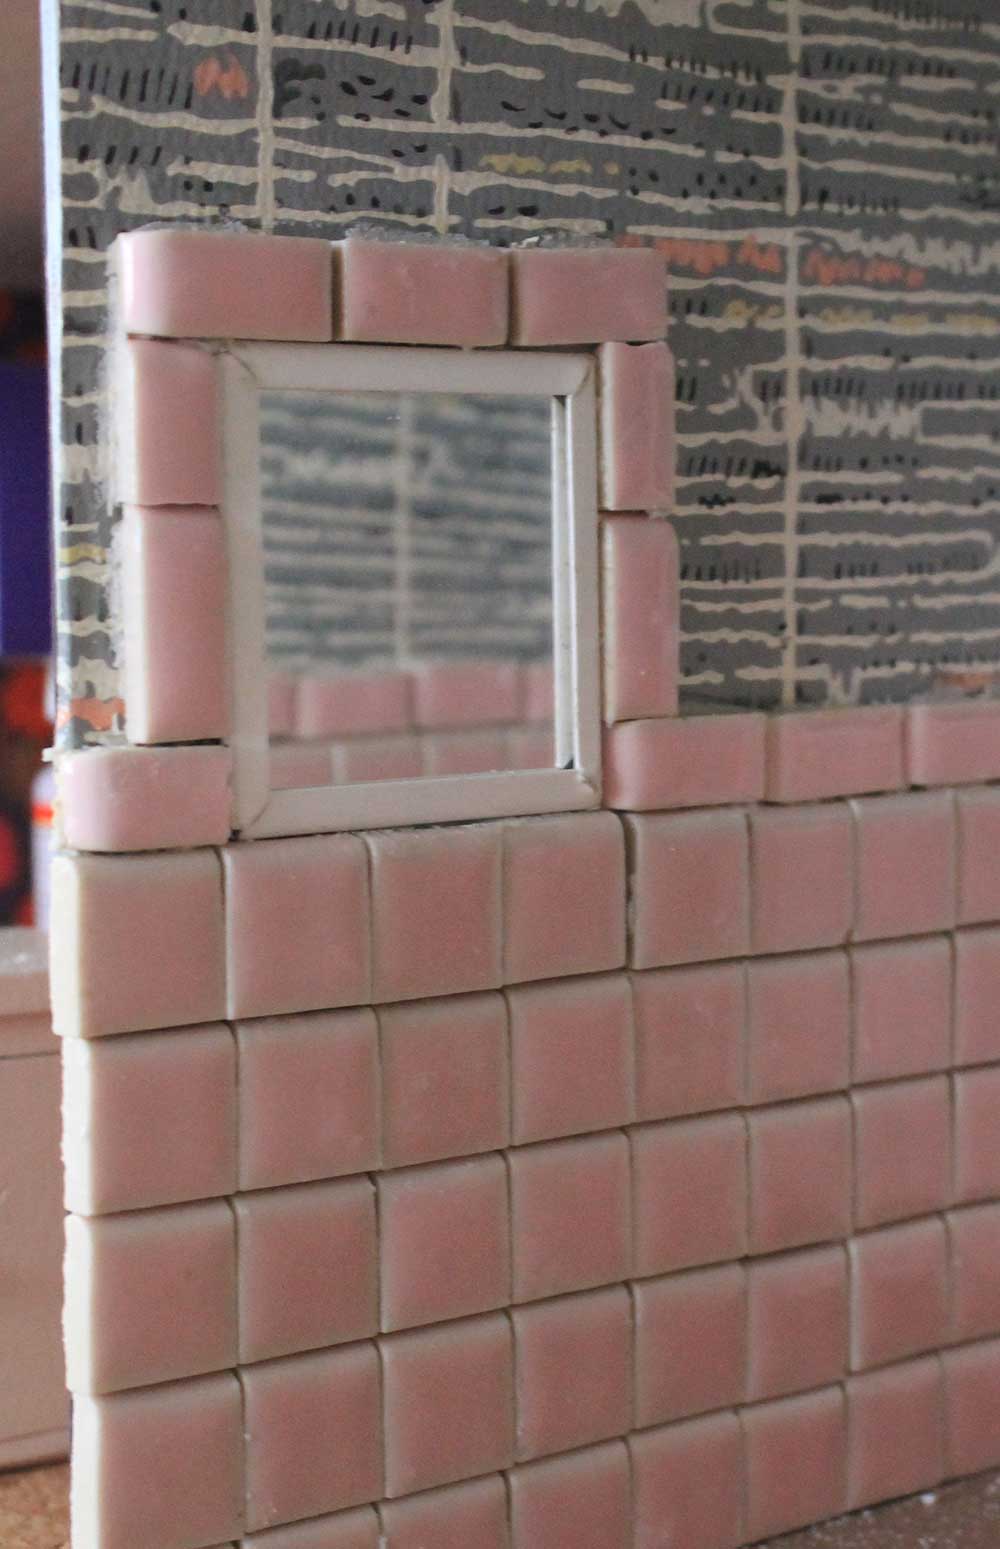
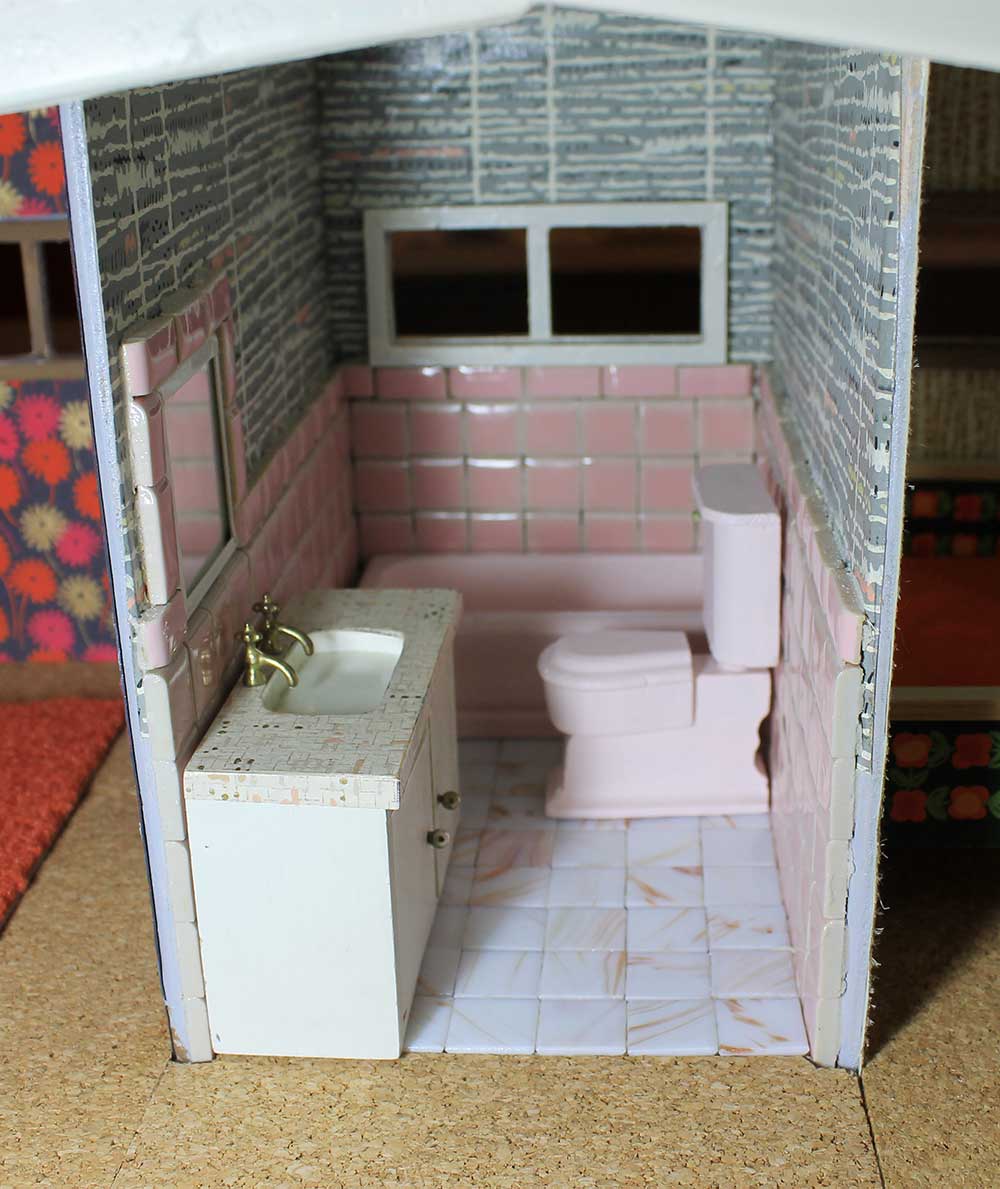
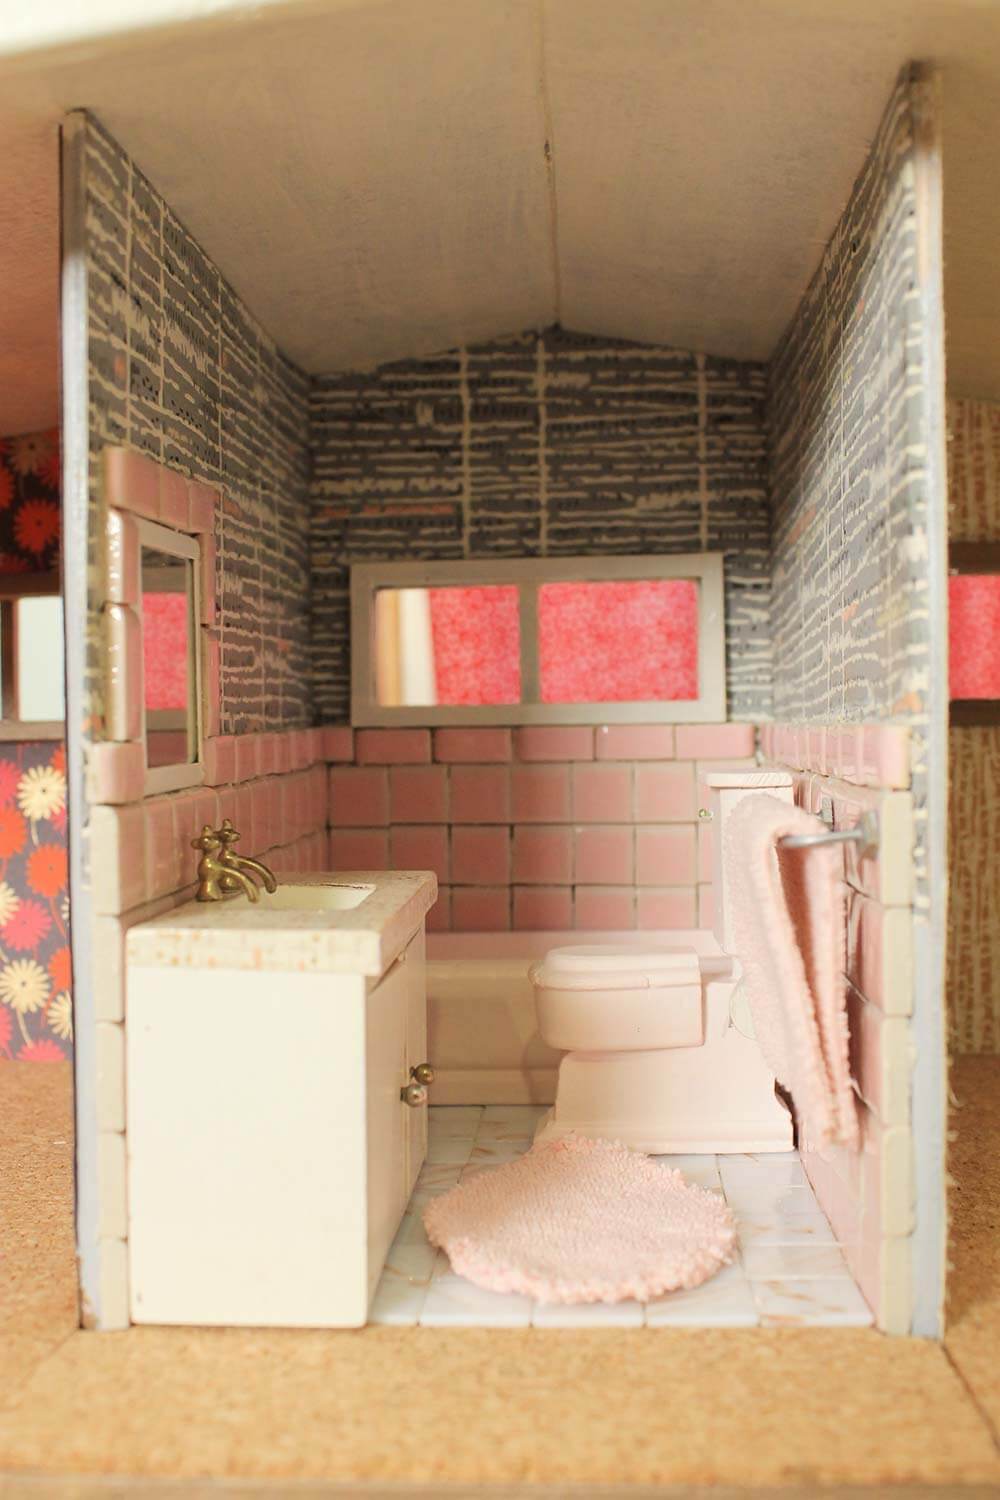
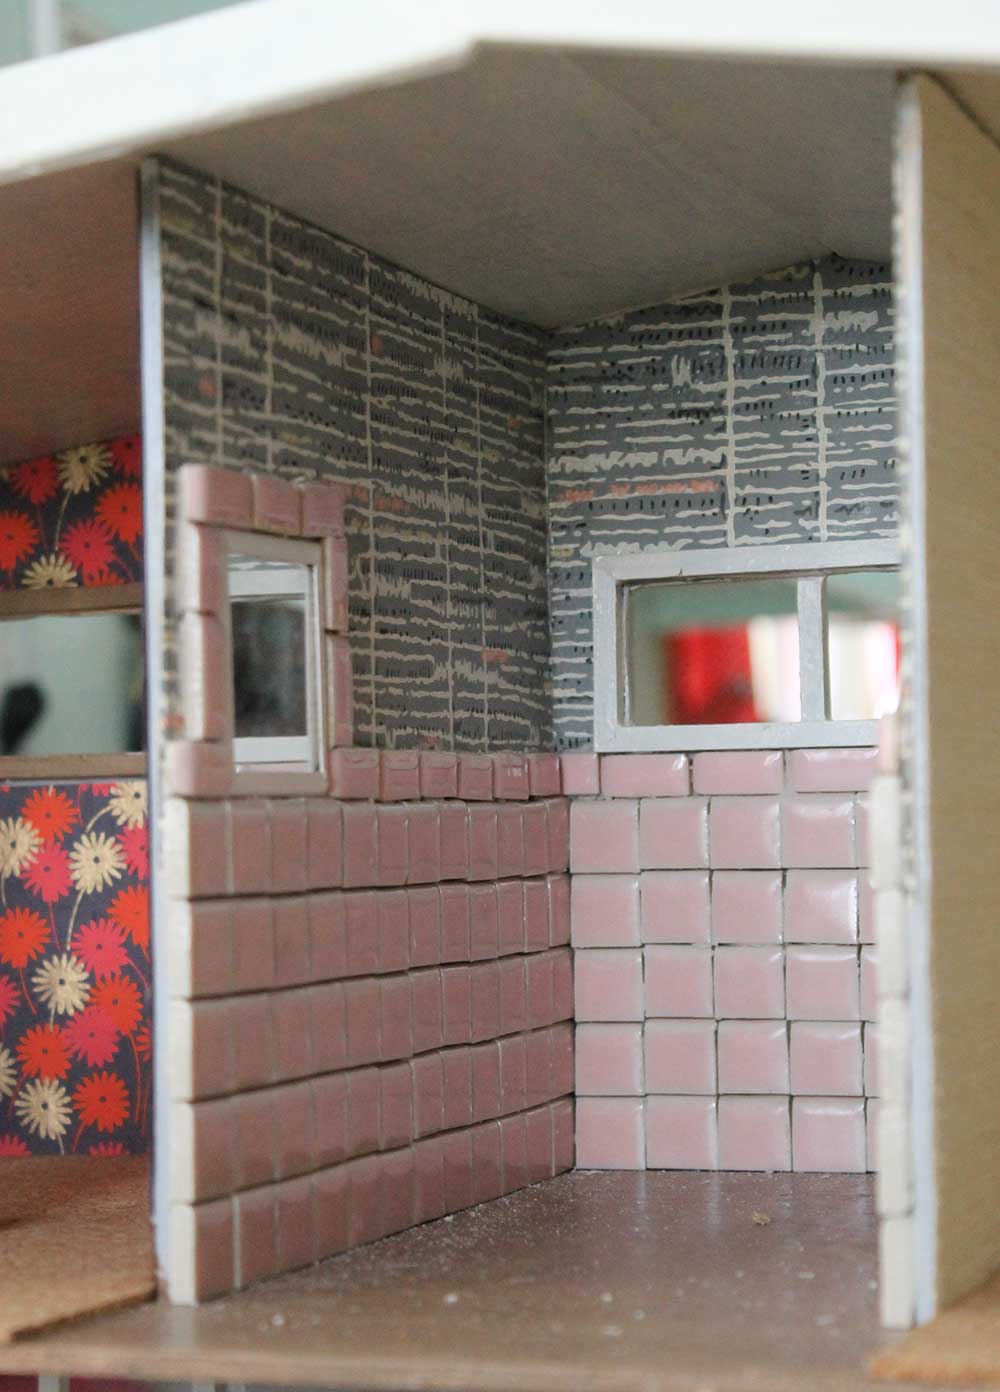 The first step was to tile the three walls of the room. I knew I wanted the tile to span from the floor to the bottom of the window frame — and I was super lucky that the math just happened to work out so five square tiles and a mini bullnose tile fit perfectly. Yay for less cutting of tiny tiles!
 I had pre-planned the layout of the room, so I knew where I wanted to put the vanity. I also wanted to pump as many retro design ideas into the space as possible.
I used a small pocket mirror — a freebee from the dentist’s office that has a toothpaste advertisement on the other side — to make a mini tiled-in mirror.
 With the walls complete, my next task was to install the luxurious alabaster floor tiles. Seriously, have you ever seen such a posh dollhouse before? Real alabaster, folks!
 I covered the rest of the upstairs floor with some sheet cork that Pam pulled out of her Mary Poppin’s handbag. Instead of continuing the bathroom tile floor all the way to the edge of the dollhouse, I opted to connect the cork to make a small hallway between the bedrooms and the bathroom.
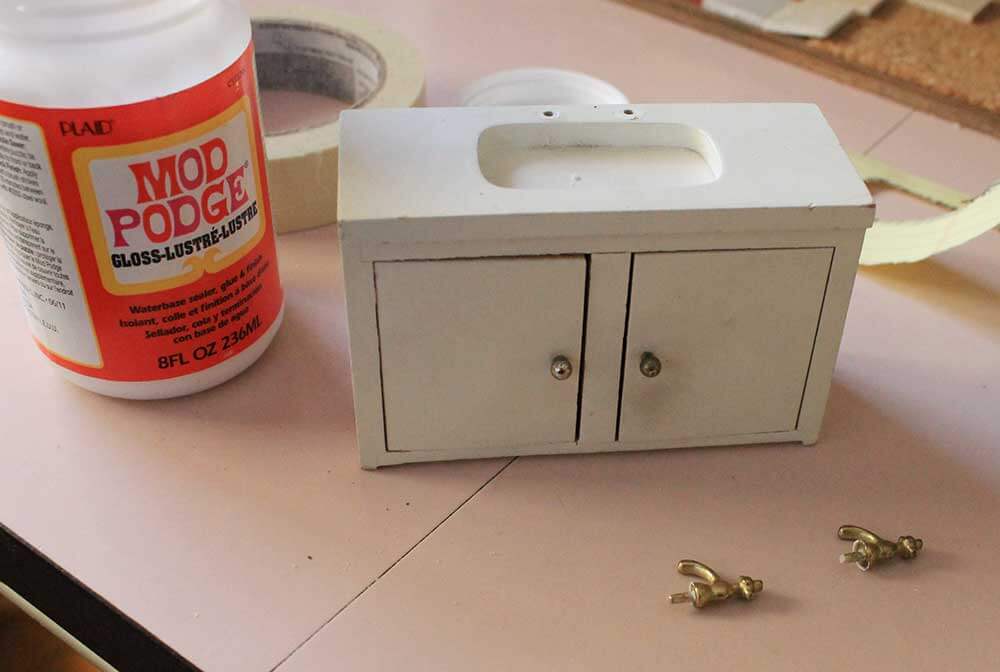 As you may recall, Pam gave me a $100 budget to completely furnish all six rooms in my 1:12 scale house. I can use only only vintage and handmade furniture. One of my tactics for making my furniture budget go as far as possible was purchasing Ebay lots with several pieces of less than perfect vintage dollhouse furniture and making them work for me. This strategy made me end up with two ‘kitchen sinks’ and no bathroom sink. Even though the furniture in the bathroom would be a tight fit with a spacious vanity like this, I decided that the inhabitants of the dollhouse — having to already share one bathroom — would much appreciate the added counter and storage space this vanity would provide.
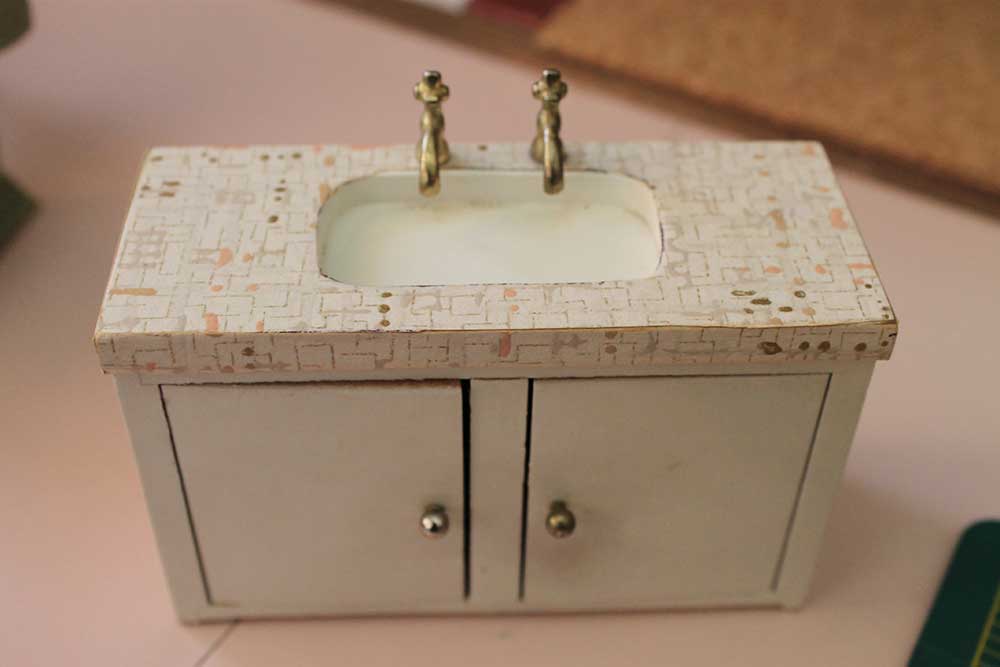 To give the vanity some mid mod pizzazz, I “laminated” the countertop using yet another scrap from Pam’s vintage wallpaper stash and topping it with Mod Podge. Ta-da! Instant retro upgrade. Don’t you wish we could get laminate that really looked like this?
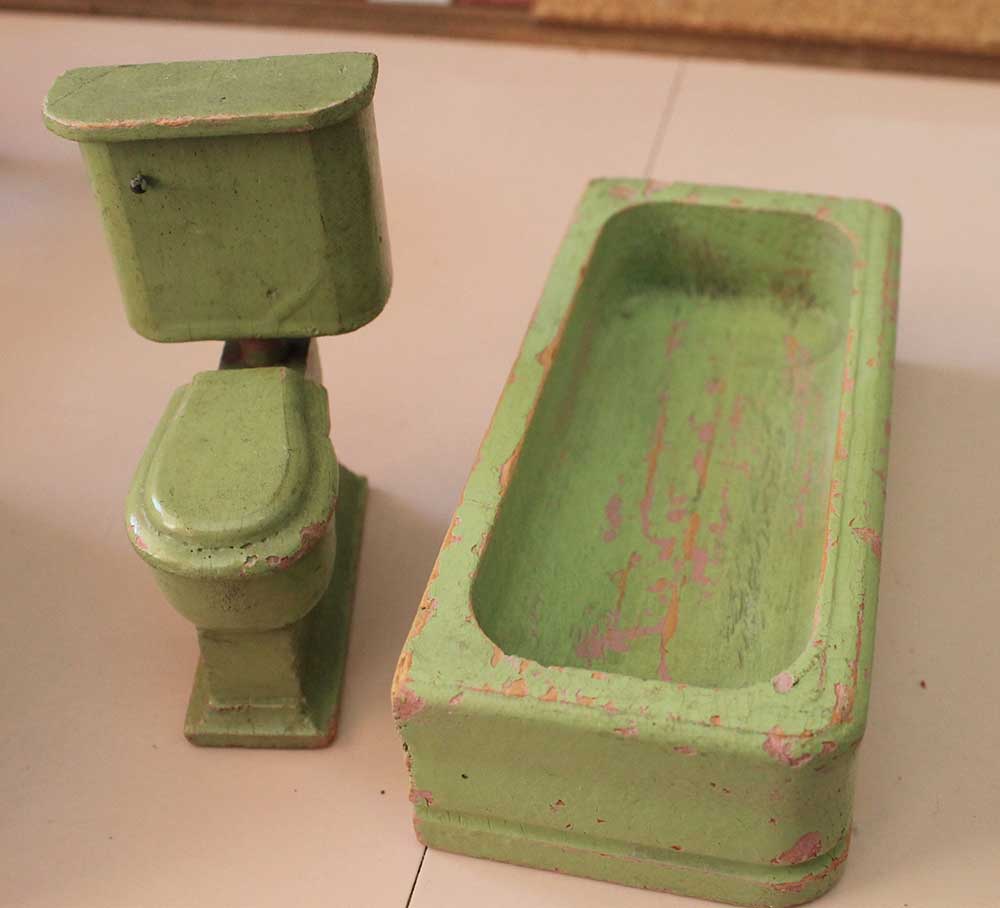 The toilet and tub were also pretty sad — and the wrong color for my room — but they had beautiful lines. Painting was in order. I realized that the pink walls in my den were just the perfect light pink to coordinate with the bathroom wallpaper and laminate-topped vanity, so I used some of my stash of leftover paint to give the tub and toilet a quick make over.
 By now, my pretty pink vintage bathroom was starting to give me a case of the smileys — it is so cute!
 But hey, something is missing…something very important…
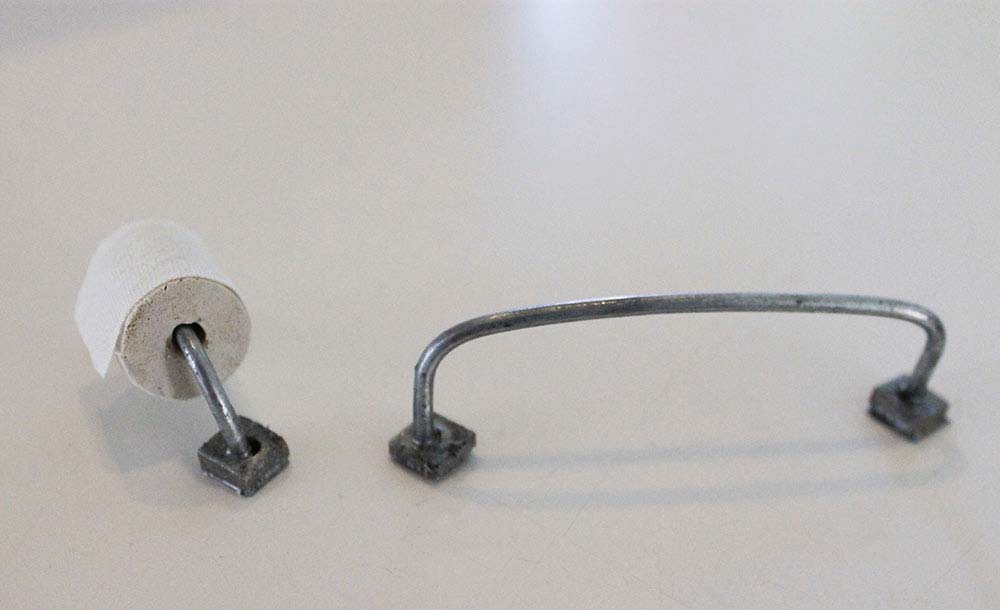
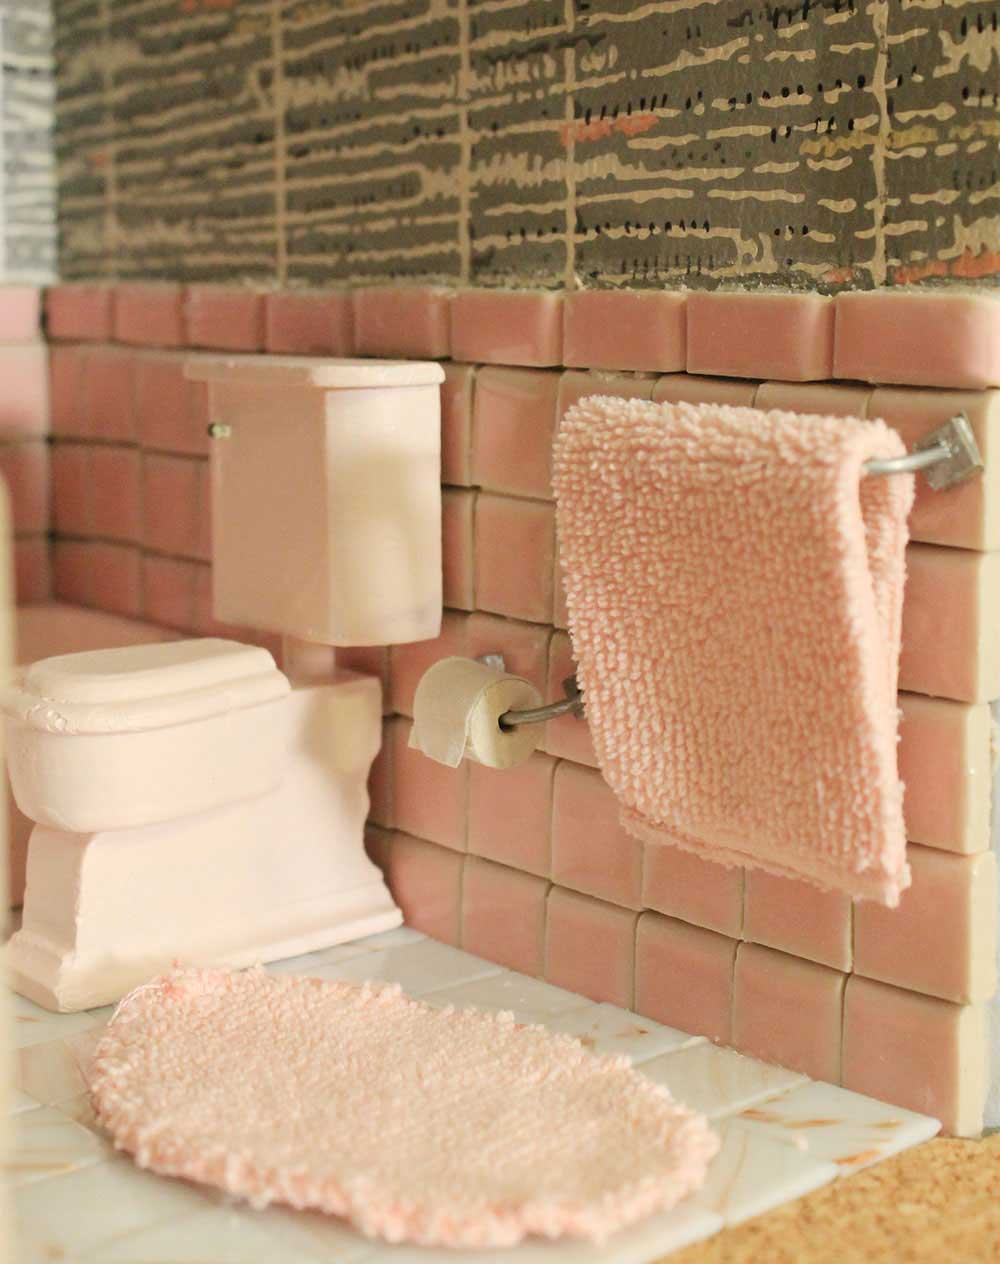
You guessed it — the toilet paper. How would the tiny residents of this home function without it? Also needed was a towel rack, towel and bath mat. I put my thinking cap on and quickly decided that I could make my own toilet paper, toilet paper holder and towel rack fairly easily using: a scrap piece of dowel rod with a hole drilled in it (for the toilet paper roll), a small scrap of white fabric to simulate the toilet paper, some carefully bent wire for the toilet paper holder and towel bar and a smaller square dowel (left over from making the window trim) with a hole drilled down the center, then cut into small slices to use for brackets. After painting the brackets with silver paint and getting the wire bent just so, I used super glue to attach the towel rod to the brackets and then super glued the completely dried and set bar to the wall.
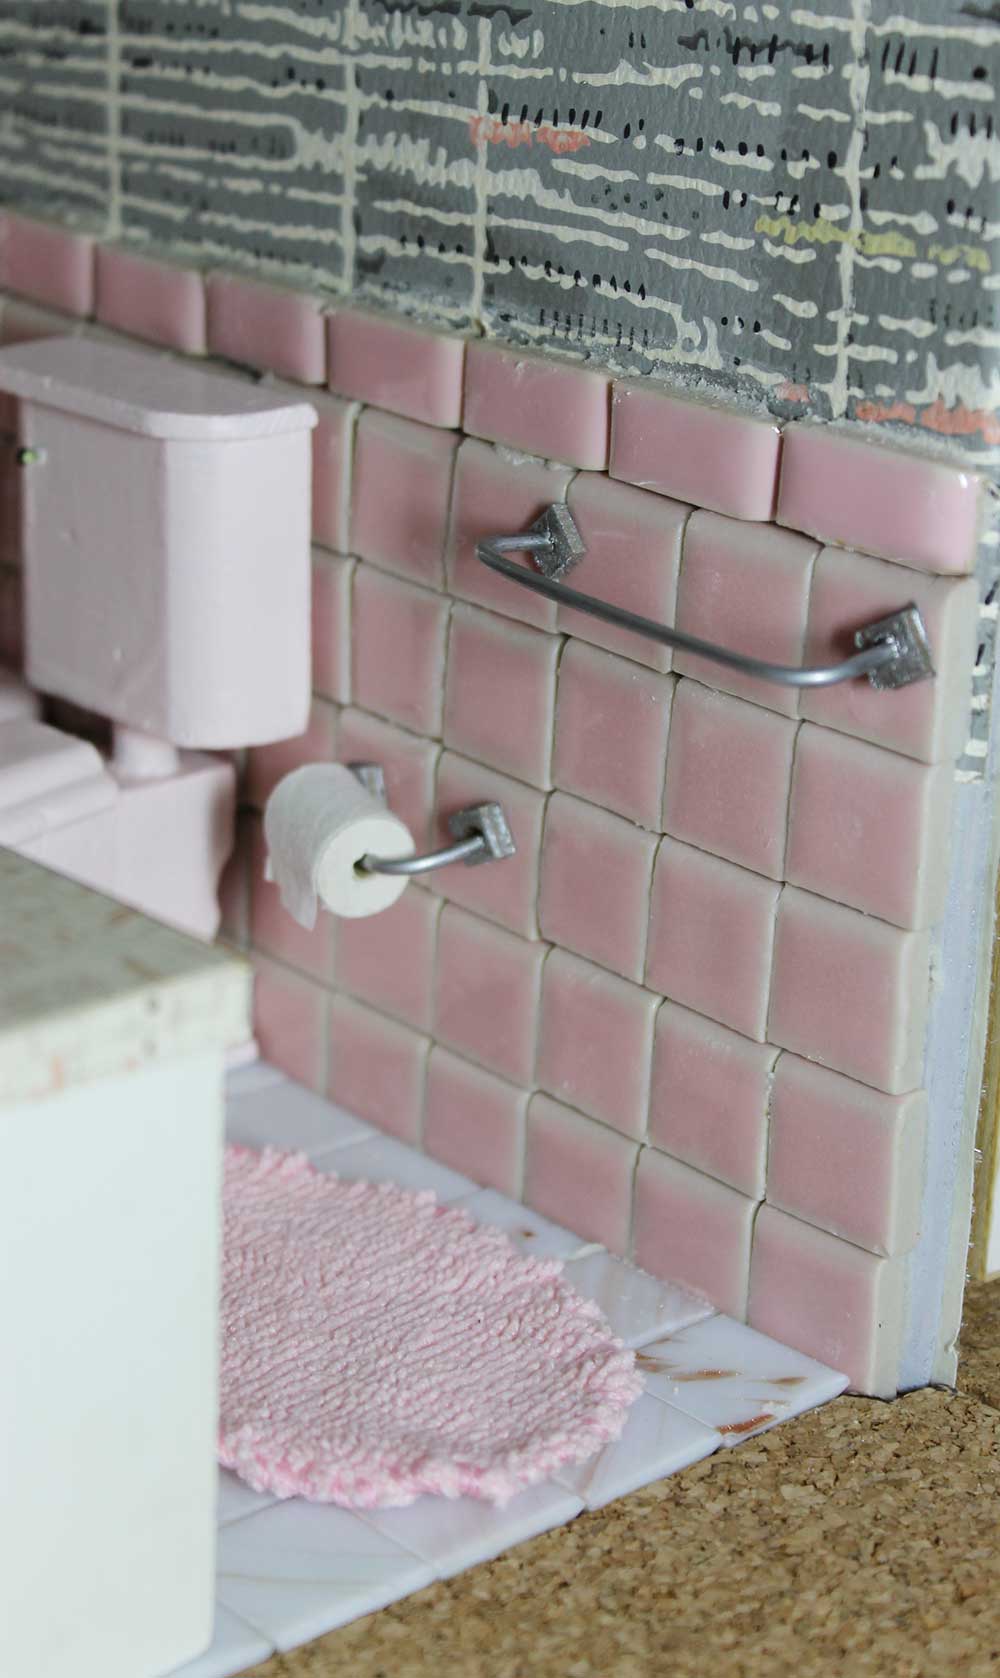 Presto — instant “chrome” bathroom accessories!
 Next it was time to find fabric to make a mini bath mat and towel: One of my microfiber cleaning cloths was just the right shade of pink.
 The tiny loops of the microfiber cleaning cloth are perfect to simulate a bath towel, don’t you think?
 I used a scrap of pink embroidery floss to hem the edges of the oval bath mat, but the towel is just a carefully cut rectangle. So far it seems that the hemming is an unnecessary step to keep the cloth from unraveling.
 By this point, my smileys had turned into full on giggles. I just made a tiny roll of toilet paper — hehehehehe. At just that precise minute, Pam called me and asked why I was so giggly. When I told her she just paid me to make a 1:12 scale roll of toilet paper for a tiny vintage pink bathroom she started to whoop it up too, too. Did I mention I love my job?
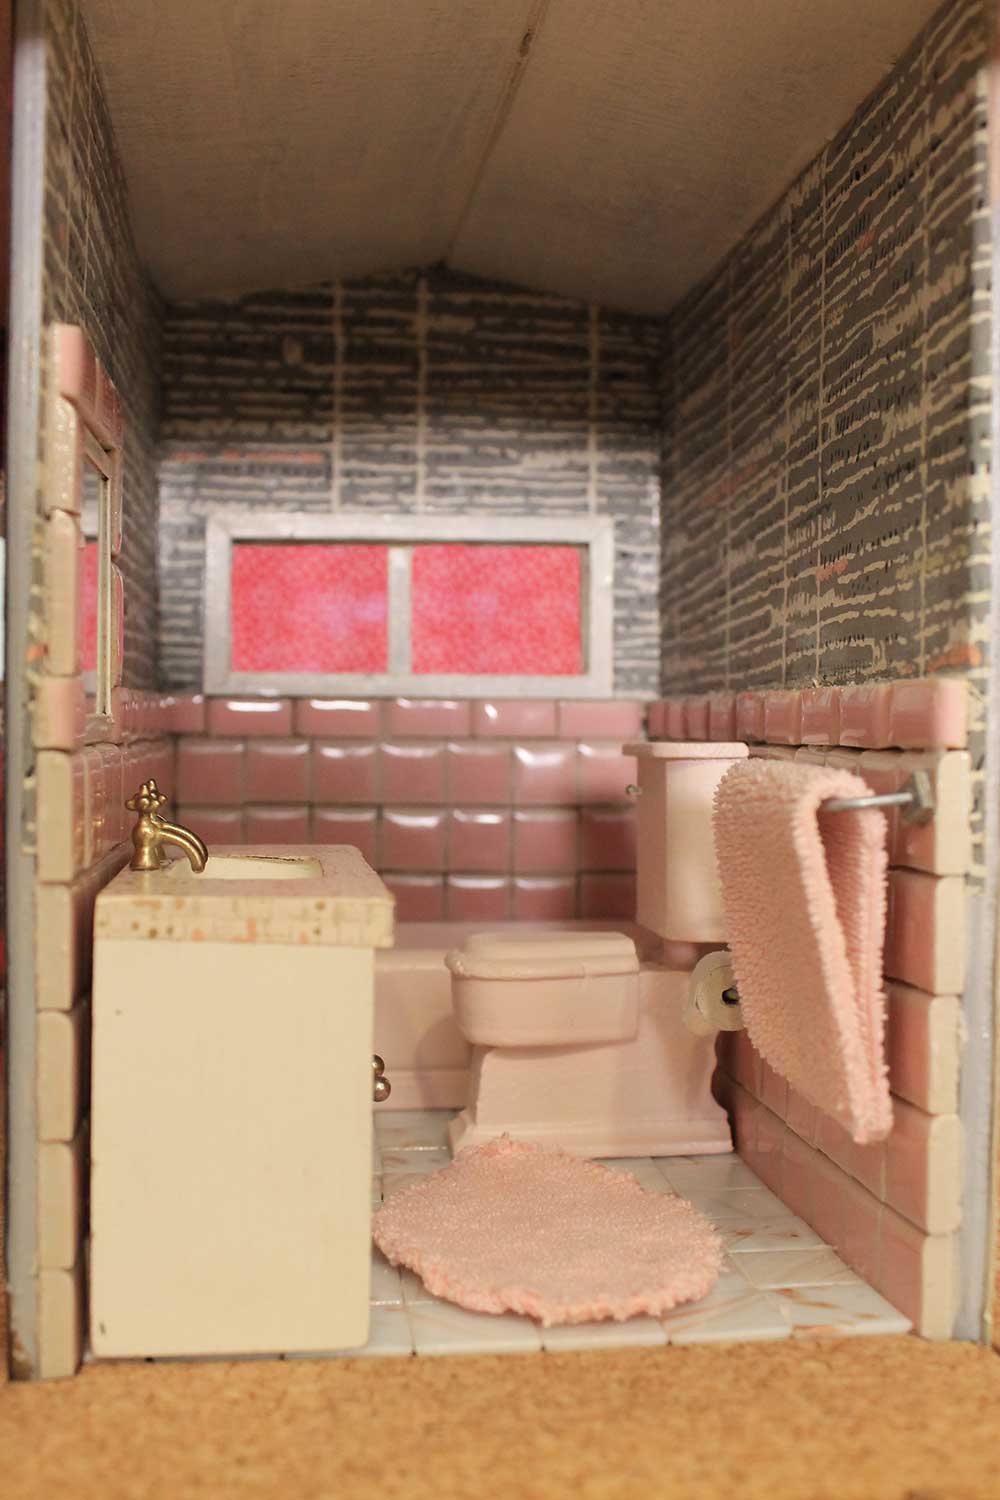 The bathroom could still benefit from a window curtain and perhaps some tiny chalkware fish, but for the most part, it is a totally adorable miniature pink vintage bathroom — the smallest vintage pink bathroom we’ve ever featured on Retro Renovation: A mini mid-century modest!
 Okay, readers, I’m all ears. Who has ideas on how to make a little chalkware fish set? What sort of fabric should I use to make window curtains? I’m also open to suggestions for other tiny finishing touches. Ready — go!
 And just to keep the scale of this pipsqueak of a pink potty palace in mind, here’s a shot of the dollhouse bathroom next to a standard roll of toilet paper.