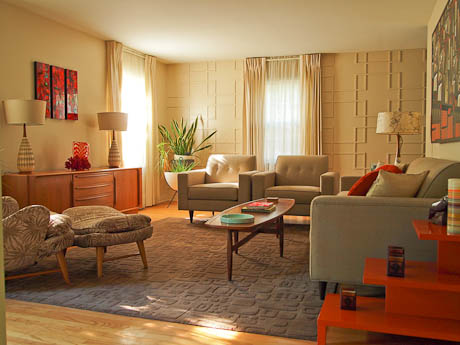
 David and Kristin have the eye for mid century modern decorating, and, it turns out that Dave is one handy guy. A
now
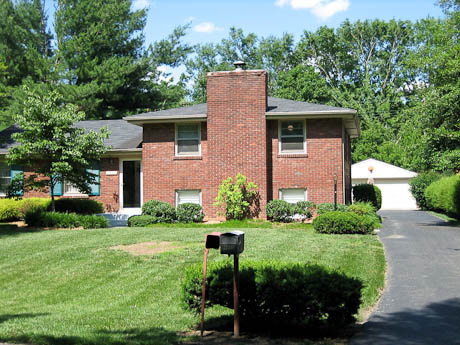
My wife and I searched for a house for about a year, going to open houses every Sunday. My requirements were brick, 2 car garage, a driveway that we didn’t have to move cars around to get in and out. We hadn’t seen anything that met our needs for the right price until we saw this house for sale by owner.
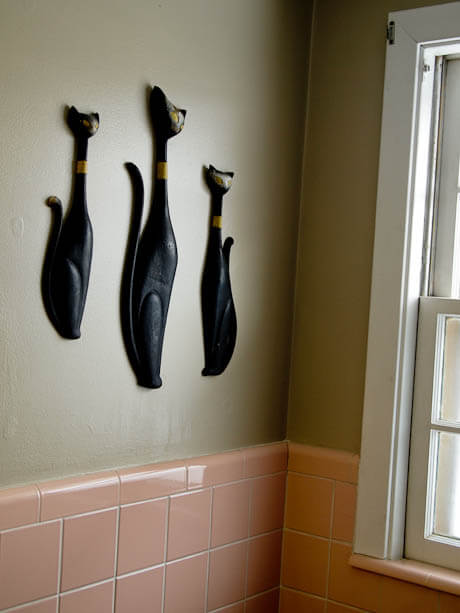
It is a trilevel built in 1959, and has a pink bathroom in perfect condition that we both fell in love with. I am sure most buyers were scared away because the house needed “updating” but we just fell in love with it. We put in a contingency offer, hurriedly got our house on the market, and sold it in less than a month.
We started loading up on design magazines and quickly discovered that mid century design fit our house to a tee! Items have been purchased for the house from 2 great mid century shops and several different antique shops in town.
We have been here for over 4 years now and continue to take on new projects, one room at a time. I found your blog early on in our renovation and read it every day for ideas and inspiration.
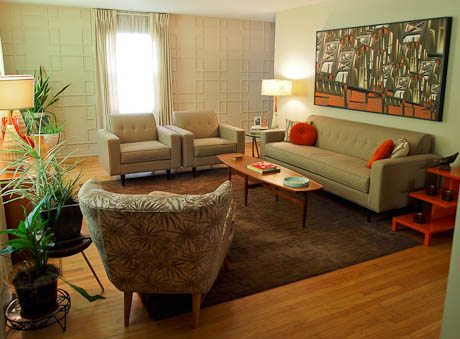
I thought you might like to see pictures of our living room. Our accent color is orange and it is my favorite room in our house.
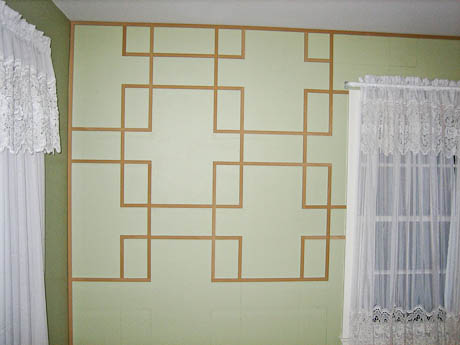
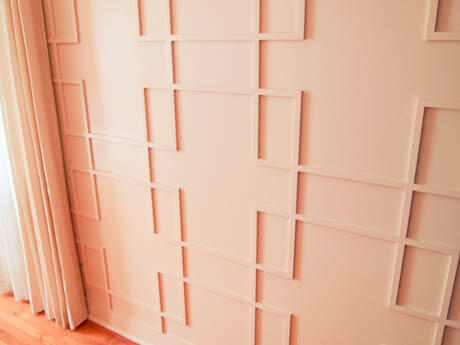
I did the wall myself. It is just strips of MDF. It was a time consuming, low cost project. I have about $250 in the whole project (including renting a paint sprayer). The wall project evolved from a picture in the now defunct Metropolitan Home magazine. My wife brought it to my attention and asked if I could replicate it. I kind of took it on as a personal challenge. I spent two days laying out the lines on the wall. The wall starts in the living room and continues into the dining room approximately 8′ tall by 24′ long. The next step was cutting 1 sheet of 3/4 MDF (medium density fiberboard) into 3/4 x 3/8 strips on the table saw. Yep, only in 4×8 sheet ! I set up a miter saw outside the front door and cut pieces to length, one at a time, using my lines on the wall to mark the strips (not a tape measure) because that was more accurate. I then adhered each piece using powergrab adhesive and pin nails. I only worked on it about 2 hours a day, maybe 3 days a week.
After about 5 weeks, and about 6 hours of caulking, it was ready for paint. I rented a HVLP (high velocity low pressure) sprayer from a local rental store for the weekend, primed first, then added 2 coats of latex paint. It has been done for about 2 years now and it still makes me smile every time I walk in the house! Note: the tone-on-tone curtains are from Penneys and were $30 a panel and fit PERFECTLY with NO alterations. What a lucky break! — Dave and Kris
That is so impressive, Dave — like I like to say, “some therapy.” You now move ahead in our overachiever of the year award, ahead of Uncle Atom, who has not actually finished his tiki totem pole, and TroySF, who is resting on his 2010 laurels (so far.) Thank you so much for sharing, the house is really truly stunning. I love the living room — with its mix of white walls, light gray upholstered furniture, the blonde Heywook Wakefield and the puches of orange. You two really know what you are doing — in your next career, you need to be a decorating team, truly!







Jackie says
Where did that great rug come from?
Suzy says
Very cool .. I just found 2 large sample books of wallpaper & wallpaper coverings at my moms .. I think they’re from the 70s maybe .. If you’re interested check phoenix craigslist.
Peter says
I know I’m replying quite late to this, but I just came across this post and love the look of those wall panels! I’m seriously thinking about replicating them in the living room of my 1965 rancher, even using the same Oatmeal color.
But… I’m not sure which color of curtains were used for the tone on tone match. It looks like JC Penny still sells the drapes. If I’ve found the right ones, they’re called “Royal Velvet® Supreme Pinch-Pleat/Back-Tab.” One style is lined, the other is thermal. Has anyone bought these, or matched them to the Ralph Lauren “Oatmeal” paint color? The drapes come in many colors, but there are three that look like a close color match: Ivory, Linen or Cream.
I’d be most grateful for any help. I’m almost 5 hours away from the nearest JC Penny store, so going there in person is not that easy. I’m thinking of ordering online, but don’t want to go through mailing back a bunch of drapes to return or exchange until I find the right color. I’m almost tempted to get a paint sample card from the Home Depot and mail it to the nearest JC Penny store and ask them to match it to display models, if they have those three colors on display in their store.
Dave B says
Hey Peter, I hope this helps, here is what the tag on the curtains reads: 73-20-086-B, made in u.s.a., face fabric 72% Rayon 28% Acetate, Lining 70% Polyester, 30% Cotton. They most likely don’t make them any more but I hope the numbers can be cross referenced somehow to help you.
Dave B says
I think they were ivory
Peter says
Great, thank you very much! I will ask at Penny’s and see if that info leads me to the same curtains (probably by phone first – as I mentioned, the nearest JC Penny is almost 5 hours away).
As for the paint, it seems the “Oatmeal” color has been discontinued now, but the lady at the paint department at my local home depot was able to find the “recipe” for it and mixed up a small sample can for me.
I ended up tackling two bedrooms and a bathroom first, which is what I’m the midst of right now in my 1965 rancher. But next will be the living room. I want it to look classy and mid century, like yours.
Dave says
Thanks Peter ! Best of luck with your projects !
Megan says
I love everything! Where did you get the fabulous rug in the living room?
dave b says
Hey Mark, The squares I did were 26″ x 26″ with 6″ between the squares. It was the measurement that seemed to work out best with my 8′ ceilings. I cut the MDF into 27″ wide pieces to make them more manageable. It isn’t easy ripping the pieces into 3/8″ strips. You need a good table saw and a good blade. A very thin layer of Powergrab Adhesive works well because of a strong initial tack and a pin nailer is a must. A brad nailer will split the MDF in half as the nails are too thick. Best of luck !
mark says
Wonderful wall Dave! I am curious if you have any advice on the pattern? Things like your pattern dimensions, cutting advice, attaching advice, etc. I would like to attempt this but more insight would be helpful!!! Thanks again.
Tom says
What color did you use in the bath? I have the same exact tile. Love the combonation.
mia says
Beautiful
Trina says
Fantabulous idea with the wall tiles. i live in an apartment so I am always looking for alternative ways I can create without investing a lost fortune. can the wall tiles be removed and brought along? Is there damage in removing them? Any more wall ideas for apts?
Dave Bramblette says
Hey Trina, the original article we got the idea from looked as if they were panels. I think you could create the pattern on 1/2″ sheets of MDF. The problem would be weight, probably around 100# per panel. You also might be able to have someone cut out a panel with a c&c machine. Pam had a post a few months back about panels you can buy that looked great. They were also in a more manageable size. Good luck, be creative, and have fun with it !
Kimberly Conlin says
I love this design. The tan and orange looks amazing!