

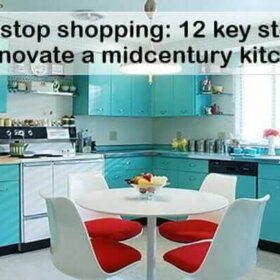
 Yabba dabba do — this sure makes me want to sell my “finished” house and buy a new/old one so that I can get all retro-eclectic all over again. Chicken 301 is the one with the groovalistic kitchen. **Platinum star** He/she (?) explains:
I had never wallpapered before and was putting it off, however it was easier than I thought. This is often the case. I think I have caught the wallpaper bug and have just bought 4 rolls of vintage wallpaper on ebay for $66.
Week #3 of Finish What You Started. Upload your photos and show us your productive self –>
What project(s) did you complete in Week #3?
Comment and/or share a photo with the uploader, below
Tips:
- (1) PLEASE PLEASE PLEASE set your camera to no bigger than “medium” images, so files aren’t too large — large files really slow down the slide show and over time increase my costs to run this website.
- (2) Uploader DOES work but message you get on screen *may be* funky and confusing. Upload ONCE and trust the image it there — I just need to “set new photos free” from my control panel and will be checking hourly to do so.
- (3) Terms of Use apply.
.
[ngg_uploader id = 208]
Tips to view slide show: Click on first image… it will enlarge and you can also read my captions… move forward or back via arrows below the photo… you can start or stop at any image:


Windylou says
I’m holding myself accountable through this thread! Thanks again for such a great reminder that I need to finish what I start. I love seeing everyone’s progress. Unfortunately, it just gives me even MORE ideas!
Audrey says
The floors are done! I lurve them! Even with all the imperfections. They are 83 years old, after all. I was actually able to start painting this weekend! Woo hoo!
clampers says
I love the orange door too! I might paint my door orange at some (distant) point too.
I planted a little apple tree in my yard, in place of the perennials I transplanted earlier this month. Still working on getting organized enough to take pics. Moving will do that to you. 😉
Jan says
I love this ongoing thread! Wendy – thanks for the mirror instructions! I was just going to ask! Denise – I love the orange door! Not only is orange a favorite of mine, but why did I never think of painting the storm door the same color as the door? Great idea!
Jan
pam kueber says
Thank you, Jan — it really is keeping me inspired to keep attacking my list!
Jon Hunt says
This weekend:
– Painted hallway (sort of a dusky lime green, matches couch and plays nice with avocado kitchen) and hung HUGE vintage print in vintage frame of streets of Paris
– Trixi finished painting the bathroom and stenciling atomic stars on the walls
– Cleaned out the barrel-furniture rec room in the basement which has remained unclean during our entire remodeling process (you have to put the stuff you remove from your rooms SOMEWHERE)
– finished painting the exterior of the house (pink!)
We were EXTREMELY busy all weekend, but when we were done — we were literally DONE.
pam kueber says
you mean your house is DONE???
Katie says
The tiling is done! Now we just need to get the oven installed, get the drywall repaired, and paint.
Lynn-O-Matic says
Very fun and inspiring to see what everyone’s been accomplishing. Can’t wait to send in pix of my own when the time comes.
Pam, I’ve always loved the thrifty finds feature on here, as well. What about alternating Finish What You Started with thrifty finds every other Sunday?
Keep up the good work, everyone!
pam kueber says
yes, lynn-o, i think that is a jolly idea and will start doing that! however, i want everyone to keep the PUSH on to Finish What You Started!
Kat R&D says
I LOVE the home made starburt mirror! I’ve been pining for one I found on Amazon a while ago but just couldn’t convince myself that the $300 was worth it, even if I wanted that particular style. I’m inspired!
pam kueber says
Go look at Target – they also have one, around $35, as I recall…
Wendy M. says
Thanks! It was super-easy and about $10 to make. Basic instructions- cut styrofoam circle slightly smaller than a flat, round mirror (both from Jo-Ann). Cut wooden skewers at different lengths- I have them at full (12-inch) size, 10″, 8″ and 6″. Push them into the styrofoam using the pointy end until they feel secure. Spray paint both sides (I used Rust-oleum Universal Metalic in Champagne Mist) and allow to dry overnight. Glue the mirror to the front using Gorilla glue (I wet the backside of the mirror, per instructions on the bottle). When it was all dry, I pushed a plastic wall anchor into the styrofoam at an angle on the back that would secure to the head of the nail I was using. Voila! It was a heck of a lot cheaper than the Rejuvenation one I had been coveting! 🙂
Jill says
Handmade brilliance! Thanks for telling us how!
Wendy M. says
I forgot to mention a detail…after cutting the skewers, rub some fine-grit sandpaper over the end so it is smooth (before you paint). Happy crafting!
denise says
I’m bummed that I did not get to finishing the decorative painting in my living room this week, as it was a crazy week with the foster dogs coming and going to vet appointments and new homes….BUT…in the decluttering aspect, I did bring 3 boxes of stuff no longer needed, to the thrift store.
Eartha Kitsch says
It’s so fun to see what everyone has done! And I must know more about that pink, yellow and green kitchen – LOVE!