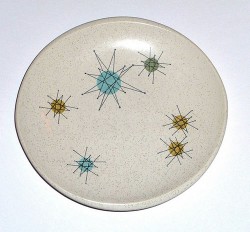
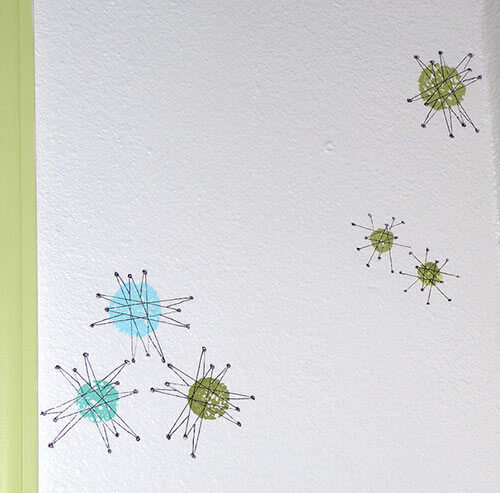
Remember Lora’s bright and colorful kitchen? If you did a double take when you saw her hand painted Franciscan starburst style wall — you weren’t alone. Lora has kindly offered to share her easy, affordable trick for painting an entire wall with these Franciscan style atomic starbursts. With just a little bit of paint and a few other odds and ends you might already have around the house, this project can be completed in as little as two hours — how’s that for instant wallpaper.
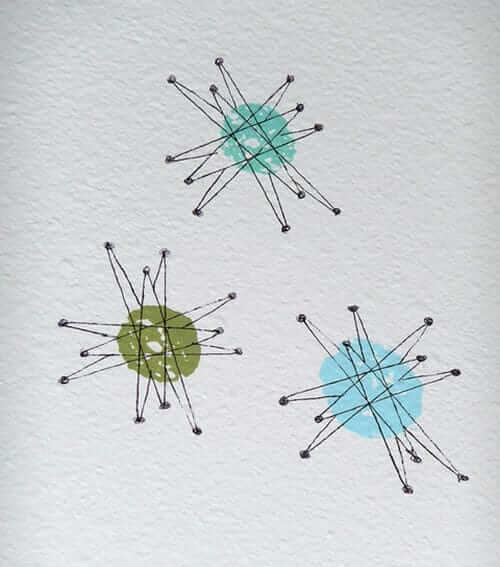
To make the pattern, and to be loose about it in design, I took a new regular kitchen sponge and cut 3 sizes. Using the colors from the Star Burst plate, I randomly placed clustered spots. From a heavy card stock paper, I made semi triangles to simulate the the star, and with fine tip permanent pens, I drew the stars and dotted the ends…It was about 2 hours and WahLah!
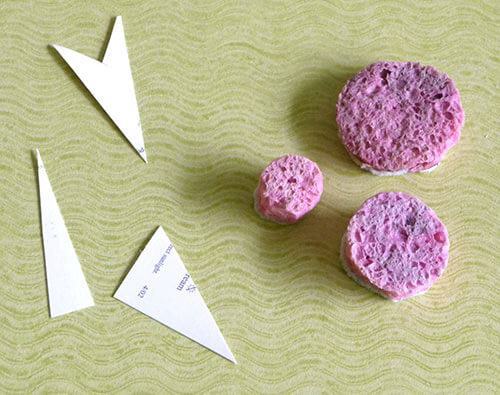
The sponge is a basic with scratch pad on the back. It’s easier to hold and the paint doesn’t go though the scratch pad!
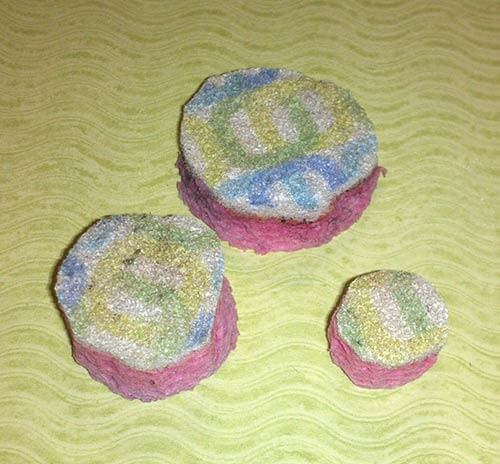
Add texture
Lora painted her googie starbursts onto bright white wall paint. But you know, if you wanted to come even closer to replicating the actual vintage plate you could (1) match the wall color to field color of the paint and then (2) after the base color is completely dry, experiment with getting the dark gray speckles onto the wall by dipping a medium-sized paint brush into paint… blotting the brush… then kind of “whipping” or “flicking” the brush to splash the speckles onto the wall. This would take some time…Work on different non-overlapping portions of the wall as you go so that you can remove the wet speckles if they are too gloppy or whatever.
Thanks again, Lora, for sharing your secret to getting the atomic googie Franciscan style pattern up on your walls — without having to use wallpaper. This is a great budget-friendly project for anyone who has a wall that could use some atomic pizazz.





rayena says
Love your artwork…My mom gave me her set of these dishes she was given for a wedding gift I treasure them dearly they are THE most favorite set of dishes I own…Love the way you have decorated your walls accordingly.
Kimberly Ann says
Thank you! Your post inspired me to try this and I love how it turned out! I just don’t want to see another Sharpie for a long time….
You can see my dining room here: http://pinterest.com/pin/36873290670788159/
pam kueber says
Nicely done!
Kimberly Ann says
Thank you, Pam!
Katie B says
Oh my word… I read the other post highlighting your kitchen but I JUST noticed the rug under the tulip table. Are those just six bathroom rugs lined up together? That is honestly such a brilliant way to make a “custom” rug! I am definitely going to have to steal that idea!!!
Theresa says
I would recommend using paint markers for the line work. Some permanent markers (including Sharpie) will eventually fade or bleed, and are impossible to paint over without being sealed.
Scott says
Ingenious and stunning. I’ve been stumped on how to take my bathroom from “Martha” to Mid-Century… I think this could really work! Thank you!
tammyCA says
I bet this is way easier than putting up wallpaper (that is if you can find it in an affordable Mid-century style)…thanks for the how-to and a peek into your home. 🙂
jen says
These look terrific! I love figuring out ways to add to paint. Been looking for a pattern for my hallway, this could be it!
Pam, thanks for asking HOW!
Jessica L. says
Lora,
SO Clever and nicely done. i love the warm and inviting feel to that room. great colors, and great aesthetic. i’d love to see pictures of the rest of your house!
-Jessica
Lora Jabot says
Hi Jessica,
Thank you soo much! Here are other pictures of my House…http://www.flickr.com/photos/retrochi/
😉
Annie B. says
Oh, Lora! What a showplace you have. I’m in awe of your talents – and all that fabulous MCM decor you have. Thanks for the inspiration.
lady brett says
you could also stipple the wall to get a similar effect – it would be much closer dots than the flicking (and than the original), but it would create a more regular, small spotting somewhat like the original. it would also, i think, take quite a bit longer.
but it could be a really good option, depending on your position on the ocdfreehand scale.
Alice says
to get the speckles, dip a TOOTHBRUSH in the pain and then hold the brush close to the wall and drag your finger across the toothbrush – you’ll get perfect little flecks.
Tracie @MiddleClassModern says
I might have to steal this idea for my pink bathroom (). Love it. So creative.