


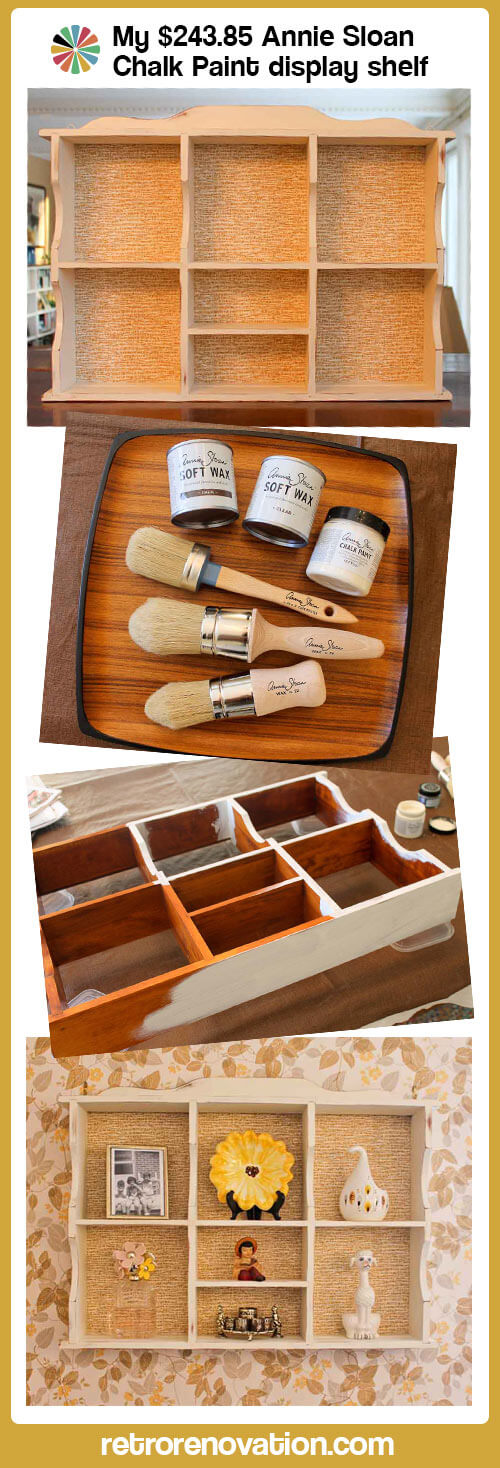
 Yes, I am going to write about shabby chic. Don’t yell at me! I actually like shabby chic style — I pretty much like all decorating styles if they are done well. This story, though, is not about painting big pieces of furniture (please think hard before you do this!) Rather, it is about my desire to paint several old wood display shelves that I have collected from estate sales and turn them into display-assemblages to hold various of my Kitschmas weebits. My plan is to paint the display cases white… add vintage wallpaper or vintage wrapping to the back… and probably also glitter them up. I’ll give the finished products to friends and relatives, as a complement to my vintage ornament wreaths and other Kitschmas krafties. Once I geared up to start, I thought I would merge these painting projects by testing various paints to use. My first test: Annie Sloan Chalk Paint. Read on for my product test — and initial verdict about this DIY-painters-gone-wild chalk paint.
Getting start with Annie Sloan Chalk Paint: Expensive
 Because I read virtually no other home decor blogs (they annoy me on too many levels), I didn’t know that Annie Sloan Chalk Paint was a phenom. But then, in one of our discussions about painting vs. not painting wood furniture, a few readers mentioned the product. So finally I decided to use this opportunity to see what all the fuss was about and to weigh in.
A store nearby sells Annie Sloan Chalk Paint, so I headed over, and — thank goodness I was able to put this on the company credit card — because you surely noticed my headline right away: Yes, the supplies to get started cost me $238.85. Okay, so this is headline hyperbole, because a lot of the cost was in the made-in-Italy brushes, which should be longterm “fixed” costs, and also in the waxes, which will go along way. But still: I wanted to test this system… and to test it in its recommended entirety, I needed all the Annie Sloan tools… so, even if I decided, after my test that, nah, not worth it, I’d still be stuck with all the tools.
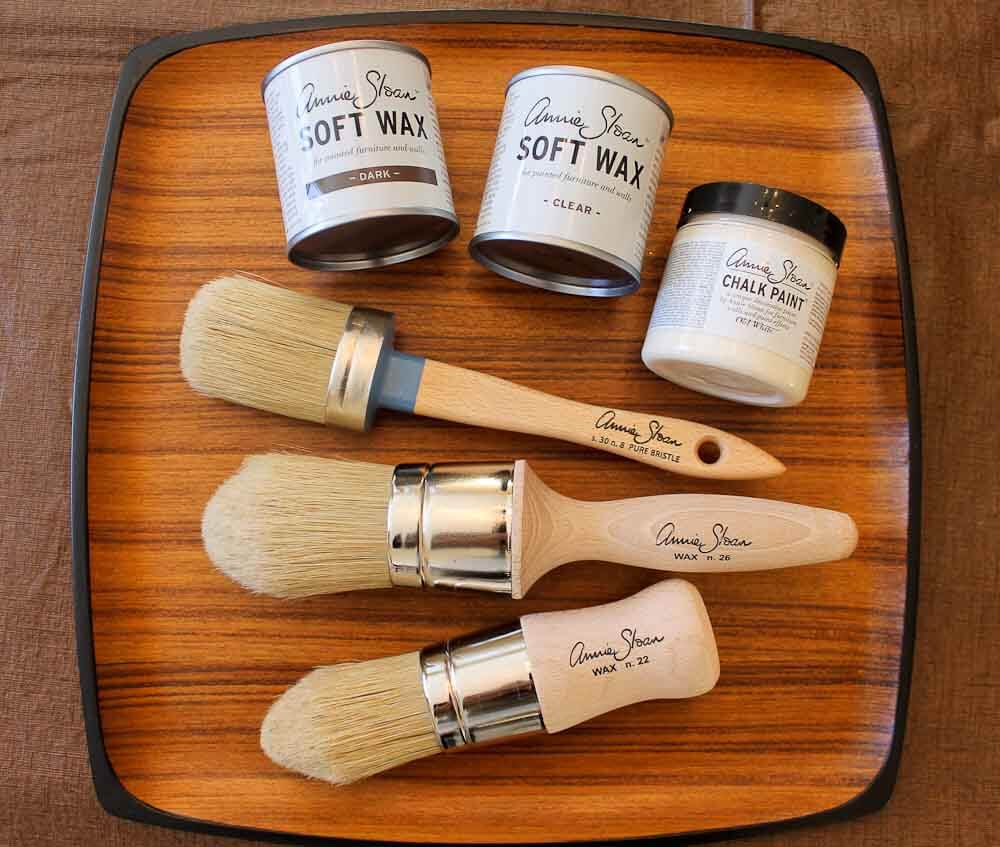
Here’s the breakdown of costs for the official Annie Sloan products:
- Large wax brush — $72.00 [This was the best brush you could buy for applying the wax.]
- Small wax brush — $52.00 [I bought a second, smaller brush to use for the antiquing wax. The store recommended a separate brush to apply the dark color antiquing wax so that the two waxes don’t mix.]
- Small paint brush — $32.95
- 2 mini waxes — one clear, one dark for antiquing — $31.90 [that is $15.95 each]
- 1 small can of Old White chalk paint — $13.95
- 1 tin of gilding wax — $22.00
- Total with tax: $238.95
Recommendation: If you are only going to do small projects or test projects, like mine, I really do not think you need to buy the brushes. In addition, for this project, I wanted a very smooth finish and for that, I actually found it better to apply the chalk paint with an inexpensive sponge brush. For the wax, just use a small normal natural bristle paint brush.
For this project, I did not use the small wax brush or the gilding wax. But I’ll still show you what I spent here, cuz my receipt says All Sales Final.
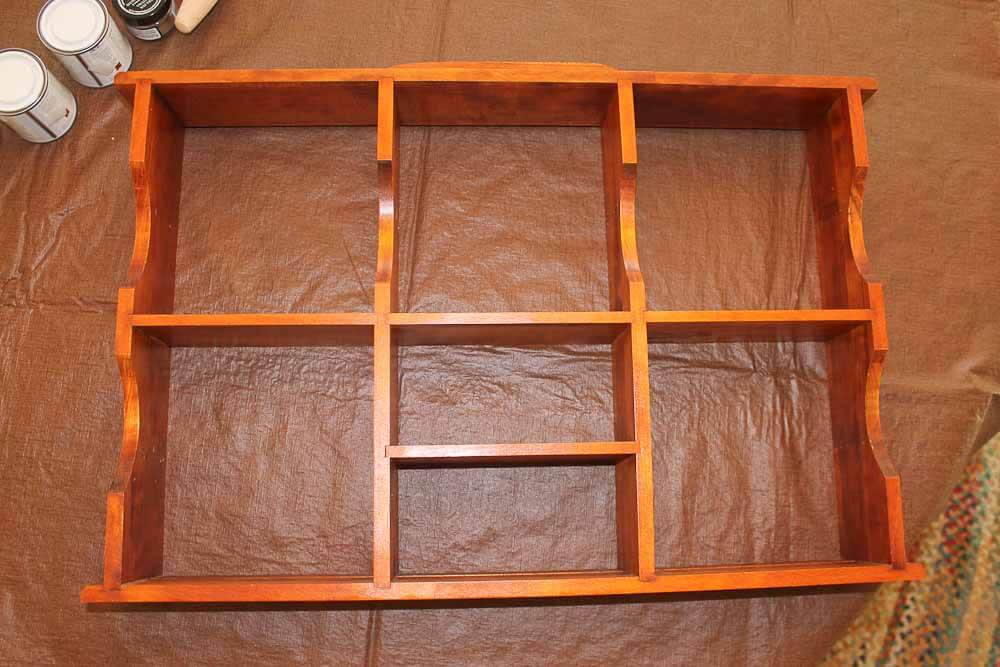
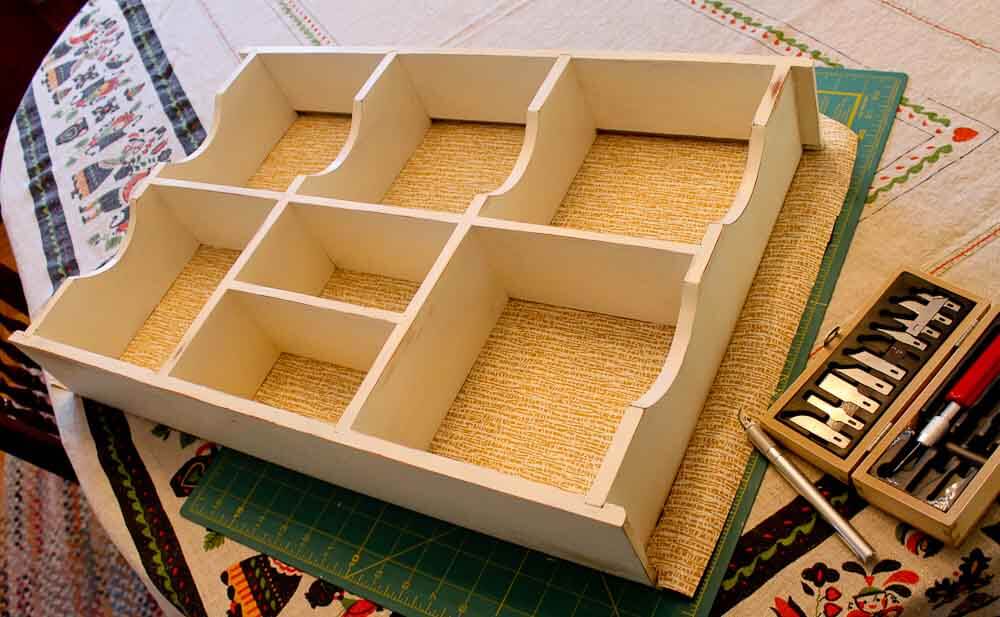
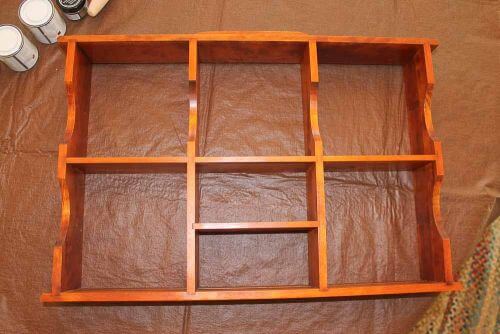 The display shelf, $5, found at an estate sale. I see these at virtually every estate sale I go to, they are so abundant.
- The wallpaper came from a roll I bought for $1 at an estate sale. But I am not counting this in my total, because I already had it on hand, and because, don’t ask me how I know this, but $243.85 is a funnier sounding number than $244.85.
Step One: Apply the chalk paint

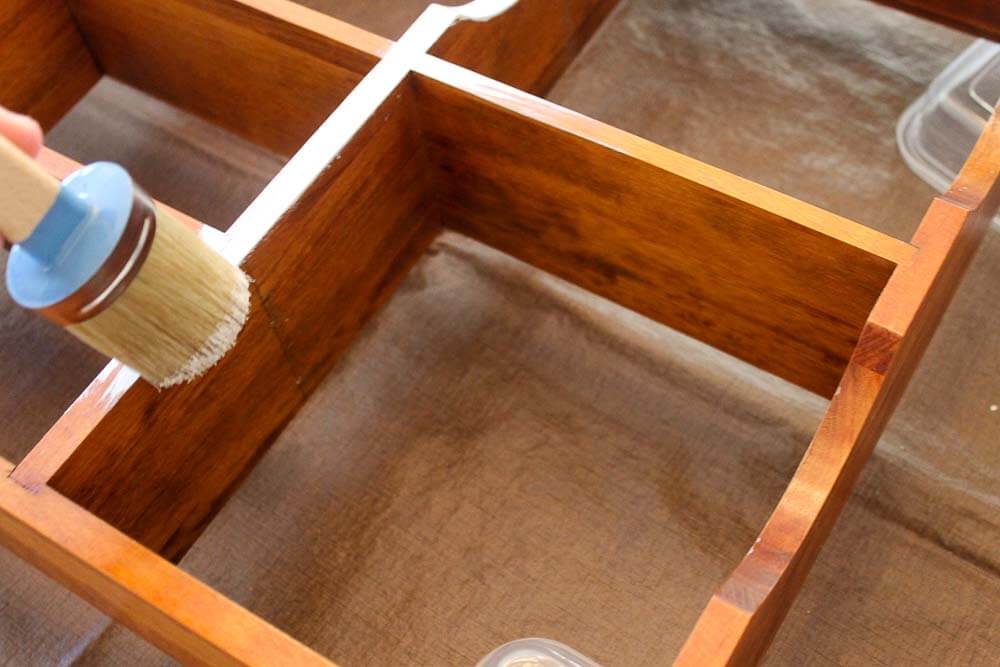
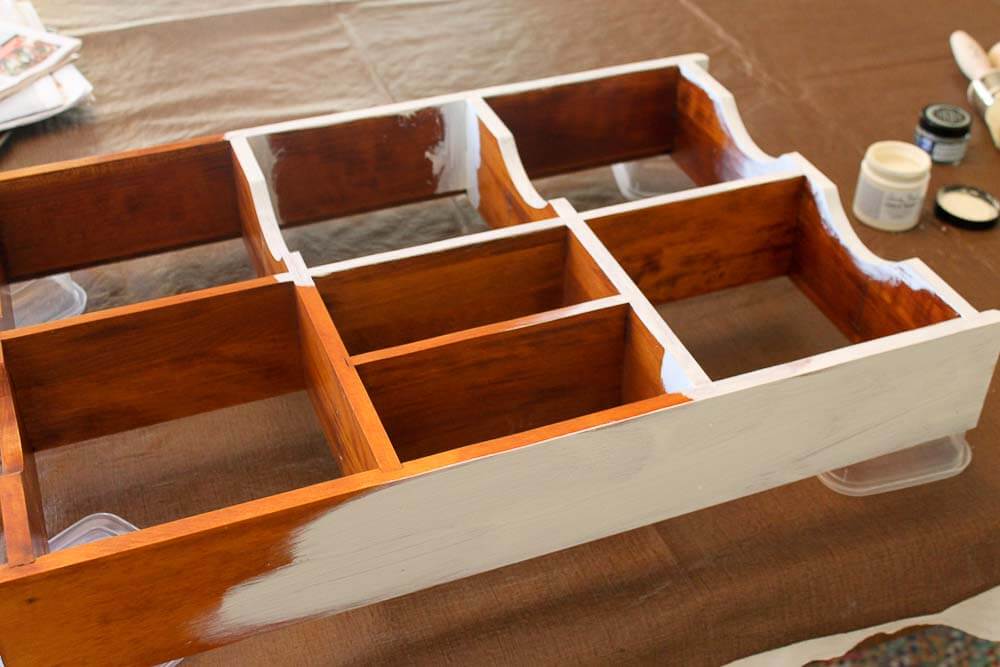
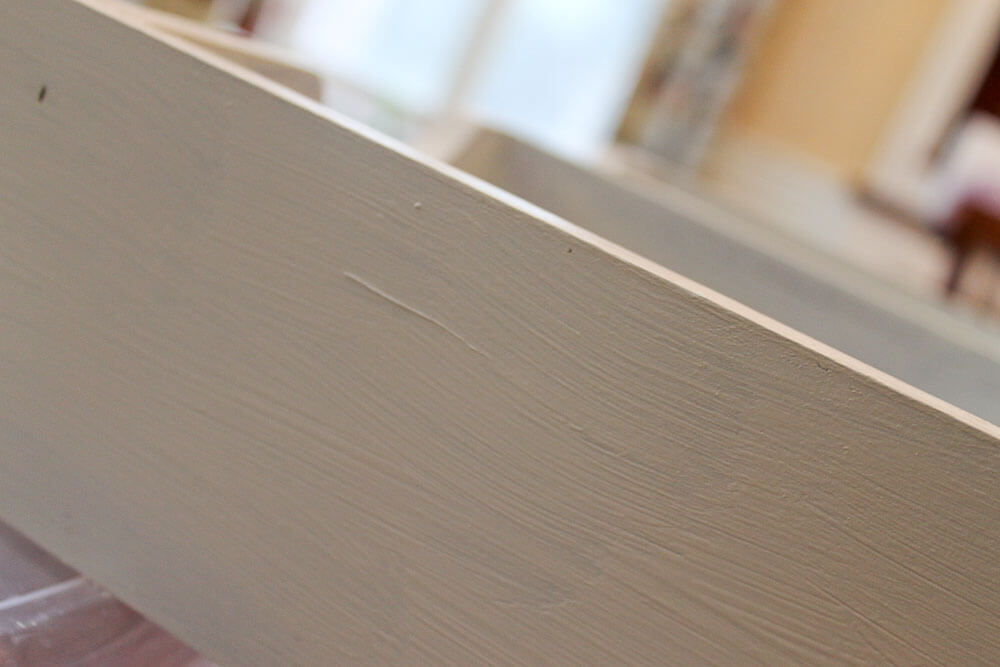
 When I bought the chalk paint, the salesperson told me that it should paint two or three small shelves like the ones I was describing. My experience: No Way! Above: Putting on the first coat of chalk paint. The coverage was not good. It took me three coats to get decent coverage — and I could have used four, but I ran out of paint. Kaput.
As for the process: I used the Annie Sloan paint brush for the first two coats. I found it a very frustrating tool for this particular project, as I had to get into the piece at 90-degree angles — and using the brush with this paint I could see all the odd and unappealing brushmarks, at least until I sanded. The paint was very thick.
One of the promoted advantages of this chalk paint: You don’t need to prep your surface. For this small piece, I did nothing but lightly sponge the display shelf to get rid of any dust before painting.
I found that the paint had virtually no odor. That said: I am not very good at smelling. BUT: I did get a headache — I am actually very sensitive to odors, apparently at the cellular not nasal level, and will get blasting headaches from certain smells. While I’ll stop short of saying it was a blasting headache, I’d say, yes, I got a noticeable low-grade headache — so there is something in the air.
I did this indoors on a cold winter day. Maybe better to do it where and when you can open the windows.
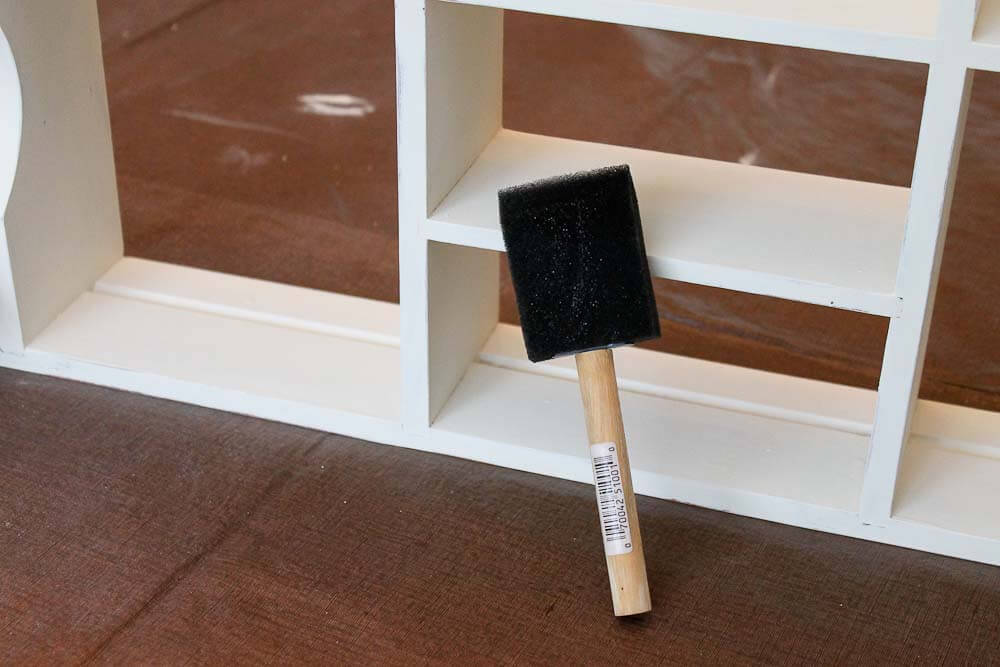
 For coat #3, I: (1) thinned the paint with water to try and make it go further especially where I needed it, since I was going to be out of paint after this third coat, and (2) used a sponge brush to apply the paint. I thought that with these two changes I had much better control of the paint. And as you can see, with the third coat I finally had good coverage. Even so, I could have used a fourth — inside certain of the shelves, the paint is still not opaque — but I was out.
 Above: I also could not really get the small paint brush into the small paint jar very easily…
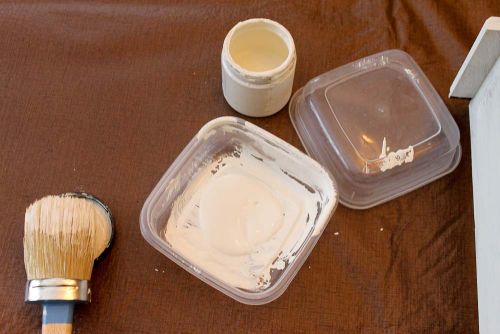 … So, I decanted the paint into a plastic thingy.
 Above: One more first-world whine: $33 natural bristle Made in Italy paint brushes should not leave bristles on your piece the first time you use them.
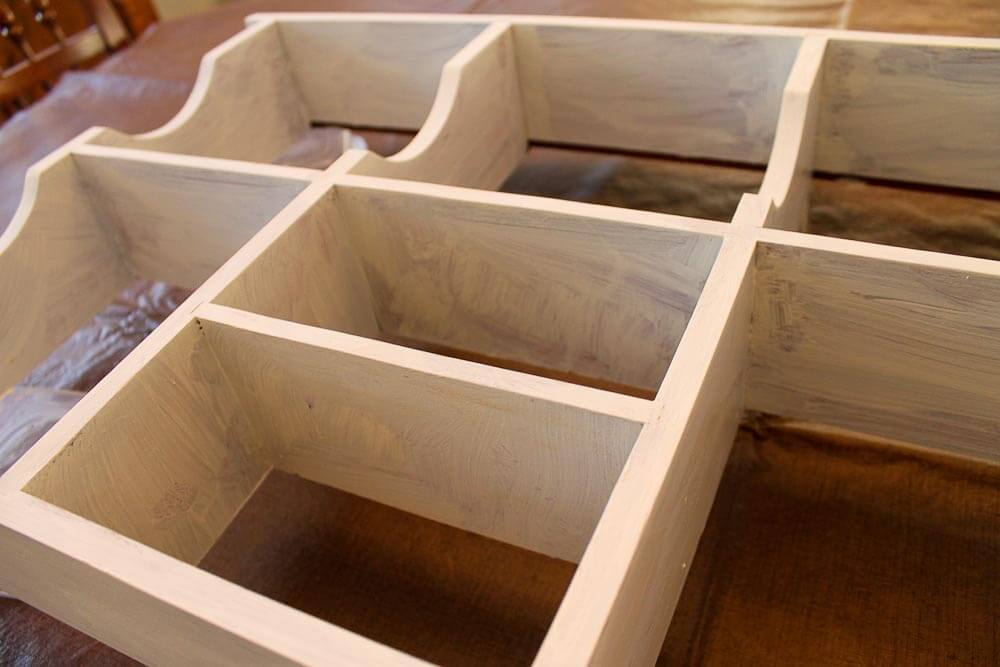
Step Two: Sand, as desired
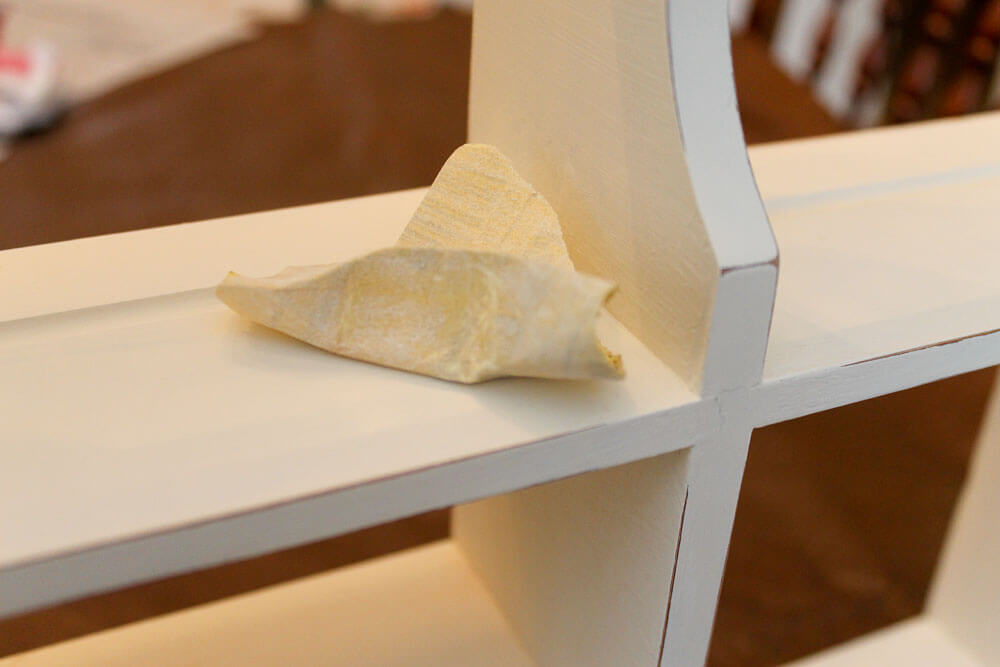 Above: The next step was to sand the edges to get the (1) smooth flat surfaces and (2) distressed edges that I wanted.
Big “Like” — even a the level of “Love” — for this product once I got to this part of the project: I found that, yes, with enough paint on the wood to work with… (applied with the sponge brush)… then sanded with very high grit paper… I could get a very smooth finish on the flat surfaces. No brush strokes visible at all. The edges distressed up no problem, and I had good control. At this point, I had not even waxed yet, and I was really liking the outcome.
Note: I think that Annie Sloan advises to sand after the wax is applied. I did not follow that instruction. I sanded before waxing.
One note: This part is super messy. The chalk paint sands like a dream — but make sure you have a plan to clean up.
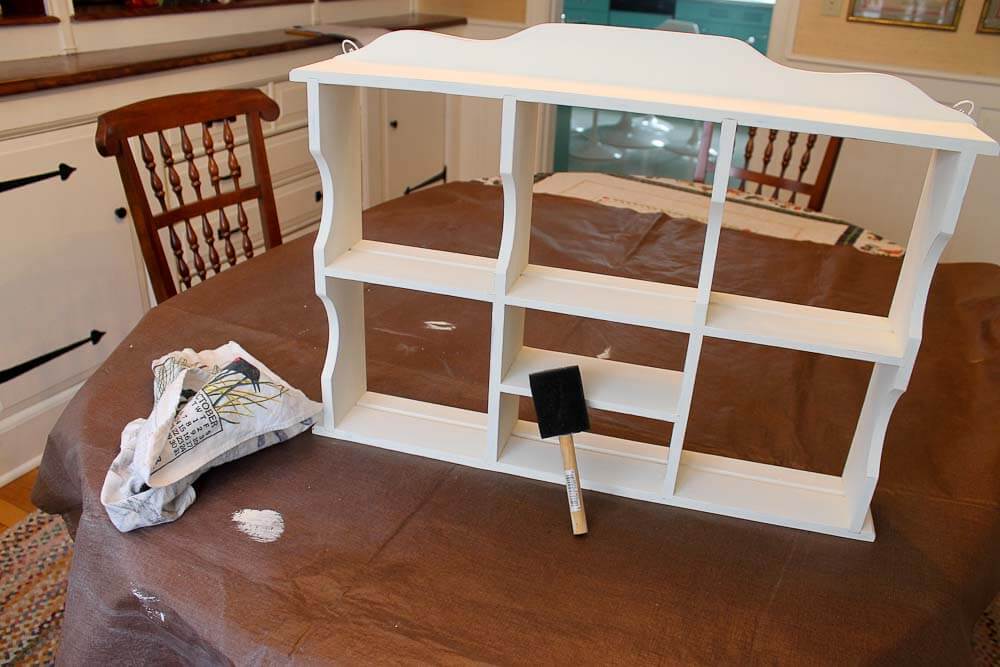
Step Three: Wax
 Ooopsy, I didn’t take photos of the waxing part. Soft wax is required to set the chalk paint. You apply it with the wax brush — then buff it off with a lint-free cloth. If you do it right, you get a somewhat lustrous sheen. “Doing it right” means not over-applying the wax and then, buffing like a maniac. I think I did a fine enough job on this part. It was good exercise for my right arm, which I have not updated you on since I broke it last October because the whole thing bores me so. I have declared myself “cured” even though I am not.
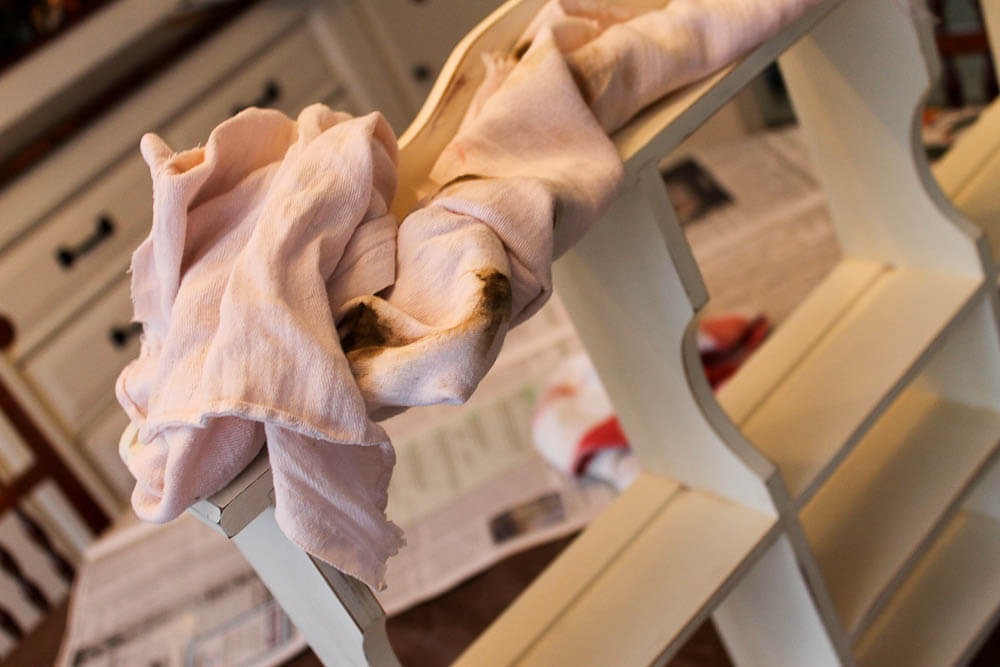 Above: After I applied the clear wax with the brush… but before I buffed… I applied the dark antiquing wax — mostly just on the edges — with a lint free cloth. Then I buffed everything.Tip: Be careful with this dark stuff, it was my experience that once I laid it down I could not easily wipe it off if I did not like how it looked.
Wallpaper for the back of the display shelf:
 Who recognizes where we used this same wallpaper
in a different crafty project?
Gold star if you can name it.
This wallpaper actually is the complement wallpaper to the vintage wallpaper in my bathroom — which is where I planned to hang this shelf. Yes, I started thinking this would be for Kitschmas, but when I saw this paper again in my hoard, I thought it would look great in the bathroom with its sister, the flowered wallpaper. And, I didn’t have any art or anything up in the bathroom, so I had the space.
 In typical pammy whammy schmeck-aleck style, I simply glued the paper to the back of the shelf. I need to be super duper careful not to poke a hole when moving this around. That said, this solution was not just out of total laziness — I wanted the shelf to lay totally flat on the wall, so I did not want to mount the wallpaper on anything thick. That said, I could have put it on a strong paper or piece of thin acrylic sheet or something. Honestly, I think that working on the internet for all these years has reduced my patience to the size of a pea.
The finished product and my verdict on Annie Sloan chalk paint:
 I installed the shelf in my bathroom… then I ran all over the house playing stylist looking for its and bits to put in it to get it “just right.” I stuck with golden tones (except for the center piece for effect), all of a certain height, each a different shape, and just one item per display box, as my bathroom is simple, glowy and uncluttered.
When I style: I get very mathematical and have rules like the ones I note above. I think there is a science to styling — it is not just an art.
I LOVE IT! So darned proud of myself I could just bust.
Even though I know I probably could have bought a display shelf just like this at HomeGoods made in China on clearance for… $19.99, I am actually very happy with this little project I made all by me myself and I.
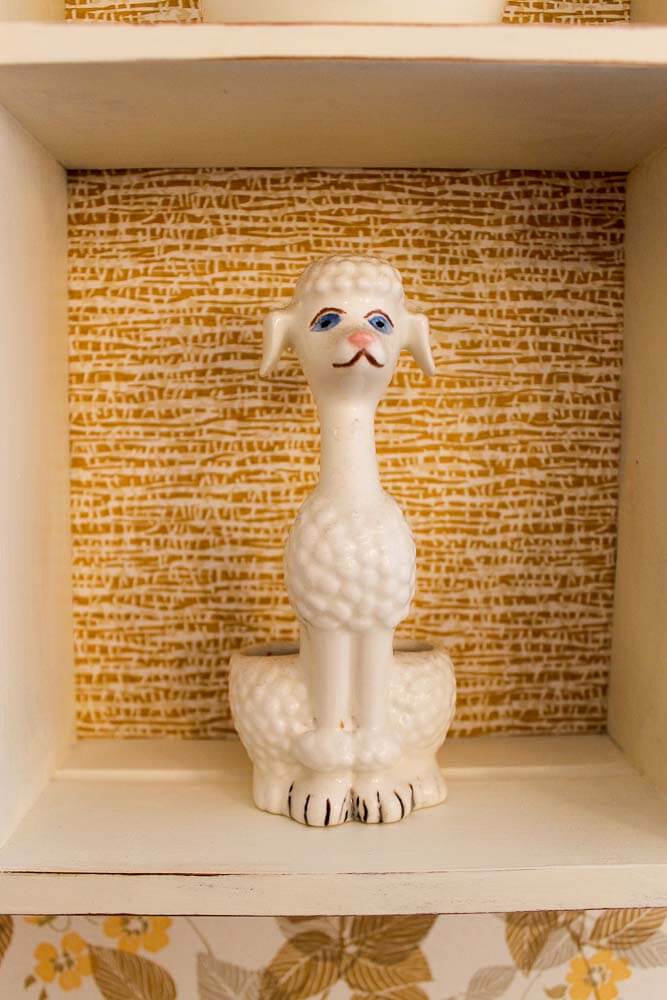
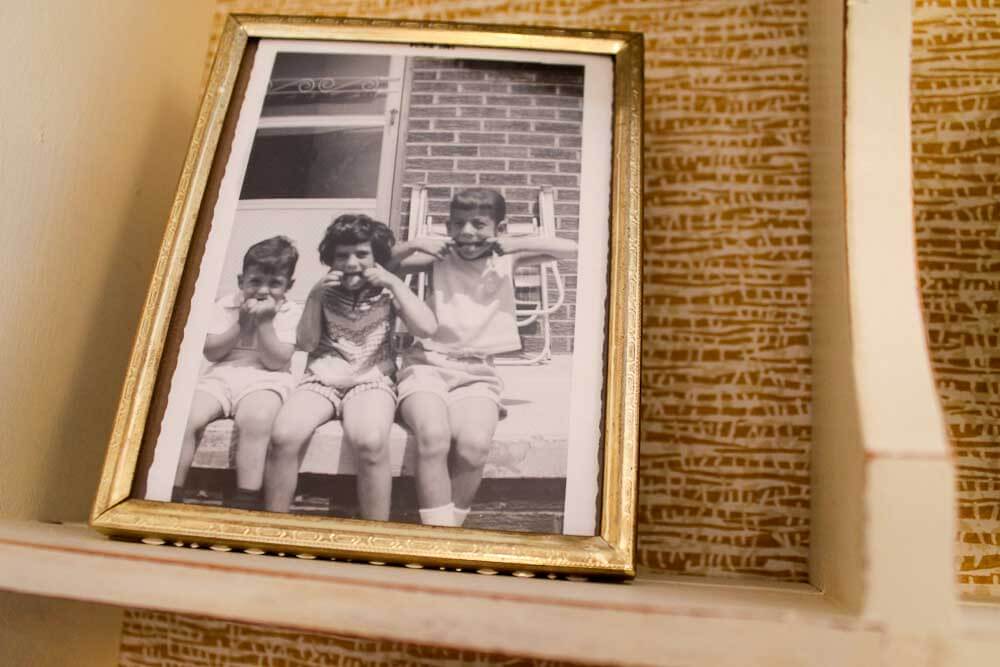 The shelf is installed at eye level in my bathroom and every time I go in there Mr. Poodle and my +1 and his sister as a weebits and all the other little pretties are right there to greet me. The display brings me a thunderbolt of instantaneous joy every time I go into my sweet little bathroom.
Pros of using Annie Sloan Chalk Paint:
- Great finish — I loved the luminous finish of the end product — note, I applied a lot of paint, including with a flat sponge brush, and then sanded it to get a smooth finish.
- Great color — The color Old White — a great color.
- Quality — Quality of the paint, in terms of final result, seems very good.
- No prep — No sanding or stripping required before application.
- No smell — No icky smelly (to me, but I am not good at smelling) — BUT, I did get a headache.
Cons of using Annie Sloan Chalk Paint:
- Poor coverage — Took me three coats, and this small piece still was not totally covered. I was told at the store that my small jar should do three of these pieces — it didn’t even really cover one.
- Pretty expensive — If you buy all the Annie Sloan tools, your upfront costs are pretty steep. And, the paint did not give great coverage, so you might need a lot. It took me one complete jar of $13.95 paint to cover this shelf, and I really could have used more to obtain the complete coverage I wanted. On this issue, though, *stay tuned* as I test other popular alternatives. It could well be, the Annie Sloan is “worth it” in terms of final quality weighed with cost — that is, “value”. We’ll see.
- Requires waxing — Waxing is required to set the paint, and this part of the process takes patience, some finesse, and certainly some muscle. Depending on the use of the piece, I think they said you may need to rewax occasionally. Note: I am also told you can use a clear water-based finish — lots of folks seem to love this Varathane product (affiliate link). I will try this next time and report back on that option.
- I got a headache from the smell.
- You are going to yell at me because I wrote about chalk paint.
Initial Verdict: Not having done any comparisons to other painting options for this project series… and putting a placeholder pin in the cost issue — because I will be assessing “value”… the Annie Sloan Chalk Paint seems great.


Kelly says
Nice job, Pam! The shelf turned out great! I especially liked how you styled them. I am not a shabby chic lover, but have too been curious about chalk paint.
I do have some advice about using the Varathane though. If you want a clear finish and white to remain white do not apply Varathane. We had been working on our cabinetry for six months and applied Varathane over seven coats of Sherwin Williams super white oil based paint and it absolutely ruined our smooth, white finish. It left this awful yellow tint and with all the effort I took to keep brush strokes to a minimum, it left terrible brush strokes. It was not self leveling and it yellowed, which was not what I read in all the rave reviews about it. We had to resand and start all over again. I will be using Johnson’s paste wax to protect them when they are finally done rather than Varathane.
pam kueber says
Oh my gosh!
denise says
Painting your cabinets, especially with oil base paint and that many layers, I wouldn’t recommend any type of varnish or wax on top of it. I’m curious if someone suggested you would need to put a clear coat on them. Oil base paint creates a hard finish and offers easy cleaning of the surface.
Kelly Montano says
We want a super shiny finish, which is why we wanted to use a poly or other shiny top coat.
karenn says
Oil-based Varathane will yellow. Varathane water-based poly does not.
Kelly Montano says
We did use water based Varathane and it did yellow the white paint. All polys and varnishes will yellow to some degree. The Varathane is said not to yellow, but I think it just yellows the least. It is probably less noticeable on unpainted wood.
Mary Elizabeth says
Lou, my go-to paint guru, always told me not to put water-based on top of oil and vice-versa, unless you put down a good primer in between–which you can’t if you are trying to keep the color. There may be exceptions to this, but I’ve used that as my yardstick. As the old cooks used to say, “Oil and water don’t mix.”
lynda says
“I pretty much like all decorating styles if they are done well.”
I love this quote, Pam, and I so agree. If people love their style and do it well, I love looking at it and sharing their enthusiasm!
Michele DeGroat says
ditto
Jacquie Y says
Amen to that, I think that some get to be snobs about a certain thing…c’mon -we all love mid century, but in that, we should have respect and admiration for anything built well,… antique, vintage,..shabby chic is just a couple of words to describe something vintage or antique that has possibly been painted or distressed. Saving something wonderful from a junk pile, with painting, is absolutely “pat on the back-able”. ( Nice story Pam, and no one should EVER yell at you. 🙂 ) I have a blanket chest with a bit of damage from a chewing dog, it would be called shabby looking for sure, but I love it. It was my husbands before I met him and it is in need of paint. There is no way I can see to refinish. I fixed the ares of damage with wood putty, but there is too much. It would look fabulous in milk paint or chalk paint, (or plain old paint! Just don’t know about the cost..the chest is much larger than that shelf, …whew… could be pricey. Might try the alternatives mentioned in the comments. 🙂
Anya says
Will you be doing a comparison test with milk paint? I wonder how it would work on a small project like your shelves. I think that it is quite a bit cheaper than chalk paint.
Sometimes painting furniture can save it from the dump–I just inherited a hutch from a friend whose father built it. It was completely thrashed after being used by two generations and although it was mostly built with quality wood, the sides are beyond saving. I did strip layers of old varnish off the top and drawer fronts, but the body had to be painted. So now it has a new life with beautiful cedar AND a little bit of paint!
pam kueber says
yup! i already have it! that will be the next one!
Mary Elizabeth says
I was just going to say that you should try milk paint and a glaze. That’s what they use on painted Amish furniture. I love the effect of that on the kitchen island my DH built, and it has held up very well for four years.
bobbie says
Have you considered trying Miss Mustard Seed Milk Paint?
pam kueber says
yes, that’s the kind I got for the next project although I found the color in the company that makes hers
Alisa Reynolds says
I had the opportunity to “shabby chic” a clients entire kitchen cabinetry with the chalk paint. It was expensive and time consuming, but the end result was fab! The downside was the time it takes for the wax to cure and the paint chips easily. I wouldn’t recomend it to any one with kids or high traffic areas. I work with mid century design in helping folks “retro fit” their interiors ruined by the Home Depot fairies. Once in a while, my old “faux” painting skills are required and I have to say, the chalk paint makes the process easier.
Thanx from Ms. Retro, Denver Co
MJ says
For high traffic areas, verathane works well.
But could be that paint is supposed to be chippy? My non-chalk paint cabinets looked moth eaten from unintended chippiness.
Debbie says
I can’t decide if my favorite sentence in this story is “and probably also glitter them up” or “I decanted the paint into a plastic thingy”. 🙂
pam kueber says
teehee 🙂
Carol says
I like “weebits”.
pam kueber says
🙂
MJ says
Me, too. Weebits is a winner IMO.
denise says
“pammy whammy schmeck-aleck” got me. 😉
Mag says
Good job on the shelf, but my eyes are all for your Penn Dutch tablecloth!
pam kueber says
Yes, I love it! I have two of them, both found NOS on ebay. The colors are great, and very saturated/strong! Lovely fabric, too, washes like a dream.
Works great in my Cool-onial.
Blondie7 says
Yummy! Gorgeous Pam! Beautiful! You and Kate rock for your phenomenal projects! Keep up the excellent work! I love it!
Jeanne says
I’m a pretty strong believer that shabby can never be chic so I thought you had slipped off your swivel rocker when I started reading this story. Even when I eyed the final product I was still thinking meh. But after seeing the shelf installed and all doodadded up, my faith in your decorating genius is restored. It looks fabulous!
Wondering: do you think you would have needed fewer coats if you had started with a sponge brush and/or thinner paint?
pam kueber says
Phew! Thank goodness for that! You are so sweet.
I don’t think that I would have needed fewer coats if I had started with a sponge brush. I think I would have had more even coverage, but I can’t extrapolate to how I would have had complete coverage.
tammyCA says
Your shelf looks sweet.
But have to say, I tried Annie Sloan paint a few years ago..I’m not a fan. It was $$ and took many coats, seemed to dry as I was applying & I ran out of it before I was done & this was only for a tiered plant table. To me, it seems like a weird cult..people/bloggers are going bonkers & painting everything & the cat. I see they even chalk paint books now!
I like all kinds of decorating styles, too but I really think the overdone painted furniture (and hacking..how many freakin’ changing tables does one need?!) is frightening..they are going after fab MCM pieces & great solid antiques with wonderful patina..all lost. Does anyone even restore anymore since painting is faster & easier?
Mary Elizabeth says
Tammy, loved your comment about painting “everything and the cat.” I can tell you that you don’t have to paint the cats while you have a project going–they will paint themselves, especially paws and tails.