

 Well, my dollhouse renovation project is going slowly. Summertime: There are just too many happy diversions! Even so, I did power on to complete the first to-do item on my checklist: Stripping and refinishing the floors. After much research and anxiety about making *the right* decision, I decided to finish the floors with classic, orangey Bulls-Eye Amber Shellac. Bug poop! Yes: Bug poop, in its liquid form, looks great on my dollhouse floors. I LOVE how they turned out. I LOVE Amber Shellac!
Here’s the process I used to refinish the floors…
1. Remove the original flooring
Above: As found in my awesome circa-1940 Neely-Hall dollhouse, pieces of woven wool were used for “carpeting” in the two living areas and the bedroom. Sheet cork was glued down for flooring in the kitchen and the bathroom. First step: Get this stuff off.
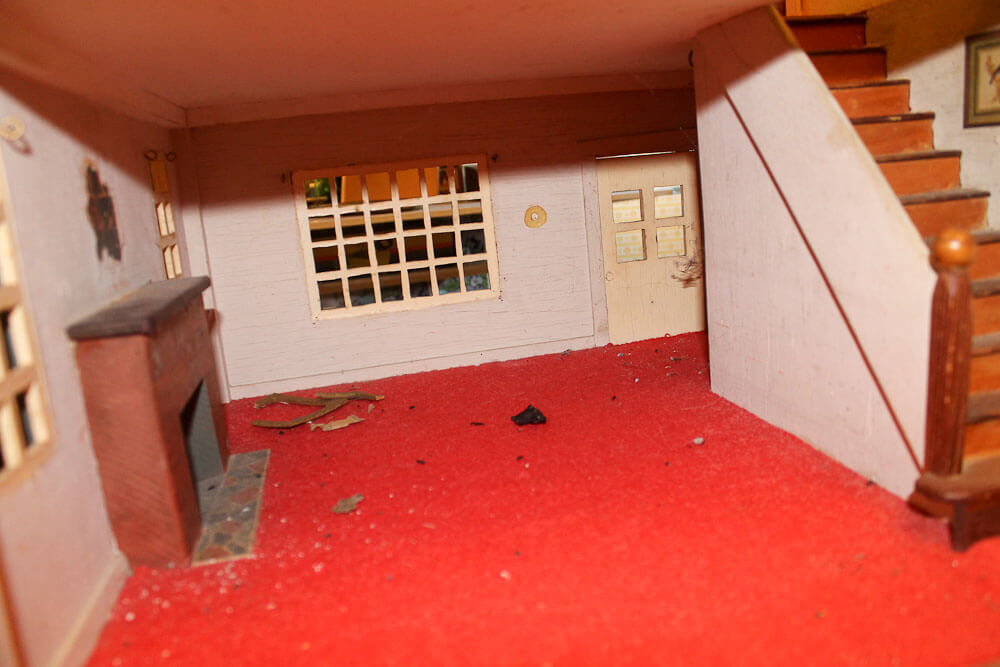

Above: The wool ripped out easily — one tug on a corner and it all came up. The adhesive was quite dried up. As you can see, in the downstairs living room, there were remnants of wool fluff left. Also, as I later discovered, I *think* there was amber shellac also applied on to the plywood floor under the adhesive.

Above: In the upstairs living room, the wool came right up. In this shot, though, you can see the paint that I needed to get off the floor. I am pretty sure it was oil paint. When Grandpa painted the trim, he knew he was going to put down carpet, so he didn’t bother being neat about where the paint ended.
 Above: Removing the cork was much more difficult. I used a steel paint scraper to get under the cork. I hit the end of the scraper with a ballpeen hammer to get more force.
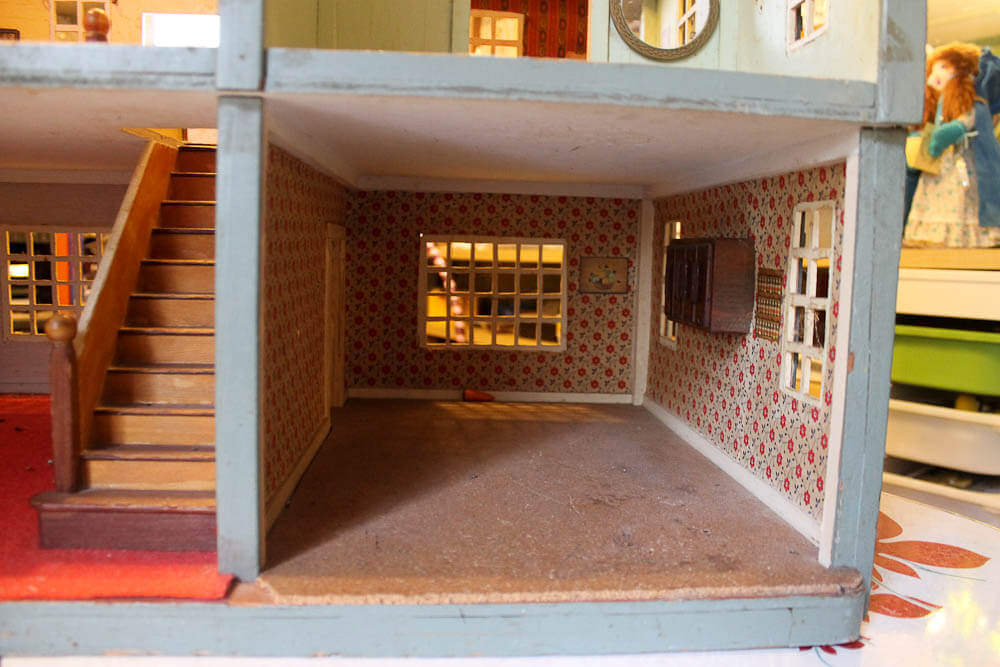
This strategy worked just fine, it just took patience. Above: There was cork in the bathroom, too. Here’s what the room looks like after I got the cork up. Lots of adhesive left, and paint along the edges here, too.
 Precautionary Pam reminds: There can be vintage nastiness in old materials, including varnishes, adhesives, flooring, and more. Do you own research, testing, consult with your own professionals on how to make informed decisions on how to handle. Read more about the hazards that may be found in old houses and for more links: Be Safe / Renovate Safe.
2. Remove all the adhesive and paint drips with Citristrip Stripping Gel
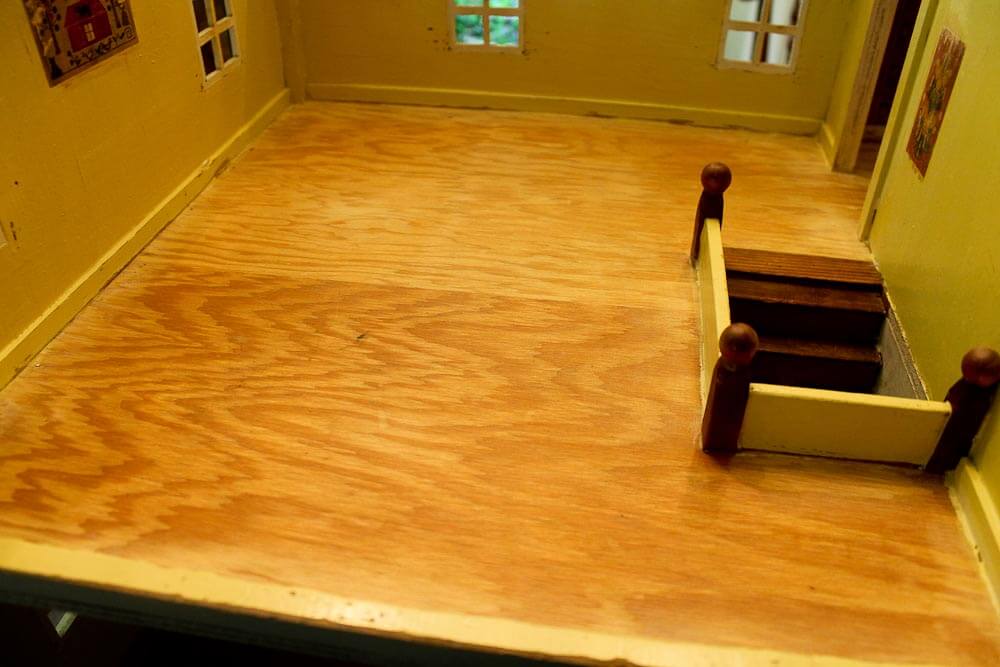 Above: I used Citristrip Stripping Gel, and it was pretty darn effective at getting up the adhesive, the wool and the cork. The oil paint was tougher; I really had to scrape at it — carefully — as the plywood underneath was soft and I didn’t want to wreck it. But with time, I got most of the paint up, too. What shadows of oil paint that remain along the edge of the floor, I just left… wabi sabi is better anyway.
As per the directions, I used odorless mineral spirits to clean up the Citristrip. And as per the directions, I did this all in a very well ventilated space and used the personal safety equipment recommended.
This was all quite messy, but it worked. Here are some thoughts from my experience:
- Follow the directions.
- I really liked the Citristrip Gel, including because it did not smell bad to me.
- I also liked it because it does not dry. You can leave it on a long time to do its thing.
- I started out leaving it on for an hour to see what would happen. Nah.
- Longer. Yah-ish.
- At one point, I left it on 24 hours. That did the trick, for the most part. In all, I think I ended up putting down the Citristrip four times.
- I did need to use a scraper.
- It was not really good for getting up all the old oil paint along the edges of the flooring.
- Overall: I definitely preferred it to other stripping products I have used before, because it seemed pretty gentle overall, not smelly, but got the job done. Other products that use harsher chemicals may work even more effectively, but golly, I loved the gentleness of this product — it was so much more pleasant to work with — and except for the most seeped in oil paint, it got everything up.
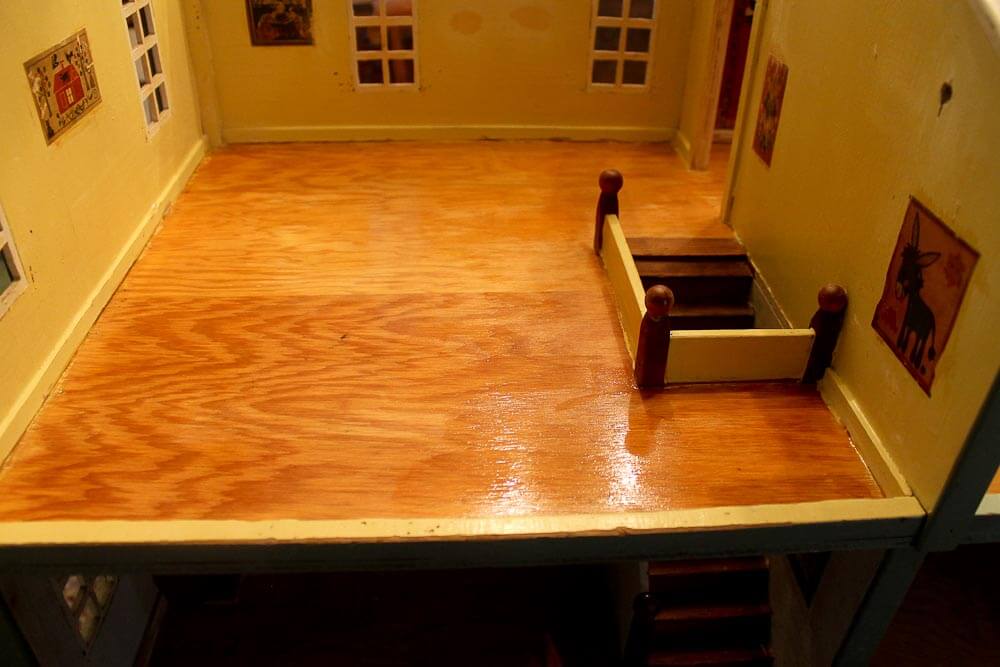
Why do I think there was Amber Shellac on the plywood flooring originally? It was while I was using the Citristrip that I decided that the plywood had likely been covered with at least a coat or two of shellac before the flooring went down. Gooey orangey stuff came up along with the wool fluff, for example. See how, after stripping, there is no gloss whatsoever to the wood? When I pulled up the carpet, there had been gloss on the wood.
See the stair risers? I also think there is Amber Shellac on those.
I also decided to go with Amber Shellac because I thought that’s what Grandpa would have used in the 1940s — when this dollhouse was likely made. Also, I thought the glowy orangey Amber Shellac would look lovely on the plywood. Which it did! Burnt orange is my favorite color. Heck to the yeah to Amber Shellac!
2. Apply Bulls-Eye Amber Shellac
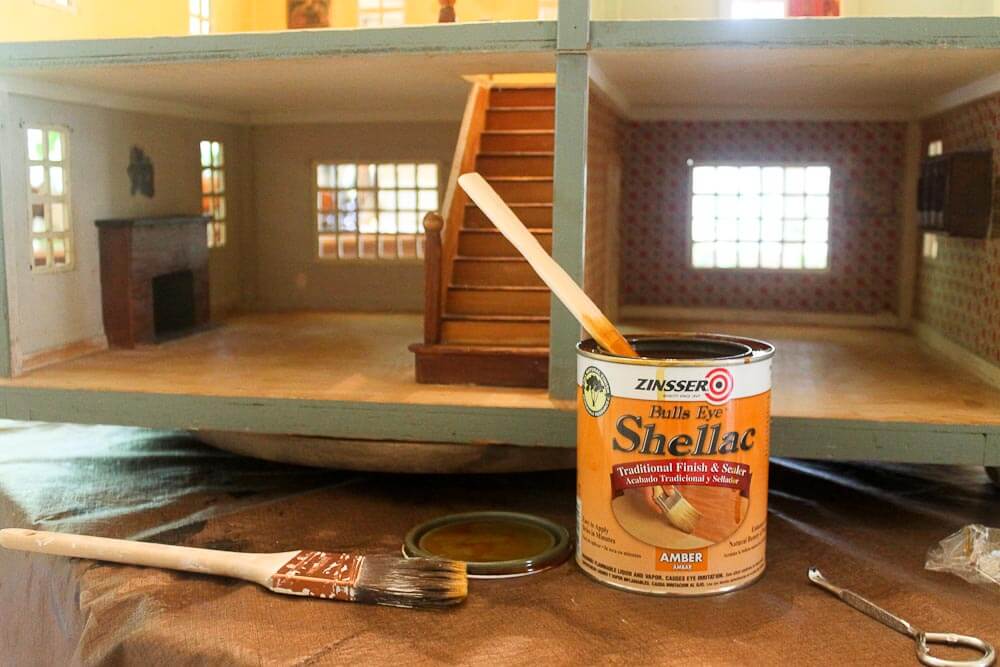
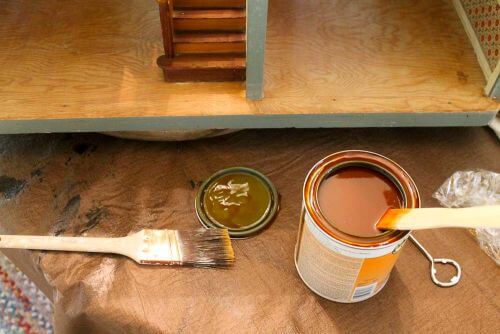
I followed directions. Nom nom nom. I love this stuff. Experience:
- Apply in very thin coats — and move fast while you work. Apply in the direction of the grain. Try not to overlap strokes. The thinner you get the Amber Shellac down, the better — if you apply too thickly, it will take much longer to dry.
- I used two angled brushes that I already had on hand. I am not sure, but I think one was natural bristle, the other, not. I think the natural bristle brush worked better — it worked very well. They worked very well.
- Let dry thoroughly between coats. I let each coat dry at least 24 hours between coats — because it was hot and humid outside — and because I had the time.
- If it’s humid outside, it will take longer; be patient.
- Follow directions — do this in a well-ventilated area and use any personal safety equipment recommended, etc.
- I sanded with high grit sandpaper in between coats — to facilitate adhesion of the next coat. After sanding, I wiped with clean lint-free cloth, the stuff shines right up, easy
- I just kept going until I got the coverage and gleam that I wanted — in this case, four coats. I did not sand the last coat, although I could (when you wipe off after sanding it’s still shiny.)
- The stuff goes a long way. I have tons left over in my quart can. What will I do with the rest? I already have a plan!
UPDATE: Reader Douglas provide the link to this Zinsser (marketer of Bulls-Eye Amber Shellac) bulletin, which describes how you can further thin the Amber Shellac if you want: http://sevenspaint.com/docs/tds/Zin%20clear%20shellac.pdf
See the reader Comment stream for further discussion of readers’ experiences using Amber Shellac. Remember, though: Do your own research — contact the company Rust-Oleum/Zinsser directly to answer any specific questions you have.
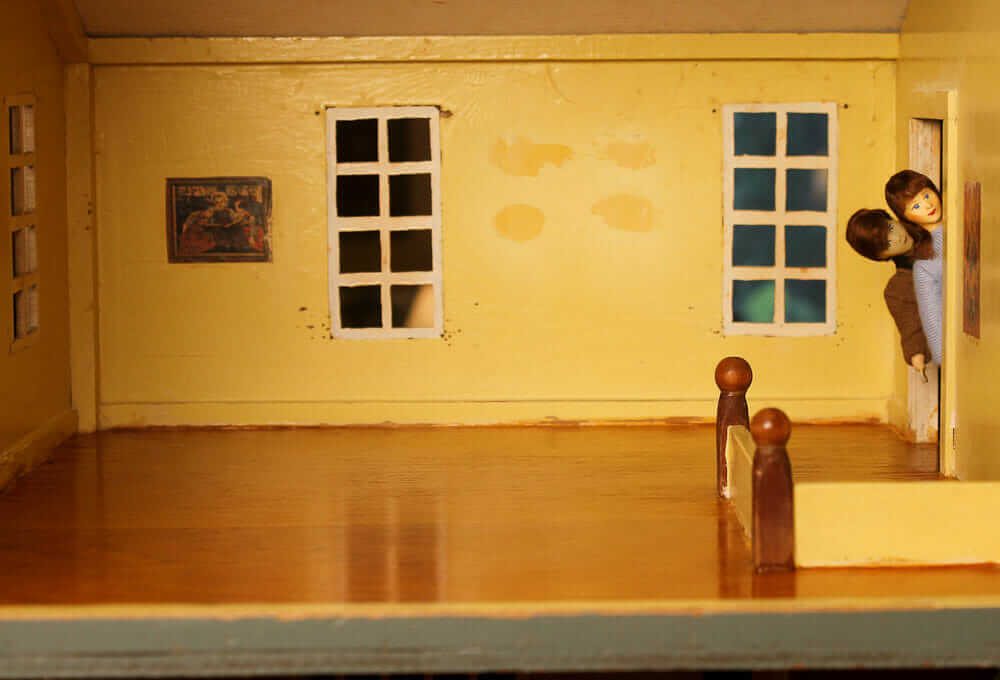
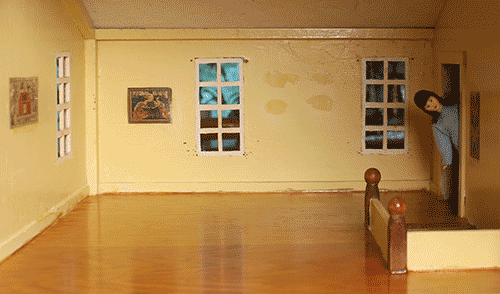
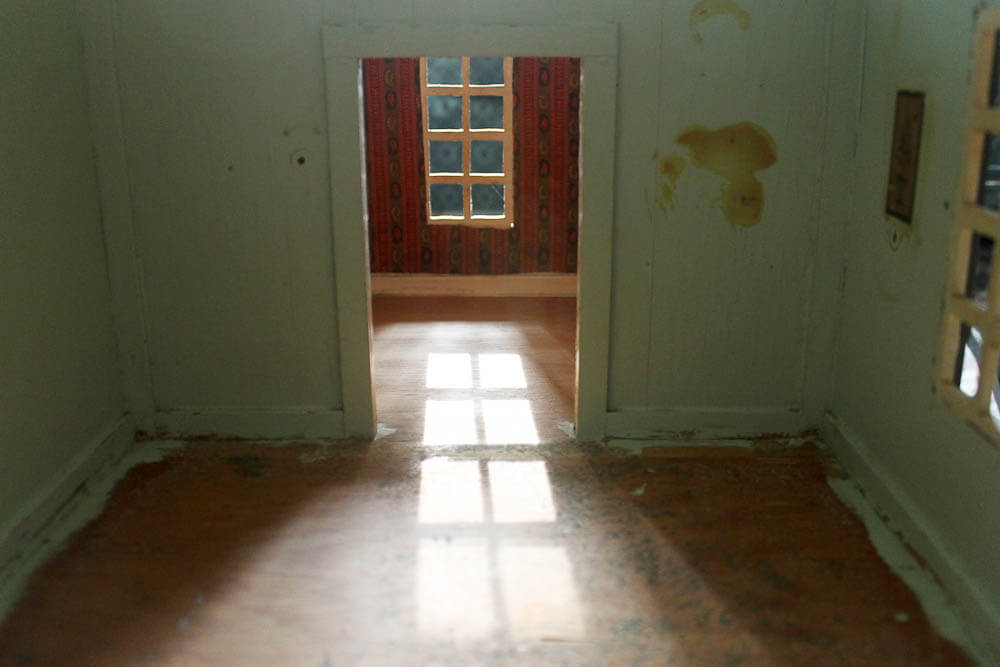
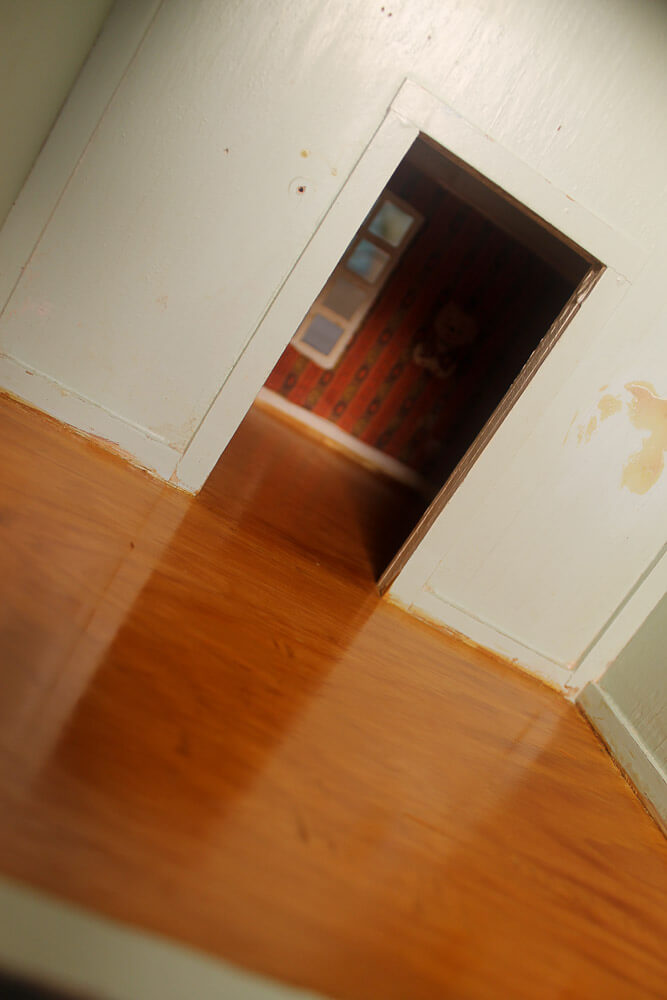 The floors turned out so well, I decided that, for the near term at least, I will not cover them with any additional flooring. I’ll use *rugs.*
So pretty! So shiny! So orangy! So vintagey! Makes me wish I had a knotty pine kitchen to refresh and renovate! Makes me want to do cartwheels!
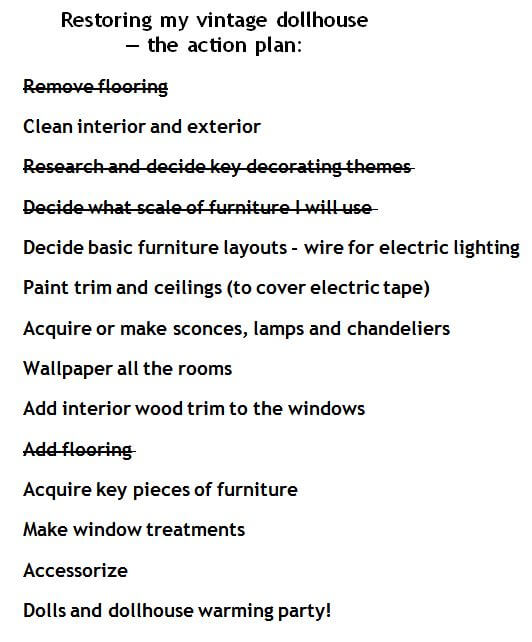
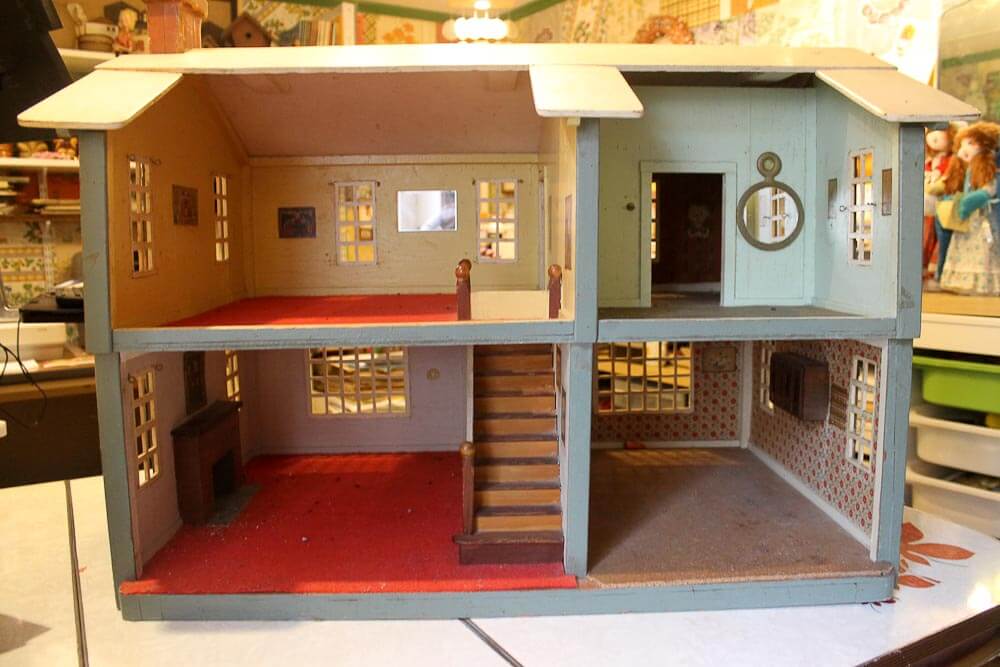
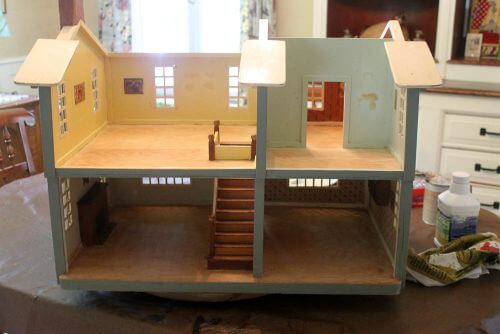
Next on my renovation checklist: Thoroughly clean the inside and outside of the dollhouse. Then: Make final decisions on basic furniture layouts so that I can wire the dollhouse for electricity. Yikes, that will be nerve wracking — I’ll be cutting some holes in my precious dollhouse!


LuAnn says
Love the floors, Pam! You did a great job. And I LOVE the whimsy of the dolls, both cartwheeling and peeking around the corner. 😀
tammyCA says
“Little Pam” doing cartwheels cracked me up!???? Looks great! I need to get some shellac for my dollhouse floors now.
And, Doug’s real floors look amazing..My real house oak floors are in sad shape after years of kids & pets & everything..and the thought of hiring someone to refinish the entire house makes me shudder (where do we move everything, where do we go? etc.) Can I actually restore them myself, one room at a time, without chemicals & fumes? I love warm, glowy Amber wood (that’s what my original floors look like & I never want any other shade)..I feel hopeful. 🙂
Douglas Camin @ House on Rynkus Hill says
Tammy – You can run shellac over existing finishes, but it will bring out imperfections in those finishes. So if you have a worn area that starts lighter, or severe scratches, etc, they will show through. Depending on how your floor looks would guide you on whether you could go over your existing finish or would want to sand it first.
Shellac is not as hard as polyurethane, FYI, but it is a lot easier to re-coat (since you don’t have to sand it all down) and to repair damaged spots over time. Taken care of properly, it will last just as long if not longer.
This is just my suggestion, but you may want to consider having your floors sanded to remove the existing coating (do you know if it is shellac or stain with polyurethane?) and get back to the raw oak and then put shellac on that if it has a lot of damage to the existing finish. It will look spectacular with fresh shellac – and if 10-15 years down the road it needs a refresh, all you have to do is what I did to mine and throw a fresh coating over the existing ones. I did our house one room at a time – you just tape at a joint in the wood so as not to create a lap mark – the fumes are minimal, and the coating dries in an hour (and is usable within a few hours to (safer) 24 hours.) It took a little practice to get good at it, but once I was rolling it was easy. I did whole rooms (4-5 coats) in a single day.
tammyCA says
Thanks, Douglas for that info.. I was thinking the floors would definitely need to be sanded first as there are now so many scratches, worn spots, etc..not sure how they were refinished before we bought the house..they have the varying warm orangey tones, you know, the random light next to the darker orangey tone throughout that I love & want exactly the same..so does the shellac make it all uniform & it’s the stains make it varying?
Douglas Camin @ House on Rynkus Hill says
There are a few ways to tell what kind of coating you have – if you take a little denatured alcohol on a rag and put it in in inconspicuous spot and it softens the finish, you have shellac. (polyurethane will not react with denatured alcohol.)
When looking at the finish visually, stain with poly usually results in the wood grain becoming much darker because of how it soaks into the wood. Shellac shows the grain but it’s less pronounced with less contrast because it really sits “on top” of the wood, and the color is in the finish coating, not in the wood. That’s where the easy varying orange\amber tones come from.
The stains or scratches will just show through because they make variations in the base wood – if one section is worn to bare wood, and the area next to it already has some color, the shellac will only serve to highlight that difference. That’s why sanding would be good if you have a lot of surface condition issues. Hope that helps!
Frances says
Oh man! I’m pretty sure that my ENTIRE house is Amber Shellac’d. Anything that’s wood, anyway. Doors, trim, kitchen cabinets, fireplace mantle… and after looking at this, I’m rather suspicious the floors are, too. It’s a beautiful finish, but sometimes I’m not sure that everyone appreciates the lovely warm glow equally…
Douglas Camin @ House on Rynkus Hill says
I’m a huge amber shellac fan too. It’s awesome stuff! Looks great in the dollhouse.
All of the wood floors in our house were shellacked, and I put a fresh coat on top of the existing.
Some things I learned:
1. Shellac is thinned with
mineral spiritsUPDATE: Douglas meant to say Denatured Alcohol – see his follow up comment. So you can basically keep thinning it out more and more before you apply it to a floor (it needs to be pretty thin to avoid lap marks.)Mineral spiritsDenatured Alcohol [updated] evaporates and leave the shellac behind.2. Fresh coats of shellac dissolve the coat below it because the
mineral spiritsdenatured alcohol [updated] in your new coat react with the existing one. When it’s dry you have one single coating, which is pretty cool.3. When it’s very thin, you can re-coat in as little as 1-2 hours. It does take a few days to a week to become very hard.
4. You can patch scratches pretty easily just by brushing
mineral spiritsdenatured alcohol [updated] over the scratch.Here are pictures of my floors when I shellacked all of them: http://www.houseonrynkushill.com/2014/05/02/boom-shellac-laca
Kate says
Your floors look awesome Douglas! 🙂
pam kueber says
hey Douglas, you say thinned with mineral spirits in this comment but denatured alcohol on your blog. Which did you use?
Note, the can said DO NOT DILUTE so I didn’t!
Mary Elizabeth says
Yes, I want to know which also.
Jay says
I got to wondering about this. The Zinser Bullseye page says brushes can be cleaned with alcohol so don’t think it’s suitable for thinning. Zinser makes no reference to this. I saw several sites where mineral spirits were lightly used on the applicator pad for smooth application of the shellac to prevent the pad from dragging. Sure hope Doug replies.
Erik says
ALCOHOL is the solvent in shellac, not mineral spirits/paint thinner.
DO NOT thin shellac with mineral spirits. Shellac is thinned with alcohol.
You can actually mix your own shellac by purchasing shellac flakes and mixing it with denatured alcohol.
Mineral spirits/paint thinner has no effect on dry shellac. Mineral spirits/paint thinner may be used to clean dry shellac finishes.
Alcohol will dissolve dry shellac. Applying a small amount of alcohol on a finished surface is an easy way to determine if it is shellac or varnish. If the finish softens, it is shellac.
Shellac is very easy to work with and easy to touch up or completely re-coat without the need to strip the original finish from the piece, even after many decades after the original finish was applied. The prep work is fairly simple in order to touch up or re-coat.
Fine steel wool is much easier to use between coats than sandpaper and shellac can be made very smooth.
Personally, I would not use shellac on kitchen cabinets. It has poor water resistance and in my opinion is not practical for woodwork that is exposed to moisture and/or needs to be cleaned on a regular basis.
Shellac is a great finish on fine woodwork because has a much richer appearance and enhances the detail of the wood grain better than varnish. However, just as it enhances the beauty, it will also exaggerate any flaws if the wood is not properly prepared. Therefore, for the best results more time may need to be spent preparing the wood (such as sanding) when using shellac than when using varnish.
Douglas Camin @ House on Rynkus Hill says
Kate – Thanks! Mary and I really love them.
Pam\Mary Elizabeth – Oops – my bad there. For some reason I confuse the two in my head. Denatured alcohol! (If you can edit my post, maybe you can switch the words so no one is confused…)
Shellac is measured in “pound cuts” – how much resin (shellac flakes) are mixed in with 1 gallon of denatured alcohol. Zinsser shellac from the shelf is a 3 pound cut. For a flooring application, you usually want it thinner (like a 1-2 pound cut) so that it gets exceptionally thin for each coat – way easier to apply this way using a pole mounted lambs wool applicator. I took a can of shellac, poured out half of it into another container, then added that amount of denatured alcohol into the halves.
I did find this technical bulletin from Zinsser about how to thin their products, with procedures: http://sevenspaint.com/docs/tds/Zin%20clear%20shellac.pdf
Jay – You use denatured alcohol to thin but the same properties allow you to clean the brush as well when finished by thinning then washing away the significantly thinned shellac with water and letting it dry. The denatured alcohol will cleanly evaporate just like on the floor, so if you don’t rinse it will coat your bristles with shellac (albeit a very, very thin coating.)
pam kueber says
Thanks, Douglas — the PDF is a terrific find — I will update the post and add it! Thank you!
Jay says
Doug, thanks for your updates and explaining the use of the alcohol. I should have realized that since the shellac is created by adding alcohol to the flakes that adding aditional alcohol would not be detrimental. The mfr probably states no thinning on the can because it has aready been mixed according to weight and the average person like me would not have the experience to properly thin it.
Anyway, I’m tempted to play with shellac to see if I can improve on the kichen cabinet appaerances provide a test proves the original finish is shellac. This site really provides some useful learnin’.
pam kueber says
Be sure to see the PDF that was added to the story, courtesy Douglas’ sleuthing. It addresses the thinning issue.
Mary Elizabeth says
Doug, those floors are wonderful, and who would have thought it was so easy to do? I am going to try this on my cabinet doors. Do I need to be sure they are clean and free of fingerprints, grease and dust?
Jay says
I think cleaning as a first step is a given! You won’t get good adhesion if the wood surface is dirty, just like painting walls and woodwork.
Douglas Camin @ House on Rynkus Hill says
Mary Elizabeth – I gave our floors a reasonable cleaning before coating them, but did not go crazy. If I was doing cabinets I would make sure you clean them in a way to remove any greases that may have accumulated. When it’s thin you need several coats – I think I put four to five on our floors. Each one brings a little more amber color though, so if you wanted only a light color you should start with amber shellac, then build your final layers with clear shellac once it hits a color you like.
eric says
The final finish looks great. There is a trick to sand the final coat and still get a good shine. Very lightly use at least 600 grit sand paper. Then use a piece of a brown paper bag to buff it out. This will bring out the shine. Got this tip from my brother in law who remodeles restaurants and bars. They always do this for the bartops-how they get super smooth finish with a good shine. I did it when i stripped my kitchen cabinets and put on clearcoat, surprised how well it worked.
pam kueber says
Thanks for the tip!
Mary Elizabeth says
Yes, good tip, Eric. I might need it to work on my kitchen cabinet doors.
Robin, NV says
The floors look gorgeous! Any final decision on décor? I think colonial would be perfect.
Kate says
I think I need to pick up a can of Amber Shellac! That stuff is gorgeous!
Steve H says
Looks wonderful! Nothing transforms a room like a freshly refinished floor. Some oval braided rugs would go great.
pam kueber says
Yes, the dollhouse came with several hand-braided rugs!!!
Mary Elizabeth says
My favorite observation on this post: “When Grandpa painted the trim, he knew he was going to put down carpet, so he didn’t bother being neat about where the paint ended.” It reminds me that when we renovate in the large scale or small scale, we often find ourselves in the heads of the original builders and homeowners.
Looks great, Pam. Keep up the good work.
pam kueber says
Yup, ME, sometimes in the head happily — and sometimes cursing!
Jay says
Well, since you’re in the mood; I don’t have knotty pine, will birch plywood cabinets do? They could do with a refreshing. Seriously though, the floors look great. I am enjoying the tale of two dollhouses. First it was MC now it’s the 40s. I definitely think it’s appropriate for exposed wood floors in the living room. Keep up the great work!
pam kueber says
Uncle Atom Amber Shellacked his birch (I think) kitchen cabinets. Here’s how it turned out — https://retrorenovation.com/2012/05/23/stripping-paint-from-kitchen-cabinets-and-returning-to-the-original-1950s-wood-some-therapy-but-great-results/
He also used Citristrip Gel!