

 Robert Dobrin, self-titled Chief Ding-Dong Officer at ElectraChime has already donated his time, materials and brain power to make an adorable mini chime doorbell and stereo console — complete with sound — for my 1955 Betsy McCall DIY Dollhouse. Now, Robert has done it again — creating a miniature-mini ranch house shelf for my dollhouse, based on the mini ranch house shelves that I built back in 2011. As expected, this tiny dollhouse wall shelf is magnificent — and so darn cute I could just scream. Robert’s creativity and generosity inspired me to make another installment of the lives of Mini Kate, Mini Jim and Little Leo in their 1955 split-level home. Enjoy!
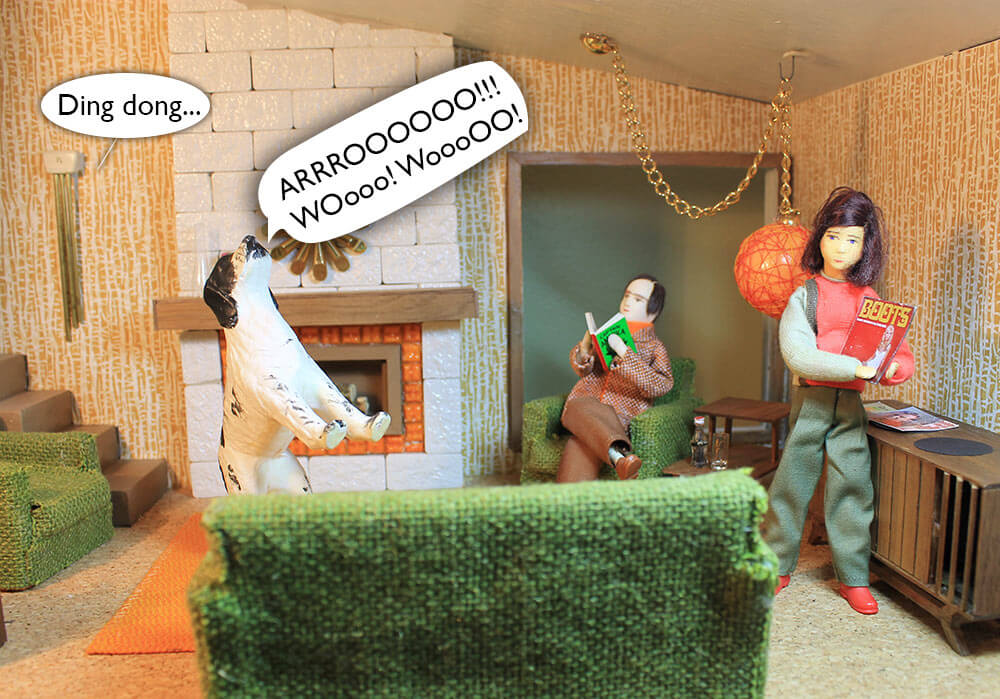 I think someone’s at the door…
 Oh, It’s Mini Robert Dobrin — Chief Ding-Dong Officer at ElectraChime Doorbells — the talented craftsman who made our doorbell and our Hi-Fi!
 Hello, Mini Robert!
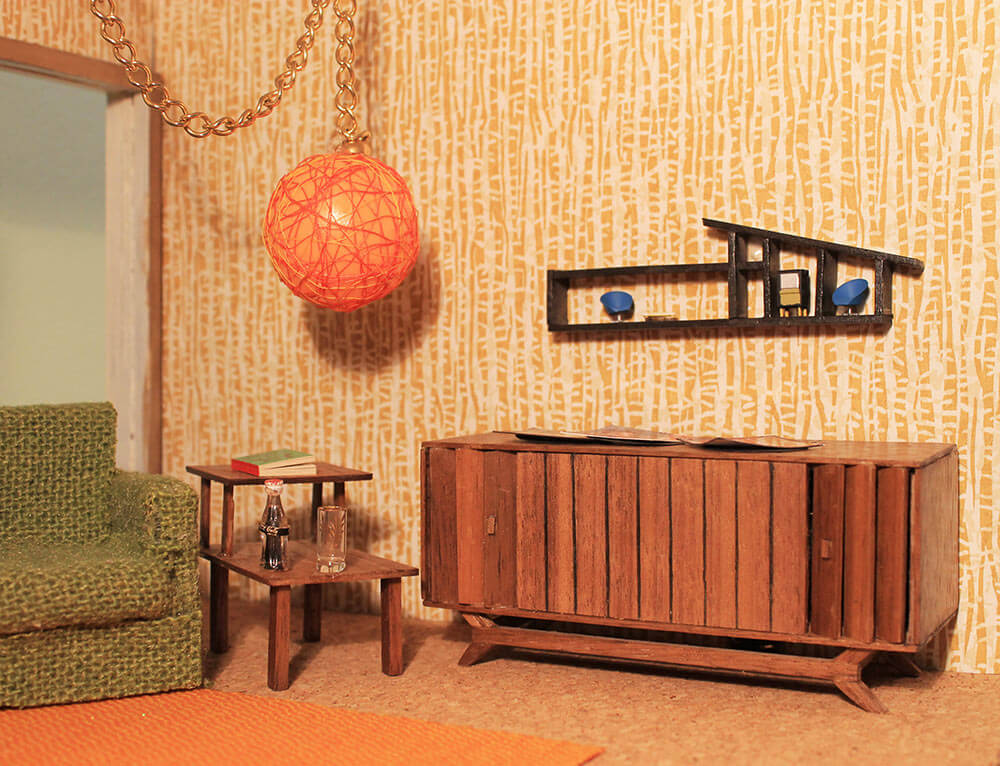
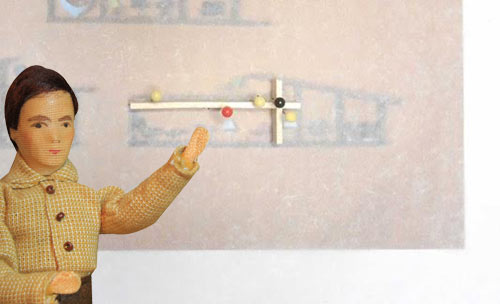
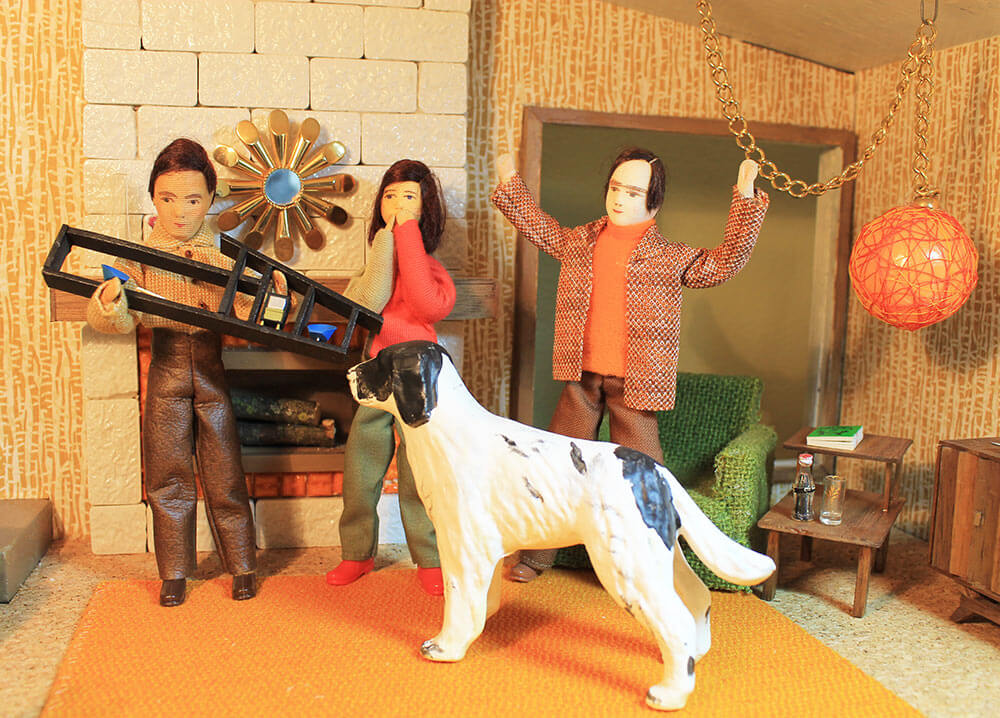 Oh look, Mini Jim, Mini Robert made us a miniature-mini ranch house shelf, complete with furniture! Wow, we love it!
 But where should we hang it? Hmmmmm….
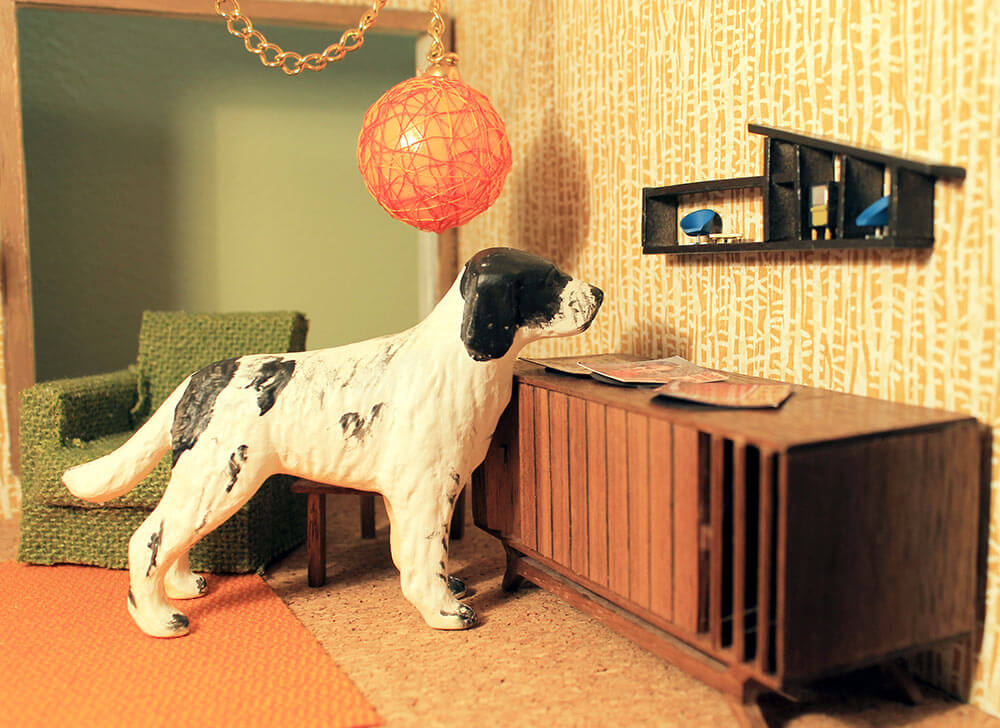
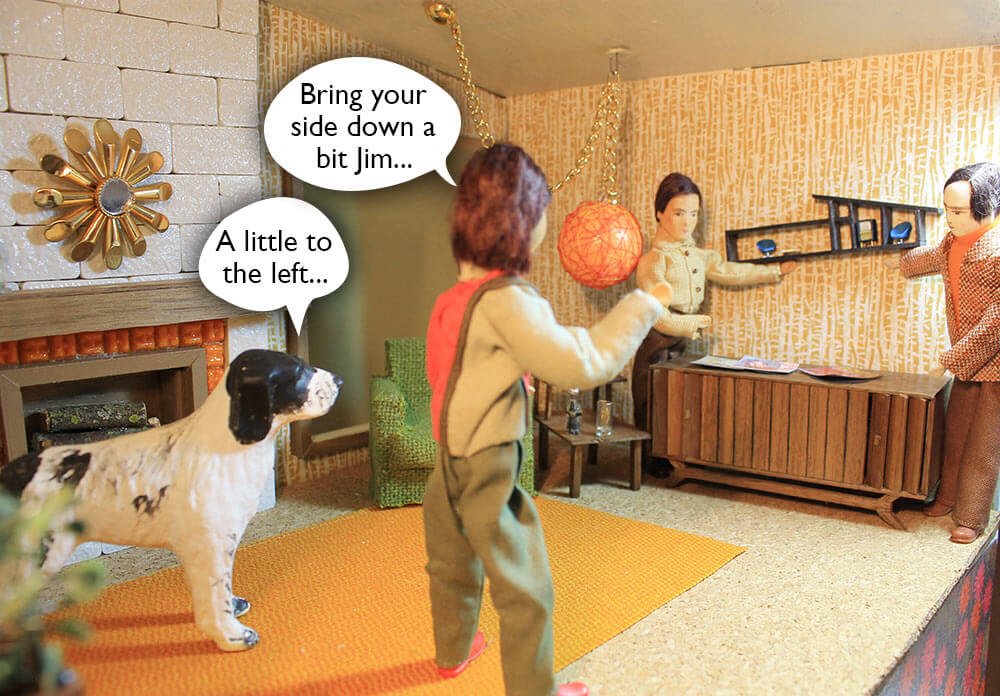 How about over the Hi-Fi that Mini Robert made for us as a housewarming gift?
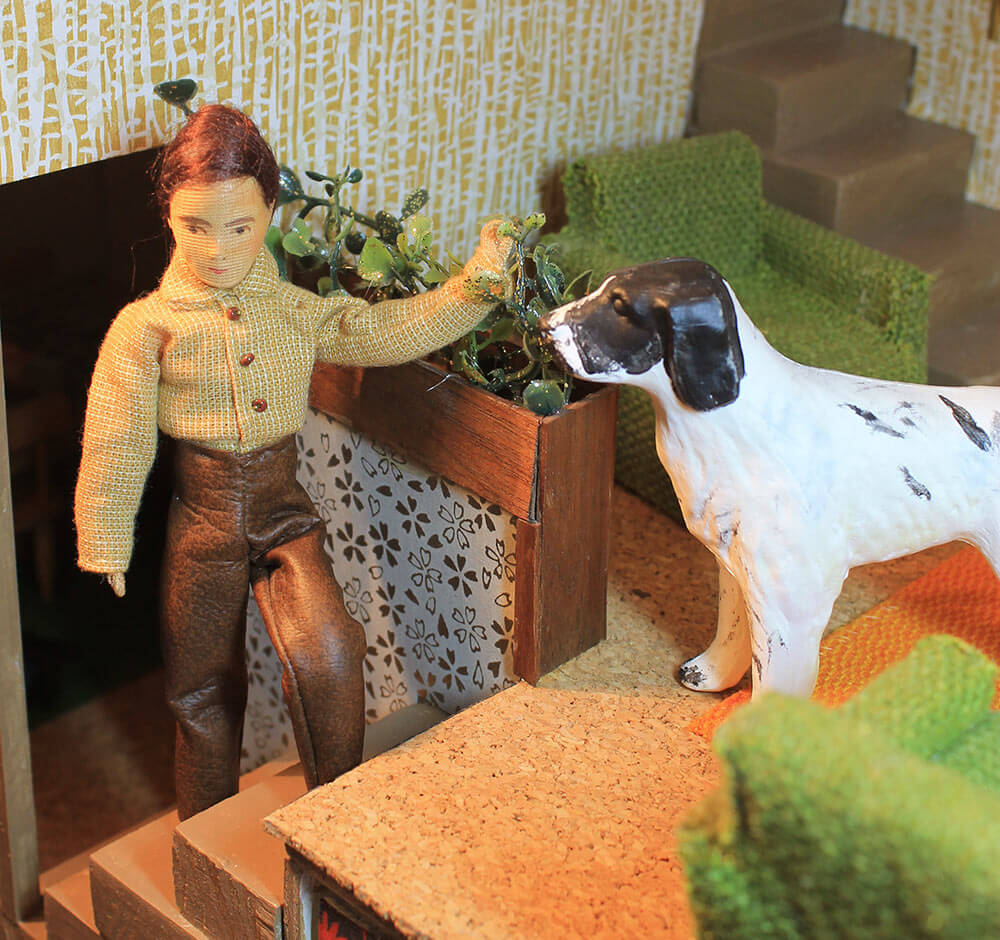
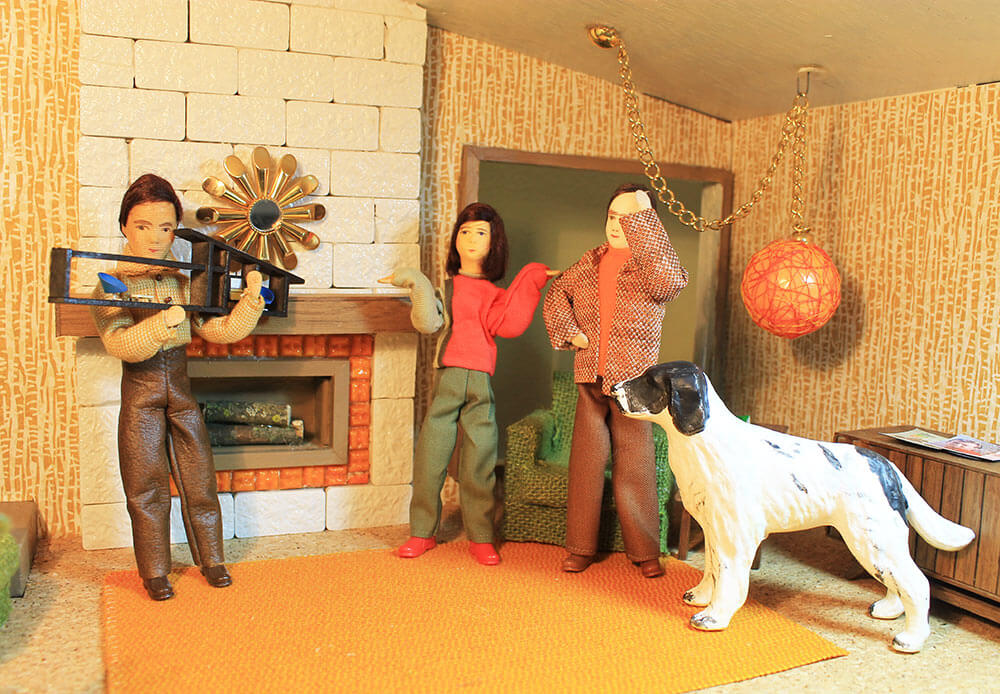
 Smartly, after that incident with the gift wrap at Christmas, Mini Jim and Mini Kate made sure to keep their new decor out of Little Leo’s grasp…
And now, because Mini Robert is so kind, he’s sharing how he made the miniature-mini ranch house shelf!
Mini Robert says:
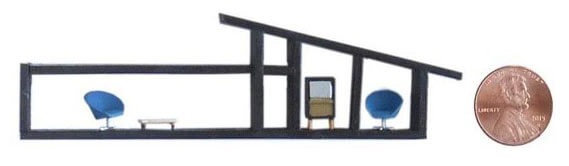
What do you do with a few hours on a rainy Saturday in Northern California? You build an extra-miniature mini ranch-style shelf for Kate’s Retro Renovation dollhouse.
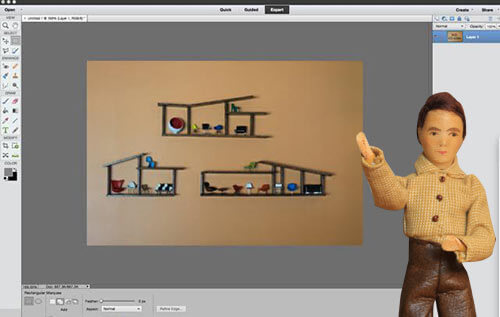
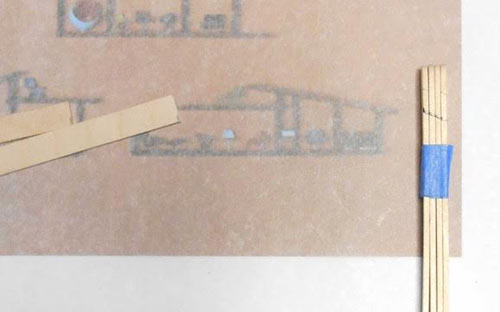
First, start by going to Kate’s Retro Ranch Revamp site and printing out a photo of her swell design. Copy the photo to just about any software program you have so you can scale the image. Powerpoint, Pages or even Word will work. Then scale the photo to the size you want to build the shelves. I used Photoshop Elements and printed the copied picture at 95%.
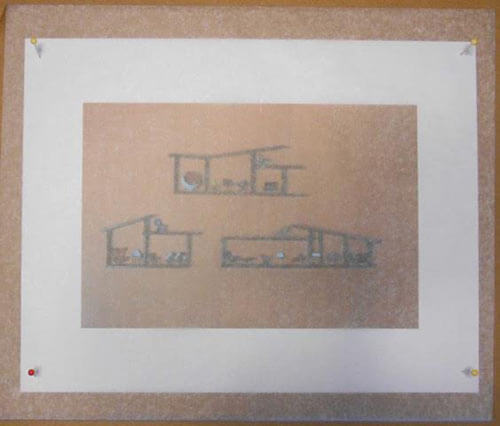
Next, pin your “plan” beneath a piece of wax paper over a piece of cardboard. You will work on this board. You’ll use the board to measure the correct lengths for popsicle sticks.
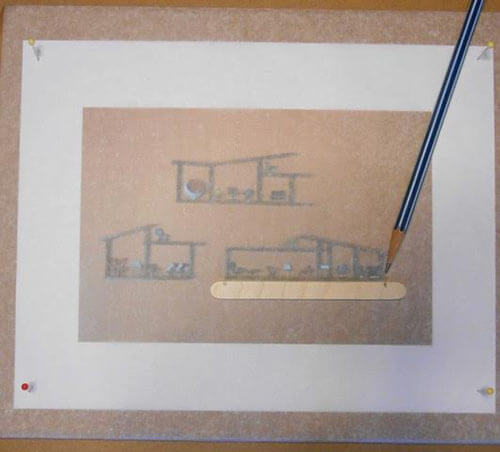
Cut the sticks to size with a mini miter box and mini-back saw. You can do this by hand, although a mini-miter box will enable you to get accurate, square cuts.
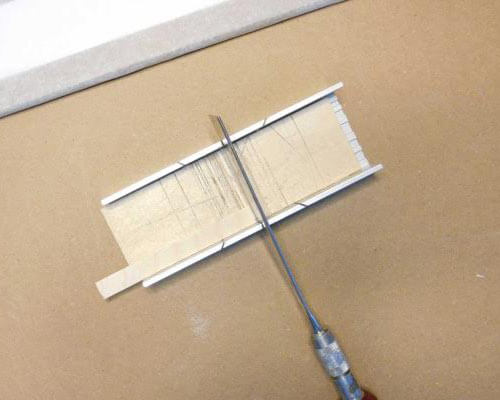
A mini-miter box and back saw will run you about $20.00 and will quickly be one of your best crafting friends ever. Find one at an artists supply store, ebay or Amazon (affiliate link).
The top of the interior walls where they meet the roof need to be beveled. Approximate the angle as best you can and then draw a line across the sticks. Cut on the mark with your mini-back saw. The 45 degree angle on your mini-miter box is probably too acute, so you will have to do this free-hand. Keep the pieces longer than necessary, you will cut and measure them later.
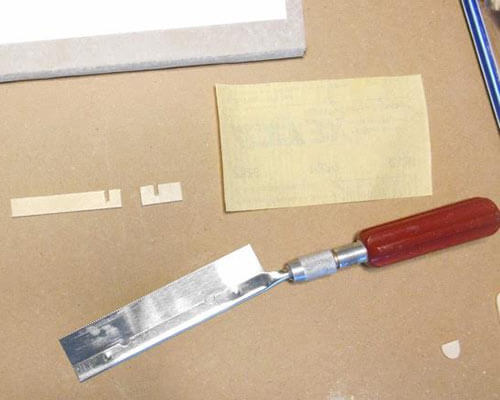
I made one interlocking shelf joint that would become a sturdy heart of the mini shelves. Probably not necessary, however I still remember my lessons from middle school wood-shop.
Glue the joint together and and pin the assembly in position to the plans. The remaining joints will in position on the plans.
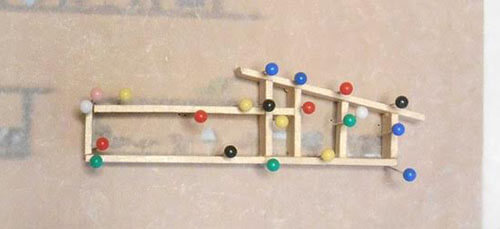
Measure, cut, glue and pin the remaining walls, roof and floor to the plan. I find it easiest to dip a tooth pick in a small puddle of wood glue and then apply it to the end of the piece you are joining. Use just enough glue for a good joint, and not so much that it makes sanding and painting difficult. Let everything dry and you are ready to paint.
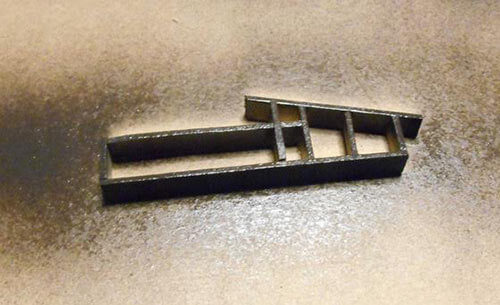
Remove the pins and go over everything with some light sandpaper or even an emery stick. Then hit it with several very light coats of spray paint. I used a can of satin walnut I had around.
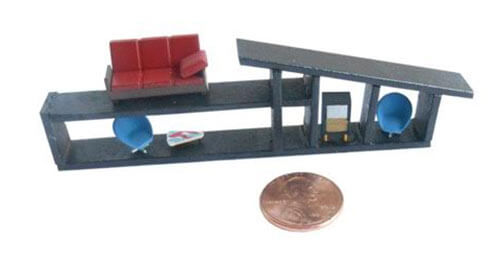
Now for the fun part, which may even be the most challenging part: decorating. I was inspired by some HO Scale furniture I found at a flea market that included some modern chairs and a really swanky coffee table. I dipped the tiny furniture legs in glue and then used tweezers to put them in place. You can find painted HO Scale furniture at Amazon, ebay or have some already designed, paintable furniture 3d printed and mailed from Shapeways. And if you have more patience and less chubby fingers than I, make some yourself.
Mega thanks goes out to Robert (and Mini Robert) for making yet another fabulous accessory for the 1955 Betsy McCall DIY Dollhouse!


Jan says
I wondered when we’d see more of Kate’s dollhouse – love it! Pam, how is your dollhouse coming along? Would love to see updates!
Elisabeth says
I am not the best with mid-century words/phrases… is pleather a word or is it a misspelling? Other than that confusion… this is AWESOME!!! I loved the “Kate Builds a Dollhouse” series and I’m glad that things are still being added to the dollhouse!
pam kueber says
See: https://en.wikipedia.org/wiki/Artificial_leather
I think the word is used generically to refer to artificial leathers – but according to wiki it may have been a brand name.
Betsy in Michigan says
Really swell! It really tickles me when I find a combo of two of my interests -miniatures, and mid-century mod! It inspires me to make definite plans (before the kids leave for college) to get going on the renovation of what I’ve been calling the Brady Bunch House (printed fiberboard dollhouse).
Gretchen in Greenwood says
I decided years ago that I lacked the co-ordination to follow any craft project that includes the instructions ” Use a toothpick to apply glue…” ! but applause to Robert for his ingenuity ( and fine-motor skills!) I loved this post! Kate, the dollhouse posts are so much fun.
pam kueber says
Yes, Robert ROCKS! Minis in minis for minis requires about as steady a hand as could possible be imagined.
Marta says
Lovely post!