

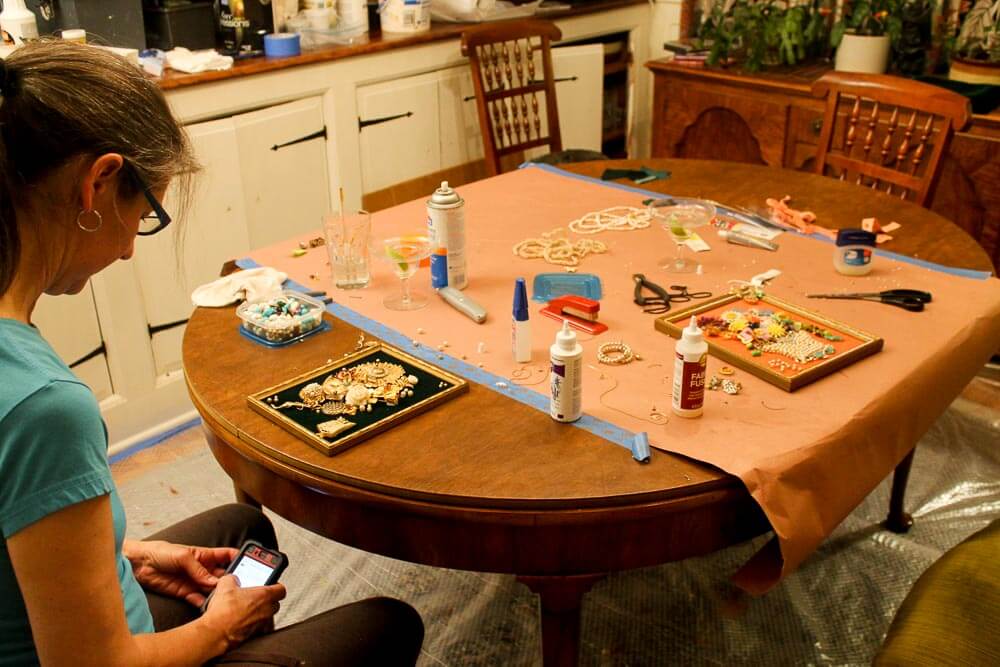
Making gorgeous one-of-a-kind works of art from broken, vintage costume jewelry is not “difficult” — but it requires a lot of patience — a lot of jewelry — an artful eye — and the appropriate adhesives. While Denise was at my house helping to faux bois paint my woodwork, we spent a crafty evening — five hours!!! — making framed artwork from my stash of broken jewelry, collected over the past few years at estate sales and thrift shops.
Read on for my tutorial, additional tips, and to see my springtime creation, too. >>>
Step #1: You need a lot of jewelry
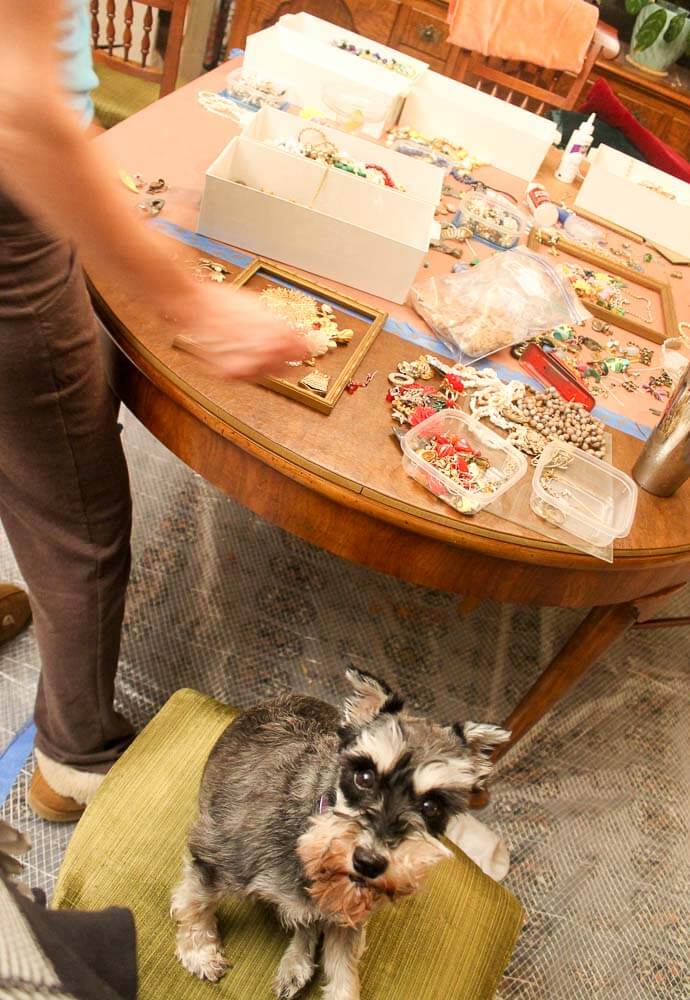
Don’t even think about starting this project unless you have lots of jewelry. As with making vintage Christmas ornament wreaths, the more jewelry you have on hand to work with, the easier it will be to create an artful project.
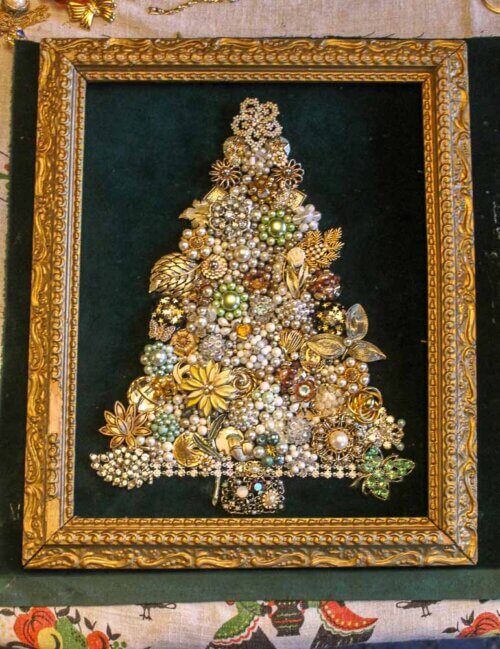
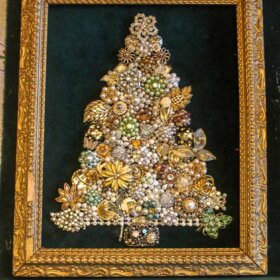
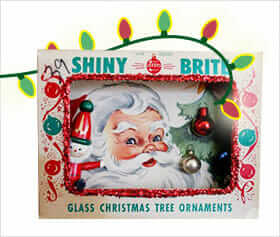
Above: I had six shoe-boxed size containers full of broken jewelry that I had collected, thinking that some day soon I would make a vintage costume jewelry Christmas tree (see these 17 examples in a recent story — gorgeous!) For this crafting excursion, we decided to try the art form to make something else … Christmas is a long way off.
- Tip: Look for broken jewelry at estate sales and thrift shops. You can even ask the estate sale organizer or thrift shop owner, “What do you do with the broken jewelry?” and tell them you’d like to buy it.
Above: Denise’s mini Schnauzer “Bug” thinks she’s a mountain goat. She climbs everywhere. She and Astro had a fantastic time playing.
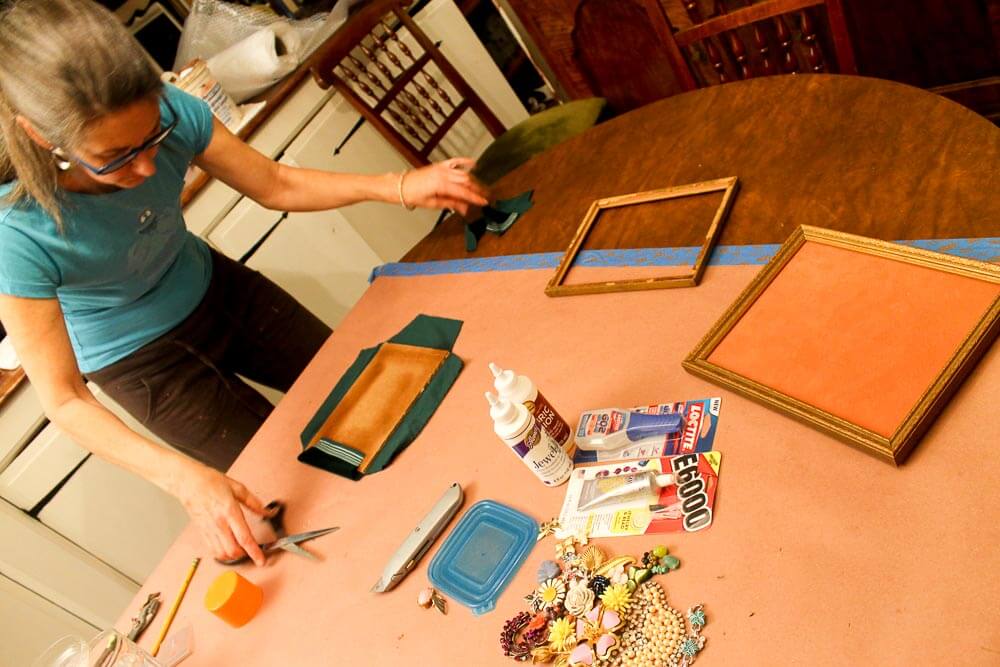
Step #2: Gather your supplies, including an adhesive designed to permanently stick metal to fabric
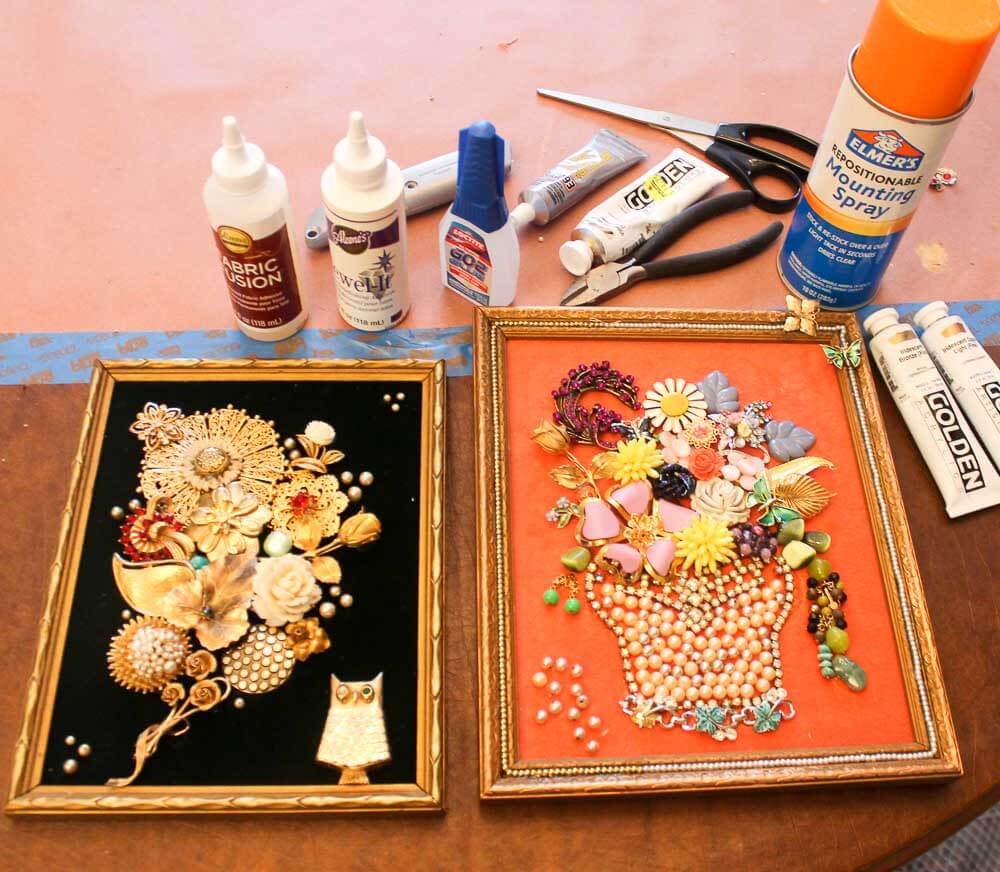
Supplies you’ll need for this project, in addition to the jewelry:
- Vintage frames — I doubt that I would ever use a new frame for vintage jewelry — the vintage-on-vintage really ups the everything factor.
- Velvet for the backing — I even use vintage velvet I’ve picked up at estate sales, I am just that way.
- Adhesives that will stick metal permanently to fabric, drying clear. Because I did not plan ahead so I could order on Amazon, I took a trip to Michael’s to buy adhesive the day we did our project. They had a nifty chart that showed which adhesives to use for which types of projects. For this one, I chose several glues that would permanently adhere metal and fabric.
- For this project, Denise tested Aleen’s Jewel-It Embellishing Glue. Note: All the links out to Amazon in the post are affiliate links — part of how I make money on the blog.]
- I tested Aleen’s Fabric Fusion.
- Note, both of these adhesives seemed to work fine; more on using these adhesives later.
- Utility knife and pliers to dis-assemble the frame, if required — use safety glasses [bits may fly; glass may not be tempered — be careful!].
- Scissors to cut your velvet and to cut the cardboard or matte board to size to fit your frame (if a backer board is not already in your frame)
- We used Elmer’s Repositionable Mounting Spray to adhere the velvet to the substrate (cardboard or matte board). You want to be careful not to use an adhesive that will bleed through to the front of the fabric. Denise, an artist, thought the mounting spray would be fine.
- Wire cutters to trim the back of broken jewelry if you need/want it to lay flat. Be safe: Wear safety glasses when you are wire-cutting the jewelry so that if an its or bits flies, it doesn’t fly into your eyes.
- Once into the project, Denise said we really should have had calipers to be able to hold and position the jewelry precisely. Amazon also sells calipers in nifty looking jewelry-making sets (you know I will have to try jewelry-making using built-up pieces of broken vintage jewelry soon; I may get one of these kits soon, although for now I find some satisfaction in dialing up the degree of difficulty by forcing use of my fat fingers. Or even just something like these:
- We also used iridescent Golden paints to brighten up parts of the frame, but in an antique-y kind of way.
- Hardware to hang the art or your solution of choice to display it.
Step #3: Prep your frame and fabric
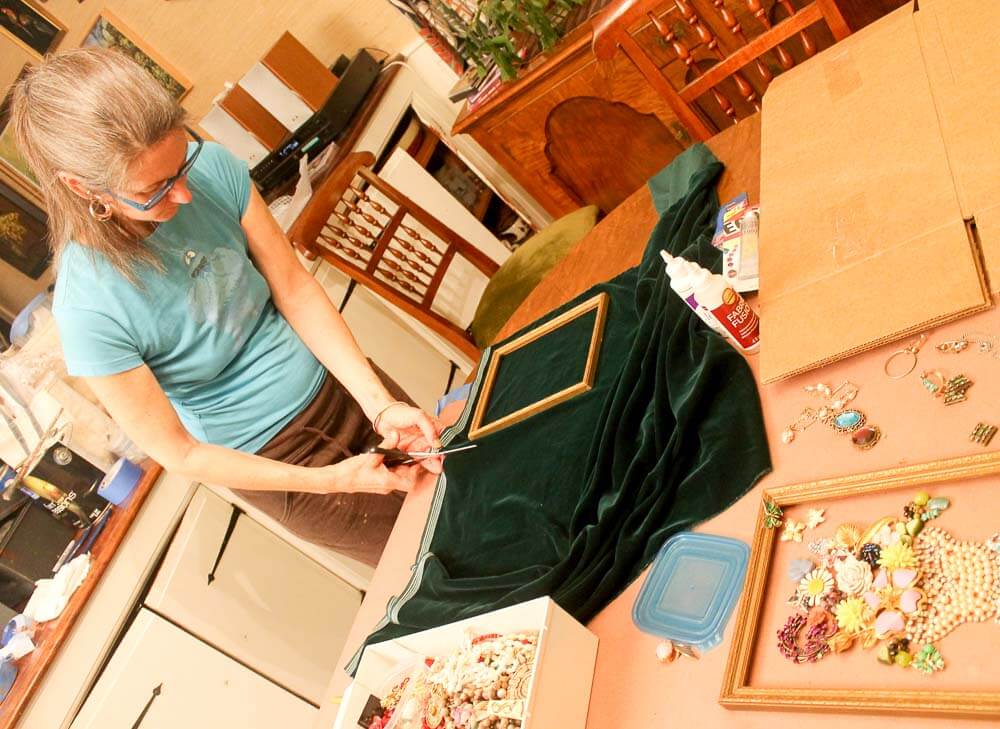
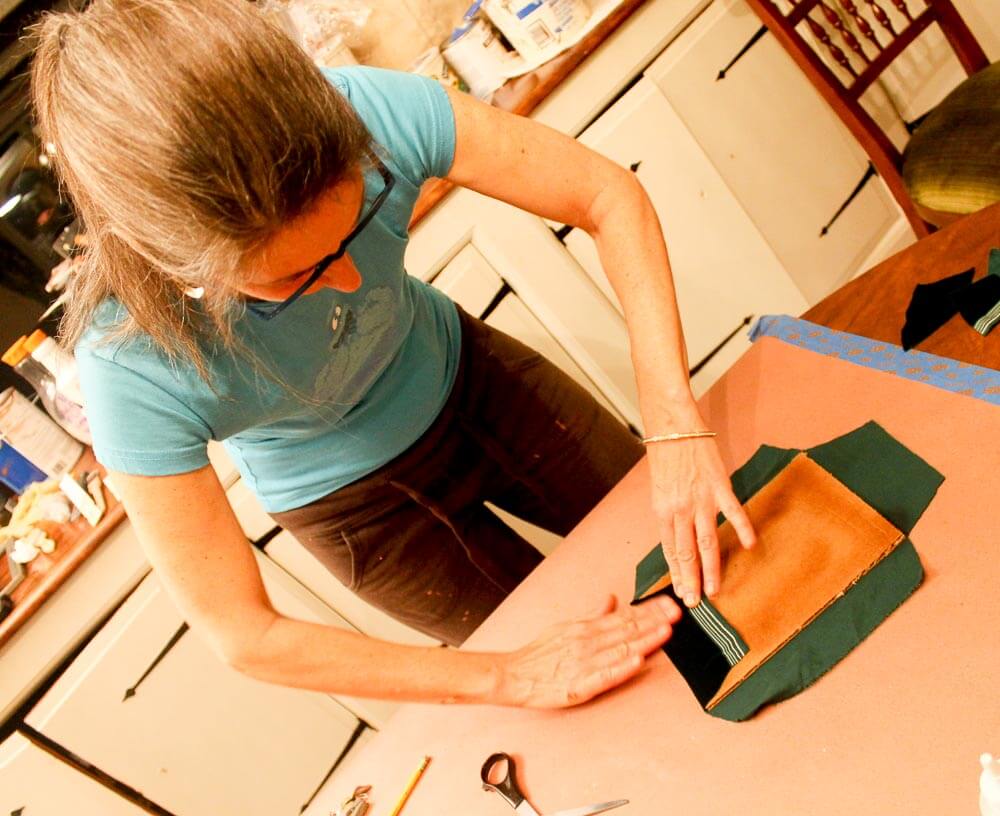

Above: Denise — who has a degree in art and is a professional decorative painter — shows how to properly miter the velvet onto the backing. Her frame came without a backer board, so she cut a new one to size using plain cardboard. It was substantial enough.
My frame had glass and an old print of no value in it. I carefully removed all. Be aware of potential safety issues, such as old glass may not be tempered… metal pieces may fly or the glass may break when you are working with it, to wear safety glasses… old paint on the frame also may contain lead. Be Safe/Renovate Safe.
In addition, my frame came with a backer piece, so I used that. Note, though:
- Tip: Before gluing, be sure your back will fit the frame once the thickness of velvet is added.
We used repositionable mounting spray to get the fabric onto the substrate. Read the directions and follow them — for example, we sprayed outside because the stuff is pretty noxious smelling.
But now, take note: Do not put your backboard into your frame permanently … You are going to arrange your pieces in the empty frame first, keeping your velvet backer close at hand so that, as you go, you can eyeball how the jewelry will look on the fabric.
More steps follow!
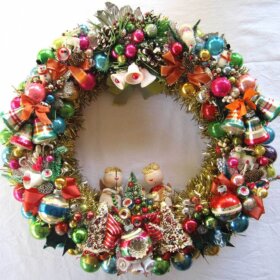
Meanwhile: Want more kitschy crafties? Check out our famous tutorial to make a Christmas ornament wreath — and video:
Step #4: Arrange your piece inside the empty frame
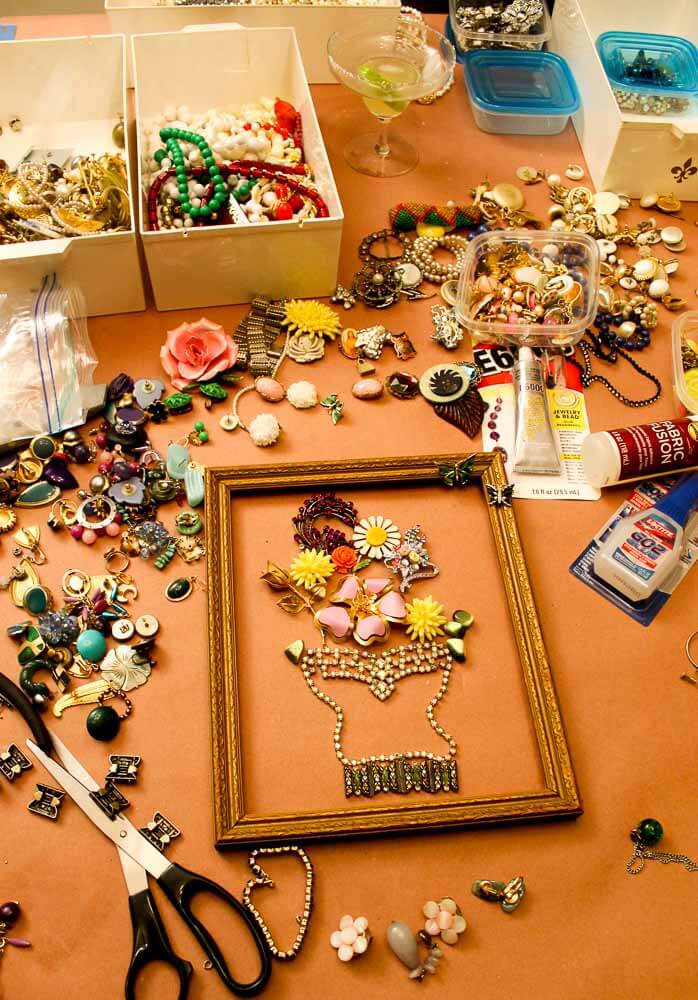
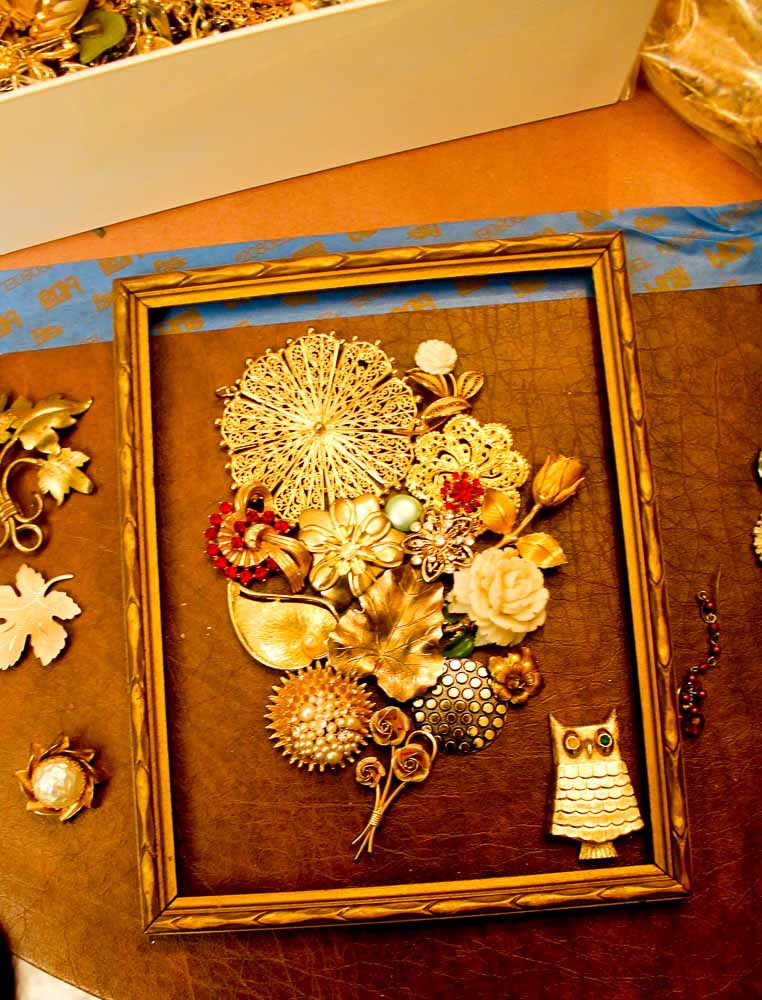
Now the fun begins! Start playing with your jewelry to get the composition you want. We did this inside the empty frames to get the balanced composition we wanted. We did not do the design work on the real velvet because we did not want to get the velvet dirty.
That said, as you are doing your design, it’s imperative that you keep the velvet color in mind. Will your jewelry look good on it? That’s a super important factor.
- Tip: If you are making a multi-color design — like I did — make sure you include a few pieces of jewelry that match your fabric color as closely as possible. Fortunately, I had a a piece of coral-colored jewelry and one coral-colored bead that I could add. Ideally, I would have liked three pieces — because odd numbered-matches are more visually dynamic.
Other design tips:
- Respect the white aka negative space. The empty space not decorated. As with any composition, you are going to aim for a good sense of balance, proportion, movement, colors, subject matter — all at the same time.
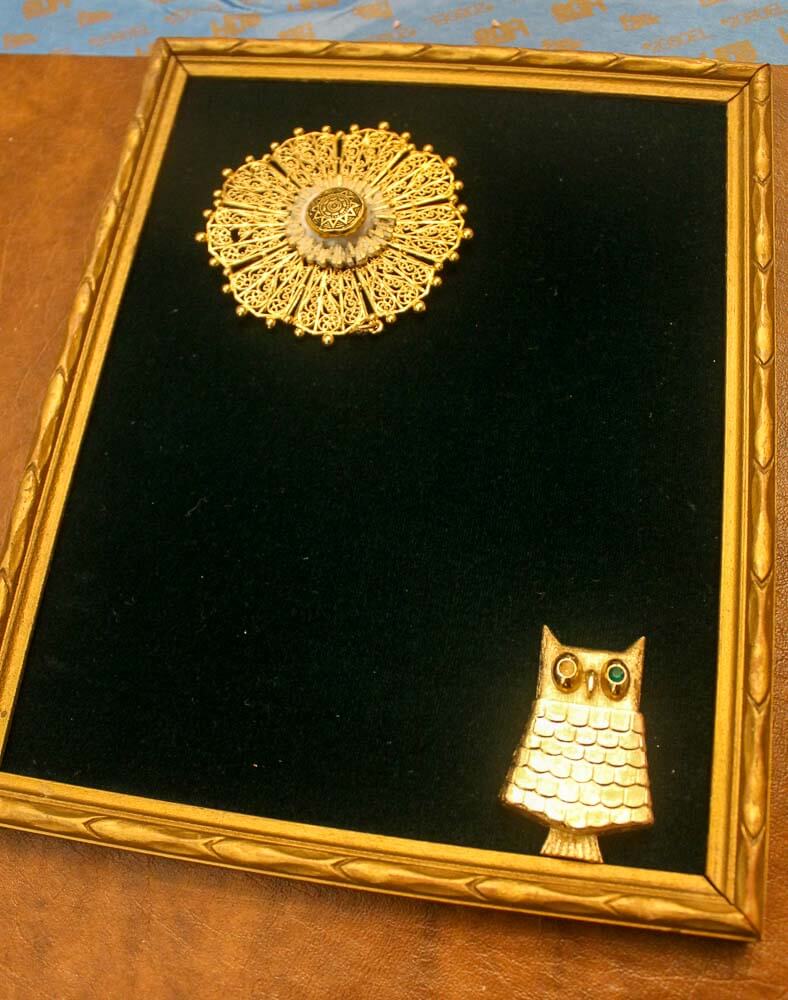
- A good way to get started: Stick to one principal colorway — like, gold — then work in only small bits of two more colors. That’s what Denise did: Gold with wee bits of aqua and red. Very pleasing.
- The other good way to get started: A bouquet, like I did. Even so — it may be that less is more — edit your flowers, keep your “vase” or “stem/s” simple, and considering narrowing your colors according to the principals of the color wheel.
- Respect the white/negative space. Yes, I’m repeating it. Your empty space is part of your design, your frame within a frame.
I only had three colors of vintage velvet to work with — dark green, coral, and burgundy — so we chose our jewelry designs accordingly.
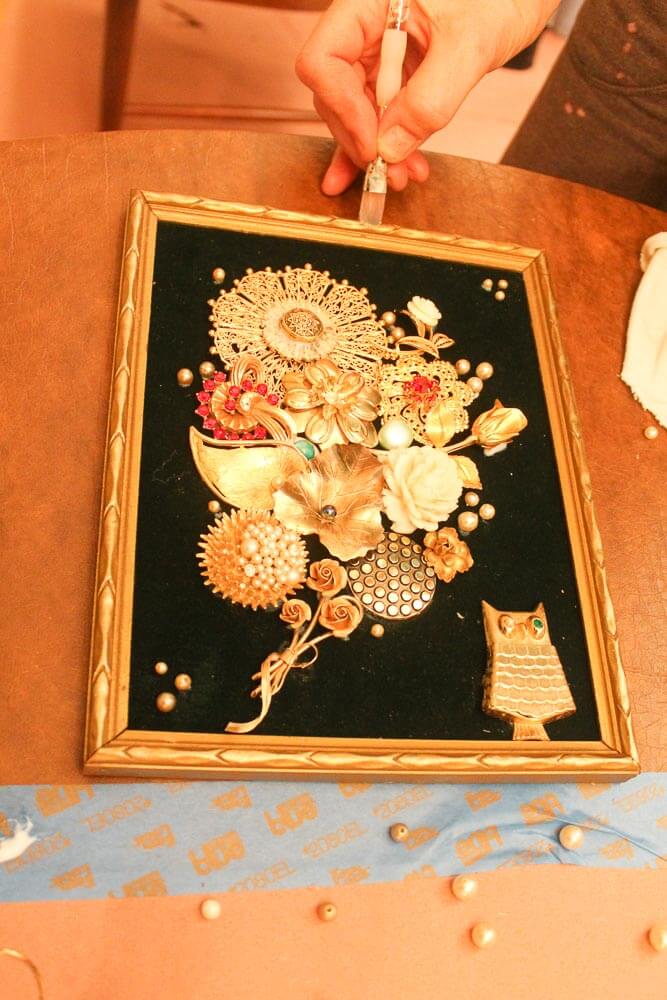
Step #5: Commit with your glue

Before committing to putting the piece on the frame, Denise took a photo of her off-to-the-side piece with her iphone. I was a little more freestyling, for once.
Our experience with the Aleene’s Jewel-It and the Aleene’s Fabric Fusion, the two glues we used:
- They both dried very slowly, which is fine… but which means that if you are going to layer stuff, you need to prop the higher pieces up to allow time for the glue to harden. This is not like high-heat hot glue, which dries very quickly.
- Mine left a snail-track where I had to move a piece of jewelry. Not horrifically. But take note, go slow.
- It took a lot of glue — I used it very generously to ensure good adhesion. I used at least 1/3 of my bottle for my relatively small piece.
- Hardened up clear.
- Hardened up strong!
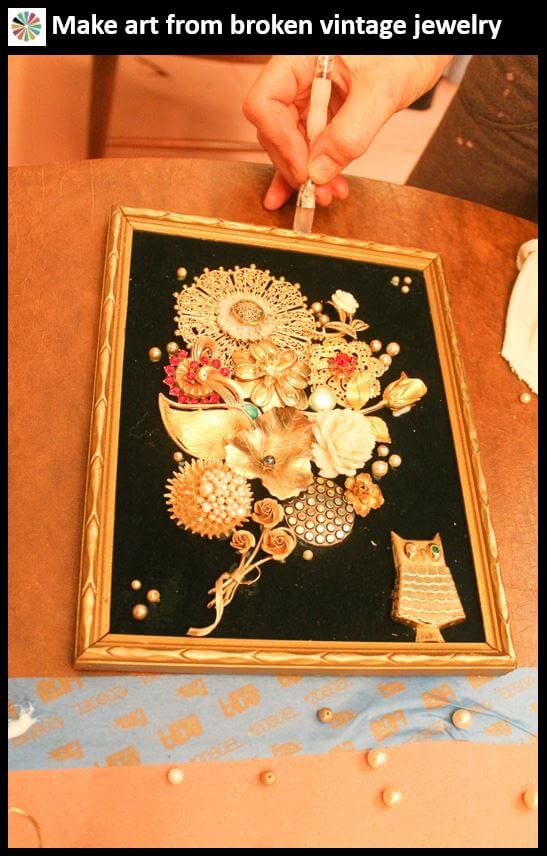
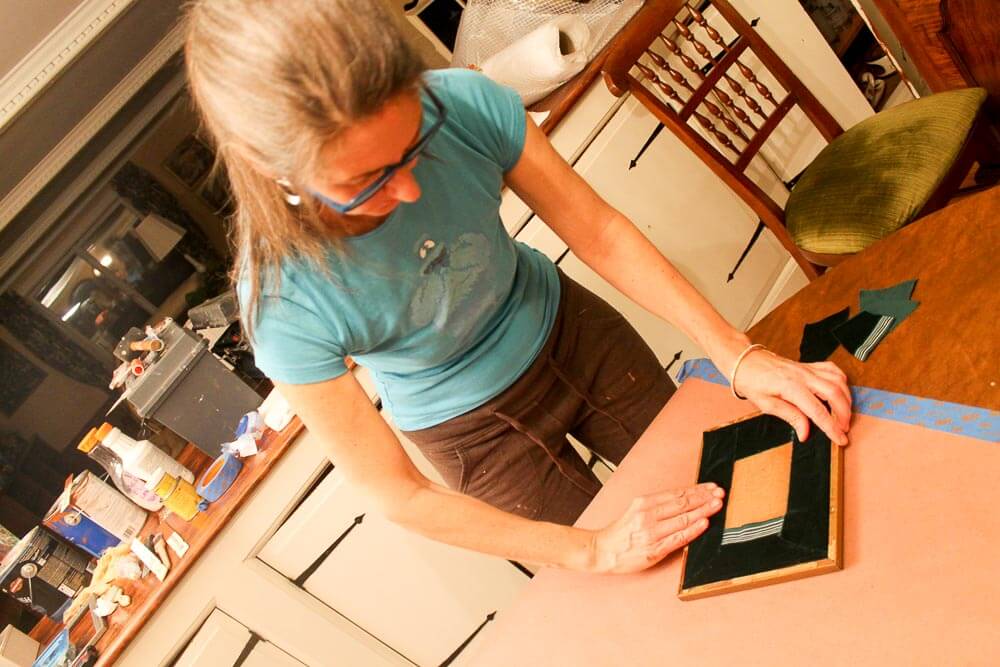
Step #6: Take a break… stand back… then fill in the gaps… add a bit more bling… gild your frame, etc.
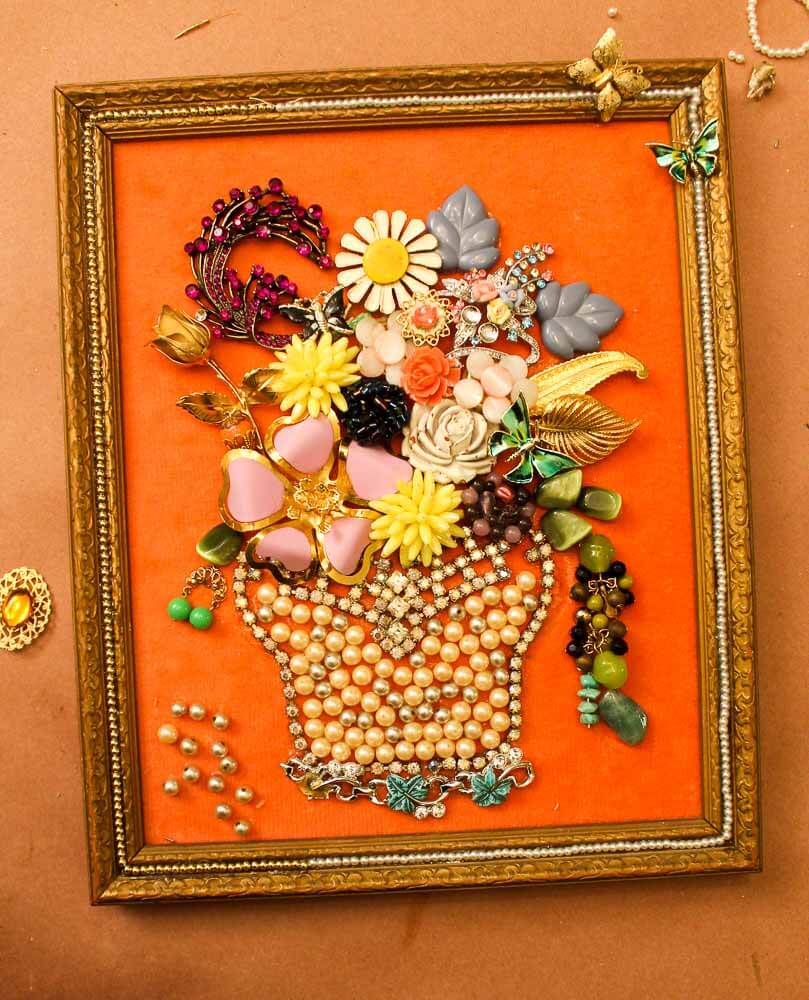
Above: Denise I suggested that I add the small bead chains inside the frame itself. Working right onto the frame is also a great way to add more dimension to the piece.
Above: Denise used my iridescent gold Golden paint to gild her frame a bit << these metallic Golden paints rock my world. Look: The Denise’s frame is framed with deco fishes — they really popped when she gilded. I then did the same to mine — but with a very light hand — we still wanted the patina of vintage.
She also added the “polka-dot” pearls and other little beads here and there after the main composition was glued down. For example: The Avon owl originally only had one green eye. It now has a second, pearl eye.
ALL OF THIS: After the main compositions were adhered to the velvet…. Take a break. Walk away. Take a breath. Have a snack. Take a walk. Come back with fresh eyes and see what else your piece may need.
It took us five pretty intensely focused hours to make these. We did take a 15-minute break to shove some sushi down our pie holes.
It was super fun. We were pretty ecstatic about our vintage costume jewelry creations!
Social media time!
Hey, we even cleaned as we went along… Yes: Vintage jewelry threw up in my dining room — but for once, not long enough for my husband to become alarmed (hi Kate, I miss you so much!)
Step #7: Did the glue work?
The next morning, we both rushed straight to the dining room table (before coffee even!) to see if the glue solidified overnight. It did! We made art!
Step #8: Secure your canvas to the frame and finish the back
I am so exhausted from writing this story. I’ll add a photo later. But cutting to the chase: Once you are sure your jewelry is secure, you can secure the canvas to the frame and finish the back. We did this after the artwork was all done. But, you could do it before you glue on the jewelry — that would be somewhat easier — although if you are gluing the velvet canvas to the frame, you are then”committed”.
To secure her canvas, Denise glued it to right to frame. She said to be careful not to use too much glue or it might urp onto the velvet on the front. She suggested “dots” of glue. You could also use tiny nails or staples … or perhaps a heavy tape.
Denise then cut and adhered a piece of kraft paper to the back (I will use vintage wallpaper!) and finally, added a hanger.
Not crafty?
I found these sellers on etsy who can deliver you artful vintage jewelry beauty quick as you can slap down your paypal:
- Vintage jewelry art from Vintage Redo
- … from Not Too Shabby Design Co
- … and from Dazzling Merrie


Cheryl Lindquist says
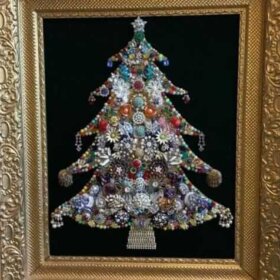
My dad made the jeweled Christmas tree. He made I think 4 if them. He also did a beautiful cross for the church he attended. When he glued his jewelry he put pearls on first in the form of the tree. Then he glued the jewels to the Pearl’s. They are beautiful. My daughter, his granddaughter has one and displays it all year.
Brenda says
I made two of these with pins from my childhood, my mother, and my grandmother on dark teal velvet fabric. They were absolutely gorgeous – for a few months. Now they are covered in dog hair and dust that the velvet attracted like a magnet. I can’t remove the dust from the velvet easily. Are there other ideas of how to avoid this, other than using a shadow box frame?
Diane Gibbs says
I use my glass as my mounting to piece. It is easier to get the glass cleaned, ( alcohol) it will also clean your pieces of jewerly. This will also clean over n over, thru time. Now it is a little more difficult to be sure your pieces glue hard. But you are also able to use more glue for it to be more secure. I have to check my pieces AFTER drying n cleaning with alcohol. But all you have to do is re-glue it. N then you will have no “snail trail” on velvet or satin. And I have very little to re-glue. BUT I always put my fabric/sprayed adhesive board with my fabric attached in the frame, after the glass is in the frame, before any jewerly is put on the glass.( make sure you have cleaned both sides of your glass) AND dress the back of your board with your paper. I advise a strong paper glued complete around the frame back. N put your hanger on at this time too.
I have had MANY BEAUTIFUL pieces. With this fashion of prep. Your finished piece will have a dimensional, clean, nice finish, that will be much easier to be kept clean.
Barb N says
I guess I’m having a senior moment because I’ve read this several times and I am still unsure how you put the jewelry back in the frame with the glass on the top. Is it that u just have to make sure the jewelry used is flat and u basically can only use pieces that will fit inside your frame with the glass on it?
Pam Kueber says
Barb, I read Diane’s comment a couple of times and think that what she is saying is that she adheres her jewelry to the glass itself, then puts the velvet — adhered to its own backer board — underneath the glass. I think.
If you wanted to do a piece with glass OVER the whole composition-on-velvet, then I think you’d need to find a shadow box to do it in.
Make sense?
Lisa says
Ive seen some cute individual pieces at Goodwill, do you ever buy just one piece at a time? If so how much would you pay… for thier costume jewelry. Ive seen the price at about $3 each… thanks….
love this ever since i saw one!
Pam Kueber says
Hi Lisa, I really only try to buy in bulk because it takes so very many pieces of jewelry to make an item. Yesterday at an estate sale, there was a nice little stash of old costume jewelry. I dug into it. There were some nice-ish things that would have helped build my inventory. The piece I wanted most was a a pretty Noel pin (would have been great in a Christmas tree) and it was just $1. But that was over my price limit for a single pice — I might have paid 50 cents. But wait, there’s this: I may go up today, the last day of the sale, in the last few hours, and see if the estate saler (who knows me well) will sell me ALL the jewelry left over for one price. I have found this to be a winning strategy and now have lots to work with and am always finding more. At the end of the sale, and if you’re nice, they just want to get rid of everything.
All that said, it really depends on how much you want the piece — for example is it really stunning, the “center” of the piece or a “filler”… how much time you have to search out bargains… vs. how much money you are willing to pay to cut to the chase and have enough to make something.
Kimberly Chapman says
I love these! My daughter and I, are going to get together and spend at least one day a month doing craft-projects, and I’m suggesting this one, to try. It looks like ALOT of fun!! And I will be looking for cheap jewelery everywhere!! Lol.
Pam Kueber says
That sounds wonderful! We are getting a snowstorm here tomorrow — I think I’ll pull out all my jewelry and glue etc. and make me something!
Mary Williams says
Recommendation on best glue.
If you want to keep your jewelry in tack,
what do you attach it to and with what?
I don’t want to destroy the value of the pin.
Pam Kueber says
Hi Mary, I think that if you glue the pin to fabric, you are risking destroying any underlying value for actual usage as a pin… Note, the story identifies the glues we tried for the project itself.
Heather Langlais says
Thanks for posting all the pic s & tips. I will making some of very soon!
brenda lamarche says
my besy friend mother had one years ago in the 70s .. it was beautiful .. shaped liked a christmas tree all her old jewels and some watches and lights ….that must of been a craft then ..it was we lived in longbeach calif .. i want to make one so i was looking on line and found this …..
Maddy says
Where can i find books how to make this art?
Madeline says
Where can I find a book with different designs and instructions and what supplies are needed
The JR aka Ramona says
Cool pieces. Kind of like a mosaic without grout.
I use Weldbond glue on my mosaics. It dries clear.
I love buying old jewelry and stuff to use in my mosaics. Never done an entire piece with just jewelry.
I love how yours turned out. They are beautiful.