


 If you love making crafty holiday decorations — and also love mid century architecture — this Retro Crafty is for you. It is a take on the miniature, vintage dime store cardboard houses commonly used, back in the day, to decorate the window sills and mantels of many homes during the holiday season. In my family, we know these as ‘putz houses’ — I’m told it’s ‘putz’ as in ‘puttering’ around. My family has a small, treasured collection — all passed down from my grandmother. Traditionally, these miniature architectural studies have never included mid century houses — until now. Using materials that you probably already have around your house, a few small additions from the craft store and my free downloadable pattern — you can start building your own mini mid mod mad Christmas village.
 Materials needed

- Cereal box
- Cardboard box
- Tissue paper (Kleenex or toilet paper can also be used)
- Paint (any kind you have around that can be used on cardboard)
- Hot glue gun and glue sticks (can also use craft glue of any sort)
- Felt squares (white for snow and grey for sidewalk)
- Scissors, X-acto knife, ruler
- Transfer paper or charcoal (to use for transferring design onto cardboard)
- Glitter
- Bottle brush trees (I got a bag of 8 small trees in three sizes from Michaels for $1.99)
- Beads or other small objects to decorate trees
- Flameless (battery operated) tea light to place inside house
Click here to download Kate’s free Putz house pattern
Step 1: Trace or glue pattern to cardboard
 Print out the downloadable pattern. Cut along the edge of a cereal box so that you can lay the box flat.
 Use charcoal or pencil to color the back of the print out to make transfer paper (or use pre-made transfer paper).
 Trace over the print out pattern, pressing firmly. (You could also glue the pattern directly to the cardboard and cut it out directly.

Step 2: Cut out house pattern and lightly scour folds
Now that your image is transferred to the cereal box, you can cut out the pieces.
 I recommend using a ruler and x-acto knife to carefully cut out the patterns (including window openings).
 Pressing very lightly with the x-acto knife, score the parts of the house that will need to be folded (corners of house as well as tabs).
 Use the same method to transfer the roof template to a piece of cardboard box. (Note: you could also use cereal box, but I prefer the thicker box for the roof because it adds dimension to the roofline.)
 Lightly score roof where the bend is so that it is easy to fold — you may have to score both sides depending on the thickness of your cardboard.
Step 3: Paint the house
 Now it is time to paint the outsides of the house. I used acrylic paint that I had on hand, but you could use anything from spray paint to leftover wall paint for your house.

 I used one color for the main part of the house and a different color for the front door and some trim around the window openings.
 If you are painting with a brush that has a very fine end, you can make the doorknob by dipping the end of the paint brush in paint and stamping the door knob directly on the door.
 Make sure to also paint the top of the roof (even though we will be covering some of it with “snow.” Then let everything dry before moving on to the next step.
Step 4: Assemble house on base
 Add window shades (or frosted windows) to your house by gluing on a piece of leftover white tissue paper. If you don’t have a tissue paper stash to work with, kleenex or toilet paper will also work.
 Cut out a base for your house from a cardboard box. My base is 5.5 inches x 9 inches but you can make the lot your house is on any size you like.

 Cover your piece of cardboard with white felt and hot glue the edges. I trimmed the corners of my felt so that the base would be level and not lumpy on the edges.
 Now it is time to build the house on your piece of real estate.
 Decide where you would like to position your house on the board. Make sure the tabs are folded cleanly and attach them to the board with hot glue.
 Do the same with the back piece of the house, taking care to make sure the house lines up squarely in the corners. Glue the tabs on the corners to connect the house front and back securely.
 To add some snowy sparkle to the roof edges, run a bead of glue along the roof edge — one side at a time.
 Wait a second or two for the glue to cool a bit and then dip it in the glitter. (You could also use craft glue if you have it handy)
 Repeat this technique to all sides of the roof.
 Attach the roof to the tabs with hot glue — and your house is constructed.
Step 5: Landscape the yard
 Now is the time to add all the little finishing touches to the house and yard. You can add snow to the roof by cutting out some felt shapes and attaching them to the top of the roof.
 I dipped my roof snow spots in glue and then in glitter for a sparkly effect. (You can also spread some glue on the front yard and shake glitter over it to make the “snow” on the base sparkle.
 Next I cut some small rectangles out of a piece of grey felt to act as sidewalk stones.
 I found this bag of mini bottle brush trees at Michael’s for $1.99. They are the perfect size for my mid century holiday house.
 I also purchased white mini trees (same price and size) to color myself.
 Using food coloring and water, the mini bottle brush trees can be dyed any color you would like. (Note: using red food coloring will yield a pink tree — the food coloring is not strong enough to make dark colored trees.)

 Using hot glue, glue the trees to your base.
 You can make a snowy tree skirt for the tree with a circle of felt with a slit cut into the center.
 Once the tree skirt is glued on, it looks like snow piled around the base of the bottle brush tree.
 Using the same methods, attach as many other trees as you would like to your yard. (I rolled the pink tree in glue and glitter before “planting” it in the yard)
 If you like, now is the time to decorate your mini trees. You can use beads from an old necklace or cut apart some holiday garland like I did to use for tree decorations. Use your hot glue gun to attach the decorations to the mini trees.
 All that’s left now is to put a flameless (battery operated) tea light into the back of the house and ta-da! Precautionary Pam reminds: Don’t overload this puppy with wattage and don’t leave it lighted unattended.
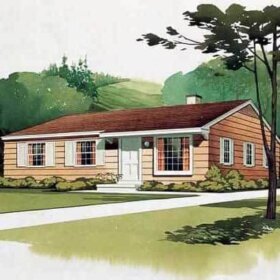
 Wouldn’t you like to live in this tiny holiday ranch home? It looks so warm and inviting. This would be a great retro crafty project for holiday get togethers: Using minimal money and resources you could easily host a holiday housebuilding party for friends and family — and create a whole new generation of putz houses for your kids and grandkids to enjoy!
Make more mid century “Putz” style houses:
- See all the designs
- Want to know why these houses called “Putz”? Read our vintage Putz house history and online guide.


Tamara Giles says
I love these houses and I’d love to make them all. I can only find the patterns for #1, #2, #8, #9, and #13. I’ve scoured the website looking for the others. Could anyone point me to the other patterns, pretty, pretty please???
Pam Kueber says
Here is the putz house category >> https://retrorenovation.com/category/holiday-2/putz-houses/
Cecilia Bourezg says
LOVE the Midcentury modern Putz houses & how generous to supply the templates!! Can anyone tell me the scale of these (1:12, 1:24, etc)??
Thanks!!
Pam Kueber says
Hi Cecilia, I don’t know about “scale”. Kate also does not work for me anymore. I guess you could… measure the height of the door to know?
Cecilia Bourezg says
What a smart idea!! Thanks.
Grimm says
I did the math and the scale of most of these templates is roughly 1:48 or “O” scale for train models. The A frame cabin template is smaller but you can size it up like I did so the door is about 1.75″ to make scale.