

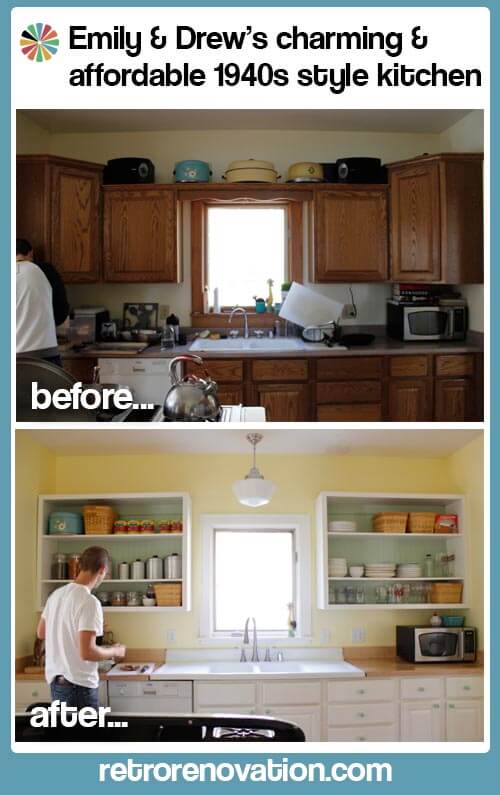
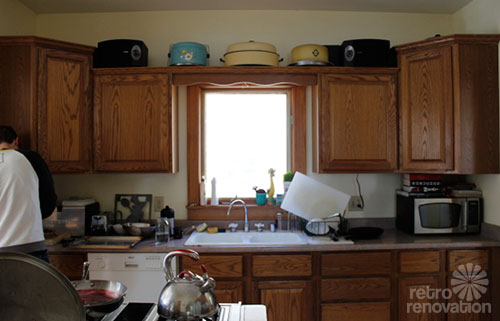
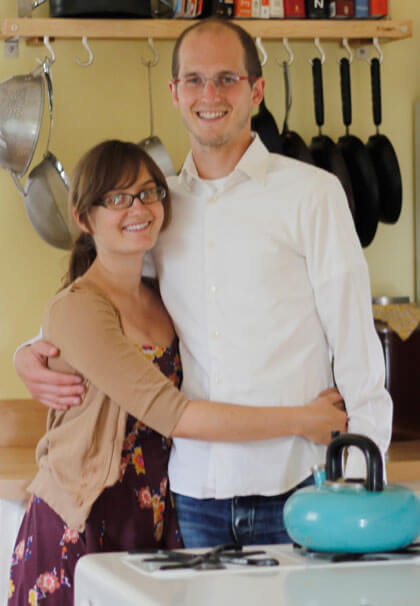
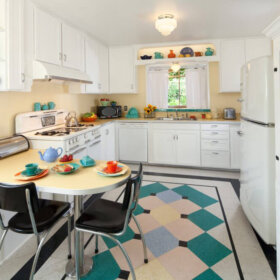
 Reader Emily and her husband Drew fell in love with their 110-year-old Victorian house immediately, even though it needed a lot of work. With a small budget that had to stretch to cover remodeling expenses for several rooms, they had to get creative. With their latest project — the kitchen — they worked with the plain Jane stock kitchen cabinets already in place, made a few strategic investments, styled to give of a colorful vintage vibe — and rolled up their DIY thrify sleeves. Months of hard work painting, building upper cabinets, installing a vintage drainboard sink and loads of other projects paid off for the couple. Their kitchen is so sunny and happy.
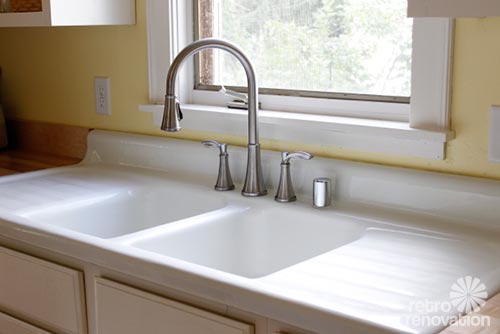
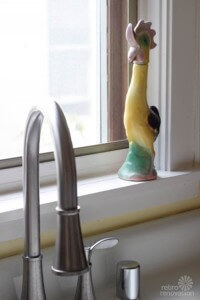
Emily made the time-lapse animation above to show how the kitchen sink area progressed over time.
Emily writes:
The house is a 110 year old Victorian, and was literally falling apart when we bought it (think: plaster chunks falling out of the walls, electrical cords duct-taped around doorways, peeling paint, etc.) But it had great bones and lots of details that reminded me of the house I grew up in – maple floors, decorative trim, tall ceilings… I was smitten. Honestly, even the disrepair seemed like a not-altogether-bad thing – it meant we’d get the house super cheap and that we’d make it our own.
We got a housing rehabilitation loan in conjunction with our mortgage. Our budget was $30K, which we stretched to cover moving one bathroom, adding another, and creating a hallway on the second floor. Anything we could do ourselves, we did…. The house was in bad shape when we moved in (110 years old, with virtually no maintenance done in the last 30 years), so we’ve gut remodeled almost every room now, but on a budget, doing most of it ourselves, and using salvaged wood/trim/fixtures whenever possible. The ReStore is my friend. I re-plastered and painted every room in this house (plaster as in lathe and plaster, not drywall repair). To anyone doing the same: I’ve tried every plaster compound known to man. Quickset45 is the only way to go. Trust me. [Editor’s Note: Precautionary Pam reminds: Remember, readers, vintage houses can contain vintage nastiness like lead paint and asbestos — get your own trusted properly licensed professional to help you determine what’s in your house and its layers so you can make informed decisions.]
The hardest part of that initial renovation was being without a bathroom. For a shower, we connected a hose to the basement slop sink and hung it from one of the rafters. You had to stand in a cement mixing tub to shower, and then run across the concrete floor to turn the water off. Did I mention this was December, in Wisconsin, in a 110-yea- old house? Yeah, that hurt.
The kitchen and back rooms were a remodel/extension done in the 90’s (the architectural equivalent of bachelors buying a new pack of tee shirts instead of washing the ones they have?), so those were last on our to-do list.
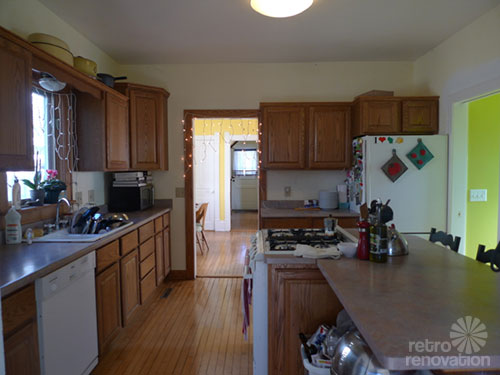
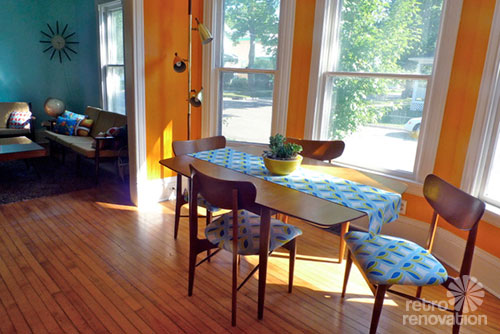
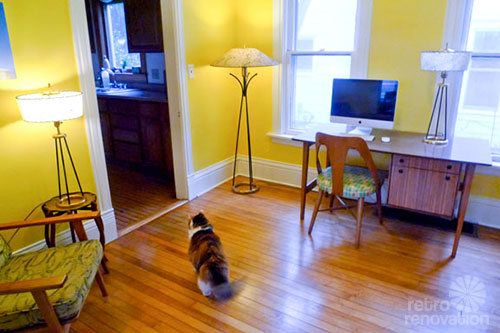
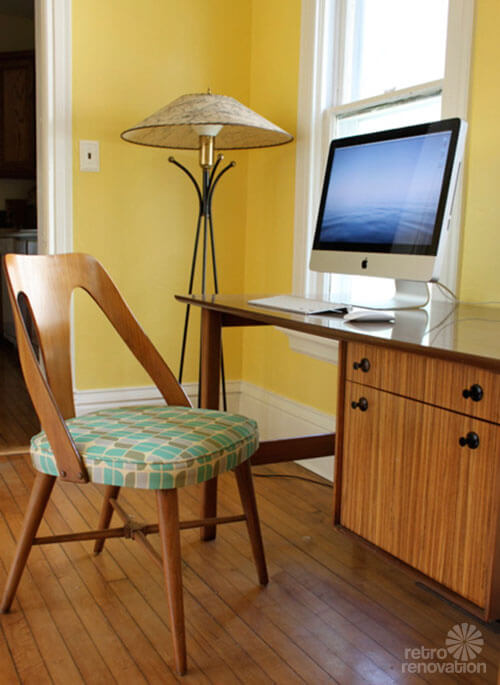
Well, we finally tackled these last two rooms this spring. Our big goals for the spaces were to make the kitchen brighter, the cabinetry more practical, and the back room warmer. It had a Mediterranean style tile floor, which made the space look and feel cold, and we really only used it for storage. We wanted to make it a family room.
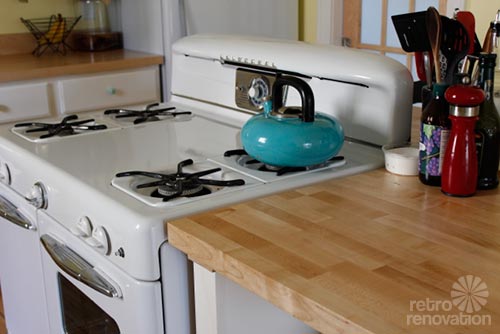
My favorite kitchen photos on this blog are always from the 1940s, and I wanted to capture that bright, clean, cheerful feel in the kitchen without it screaming ‘retro’ so loudly that it’d clash with the Victorian elements of the house.
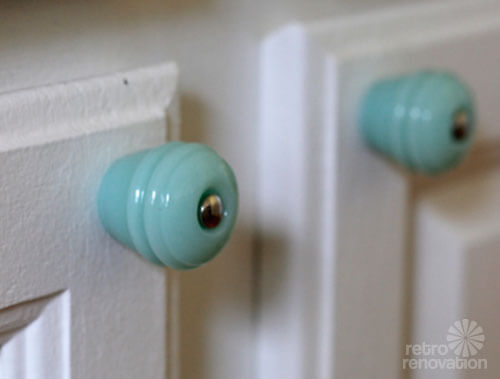
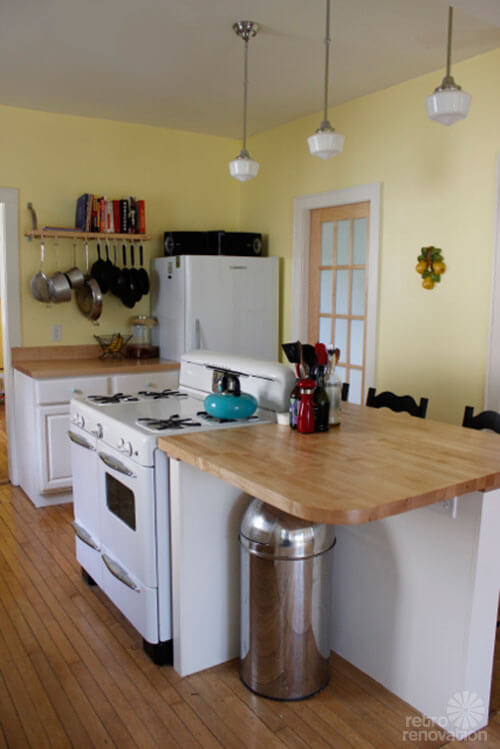
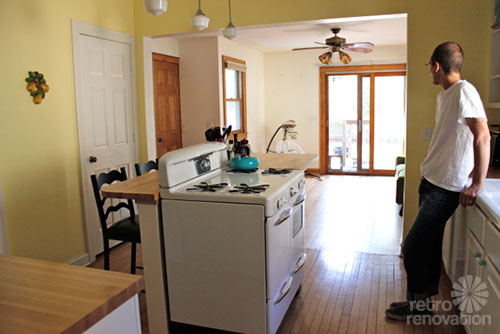
I think we managed that, using a farmhouse sink from the 40s, a 1954 Universal oven (yay, craigslist!), beadboard, school house light fixtures, and jadeite knobs. But we broke with the period by opening up the wall between the two rooms, installing butcher block counters, and keeping the wood floor.
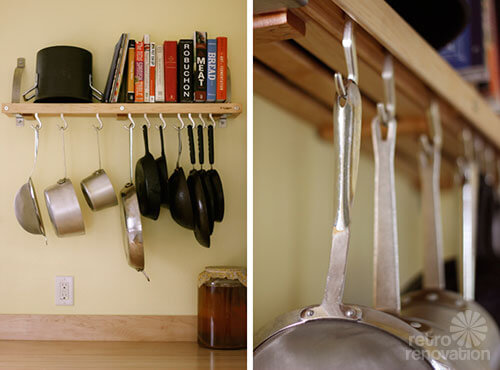
We couldn’t afford new cabinets, but the existing uppers were making me crazy (I found the corner cupboards really annoying – you have to take out half their contents to get to anything in the back). I’m an art teacher, so I took advantage of my spring break to build new ones. We kept the lowers, but painted them and added knobs.
I’d fallen in love with the jadeite knobs offered by Rejuvenation, but they were pretty pricey. I ended up finding nearly identical ones online at D. Lawless Hardware. For the lights, I dreamed of milk glass with painted stripes, but these Schoolhouse Mini-pendants were close enough and a better price.
It really does feel like a whole new room now.
[Precautionary Pam notes: Readers, please consult with local building codes — with properly licensed professionals — to ensure your stove placement conforms with local building codes.]
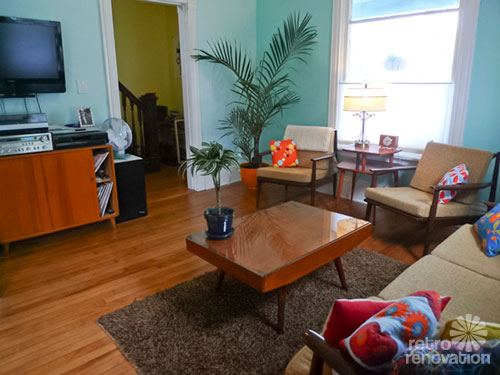
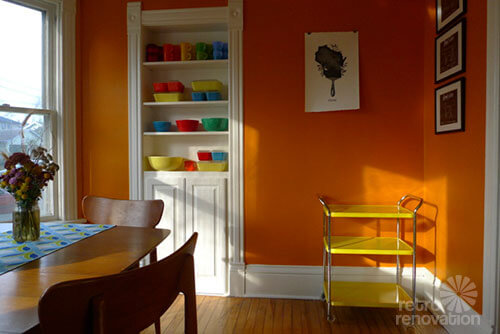
As you can see, we’re not afraid of color in this house 🙂
Well, that’s our story! Thanks for letting me share!
 The hardest part of that initial renovation was being without a bathroom. For a shower, we connected a hose to the basement slop sink and hung it from one of the rafters. You had to stand in a cement mixing tub to shower, and then run across the concrete floor to turn the water off. Did I mention this was December, in Wisconsin, in a 110-yea- old house? Yeah, that hurt.
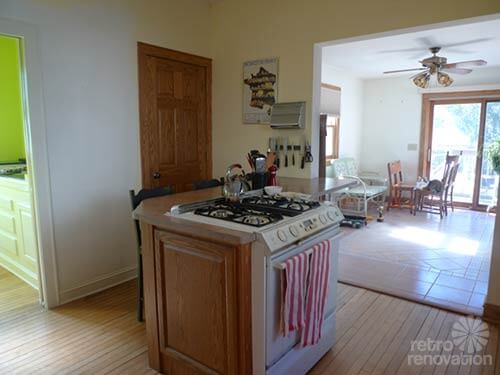 Since the kitchen and back room were fairly new, those weren’t part of the first remodel. That turned out to be a good thing, because it gave me three years to figure out how we used the space and what really needed changing. Retro Renovation has been my morning read with coffee all that time, so you can imagine how it affected the final outcome. Super helpful!
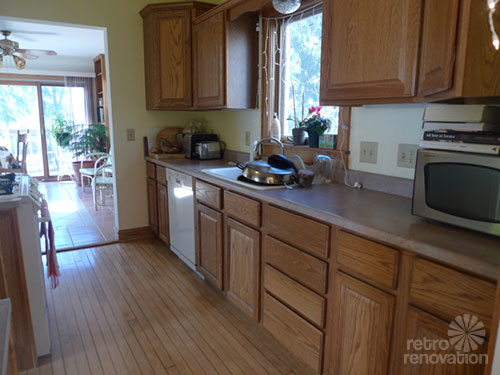


 I think we managed that, using a
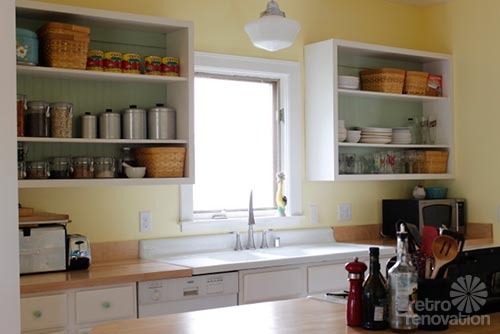
 Emily, you and Drew did a fabulous job. We also want to underscore to everyone: You waited three years to remodel the kitchen, and were happy you did. This affirms a key piece of advice we have here: GO SLOW, people, in making big remodeling decisions. (Unless the changes involve environmental or safety issues, of course.) Take the time to study and learn how you use the space… how you could use it more effectively… and what style of retro speaks to you.
Mega thanks for sharing your story and inviting all of us in to take a peek inside your cheery and colorful home.
Read more about Emily and Drew’s kitchen remodel on Emily’s blog, prairie loon.


Kristen says
Thank you so much for loving this old house and making it wonderful! It’s so rewarding, isn’t it? Some of my best memories are my husband and I working relentlessly on our 1899 home day and night right after we were married & purchased our first house. Listening to records and talk radio as we painted… many, many, many trips to Lowe’s… we got to know the employees on a first name basis… and I think I had paint and primer in my hair constantly for about 6 months.
Your home is so beautiful… very well done!
Do you know what type of house plant that is in your orange planter in the corner of your living room? I’m on the lookout for a bullet planter & that’s the kind of plant I’d like to try. Love your pyrex collection, too!
Thanks for sharing!
Emily says
Thanks, Kristen! Yeah, for all the sweat and tears, remodeling this house has given me a lot of good memories 🙂
The plant is an Areca Silk Palm. I just got it from Home Depot, but if you get one there, check for mealybugs first! I totally brought home an infestation.
Tom says
Speaking of records, I was just wondering how feasible it would be if one had a turntable to center one of those lamp globes on it, set it to 33 or 45 rpm, and then paint stripes on them with an artist’s brush…. the pinstriping stuff is a good idea too, I’m not sure which process would be easier. I’d probably manage to get the pinstripe all stuck to itself instead of the globe in the process of installation!
Robin, NV says
Great job guys! Yellow is my new favorite color and I love how it makes your kitchen glowy and inviting. I think a 1940s kitchen is perfectly at home in a Victorian house. I’m sure many people living in Victorians in the 40s and 50s would have happily updated their kitchens with the new conveniences that became available post-war.
Mary Elizabeth says
Drew and Emily, you are very talented as well as practical. Your kitchen is lovely and looks just like a World War II bride’s dream! Is that Fiesta ware in your dining room in the built-in china closet? It echos the colors you have throughout the house. My mom had Fiesta ware in her first house as a newlywed in California in 1943. She had to give it all away when my dad was shipped overseas and she moved back East to stay with her parents. I was born after the war, so I never saw it, but she would always point it out to me at church tag sales and vintage shops. Then she went through what I call her mint green Melmac period in the 1950s and a blue flowered Corelle perioed in the 1970s and ’80s. She wouldn’t buy the Fiesta again, because she said there was lead in the glaze. The reproductions they sell now, however, don’t have any lead.
I love, love the Victorian details that remind me of the 1902 house I grew up in–the deep baseboards, quarter round molding at the floor, built-in china cabinet, detailed woodwork. And yes, Robin in NV is right–the decoration of real houses owned by real families evolved with the times and with their tastes. That farmhouse sink and your stove are nearly identical to the ones that someone had put in the house in the late 1940s before my parents bought it. After the war, everyone was ready to update everything. About the wood floor–our Victorian kitchen did have a wood floor and my dad laid a linoleum rug over it. It looked like a real rug, with a border and everything, but it was mopable. It was tacked down in only a few places, so it didn’t ruin the floor. Later, he put down self-stick tiles. Oh, well!
Wonderful, wonderful work, you two, and thanks for showing us the time lapse stages.
Emily says
Yeah, I think you’re both right – homes go through a natural evolution and rarely reflect just one period.
Mary, the dishes are Pyrex and the mugs are Fire King. Two loves of mine. That built-in was originally the door to a closet that got eaten up to make room for a half bath. Instead of getting rid of the closet door frame, my husband asked the contractor to make it a display shelf specifically for my Pyrex collection. Good boy!
Mary Elizabeth says
Oh, wow! Because he used the existing doorway with molding, it looks like it was always there from Victorian times! Fantastic idea.
MikeD says
Nice work guys!
Sherree says
I love your whole house. And your kitchen is just wonderful. The way you kept your stove in the “island” looks great. I have a nearly identical Universal range, too. It is the best stove I have ever used. Thank you for letting us peek inside your great home!
lynda says
Super impressive. You did a lovely job and you should be proud. Only a creative and hard working couple can make a budget redo come out fantastic! What finish did you use on the butcher block counters? We have used Waterlox on ours and are happy with the results. Love the sink, great find!
Jennifer Kepesh says
Sweet, homey, pretty, happy, practical, usable….perhaps my favorite of your comments on the work is that you wished for X, but X was too expensive, so you found Y instead. Both the knobs and the lamps are perfect for the space–and affordable.
Diane says
Nice job–you could always paint your own stripe or stripes on your school house lights to match the kitchen knobs!
stacia says
I thought the same thing and that would look great.
Sarah g (roundhouse) says
Better yet, what about pinstriping sticker stuff for bikes and cars. Its like a decal. That way your line is solid in color and same width all around, less room for error basically
Emily says
Honestly, I’m just not sure I’m willing to risk messing them up. The glass angles out as it goes up, which would make it harder to get the stripe straight, even with a decal. And I like the record player suggestion below, but it’d still be hard to keep even pressure/paint on the brush to keep the line a consistent thickness and opacity. With the light on, any inconsistency or even a decal overlap would really stand out.
Marc says
Great job! Love the color and the clean lines.
deb says
What a great job – looks fantastic!
Chris says
LOVE IT! No surprise that I do, since we did something very similar to our kitchen. Our house was built in 1934. Kitchen when we moved in was very late 60s – early 70s.
We got the SAME EXACT cabinet knobs! The same ones! For real!
Love your kitchen!
Emily says
That’s awesome! The only downside is that now I feel compelled to start collecting jadeite 🙂
Chris says
I DO collect jadeite! I love that it is so sturdy and USEABLE! Not just something that sits on a shelf because you are afraid to break it. My parents got me started years ago — they found a bunch at some old auctions in the midwest, BEFORE Martha Stewart made it popular. The prices have soared since then. When my folks visit and have coffee in “their” jadeite mugs, they always remind me how much the mugs are worth now! 🙂
We did our kitchen reno in a flavor similar to yours. We painted the upper cabinets white, with the jadeite knobs. We painted the lower cabinets in a glossy jadeite green, with the same knobs in white milk glass.
We even got the knobs from the same place — D. Lawless Hardware. It is a little place in a teeny tiny town in Illinois! One knob came to us with some noticeable black flaws in the glass — they sent us another right away.
Love your kitchen. Loooooooooooove!
Emily says
Do you have photos? It sounds super cool – I’d love to see it!