

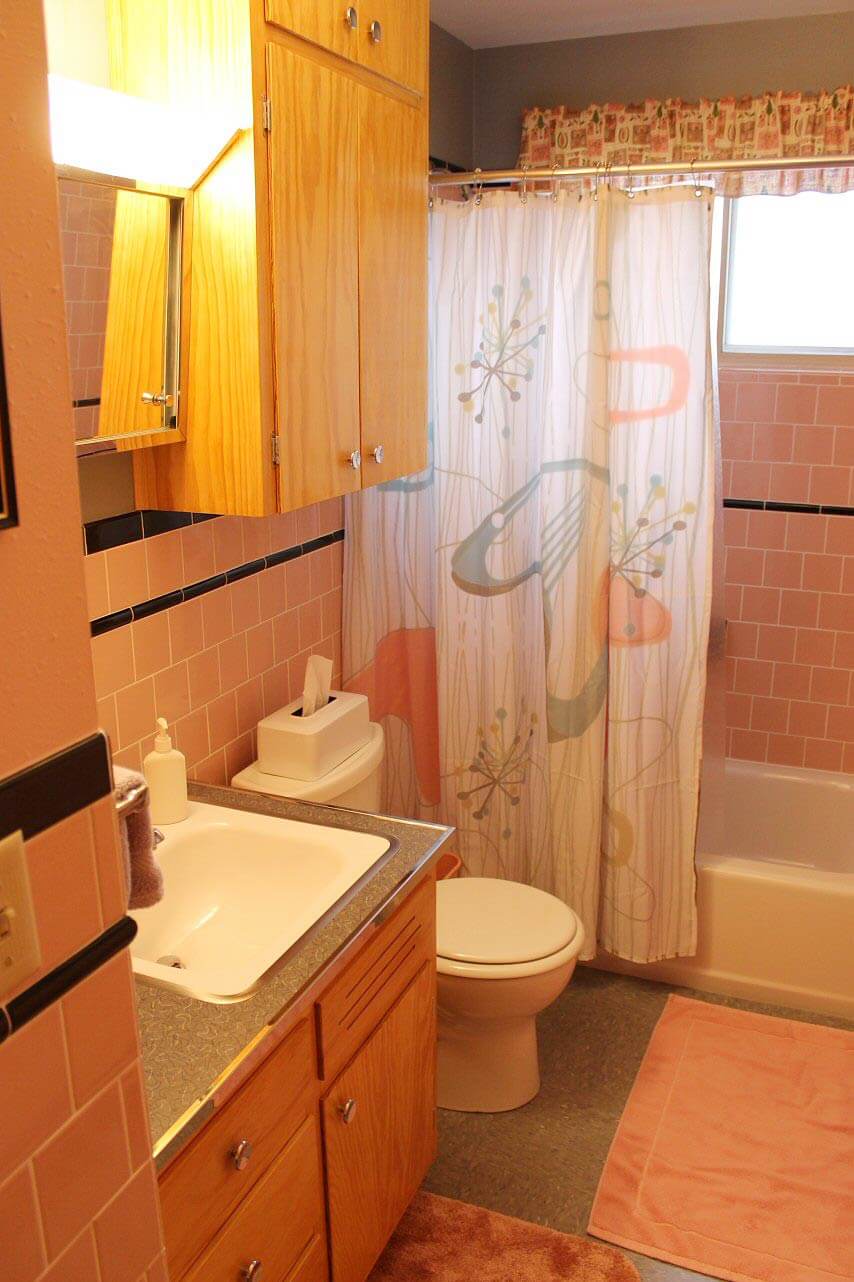
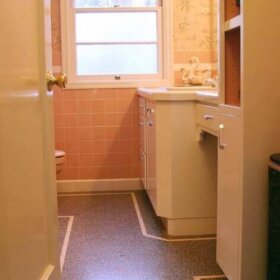
 Taking inspiration from his grandmother’s vintage pink bathroom along with the help and resources he found on Retro Renovation, Jim used his mad DIY stills to tackle a complete gut remodel of the main bathroom in his 1961 midcentury modest home. The results are fabulous — a black and pink bathroom that looks like it has always been there — but brand new!
 Jim writes:
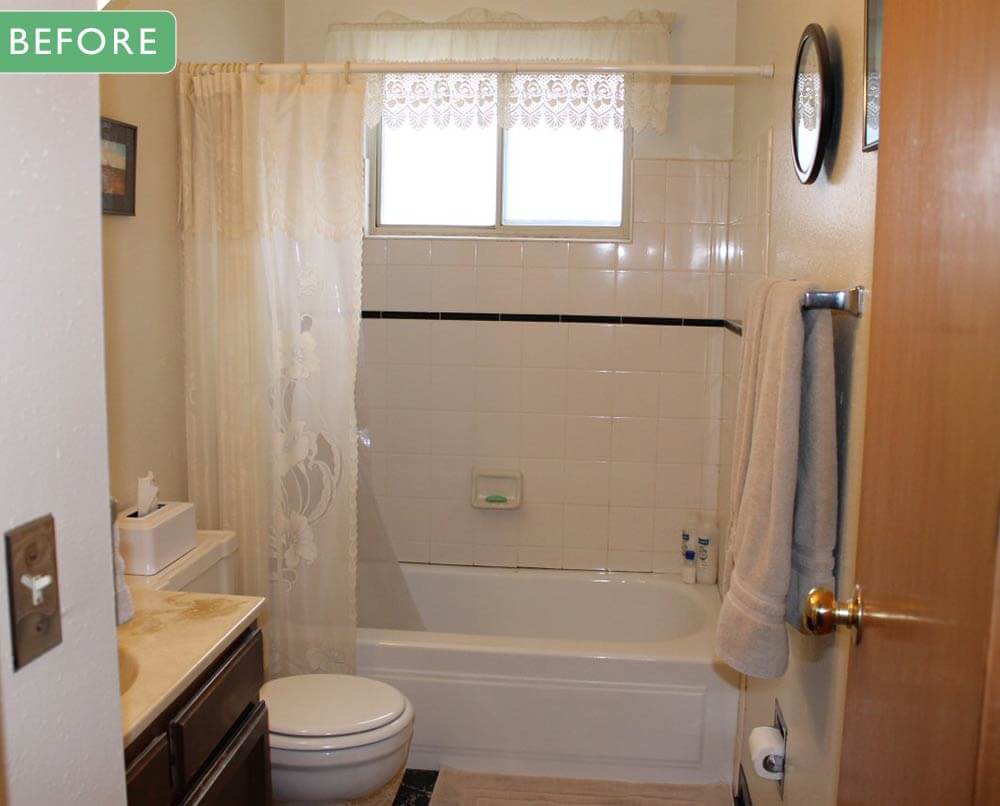
I recently finished a remodel of the bathroom in my 1961 house. Any mid-century charm that it may have had originally had been lost many years ago. It was plain and worn-out.

I put off remodeling it for many years, because I just couldn’t get excited about any of the new materials I saw in stores. Then, I had the idea of restoring it to a style appropriate for a house of this age. My grandmother’s 1956 bathroom came to mind as the ideal look that I was going for. As I started trying to source the correct materials, I kept coming across your websites. The resources listed there were extremely helpful.
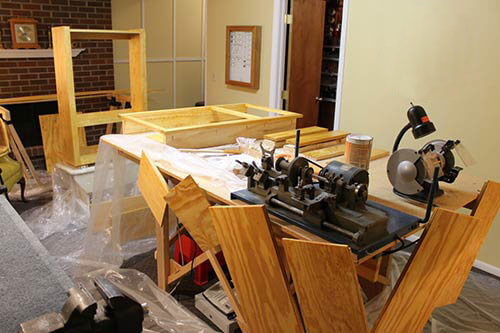

Kate’s pink bathroom project made me realize that there was no reason I couldn’t build my own cabinets from scratch. I built three of them, copying the ones that were in my grandparents’ house.
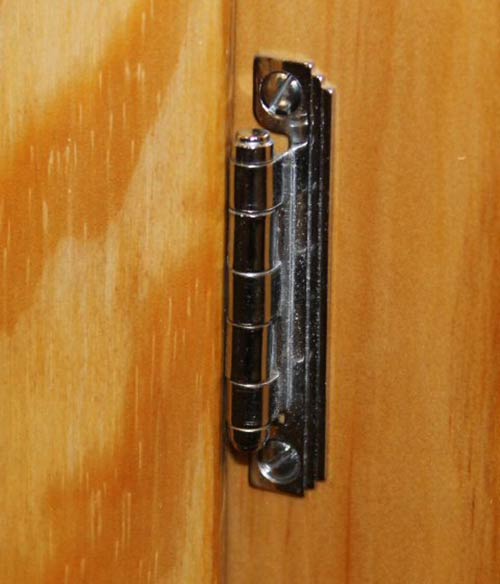
I even found new-old-stock hinges from the 1950s.
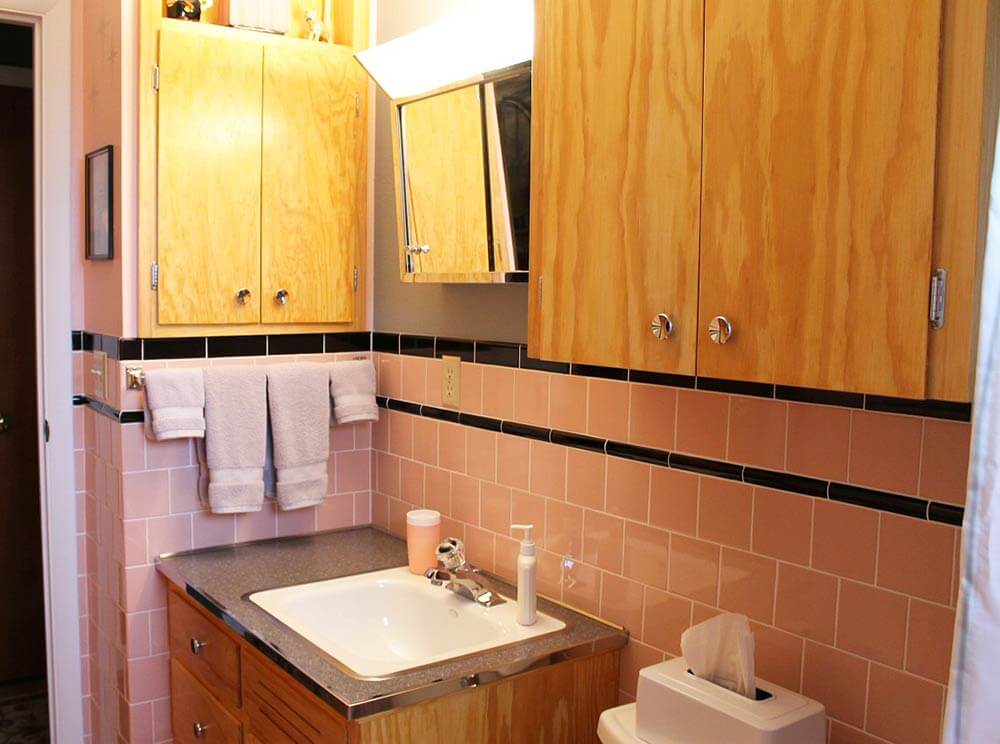

Other than the installation of the flooring, I did everything myself. I spent five months planning and gathering materials. Once I started demolition on January 1st, it took five weeks to complete the room (with very little sleep). I used 1,101 tiles on the walls.
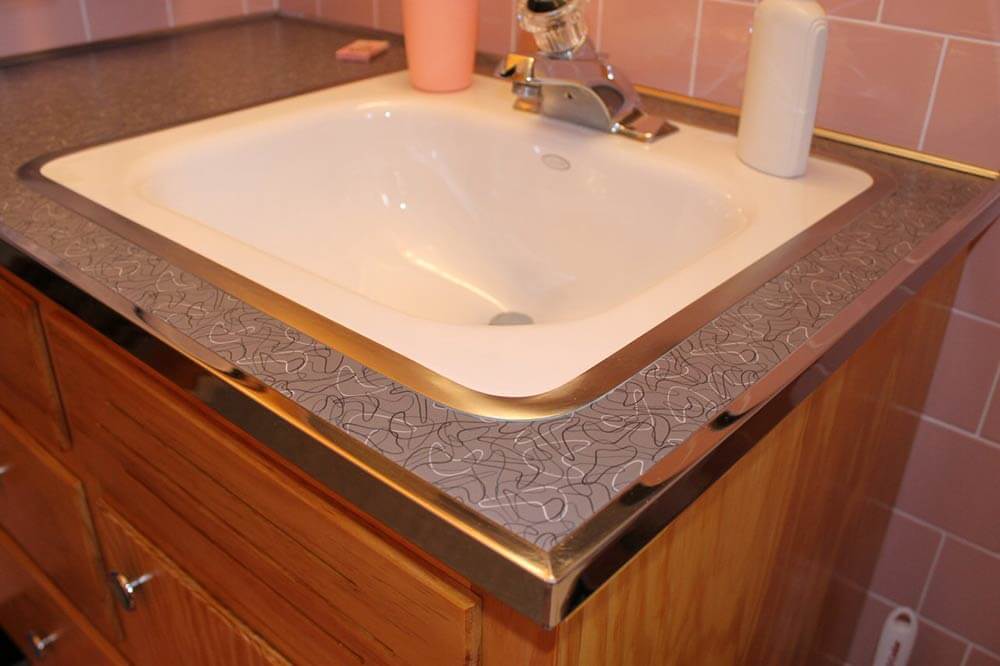
I used B&W pink & black tile and chrome countertop edging from New York Metal. The laminate is Formica Charcoal Boomerang. That was all I was able to find six months ago when I bought it. (Unfortunately, the new Wilsonart boomerang patterns were unveiled a bit too late for my project).
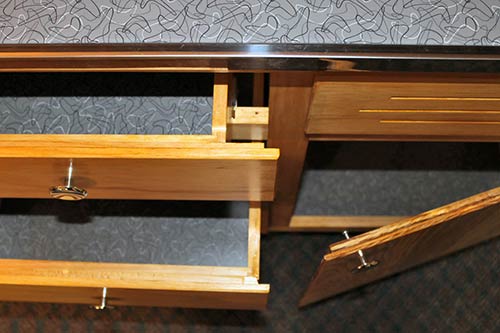
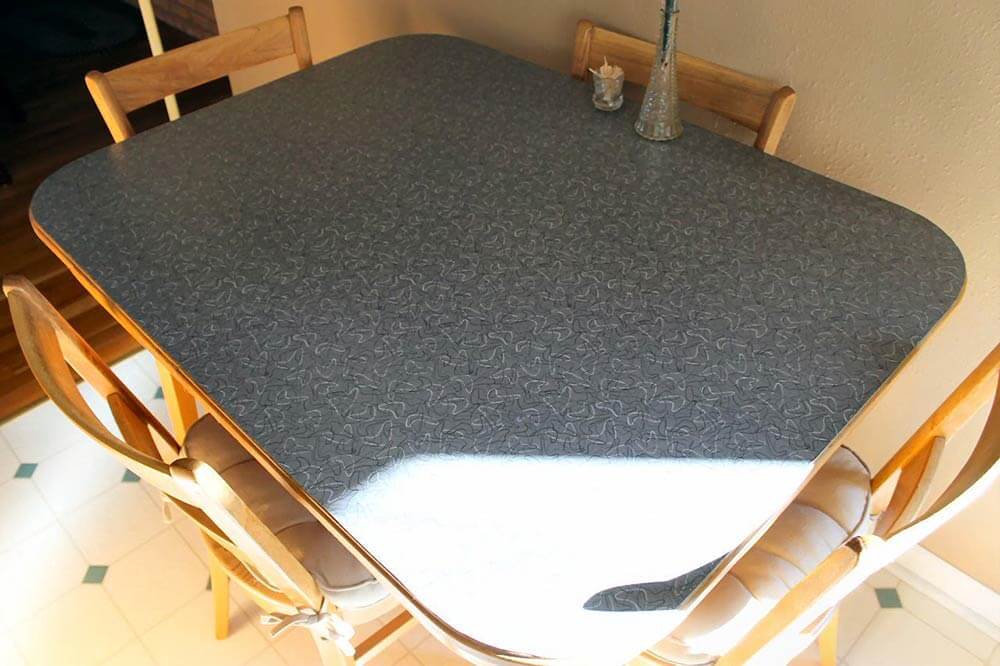
It’s a small bathroom, only about 45 square feet. Since the vanity top was so small, I had a lot of extra laminate from the 4×8 sheet that I bought. I used some of the rest to laminate the drawer bottoms and shelves. Even then, I still had a large sheet left. I decided to use it on my kitchen table (my grandparents’ kitchen table from the 1950s). I cut it to fit, but it’s not glued down. It just sits there as a replacement for a tablecloth, to protect the wooden table top. I’ll attach a picture of that, too. It’s a good use for leftover laminate.
Anyway, I just wanted to thank you for the resources that your websites directed me to. I also thought that your audience would enjoy seeing my bathroom project.
Aww, Jim, I am especially pleased that reading about how I built my own bathroom vanity made you realize that you could also build your own vanity and bathroom cabinets! They turned out wonderful — now friends and family will be asking you to build cabinets and vanities for their bathrooms — just you wait and see!
 Resource list:
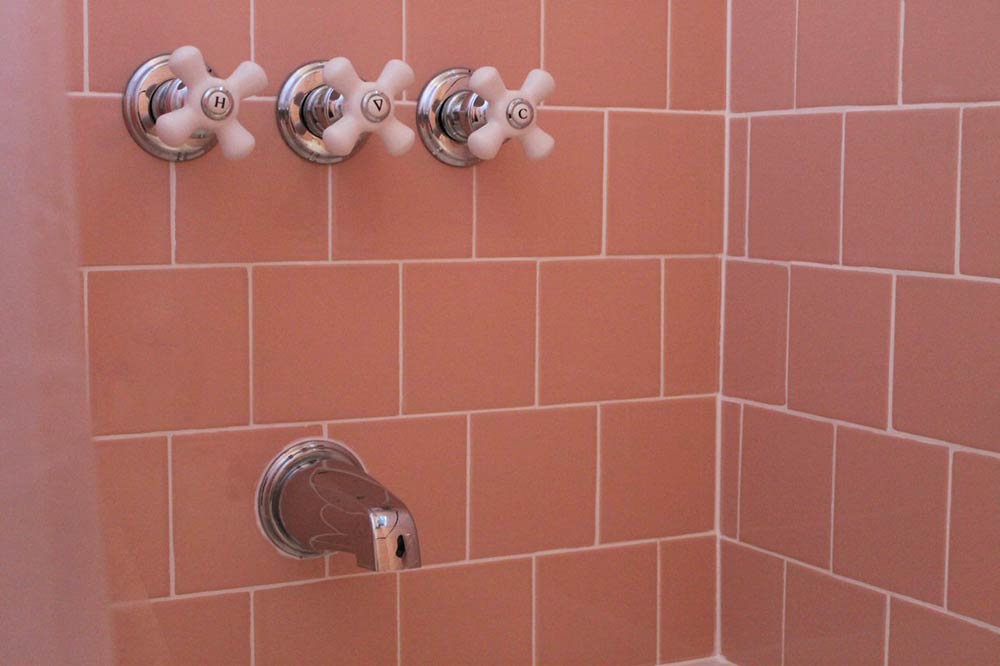
- Tile – B&W Tile 70W Pink & 92W Black
- Sink – Kohler Tahoe with trim ring
- Laminate – Formica Charcoal Boomerang
- Chrome Edging – New York Metal
- Cabinets – Homemade from pine & fir with 1 coat each of clear & amber shellac**
- Cabinet Hinges – Vintage new old stock Stanley 1530 Semi-Concealed Hinges
- Cabinet Knobs – Liberty P65015H-CHR-C 1-1/2″ Concave Round Knobs
- Cabinet Catches – Stanley 71-0100
- Bathtub – American Standard Princeton 30″ White
- Toilet – American Standard Cadet 3 White
**Pam notes: In the comments of this story about amber shellac, readers posted that amber shellac may not hold up well if exposed to water and other chemicals. Pam = not an expert on this question. Readers: When researching what finishes to put on your woods, do your own research, including contacting the manufacturers, to determine what applications are appropriate for a given product.

- Flooring – Mannington Essentials Pewter VCT
- Black Soap Dish – Clay Squared
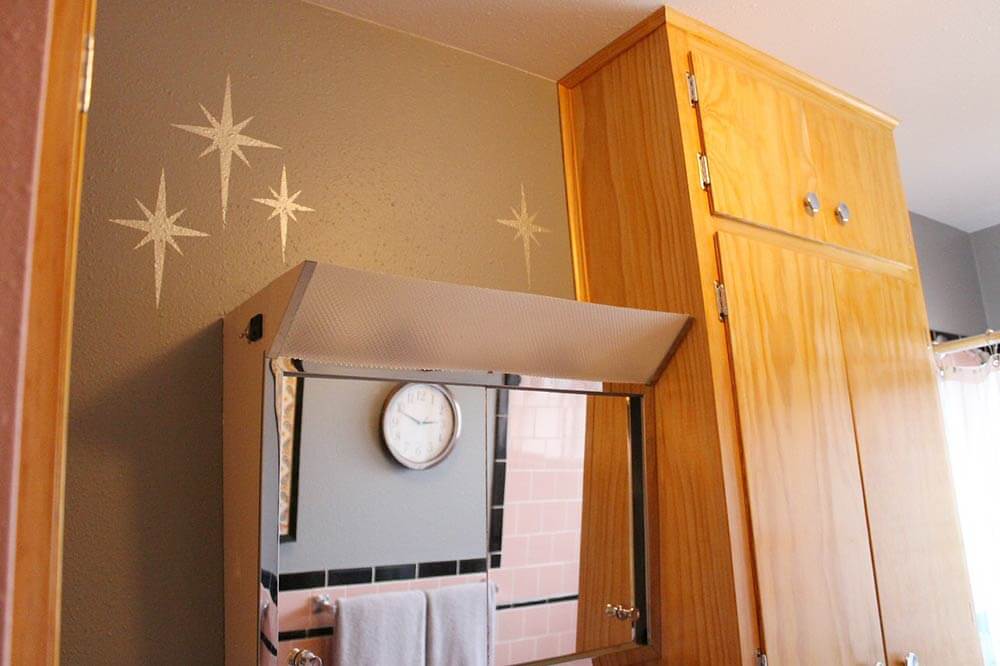
- Mirrored Medicine Cabinet – “Satin Glide” by Williams Products (Came with House)
- Wall Doorstop – Stanley 75-0161
- Towel Bar – 1 original to house, 1 vintage from Ebay
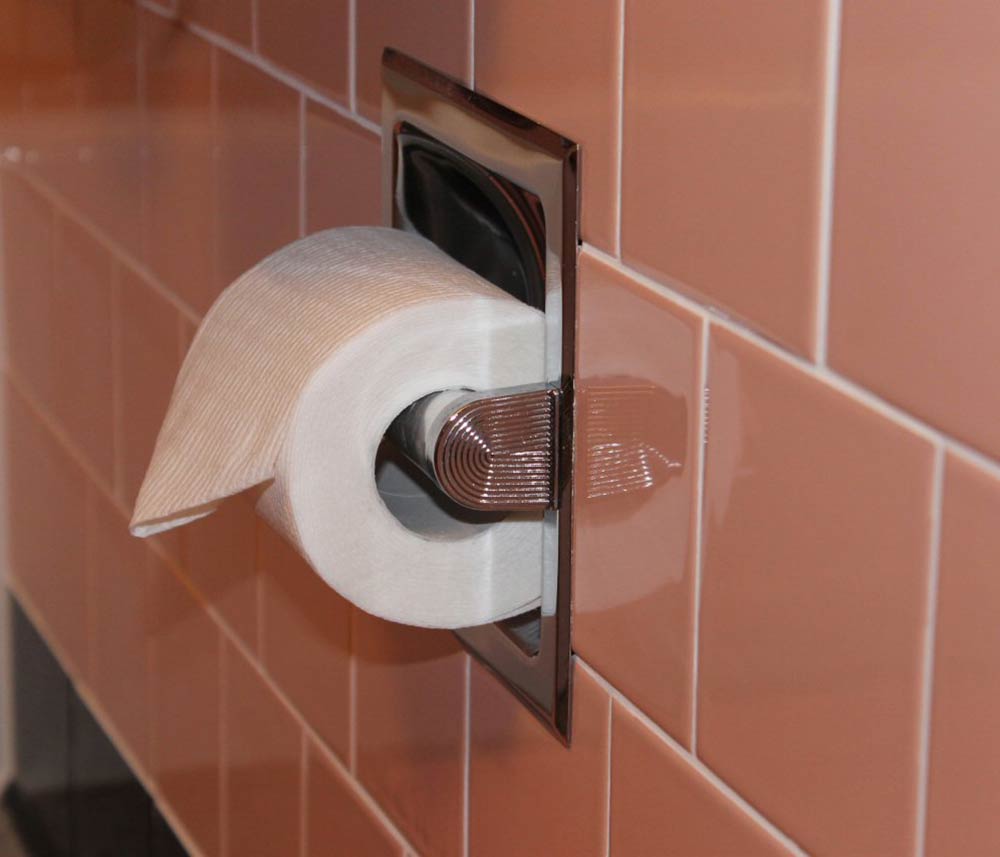
- Toilet Paper Dispenser – Original to house
- Window Valance – Vintage late 1950s from my grandparents’ house
- Shower Curtain – Cafepress through Amazon (turned backwards for more subdued colors)
- Towels – Bed Bath & Beyond Wamsutta Duet in Chrome and Dusty Rose
- Wall Stencils – Homemade from pattern found on Retro Renovation
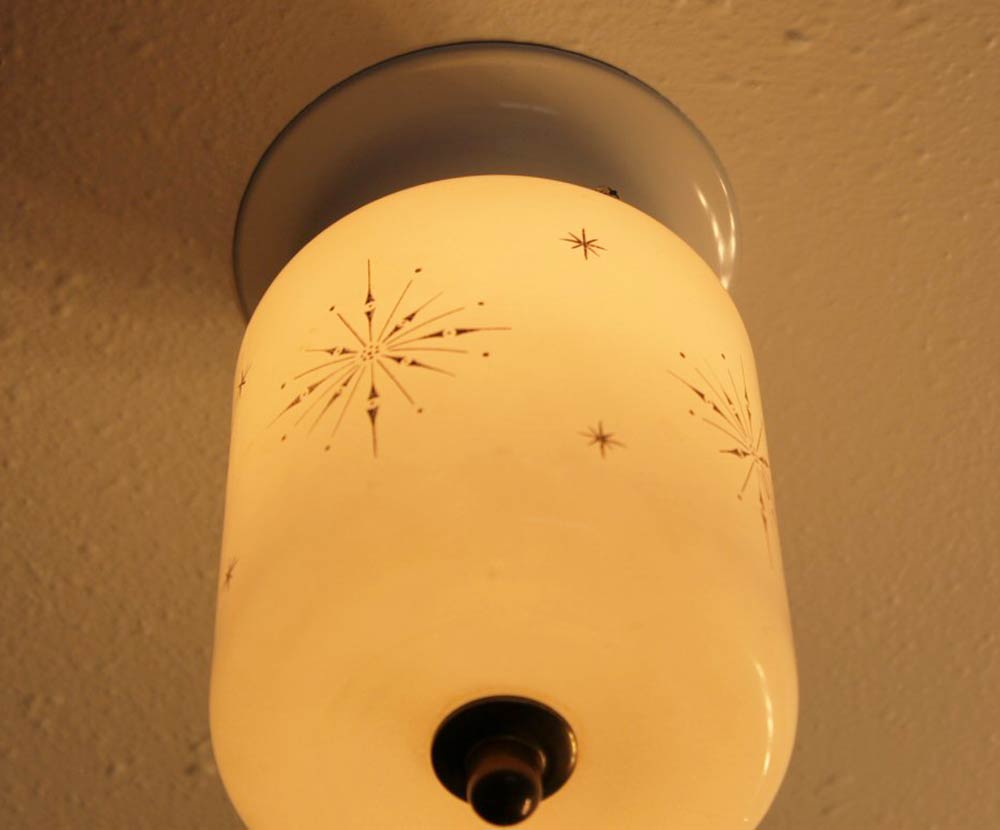
- Ceiling Light Fixture – Habitat for Humanity ReStore
- Light Switch Plates – Vintage 1950s from Ebay
- Gray Wall Paint – Ace Hardware Clark + Kensington “Fog Rolls In”
- Pink Wall Paint – Ace Hardware Clark + Kensington “Rosy Cheeks”
- Sink Faucet – Moen – Came with house, replacement handle from Ace Hardware
- Shower Faucet – Price Pfister – existing from 2003 repair project
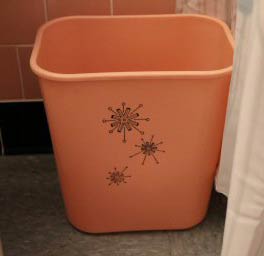
 Trash Can – Vintage Rubbermaid 2955 from my grandparents’ house
- Drinking Cup – Vintage Bolero Therm-O-Ware tumbler
- Medicine cabinet and toilet paper holder – both came with the house
Link Love:


Erica says
Love it, love it, love it! You did such a fantastic job! I’m totally jealous of your carpentry skills though. Those cabinets are fab!
tdemonti says
Truly beautiful.
Kathleen says
Stellar job on the redo! That light fixture is to die for. I have to ask though, why were the switches and outlet put on the tile, rather than on the wall?
Jim says
The switches would have been unusually high if they were installed above the tile, and the outlet would be in a slightly more awkward position to use. It also would have made it more difficult to mount the electrical boxes to the studs, since the drywall above the tile was never actually removed. An additional benefit is that it’s easier to keep clean if people touch the wall when reaching for the switches.
Kathleen says
Thanks for the quick response. That makes sense. I was just really curious since my switches and outlets are above the tile in both bathrooms of my fifties house. I never thought of them as being particularly high, and I’m a little under 5′ tall. I guess I’m just used to it. Also, the cabinets you made are beautiful!
pam kueber says
I think there is a “standard” for switch height. My guess is that Jim’s is at about that standard — it’s his tile that goes higher.
Beverly says
Superb! So inspirational! Thanks for sharing.
Shambie says
Fabulous, Jim! You’re an inspiration!
Mary says
Amazingly beautiful! Can’t believe how perfect everything turned out. Kudos on a fantastic remodel!!
Dave Seattle says
Holy cow. What a remodel. This is exactly what I’d like to do with my pink bathroom and my turquoise one. I can’t believe he made the cabinets himself. What a stud. Jim, will you marry me?
Rick G says
Superb Jim – thanks for sharing this inspirational project – you nailed this – Luv it !!!
Laura says
Perfect!! Coincidence–I just took back inside, after finding it on the curb for trash, a Rubbermaid trash can only in turquoise that had been in my bathroom growing up. Hubby heard about that one!
Nikki says
Wow!! This is a drop-dead, knock-it-out-of-the-park reno! Jim, you are amazing, not only do you excel at the technical side of renovation, you have mad color coordination and decorating skills!
If you’ve done any other work in your house we’d love to be inspired!
LOVE Grandma’s bathroom too, built the year I was born!
Jim says
Right at the bottom line of the story (under the picture of the trash can), there’s a link to my website with other pictures of my house.
The most mid-century room I have, other than the bathroom, is probably my master bedroom. The furniture set in there was from my grandparents’ house. There’s also a fun atomic-style lamp on the dresser. I found new window blinds that look just like the ones from the 50s.
The guest bedroom has the furniture set that my grandparents bought right after they were married in 1946. The bedspread in there is new, but it’s identical to the one they had for 50+ years.
Most of my house has a random mixture of things from many decades. I think it adds a feeling of history… A place where things have slowly accumulated for generations.