


 It’s been a long journey through terrazzo floor restoration, cement floor polishing, custom cabinetry and more — and now it is time for the big reveal — the eighth and final installment of Mike and Lindsey’s Edward Durell Stone ‘House of Good Taste’ remodel. Mike sent us 12 before-and-after photos, plus a helpful list of resources. So without further delay, lets take a tour!
 Mike writes:
It has been an amazing journey turning this house into our home. We endured many ups and downs, but we are finally settled. We find ourselves looking around and saying to each other, “ I can’t believe we get to live here!” We are thrilled with how things turned out and hope everyone has enjoyed taking this trip with us. We still have a ways to go, with two bathrooms in the planning stages and lots of landscaping work, but now we can take a deep breath, and just enjoy these next projects and the house for years to come.
We don’t want to rehash our previous installments and bore everyone, so this installment will briefly recap and focus on the before and after images. Keeping updates coming to Pam and Kate in real time proved harder than we thought. At this point, we have been living here for about 3 months and are feeling pretty settled, but there are still a ton of little details to complete.
We thank Pam and Kate sooo much for letting us share our project with their readers over the last few months. We hope that what we have shared helps others on their Retro Renovation journey, as we know other stories helped us.
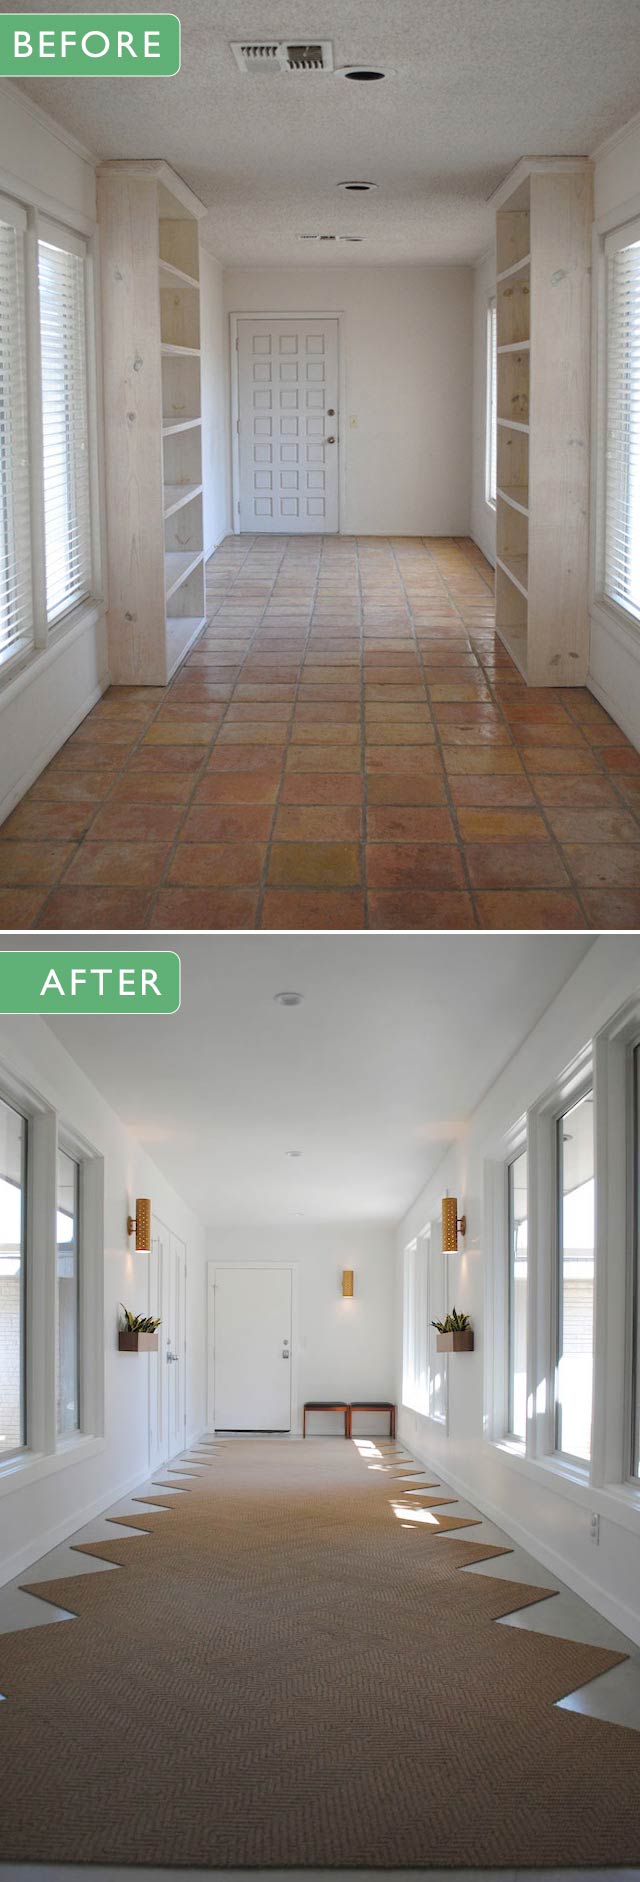
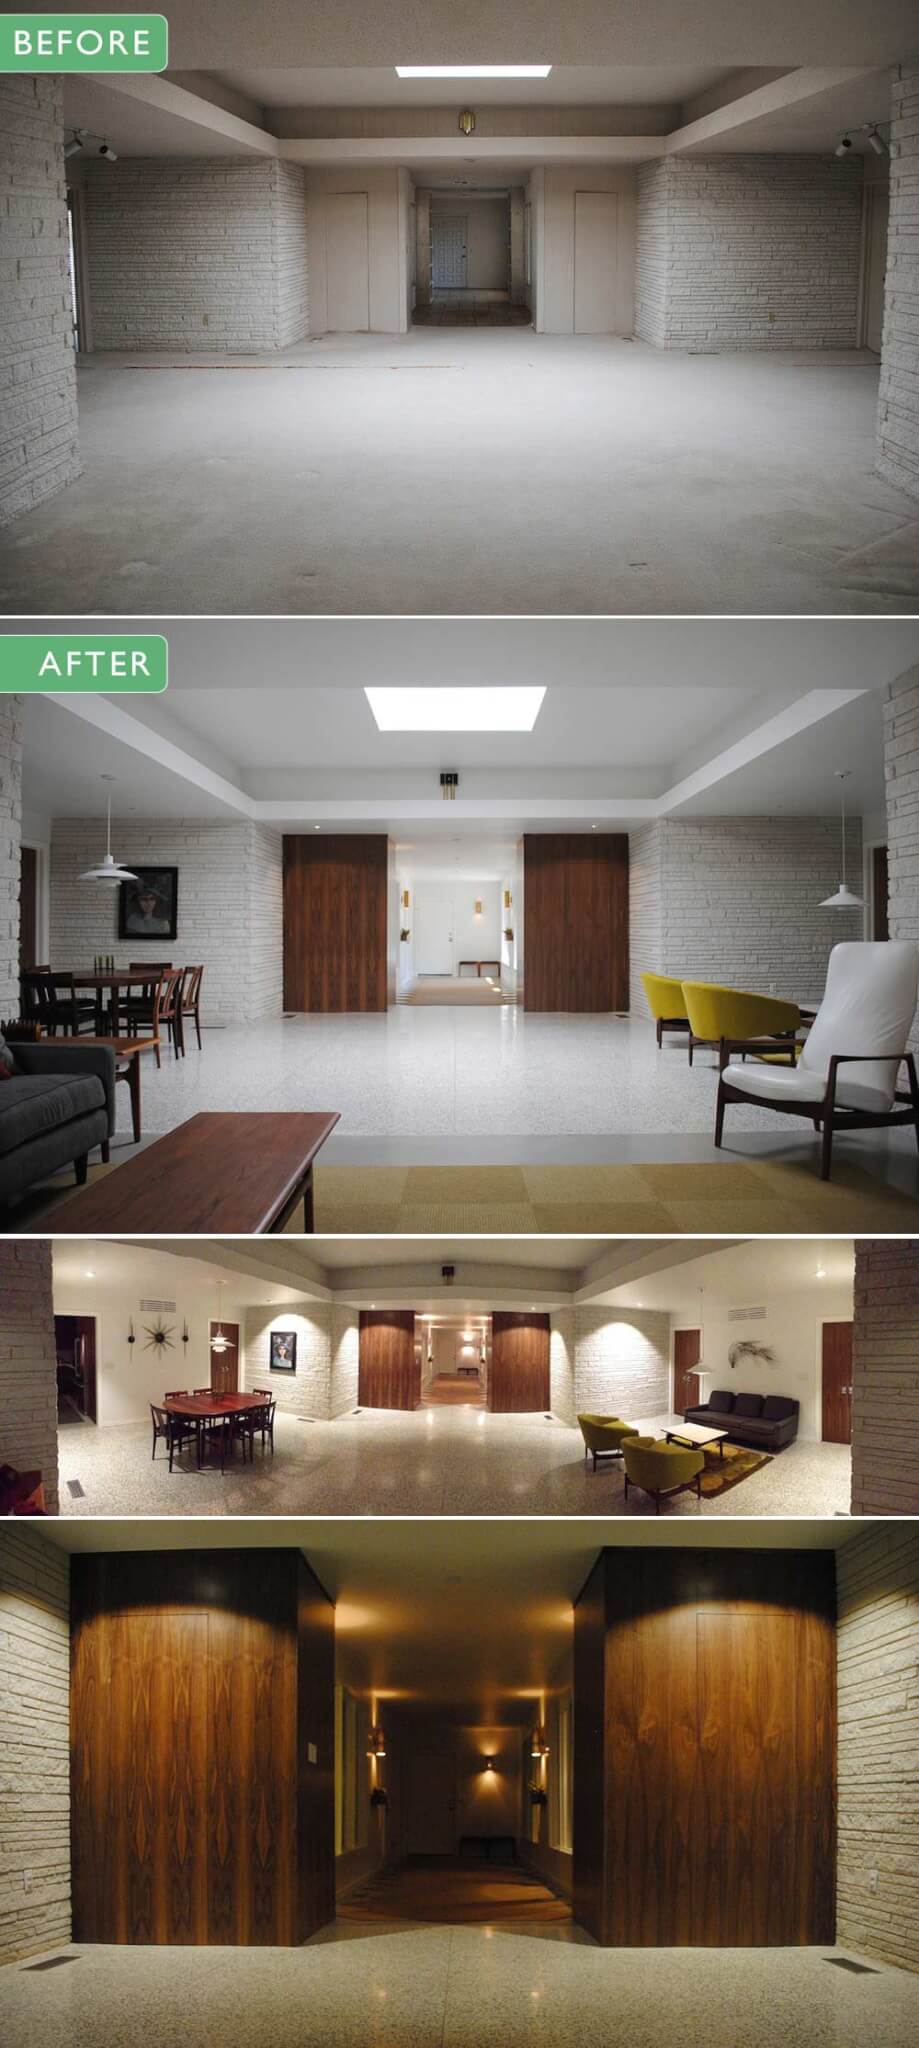
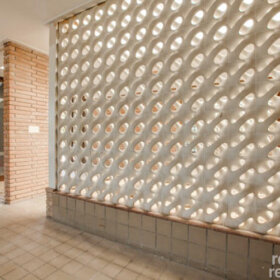
Hallway (above)
The long wide hallway connecting the garage and front door is not original to the home. Originally, this space was a large breezeway, which we are certain was very cool. We wanted the hallway to feel like a transition area from the outside to the inside and create a feeling of expectation. To accomplish this, the vintage wall sconces are very similar to the ones on the outside of the house.
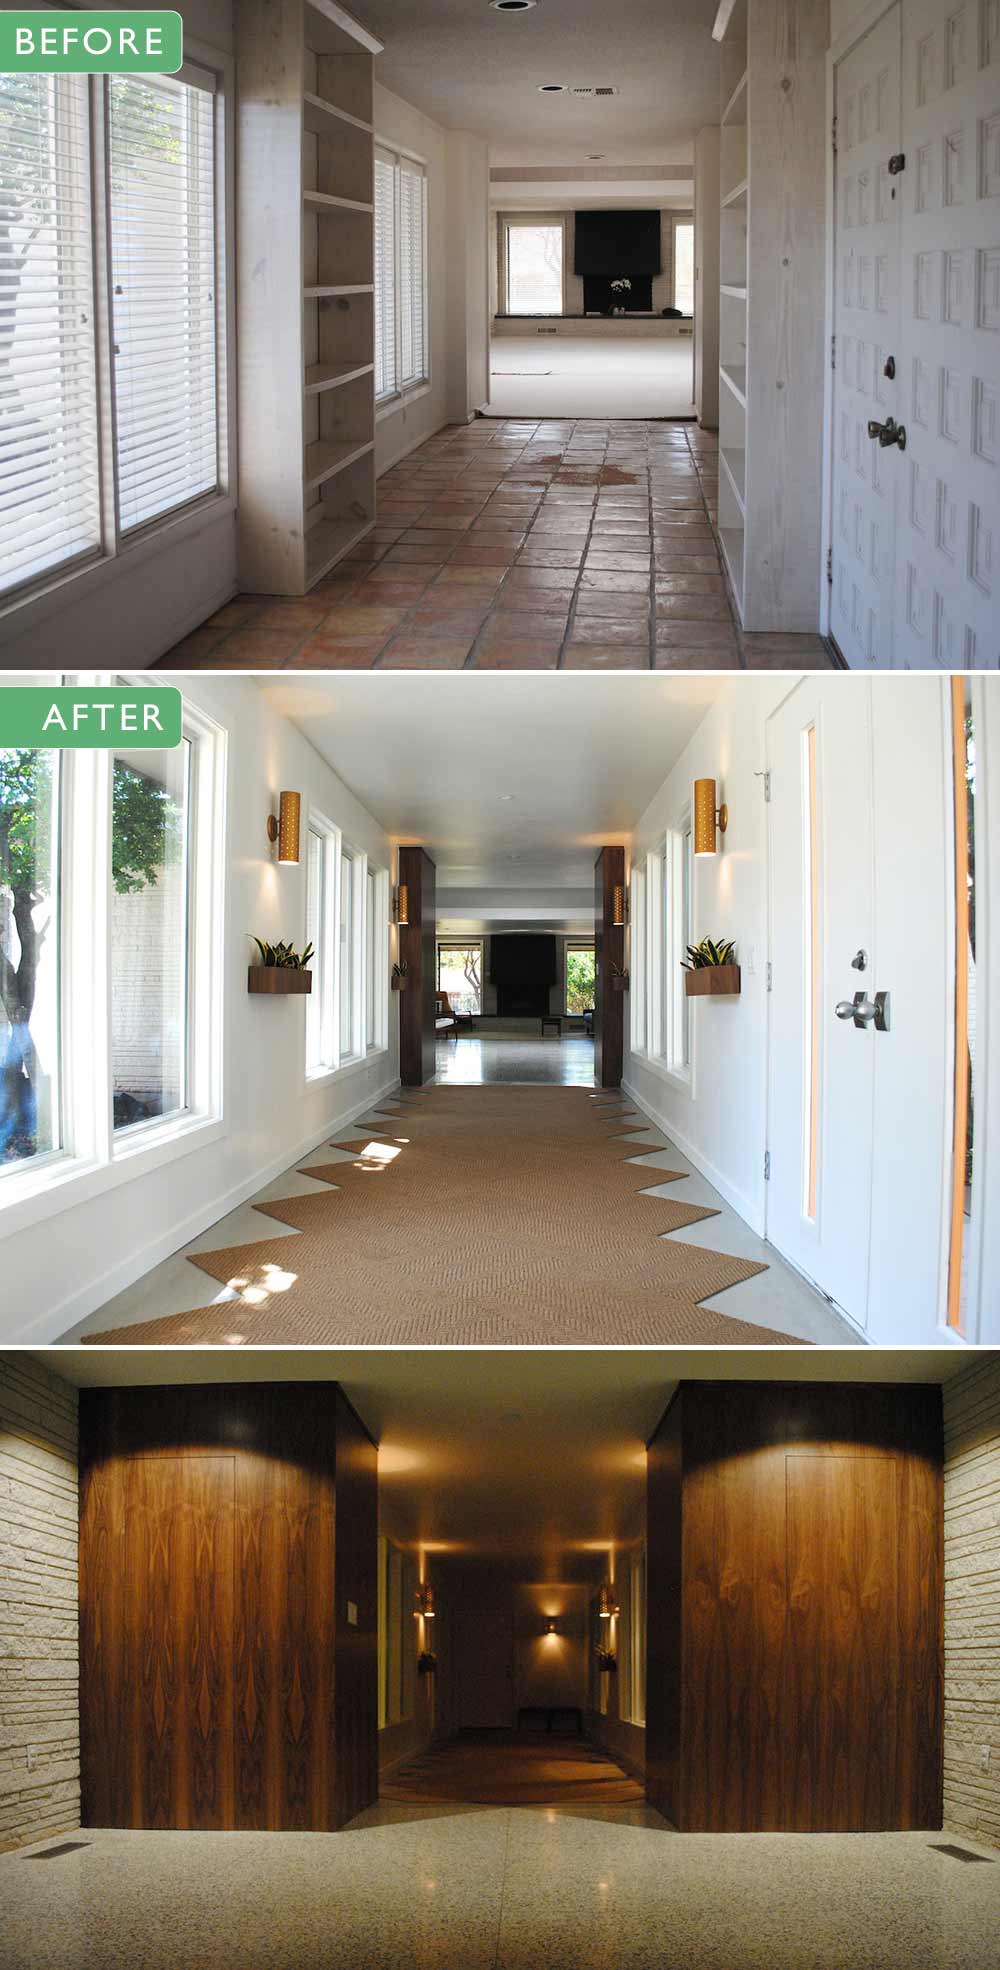
We decided to keep the nine large windows uncovered for the feeling of openness, and added a few planters to soften the space and bring some warmth to the space.
- Vintage EJS wall sconces
- 4” LED can lights
- Custom sized wall mounted planters from The Woody Beckers etsy shop
- Vintage Danish benches
- Rug from Flor
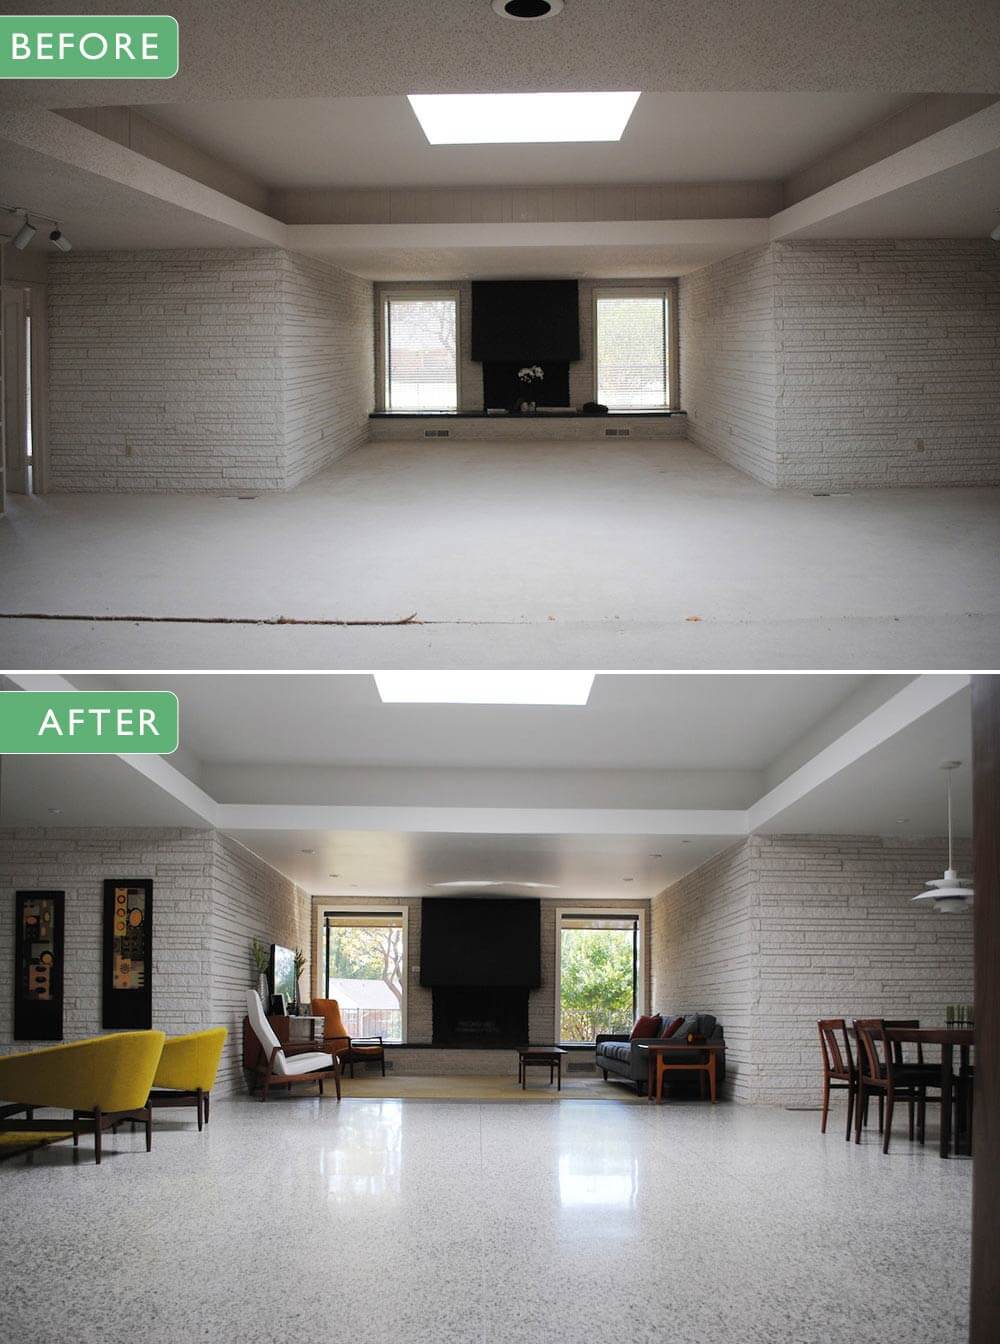
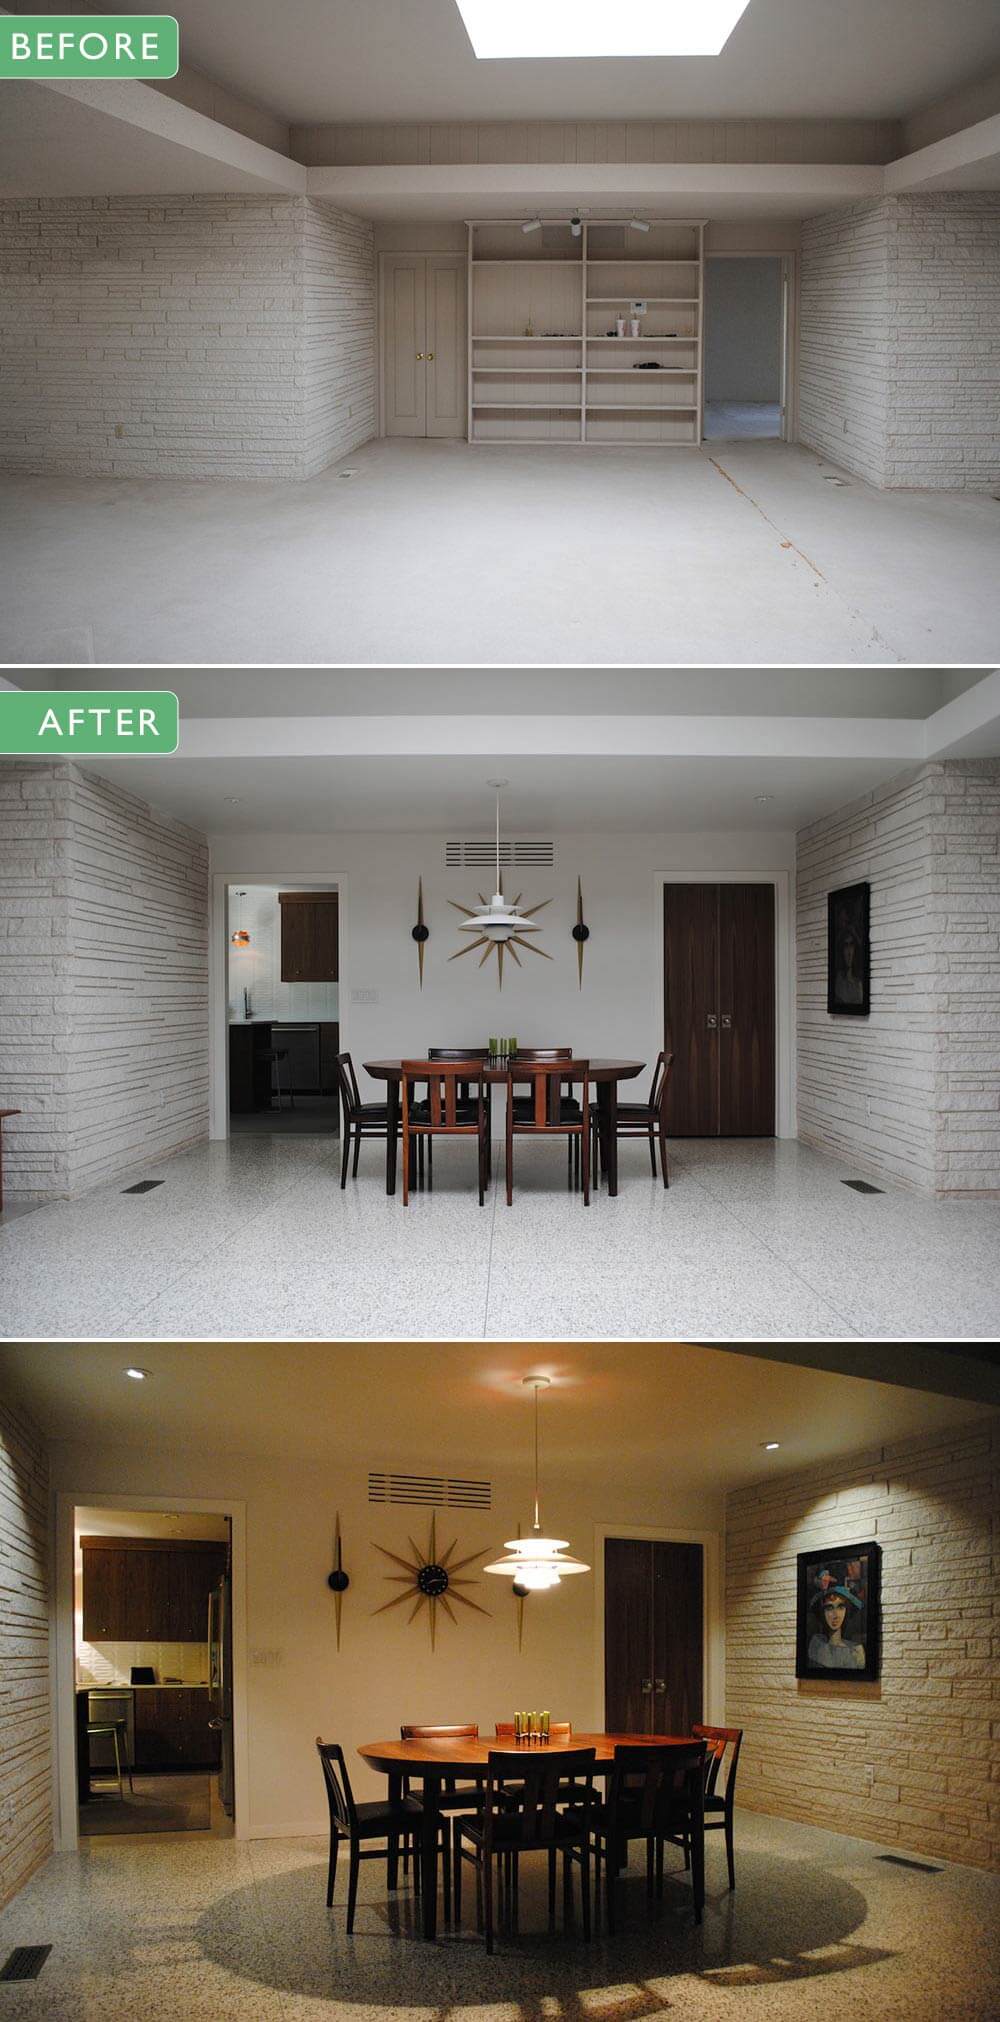
Living area (above)
With the entire common living space being completely open, we defined two living areas and a dining area while keeping the large expanse under the skylight open.
We also updated the original wood paneling element with the two large closets and surrounding passage doors in walnut.

Bringing in the walnut really helped to soften the hard surface stone walls, terrazzo, and polished concrete floors.
We are very happy we opted for smooth walls and ceilings, as they help set off the stone’s texture.

- Refinished original terrazzo floors
- American walnut paneled closets
- Passage doors veneered in American walnut
- Passage door hardware (throughout entire house), Schlage.
- LED gimbal accent lighting
- Vintage Danish pendant lights
- Vintage furnishings except couch from Joybird
- Vintage doorbell from ElectraChime

Kitchen (above)
We are probably most pleased with the way the kitchen turned out and maybe a bit surprised how well things worked out. There isn’t anything significant we would have done different.
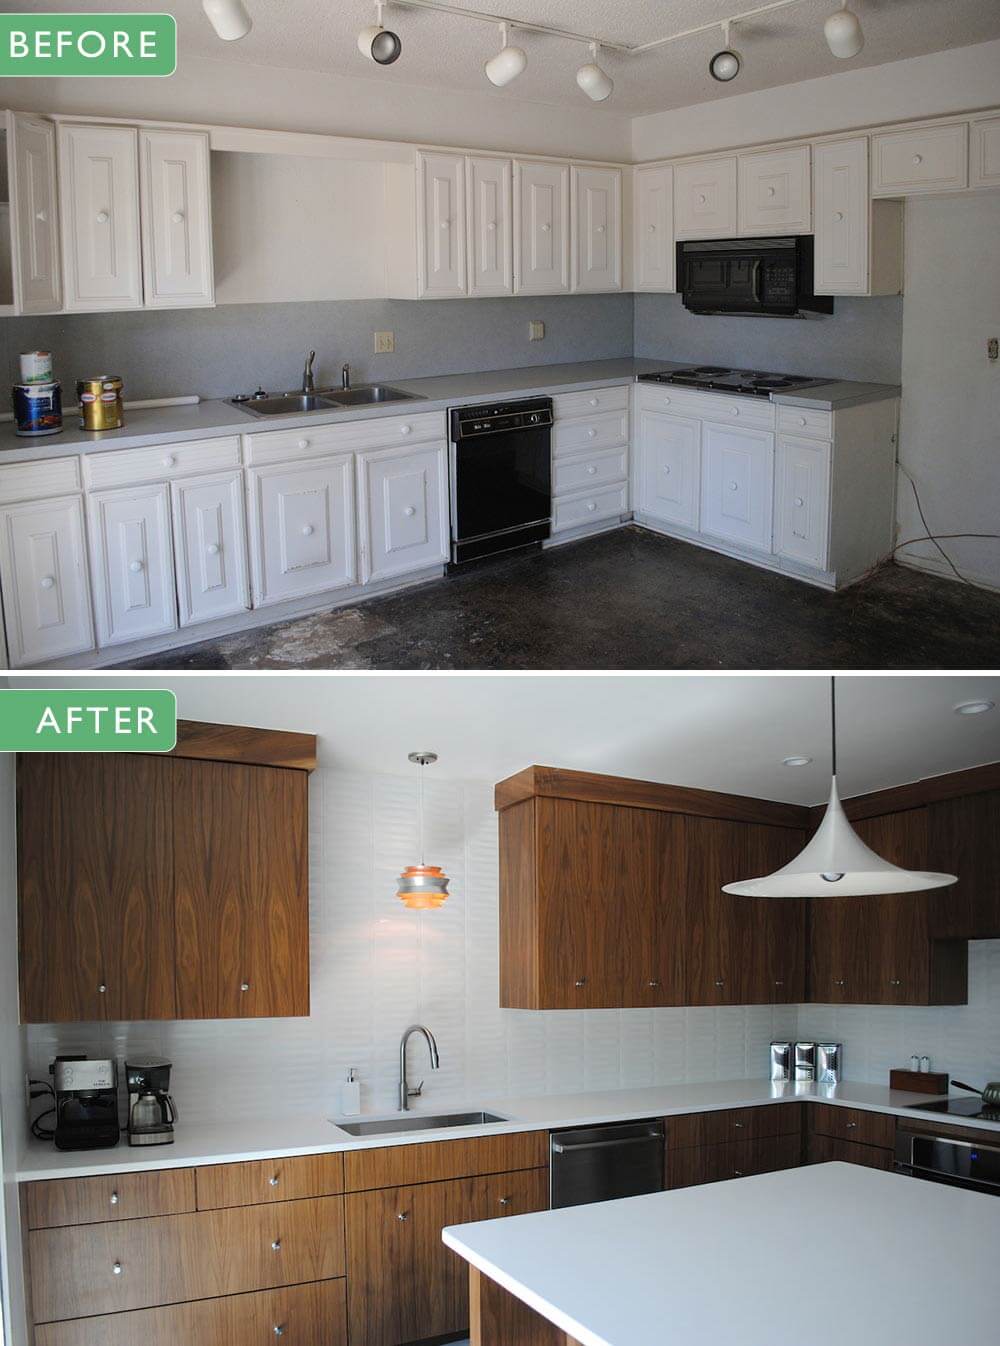
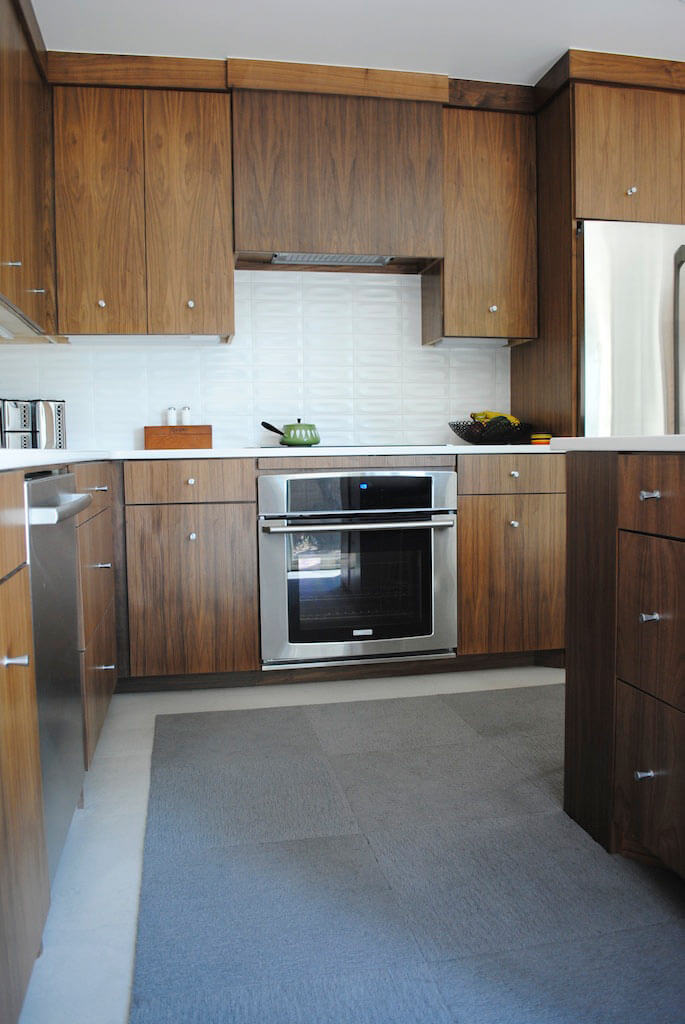
Without any major layout changes to the modest 13′ x 13′ space, we managed everything we needed and wanted.
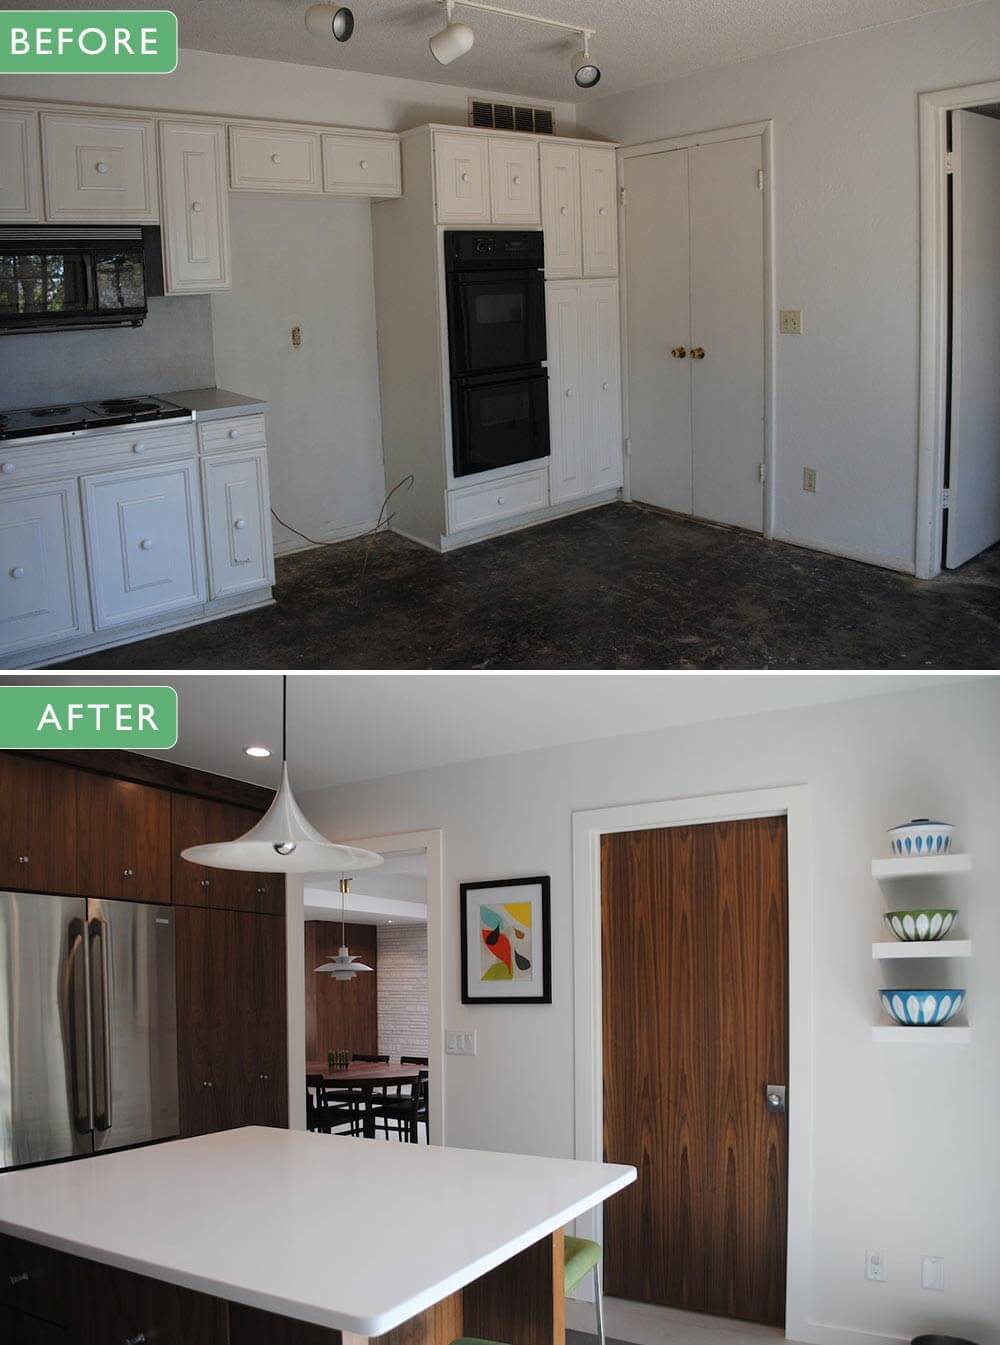
The island will seat four adults comfortably and serves as our daily kitchen table. The decision to replace the french door with a slider, as was originally there, makes the space feel more open and larger than reality.
- American walnut cabinetry stained natural
- 3×9 ceramic tiles from Daltile — natural hues collection
- Caesarstone quartz countertops in “Blizzard”
- Cabinet hardware — Mid-Century Peg cabinet knob from Rejuvenation
- 4” LED can lights
- Vintage Danish pendant lights
- Floating Lack wall shelves from Ikea
- Bar stools from AllModern
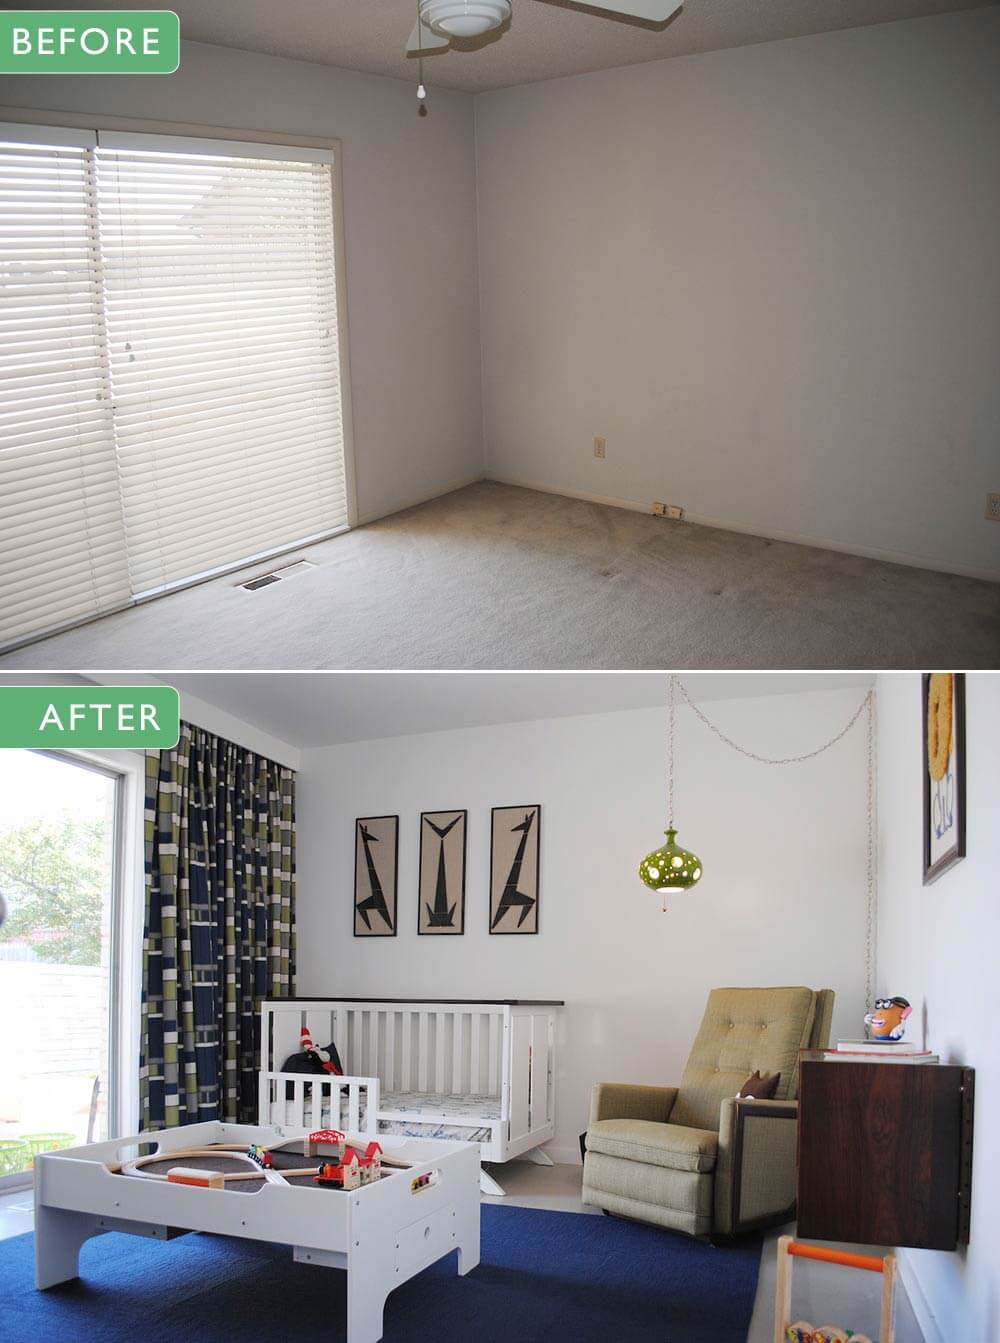
Bedrooms (above and below)
Only two are pictured, as the third is serving as our “catch all” from the move (we are opting not to show you our messy side ).
- Child’s room curtain fabric — Premier Prints Hopscotch Felix Natural from Fabric.com
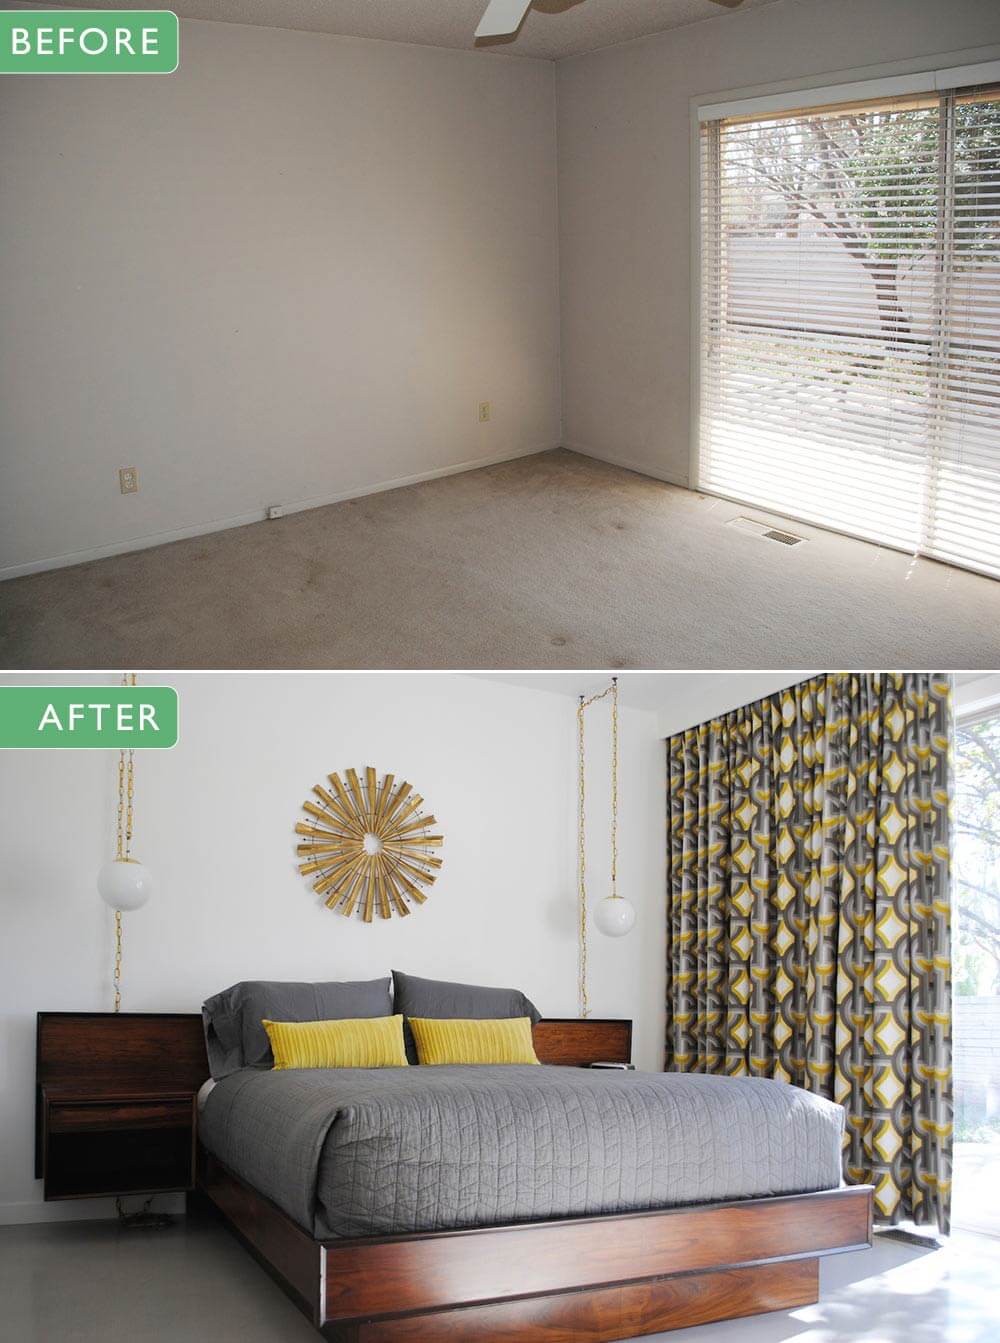
It’s amazing the difference given the fact that the bedrooms saw the least amount of renovation work. What we like the best are the floor-to-ceiling and wall-to-wall curtains for the 8’ sliding glass doors. They slide on a track system tucked behind a simple wood valance and are separated in the middle so they can bunch to either side of the sliding glass door, creating a feeling of having a entire glass wall.
- Master bedroom curtain fabric — Dwell Studio Futura Dandelion from Fabric.com

Best of the rest (above and below)
Two projects we haven’t previously discussed in our installments were the laundry room and master closet, and we love how they turned out so thought we would share. The bedroom we chose to use as the master is not the room intended to be the master. We opted to keep the original master as the guest room for a variety of reasons. So our master bedroom is not very big — when you add in the closet door, bathroom door, and sliding glass door, there very little wall space for furniture other than a bed. Fortunately the closets are large so were able to build in a dresser along one side.

We gutted the laundry room (which is off the kitchen) and rebuilt storage that better suits our needs, along with a small counter top. We also added multiple outlets so this space also serves as our charging station for laptops and phones.
Mike and Lindsey: What an amazing treasure of a home — one that is so lucky that you found it!
Thank you so very much for taking all this time to chronicle and share your journey with us!


Anastasia says
Gorgeous & still child friendly, love that too!
Mag says
I am so very, very happy for you both! Thank you for sharing your journey. If you decorate for the holidays I would love to see photos.
Christa says
Wow, you guys crushed it! Nice work. I especially like what a light touch you used for the ceiling can lights. So often those are overdone and look a mess, yours are just right. All the finishes and fixtures are fantastic!
Mike and Lindsey says
Thank you Christa
The can lights are 4″ LED’s. I had never really seen LED can’s before but they are very cool, there is not a bulb so you get this very clean an simple look with them. A big part of it is that they are white, so they mostly go away in the ceiling. don’t think we would have gotten the same effect if they were not both white. I don’t know if they are paintable if one would want to paint match them to a ceiling color, that would be interesting to know
heidi says
you guys did an amazing job!! Love your home – your kitchen cabinets are beautiful and I love your child’s room!!
Erin says
Thanks for all the before and after pictures, it’s been fun seeing the progress. What color/brand/type of paint did you use for the walls? Also, I may have missed it, but what state is your home located in?
Mike and Lindsey says
Erin, We are in Oklahoma City and the paint color is Snowfall from Behr. Semi gloss lacquer for all the trim and eggshell on the walls
Gus says
Congrats on your work! It must be so nice being able to walk around in that space knowing how well it came together. I especially love the simplicity.
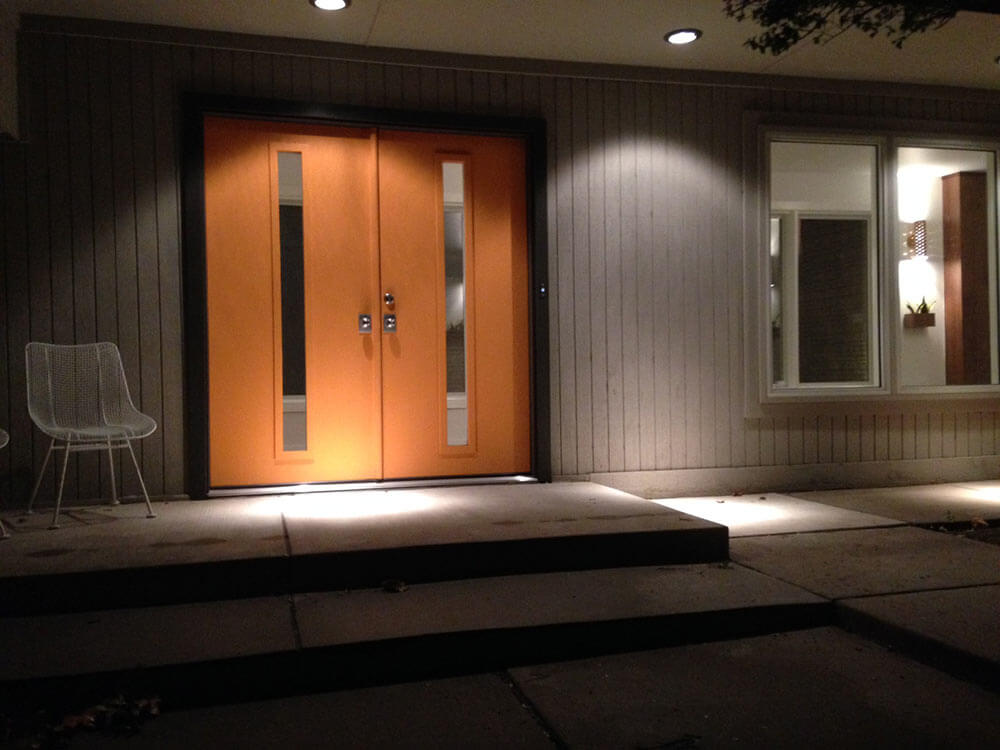
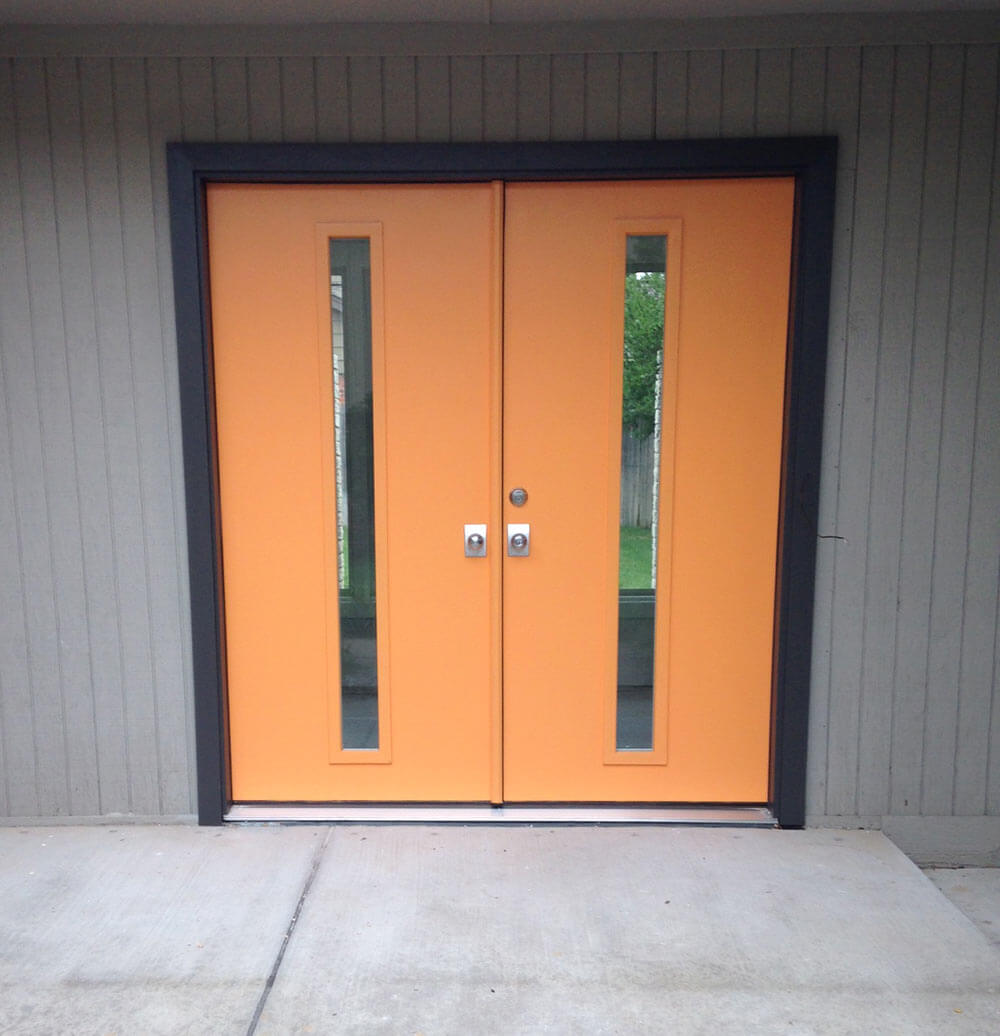
Question – Are the front exterior doors original? If not where did you get them? Sorry if I missed the mention of them.
Mike and Lindsey says
Gus
The front door is not original. You can read about it at the link below in the 7th installment. Also below is a link to all 8 installments
https://retrorenovation.com/2014/09/22/midcentury-modern-closet-hall-doors/
https://retrorenovation.com/tag/house-of-good-taste/
Melinda says
fantastically beautiful renovation.congratulations on all your hard work. I do feel like the area under the skylight would look great with a SMALL cluster of simple tropical plants.
Hope you have many years of enjoyment in your beautiful home.
Mike and Lindsey says
Melinda
We have thought about putting something under the skylight, but right now it gives our 2yr old boy a huge area to play and ride his trike 🙂
ineffablespace says
It looks great.
I had expressed some concern back at the very beginning about the ceiling plane and recessed lighting, but the lighting is really well done and enhances the interiors.
Mike and Lindsey says
Yes, I remember that comment and it was something we thought about, but with the lights being the smaller 4″ cans and in white, they mostly go away into the ceiling.
We could have left the can lights out of the hallway ceiling, as the sconces give off plenty of light. we never turn them on.
One thing that we might have done different, is instead of doing the ceiling cans that light up all the stone walls, is to have put in walnut valences along the top of the stone walls and mounted down lights behind them.
Patsy says
Beautiful job! I would love to know where you found the swag lamps for the bedrooms. Our 1955 house has only two ceiling fixtures in the kitchen, so we hung swag lamps in all the other rooms when we moved in 35 years ago. Unfortunately, the one in the dining room broke and I haven’t been able to find anyone selling affordable swag lamps or conversion kits in anything but a dark nickel finish, so what’s there now is a single bulb on a cord I put together myself.
Mike and Lindsey says
Patsy
We love swag lamps 🙂 Had a few in our last house too
its hard to really find “new” swag lamps. All the ones we have are vintage and we just rewire them and usually put on new longer chains. You can find all sorts of vintage swag lamps, or lights that can be turned into swag lamps, on Etsy or ebay. The two matching ones in the bedroom were bought off easy for about $75 and then another $20 in wiring and new chains.
lynda murray says
Thanks for sharing! I know it wasn’t easy to do during such a busy time. Also , thanks pam and Kate . I feel like your both friends of mine! I hope you and your followers all have a wonderful holiday season. ( I am enjoying my vintage orniment wreath inspired by you two.)
pam kueber says
Thank you, Lynda!!!
Kate says
awww thanks Lynda! Warm fuzzies! 🙂