


 Less than a month ’til V-Day, wanna plan ahead? Some World of Tile liquidation sale BFFs, who knew I loved making ornament wreaths, stopped by to show me the Lindt chocolate Christmas wreaths that their grandmother had been making for years. “Grandma making something for years” counts as retro to me, so last weekend I invited a friend over to make our own, for Valentine’s Day. We tried three DIY methods, and one was, hands down, the best way to make this sparkly, edible crafty.
Photo viewing tip: On a desktop computer, once page fully loads,
click on any photo and it will double in size on screen
so that you can see detail better. Hit ESC or off the photo to return to story.
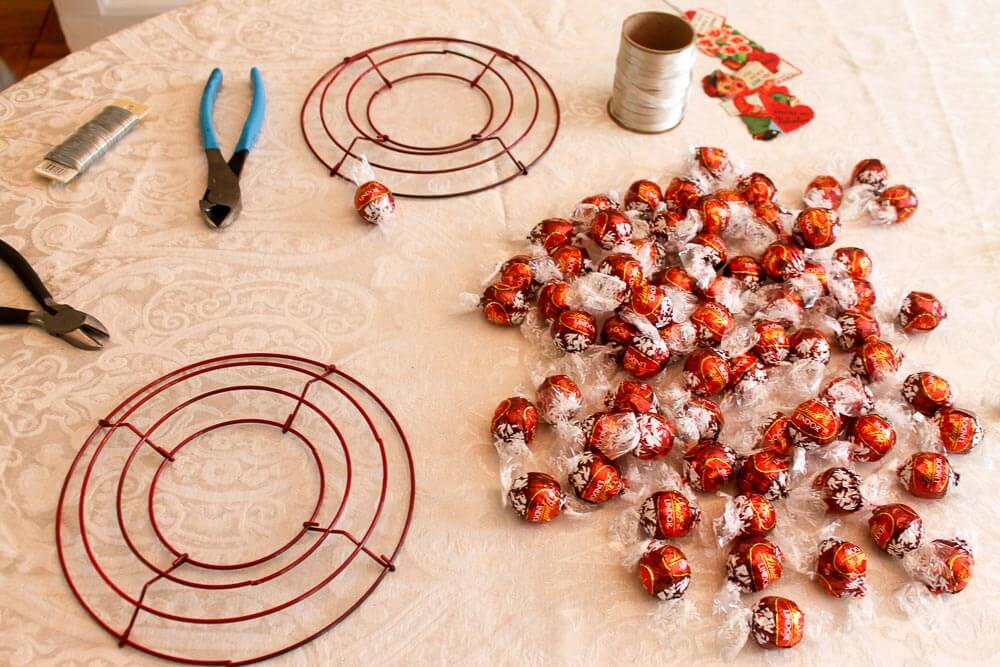
Tools to make Lindt chocolate truffle wreaths:
- Lindt Chocolates: I online-shopped a while, although not insanely, and concluded that the best prices for Lindt chocolates were at Lindt itself, which had a buy-three-get-two-free deal going on. For this project, I chose by wrapper color — red, of course. Link: Lindt Lindor Milk Chocolate Truffles.
- Wreath base: I used 8″ green wire wreath forms that I bought on Amazon. Hey, you could even use a heart-shaped form, but note that the one I see online is quite large — take that into account when you are figuring out how many chocolates to buy. Link: Wire wreath forms on Amazon (affiliate link)
- Wire to wire the candies on to the wreath form and to create a hanger for the wreath. I had lots of wire on hand, so didn’t have to buy any. The wire needs to be pretty thin — you want it to be pliable and easy to work with. I used silver wire because I didn’t want to see it.
- Spray paint: The wreath forms came in green, and I did not want to see green underneath. I had some red spray paint in my stash, so a day or two before my craft day, I spray painted the forms. In retrospect, I think that silver — or even silver glitter — paint would have been better, because, as you will see, on the forms that we used, the center metal ring showed.
- Wire cutters.
- Weebits — I had a stash of vintage Valentines on hand, and we used these for the front of our wreaths. I also pulled out white curling ribbon and red pipe cleaners from my stash. Re weebits: Use your imagination… what can you use to adorn your wreath to give it just a little more zing?
- Hot glue gun — if you need to glue on any weebits.
- Adhesive and cardboard — We used ModPodge to glue the Valentines onto cardboard (thickness of a cereal box) to give them more structural strength.
- Cutter Bee scissors — to trim the Valentines after gluing to the cardboard. Funny: My friend was wary of cutting out her Valentine after it had been glued to the cardboard. “I am not good at cutting.” She mentioned something about having been asked to leave Girl Scouts, because she and her girlfriend spent all their time, during craft activities, hiding in the bathroom. But I gave her a pair of my Cutter Bees — I am truly a fan of this product — and she was amazed at how easy it was. *soproud* that I am giving my crafting-insecure friend crafting confidence! Link: Cutter Bee Scissors (affiliate link)
Our two “don’t do it this way” methods:

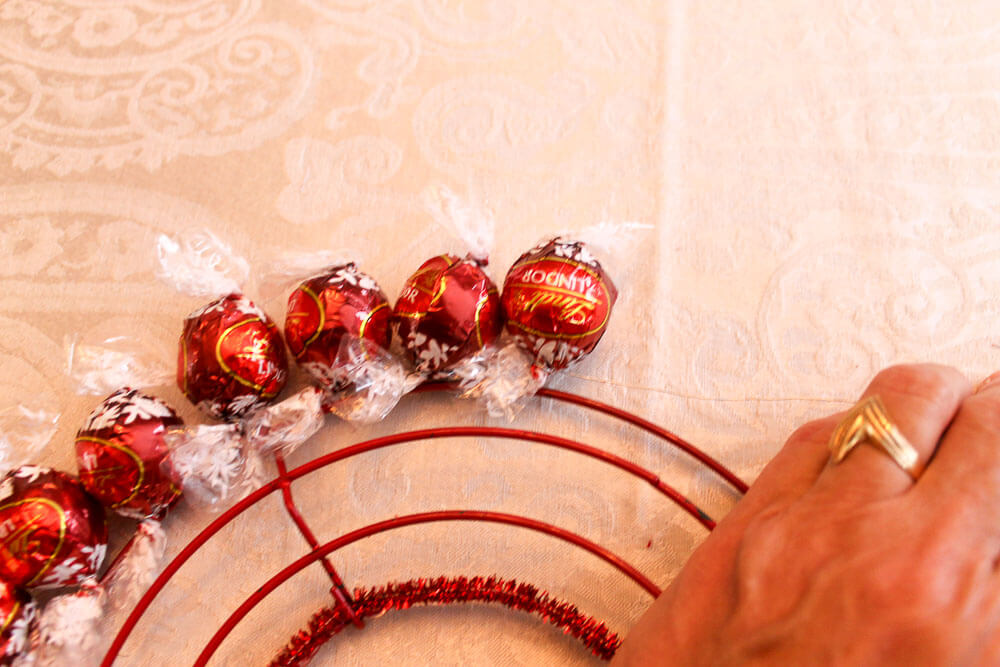
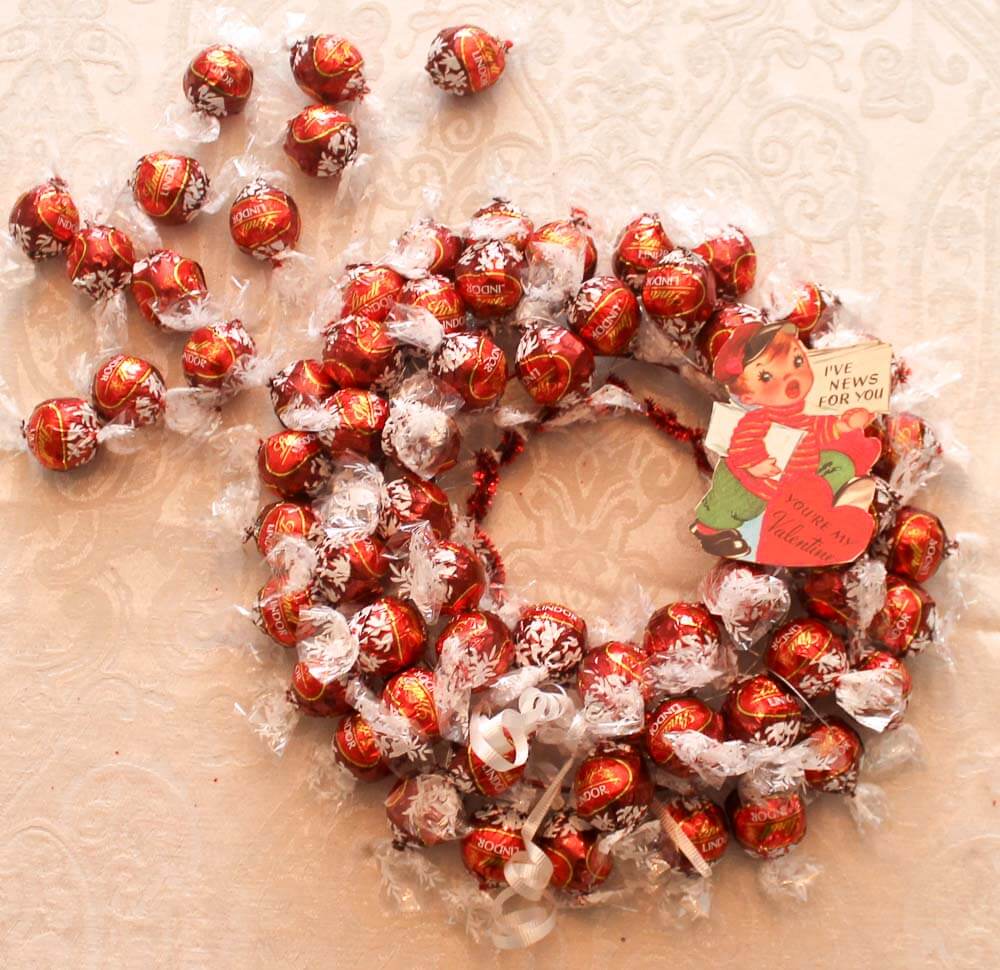 Method #1, above: Create one long rope of Lindts then attach them to the wreath base in one long spiral.
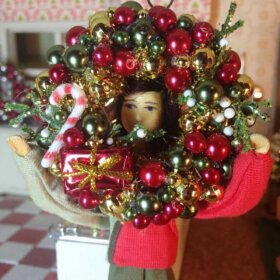
Wiring the candies together was easy peasy. My friend decided to see if she could make one long Lindt rope and then wire the rope to the wreath form. Creating the rope was a breeze – went super fast. Alas, when she tried to get everything onto the wreath form in a tidy way, it was really hard. As I recall, she cut small pieces of wire, bent them in a U or V, and used them to attach the rope to the form from the front to the back, then twist. All this while holding the spiraling rope. It was difficult. We don’t recommend this method — even though if you received this wreath as a present you’d think it’s as cute as heck. Which it is.
Notice: The center ring of the form shows after attaching chocolates to the three outside rings. Here, she wrapped that center ring in pipe cleaner. She also tied some curling ribbon in strategic spots for pizzazz.
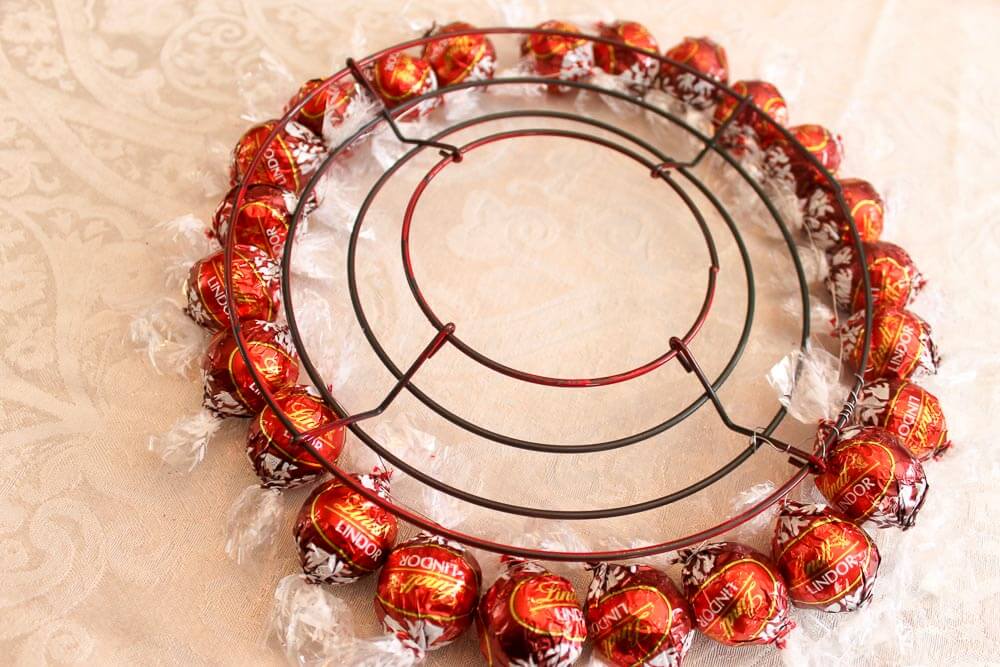
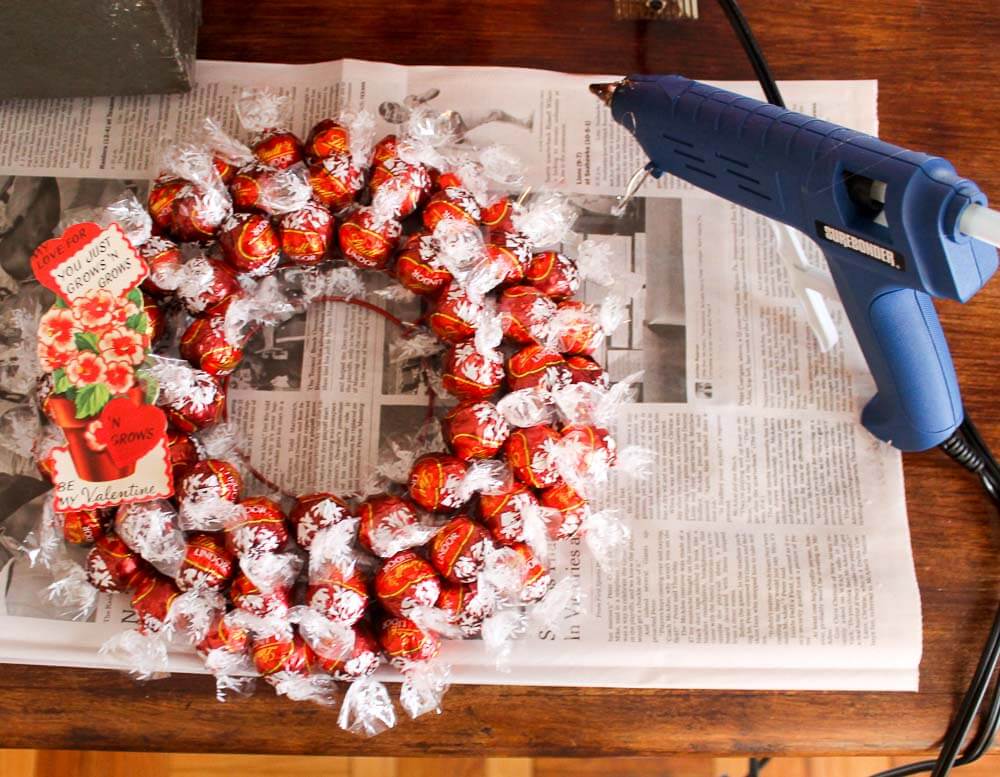
Method #2, above: Make a rope of Lindts for one ring at a time — then attach them.
My first impulse was to wire the truffles together — but to make the ropes just long enough to go on one ring at a time — then attach them. As shown above: I could turn the wreath upside down to attach the ropes to the form with wires more easily.
 Overall, this method worked fine, but still, I thought there might be a better way. Note above: I wrapped the center ring with curling tape. I liked this look the best of all I tried, because the center ring did not ‘scream’.
Note, someone is going to ask why didn’t you write chocolates onto the inside ring. Main reason: I think the truffles would flop forward. And second, we liked having the opening — it looked better; white space is super important in design.
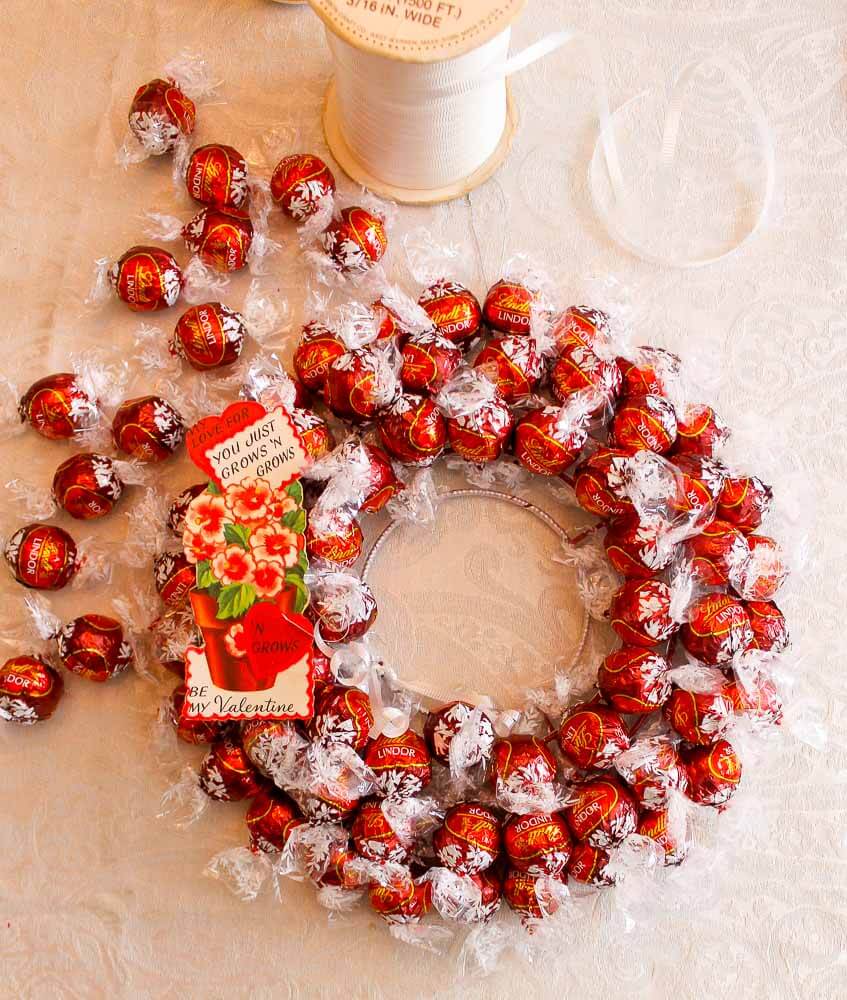
The best method, I thnk: “Sew” the truffles right onto the wreath base
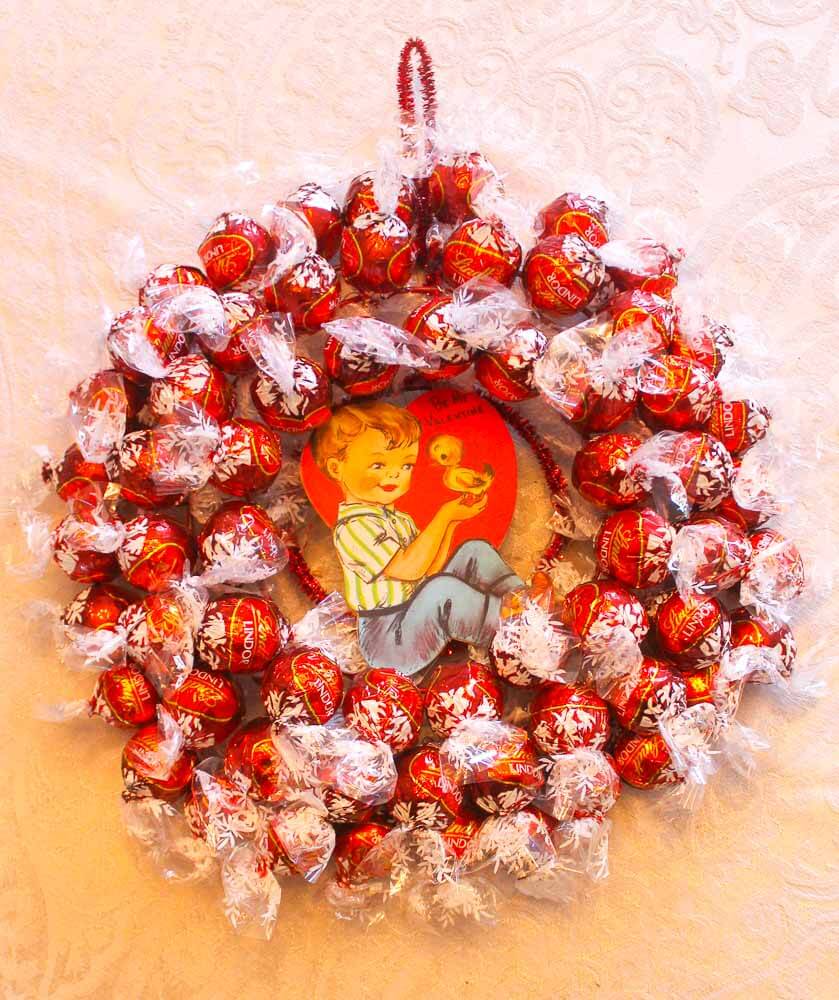
Above: The best way to do this project, I think, is to “sew” the truffles right on to the wreath base. Here’s how I did it:
- Decorate your center ring first — this is easier than doing it later (when all the truffles get in the way). On this one, I hot-glued a pipe cleaner on top of the the inside ring.
- Cut a piece of wire long enough to work with for a while, but not so long as to get tangled.
- Secure one end of the wire to the wreath base.
- Wrap the wire around the bottom of the candy — where the paper twists — twice. This also is a Goldilocks maneuver: You want to wrap tightly enough so that the candy doesn’t fall out, but not so tightly that you guillotine the paper.
- Just like you’re sewing, wrap the wire around the wreath base (to the right of the candy, for right-handers) so that the candy is secure.
- Bring the wire up behind the next candy, wrap twice, secure onto the base… and continue until you are done.
- Do the outside ring first, ending the ‘rope’. Then, move onto other two sections using the same method..
- Use wire to create a hanger (and I covered mine with pipe cleaner, too, for looks only; the pipe cleaner was not strong enough to use as a hanger — I tried.)
- Add your decoration on top.
Voila, here’s the wreath using the ‘sewn-on’ method:
A couple more points:
- When you hang the wreath, the top part may flop forward and make the wreath not symmetric. Whatever.
- Sometimes a candy might fall off. Keep your wire and wire cutters handy and twist it back on.
- Having small fingers helps with all of this. Golly, my friend and I had big fingers. Oh well — good for your concentration. Very zen, actually — I think we were generating lots of happy hormones — and we didn’t even eat any chocolate as we went!
- To eat the candies, tell folks to just unwrap them from the front and dig in. I am told the paper itself looks pretty still in place. Believe it or not, I still have not broken into either of my two wreaths yet — I’m giving them as presents.
Someone on Facebook asked during the holidays if this was becoming a “crafting blog”. No, it isn’t. But (1) I need to art — it’s so good for my soul! and (2) I need to see live peoples more often — my computer cave is lonely, and crafting with friends is fun and oh-so-retro! and (3) I like to mix things up — after nine years of blogging, more so than ever!
And: In response to a comment: NO, this is not product placement/sponsored post. Lindt did not pay me, they did not contact me, nix, nada. I always endeavor to declare any such relationships, if they exist. See my Disclosures page for my policies on such how I make money etc: https://retrorenovation.com/disclosures/


Laurie says
I like the variety of subjects. I read your blog every day!
Tom says
This isn’t a hidden (crafty) ad for Lindt is it?
Couldn’t this be made with any wrapped candy?
pam kueber says
No, it’s not an ad. They did not pay me or contact me or anything. See my Disclosures page for my policies on this — https://retrorenovation.com/disclosures/
And yes, I think it could be made with any wrapped candy as long as the wrapping was on both sides.
Tom says
That’s cool of you to do without being paid by them!
They should send you some chocolates 🙂
Well done!
dkzody says
I love it. Thanks so much for sharing.
Stacy says
Love, love, love my Cutter Bees scissors! They truly make a difference. Especially when making smaller, detailed cuts.
I actually enjoy the crafting segments. Maybe it is because I like to DIY and craft as well…but I think it is also because even if it is not a project I plan to recreate myself, it can still spark some creativity that I can apply to other ideas.
Keep ’em coming , Pam! 🙂 It’s your blog and you can craft if you want to…
Diane in CO says
Do these Cutter Bee Scissors come in a left-handed option for those of us who were “brain-damaged at birth?” On that link, there is no information which addresses this question! It is quite impossible for a leftie (at least this leftie) to cut with a right-handed scissors. (Is your friend a leftie by the way? That could be her problem with scissors.) Fiskars sells leftie scissors as an option.
Next up they need to invent a leftie tape measure. I was 50 years old before I realized that all my life I’d been reading a tape measure upside down; it just seemed normal to me! 🙂
Love your truffle wreath, BTW.
pam kueber says
I have a pair in a box still, the box says: “Comfort grip handles for left and right hand use”. I also took an open pair over to my husband, who is left handed, and had him do a quick test. He said they were comfortable for him to use.
Just eyeballing them, they seem very symmetrical in their grip design….
Diane in CO says
Actually it’s the way the blades are arranged; which blade is “on top.”
Thanks for field test on your husband! Still curious if your friend is left-handed…..
If link posts ok, there is a great graphic illustrating the scissor difference if you scroll down a hair….
Diane in CO says
http://www.lefthandedworld.com/left-right-scissors.aspx
Lynne says
I don’t think your blog is becoming too craftsy. I like the variety. It’s more fun to check in every morning and be surprised at type of story you have for us.
Donna says
Very nice but you could also use Hershey Kisses 🙂 https://sites.hersheys.com/celebrate/holidays/craftdetail.aspx?id=80
pam kueber says
but but according to the Kisses tutorial: You shouldn’t eat the candy after. NO WAY 🙂
Rickie says
Crafting was major for a lot of ladies during the mid century era. I love crafts from that time that I find in junk and antique stores. I really like to try to recreate them. Suzie Millions has a retro crafts book that is fabulous. It has tons of information and fun pictures. It explains how to create lots of retro crafts. She also has a website. Some fun stuff!
Bette Jean says
I think all the crafting has a very retro vibe, as you said. Love the Betsy McCall chapters and putz houses. You do a great job of presenting a variety of topics for many interests. My favorites are time capsules and uploaders. Nice to come to this site every morning with my coffee.
Jay says
Such patience! I think the craft episodes are funny as told from your perspective. I laughed because I thought this reminded me of Cooks Country where they try to replicate a dish by making it over and over until they hit on the best method of preparation (sometimes a bit too laborious). That Christmas wreath is beautiful, I suppose it wouldn’t have been proper for your friend to ask her grandmother her method of assembly. Good thing I have some leftover Christmas Snickers in the desk drawer, all this chocolate is making me hungry.
pam kueber says
Honestly, I didn’t think to ask my friend to ask her grandmother — because I am a “wing it” kind of crafter, generally! Seriously, it never occurred to me. I didn’t even look at the photos I took of the original wreaths until I went to set up this story. I just… plowed ahead once I got the idea I wanted to do this one!
Carolyn says
I admire your restraint – my wreath would consist of wrappers! A big reason I look forward to Easter is I can stop myself eating jelly beans and there are no more “chocolate holidays” for awhile!
Are we getting too crafty? I would rather paint a wedge of tree to resemble a slice of watermelon and discover problems than to commit to painting my bdrm and getting danged sick and tired of the all the pitfalls – undiscovered nail holes, should’ve gotten the expensive non-shedding brush, ceilings too short for a ladder yet too high for me to reach, my couch is horrible for sleeping, etc. Using different tools we may never have had the reason/opportunity to use and get comfortable with it in our hand – sets us up to try something a little more challenging to DYI (recent “hard way” entries). And be able to speak with authority when contracting out work better left to experts.
And the wee-bits – not generating joy sitting in a drawer or box so find unique ways to display.