

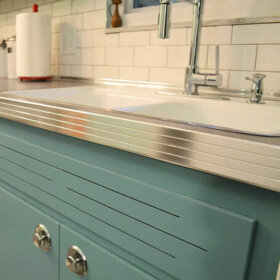
 Several readers have asked me how to install the stainless steel countertop edging from New York Metals. In this post, I’ll take you step-by-step through the process that we used to install the metal edging in my kitchen.
- See all of our Kitchen/Countertops research here — for example, we have research on aluminum (rather than stainless steel) edging, too
- See my overview story on where to buy metal countertop edging — stainless steel, aluminum, even faux
I had my countertops laminated by an outfit recommended by by contractor. They made all the countertops and backsplashes separately, ahead of time, and then, when they came to install them in my kitchen, they put everything together.
To review…The edging is comprised of three different pieces.
This is the little cove molding piece you use to mask where the countertop attaches to the backsplash. The part that “shows” is the 5/16″ part. You shove the 15/16″ part back down behind the main countertop:

This next piece, the 1-5/8″ snap-on molding, goes along the edge of the main countertop.

The question I have been receiving is, how to you handle the corners.
Answers: On the OUTSIDE corners, you snip the the metal lip that sit on top of the countertop and along the underside and miter it; the fat 1.5″ part of the metal bends easily to make the turn:
 On INSIDE corners, you cut the whole piece, also making miters on the lip that sit on the counter and underside.
 Now, somewhere in my stash I saw 50s DIY instructions on how to then weld… spotweld?… sauter? the mitered edges for a clean finish. Who knows which word? Lord knows which of 400 magazines this little article in. But I’ll keep an eye out. In any case, we did NOT weld anything and honestly, it’s fine. It kind of looks worse in the photo above than it is in real life. The miters are just real tight. Hey, if anyone is out on retro recon, with a camera and sees welded corners – grab the shot and send it in.

Finally – the 1″ backsplash…corners, miters…are handled the same way. In spots where the backsplash edges are visible vertically as in the photo below – back by the wallpaper – we made the bend then just secured them with a bead of glue. No screws were used.


Contractor Kevin, along with the countertop guys, were quite trepidatious about the whole thing coming in. This was the first time any of them had done this, their dads had done it 50 years ago! It really was a breeze, though. And as with the rest of my darling beloved kitchen – all the naysayers who thought I was nutso – were totally won over in the end and LOVED IT!

Above – Reader Amy asked you to “end” the countertop against a well. Here’s Option #1 – you run the backsplash all the way around.

Above – Option #1 e.g., where the countertop ends against a fridge, we wrapped the countertop in 1-5/8″ molding there – no backsplash.
Hope this all makes sense.
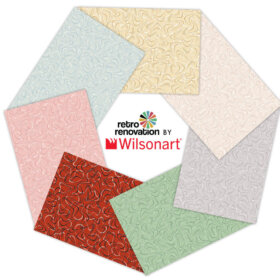
Note that metal countertop banding is available from a number of companies in a variety of metals. Some are u-shaped, like the kind I used, while others are t-shaped and require routing. Others also may have cute banding. And, there’s shiny and matte finish to decide on. Lots of choices!


Jules Jayy says
Please please let me know how you and your contractor solved the problem of the 3-way inner corner where the backsplash on your two walls meet together with the countertop! I screenshot-ed it on your video, but can’t quite make out what’s going on. I’m afraid I’ll have to fabricate a couple things. Don’t know if that’s even possible. I’m doing an early 40’s cottage kitchen with a metal-edged linoleum counter and 3-sided backsplash.
My second question is about aluminum vs. stainless: Stainless steel edge trim selection seems limited compared to aluminum. Is there a drawback to aluminum? Is aluminum authentic? Thanks!
pam kueber says
Hi Jules, I don’t know the answer to these questions; (though on the one, I do tend to think that both materials were used back in the day.)
Perhaps NY Metals can help answer them.
Good luck.
Tolga Morawski says
Hi There! I’m looking to find some NOS Formica skylark blue boomerangs and do this for a 1937 kitchen we are renovating in need of new counters…however, my mothers home has a intact 1950’s GE (?) enameled metal kitchen cabinet set with Formica counters (red cracked ice I believe). I am writing as her edges are clearly welded/soldered. I have some photos if you are curious to see them, let me know. She and my Dad bought the house in 1970 and the kitchen is largely as it was and though there are a few knife marks in high traffic areas and a bit of dulling again, in certain spots, they generally look great and have held up well!
pam kueber says
Hi Tolga, I don’t have any secret source for NOS Formica in skylark blue, but here are two stories that may help you out to find something close:
https://retrorenovation.com/2016/02/11/four-designs-29-colors-boomerang-laminate/
and
https://retrorenovation.com/2011/09/19/8-places-to-find-retro-laminate-for-kitchen-or-bathroom-countertops-my-researchtips/
Nick Balandiat says
I found one on Home Depot that looked kind of cool. But how did YOUR edge band stick to the countertop? Is it just friction? The one I found here looks like you would need to glue it or screw it on
https://www.homedepot.com/p/Alexandria-Moulding-1-4-in-x-15-16-in-x-96-in-Metal-Mira-Lustre-Grooved-Edging-Moulding-AT018-AM096C03/205576705
Pam Kueber says
Hi Nick, for installation instructions one needs to check with the manufacturer. My edging — which came from New York Metals — was installed by professionals, I am not sure what they did.
Brendan says
Did you use a clear silicon caulk around all the metal edges to seal it so liquid and crumbs can’t make their way between the metal and the laminate?
Pam Kueber says
I don’t think my installer did this. I suggest you talk to the folks at New York Metals regarding this question… historically, they have been very responsive…
Lisa Gendy says
Hi I am looking to replace the laminate on my mother in laws counters which also have this metal trim. Is it possible to remove the trim and reuse it? The stainless trim is in beautiful condition.
Thanks, Lisa
Pam Kueber says
Hi Lisa, I don’t know the answer to this.
Nicholas Balandiat says
Did you have to order the metal edge banding from their website or can you find this stuff locally.
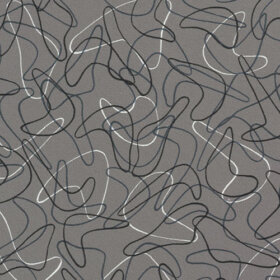
I have basically the same pattern but in white with the triangles. I want to redo the kitchen and I will need new countertops but more of them. I always loved the metal edge banding I have now
Pam Kueber says
I think you may be able to find it locally if you live in certain mid mod mad cities, like Los Angeles. Other than that, I do not know…
Joel says
According to the New York Metals website, the 5/16″ cove moulding (SS799) is no longer in stock. Any alternative suggestions?
Steven Keylon says
How tall is the backsplash on your counters?
Pam Kueber says
Just under 3″ including the stainless steel molding. Note, I didn’t do it to any ‘standards’ – I sized them so that they hit just below the kitchen window, which sits quite low/close to the countertop.
STEVEN KEYLON says
Thank you! I just ordered the molding from New York Metals, your information has been so helpful, as always!
Dan says
Hi Pam,
Any idea what they used to “miter” the corners? Did they just snip them with side cutters?
Pam Kueber says
I don’t know how they did it.