

 We’ve all come across a great looking vintage clock that would be perfect — except for the fact that it no longer tells time. When this happens we have two choices: Use the stopped clock as wall decor or try to bring it back to life by replacing the movement. After having come across just such a clock myself, I decided to take a shot at repairing it myself. While I’m no expert at DIY clock repair, in the end I did manage to get my vintage clock working again even with a few hiccups along the way. What follows is my own experience replacing the movement in a retro wall clock — in three somewhat easy steps.
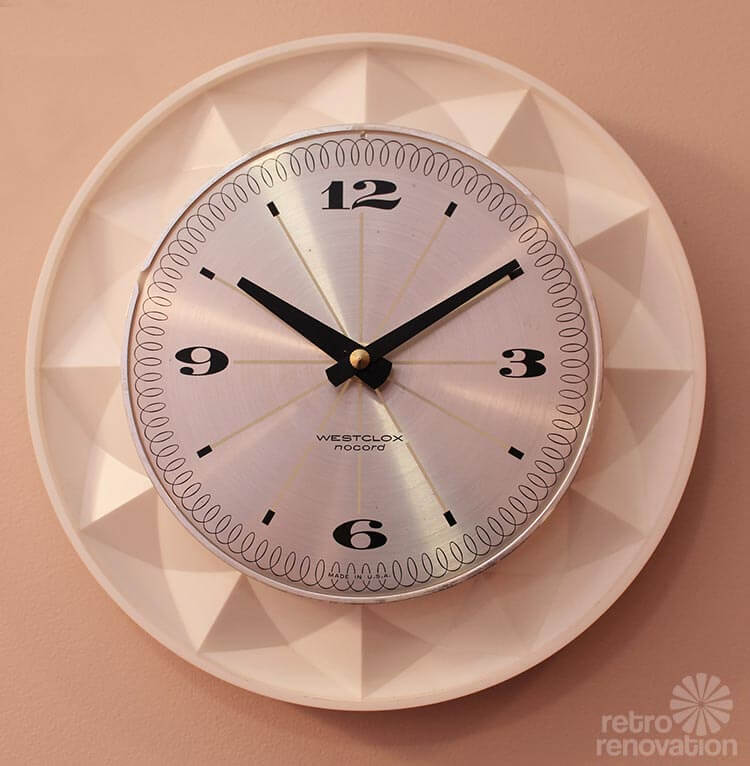
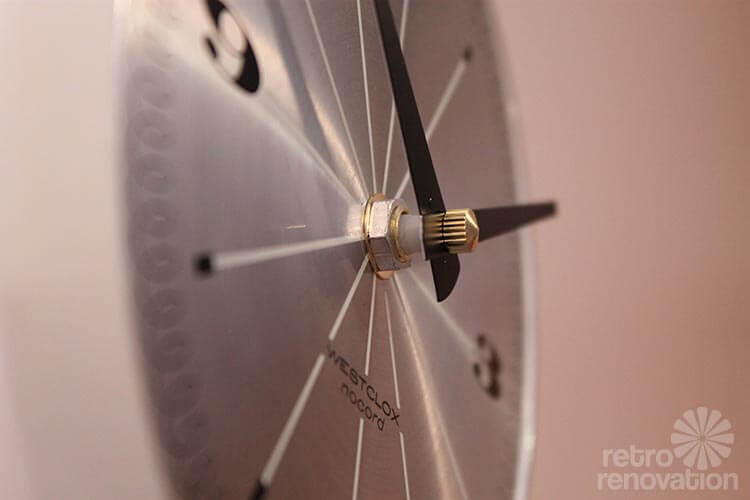
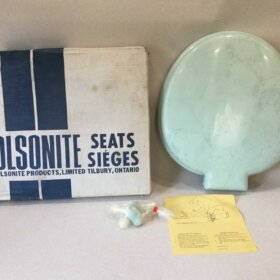
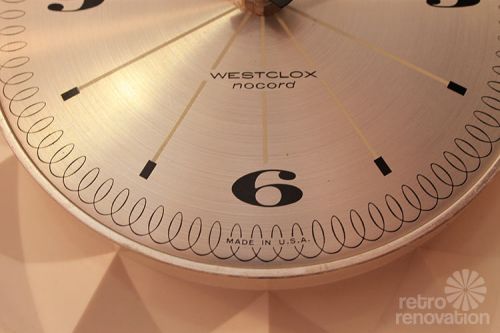 My journey into clock repair all started during my retro pink bathroom renovation project, when I purchased a vintage Westclox “nocord” from eBay to hang in my bathroom.
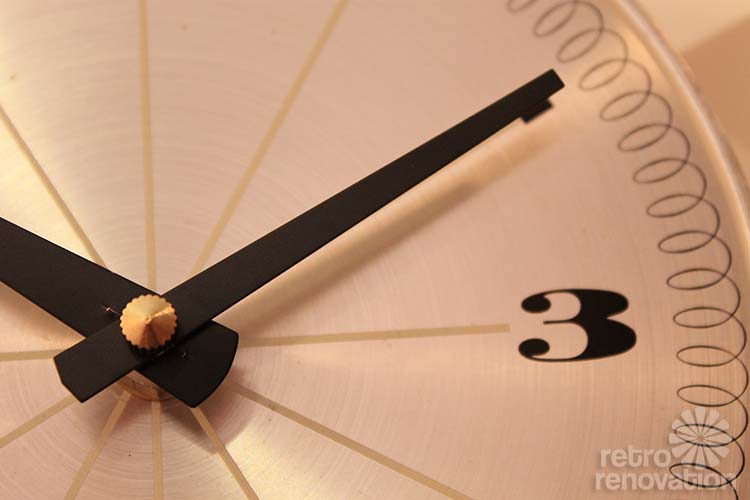
I bought the clock because I liked the interesting geometric white plastic edges and the fun retro swirly and starburst designs on the face of the clock. (Oops, I do not have a photo of the “before” clock.) The clock was inexpensive, and the seller said that it “worked great”, which made me think I’d only need to slap it on the wall and call it a job well done. Once I received the clock, though, I verified that it did work — though unfortunately it gained about five minutes every day, which add up fast over the course of a week.
Determined to replace the movement, I started doing research and found that it should be a relatively easy task assuming:
- You can easily remove the old movement…
- And, you can determine exactly which replacement movement is needed.
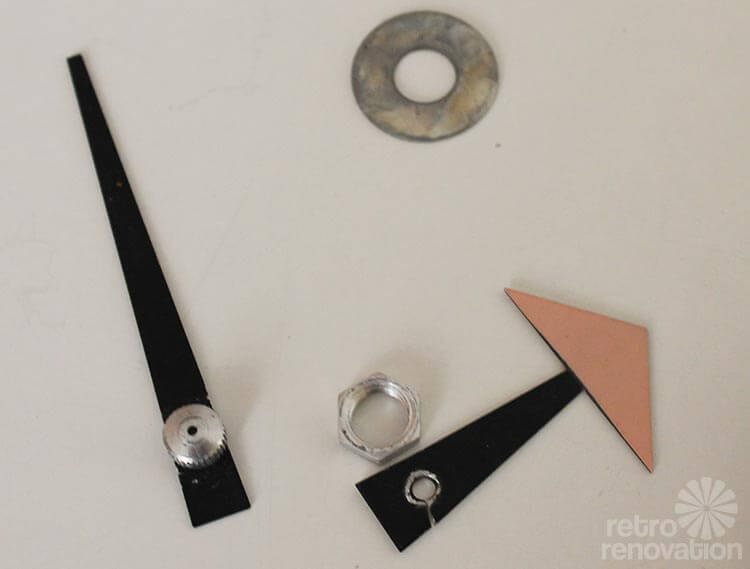
Unfortunately for me, both of these tasks proved difficult. As an added challenge, I wanted to reuse the original George Nelson-style clock hands — which I knew in advance might not be possible — or, to find replacement hands as close as possible to the originals.
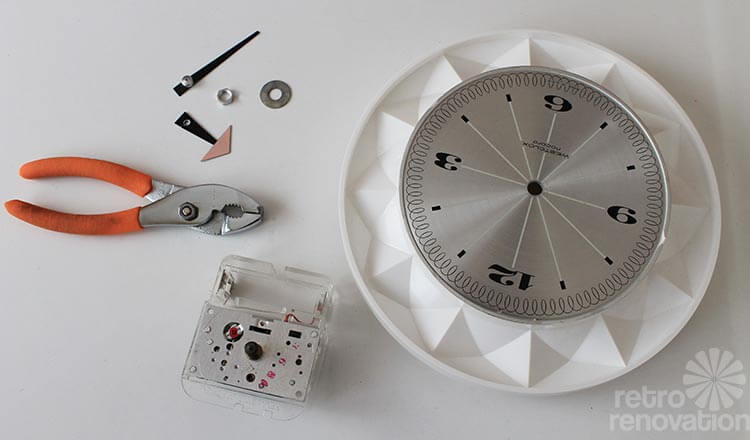
Step 1 — Carefully remove the old hands and movement
 After researching “clock movement replacement” on the web, I found that the first step was to remove the old movement. In most of what I read and saw on YouTube, the nut that holds the hands on the clock face should either pop off easily with a light, upward tug or unscrew from the clock hand shaft. First I tried unscrewing the nut, which got me nowhere because the mechanism turned as I tried to “unscrew” the nut. Next I tried to tug on the nut gently in an upwards motion. Still the cap nut would not budge. Getting frustrated, I held the “pull to start” knob on the back of the clock to hold the movement in place so it wouldn’t turn, then tried a combined unscrewing and pulling motion with the pliers.
After several attempts using this method, the clock finally let go of the cap nut, which was (interestingly) connected to the minute hand. From that point the hour hand popped off easily. Then, carefully using the pliers, I was able to unscrew the hex nut from the clock face, which freed the movement from the clock body.
Step 2 — Measure the old clock movement and find a suitable replacement
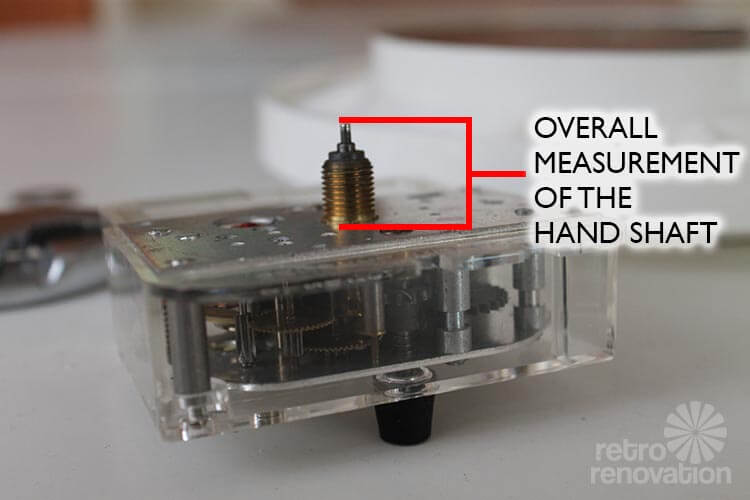 The next step is measuring the old clock movement to determine the size you’ll need when you look for a replacement. The most important part to measure is the overall measurement of the hand shaft — the part that goes through the clock face and holds the hands onto the clock. You’ll need to take into account the thickness of the clock face as well, to make sure the hand shaft will protrude far enough to be tightened to the clock face with a hex nut. There are many places to buy replacement clock parts online — I ordered my movement from Klockit.
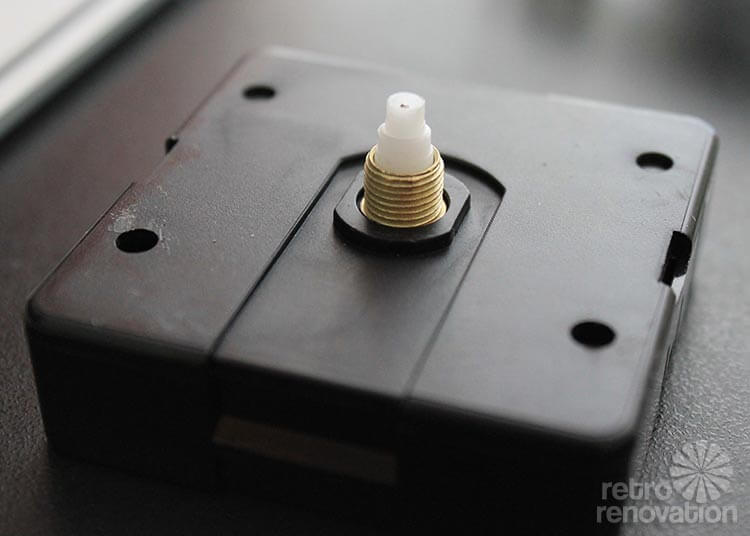
Once again, what should have been an easy task did not go according to plan. On my first attempt, I measured my hand shaft and ordered a Quartex push-on movement with hex nut with the same length hand shaft as my original movement. Unfortunately, the movement wouldn’t work in my clock. Why? First, the threaded portion of the hand shaft was not as tall as the threaded portion on the original movement.
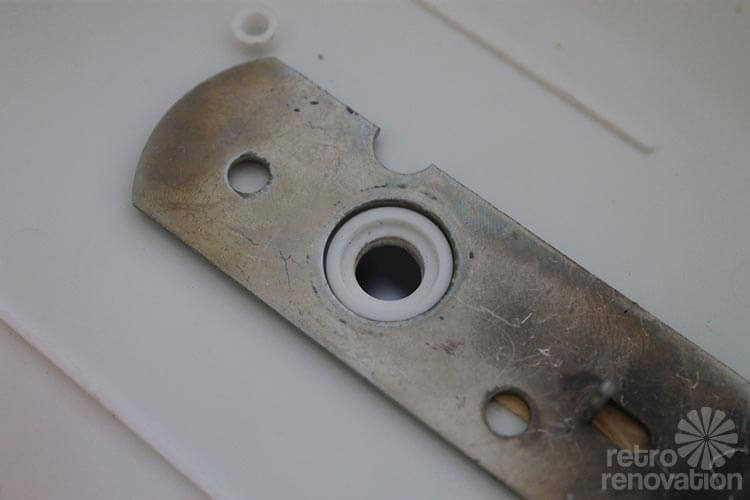 Second, because of the plastic ridge around the new movement’s hand shaft — (the original movement was flat) — and the ridge on the back of the clock face, the hand shaft would not go far enough through the clock face to be tightened with a hex nut. Bummer. Feeling frustrated, I contacted Klockit for guidance. They replied quickly, saying I was on the right track, but just needed to order a movement with a longer hand shaft, and suggested I try their Q-80 clock movements instead of the push-on movement I first ordered.
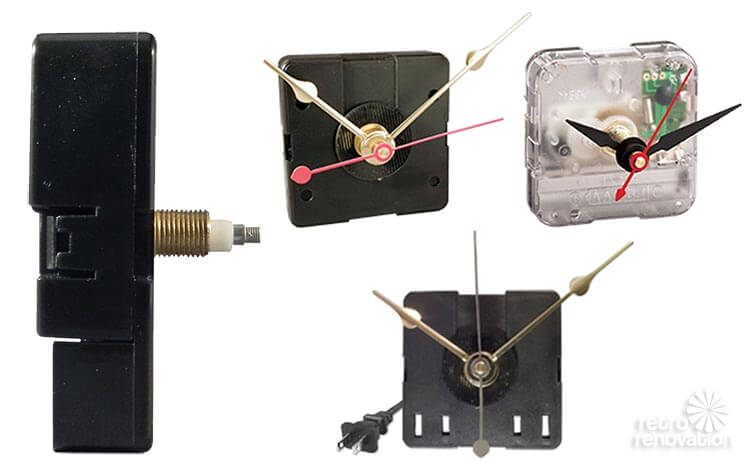
Thinking I’d give it one more shot before throwing in the towel, I ordered a Q-80 clock movement with a slightly longer hand shaft. It was apparent to me at this point that I would not be able to use the original clock hands since the holes in the original hands were much smaller than the diameter of the new movement shaft. Since Klockit offers a free set of hands with each movement they sell, I tried to find the hands that most closely resembled the originals.
 Of course none of the options had a large pink arrow on the hour hand like the retro originals, but I did find a set where the minute hand was nearly identical to the original minute hand. When choosing new hands, you’ll also want to make sure the length of the new hands is as close to the length of the original hands as possible to avoid using hands that are too short or too long for the face of the clock.
Step 3 — Reassemble your clock
 For me, reassembling the clock — once I had the proper replacement movement — was the easiest part of the whole process. All I needed to do was follow the directions that came with the movement. I made the quick sketch above to help illustrate the process.
- Use rubber spacer gasket between movement and dial to hold movement in position without having to over tighten it.
- Place a brass washer between the dial and the hex nut to prevent the nut from marring the dial as you tighten it down.
- Tighten the nut down only enough to hold the movement firmly in position. If the movement can rotate in your clock case, timekeeping will be affected.
- Temporarily place the minute hand over the “I” shaft as illustrated and rotate the hand clock-wise until it is pointing at the “12” on the dial. Lift the hand off.
- Choose any number on your dial to align the hour hand with. Very carefully press the hour hand straight down onto the tapered, friction-fit hour shaft until the hand is firmly in place. In the event that the hour hand is not perfectly aligned with the number on the dial that you have chosen, DO NOT try to rotate the hand hub on the tapered shaft. Lift the hand straight off. Realign the tip of the hand with the number and press the hand on correctly.
- When you have the hour hand mounted, carefully remount the minute hand at 12:00. While holding the tip of the minute hand between your thumb and forefinger at the 12:00 position, thread on the closed nut.
 After popping in a battery and setting the clock to the correct time, it was all systems go. I’m happy to report that the clock has been keeping perfect time since I replaced the mechanism over a week ago.
What I learned — helpful tips:
- As much as you will want to keep the clock’s original hands, it may not be possible. I was lucky to find a new minute hand that was nearly identical to the original minute hand. It may be possible for me to somehow make the hole in the clock’s original hour hand large enough to work with the new hand shaft on the movement, but I have not tried drilling or punching the hole to attempt to make it larger. Anyone with clock fixing experience want to verify if this is possible?
- All of the nuts and washers on my original clock were silver. It seems that new nuts and washers only come in brass. I was able to use the original hex nut, but for the closed nut that holds the hands in place, I could not reuse the original. The brass nut doesn’t bother me, but it could easily be spray painted silver to match.
- The hardest part of the whole project was trying to determine exactly which replacement movement would work with my clock. The movements were not expensive ($3-$5), but I did have to order two different movements before finding one that worked with my clock. It may be worth ordering two movements with slightly different hand shaft measurements to ensure that you get a movement that will work with your clock on the first try to avoid extra shipping charges.
- If you have a clock repair store near you, I would take the old clock and movement in to the store and ask for professional help in selecting a replacement movement. Figuring that part out myself was a headache!
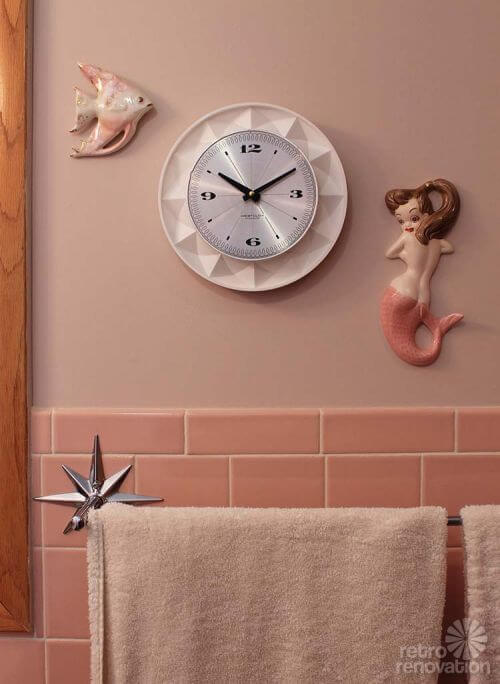 Even after all of the trials and tribulations, I’m still glad that I went to the trouble of replacing the movement on my vintage clock. The clock looks perfect in my retro pink bathroom, flanked by some vintage fish and mermaid ceramic wall plaques, and has so much more character than a new clock would have.
 Now I can check the time from inside the shower — to make sure this so-not-a-morning person is not running too late.


Kristin says
Thanks Pam, for your reply – I contacted Klockit too but will check with a local repair person, too. BTW – your tutorial was fantastic; great info and instructions. Thanks for that too!!
Kristin says
My intent to switch original works on my family’s GN Asterisk clock over to battery movement. I’m having a heck of a time getting the hands off; no gentle lift/pluck is working. I’ve been able to remove the “Synchron” portion of the original movement but it offers no further access to the hands. My thought is that I may need specific tool set to get at the what appears to be a brass fitting – I don’t own a pliers capable of grabbing the narrow reveal of this piece. Question – am I on the right track in trying to remove the brass part? And what type of tool would do this? I’m a total newbie at this but am determined! Thanks much ~
pam kueber says
Hi Kristin, I don’t know the answer to this. Perhaps – consult with a clock-repair shop?
Garo Hagopian says
This is a great tutorial, but I do have a question.
If the clock was running a bit fast, why didn’t you just regulate it? Those Nocord movements, though battery-operated, were pre-quartz, and utilized a spring-driven balance wheel, on the same principle as a mechanical watch.
There’s an easily-accessible screw on the back of the movement that lets you adjust the speed.
I think those old movements add to the retro character to the clock as whole, given that they tick like a spring-driven timepiece.
Pam Kueber says
Well, now we know… thanks for the tip.
Debra Greene says
Could you have glued the pink arrow on the new hand?
Katelyn says
Hi, when looking up one of my thrifting finds, I stumbled across your clock. Interesting, it appears your is missing the pink fur fringe (unless mine was custom added). Though it looks neat without the fur, cleaner nicer lines.
https://dl.dropboxusercontent.com/u/812387/PhotoGrid_1433392905634.jpg
pam kueber says
I had to read this a few times, but I think I understand!
Nicole says
Speaking of clocks,I have a vintage Westclox flashing light alarm clock that I love, but in researching it I have learned that the glow in the dark paint on the hands is radioactive!I can’t find too much info about it and wondering if anyone knows anything about this? I sleep with this next to my head every night so it worries me a bit.I love the light alarm so much more than that awful ringing so I am hoping the risk is low!
pam kueber says
yikes.
well, you gotta know what I am gonna say about this: Consult with a properly licensed pro. ugh!
John Cirillo says
I wonder how old your Westclox is. [Edited by Pam because it contained environmental/safety advice. PEOPLES: On issues like these, I am gonna point you to find your own properly licensed professional!]
Nicole says
Hi again!Just wanna let you know that I have contacted three clock repair people and vintage collectors and they cannot give me a straight answer either! Online research just turns up many differing opinions on the subject.Argh!
Bill says
Pam – I understand your practice about “advice”, but I have to ask where I would find a licensed radiation professional, The alarm clock in question undoubtedly has a radium dial, as did virtually every wristwatch I owned in the 50’s and 60’s. The only harm I’ve ever heard caused by this radium paint was [edited — pam says yet again: find your own properly licensed professionals to consult with when it comes to environmental and safety issues].
pam kueber says
Bill, I do not know.
MOREOVER: EVERYONE, please stop giving advice. I do not approve advice about environmental and safety issues. As you can see, you keep forcing me to edit comments. Please stop. On this one, you need to find your own properly licensed expert to consult with.
Chris says
You might have what’s known as Tritium illumination. It was also widely used in military lensatic compasses for decades. The health risks are [edited; Pam says, yet again: find your own properly licensed professional and consult with them.]
John Cirillo says
Kate,
I’ve had the same problem where the old hands had holes too small for the new movement. I have successfully modified the hand holes with a set of needle files. Just have to be careful not to bend the hands or go too far. On the minute hand especially, you need to try to make an I-shaped hole to fit onto the I-shaft so the hand locks into the shaft. It’s tedious but not hard. Now if the hand holes were too big for the new movement, that would be a different story!
Good Luck and thanks for the article!
John