


Lara Jane writes:
Hey, Pam!
Sorry to bother you again, but I have a question I couldn’t figure out while reading through the site: When you buy a set of vintage steel cabinets, how do you configure them so they fit your space? What if there are a bunch of small, “chopped up” cabinets and you have a long galley? Or conversely, what if you buy a long, galley’s worth of cabinets but your walls are “short?” I know the pieces are all separate but how do you get that “finished” look when you put your own kitchen puzzle together? I’m imagining all kinds of gaps in between!This has baffled me and made me pass on some fabulous sets because I wasn’t sure how to make them work for my space! Any info you can offer is appreciated!
Lara Jane
Lara Jane, This is an excellent question. You have hit on an important issue for sure: While vintage kitchens are most wonderful, it can be a real bear to try to fit someone else’s particular kitchen into your required kitchen space. (Also, this issue was the one that, round about, led to me creating this blog.)
To make an even longer story somewhat shorter, I also hunted and passed on several kitchens — for pretty much five years – – knowing that they would not provide enough cabinets for me to work with. My kitchen is pretty big for a mid-century kitchen, 15 x 15, as it was expanded in the 70s into an adjacent mudroom – the kind that runs long ways between the garage and the kitchen and also is accessible via a second front door. In planning for my kitchen renovation, I also was not able to move walls. And, I had a big picture window and three doors to work around. So, I knew that I would need a lot of cabinets to make a salvaged kitchen fit into my space just right. So, as I said, I watched ebay and waited for five years. There was one set I wept about letting go, but it turned out to be a blessing, as these things usually do. When we were finally ready to do the kitchen, had the money, I still had NO CABINETS. But, just when I was about to give up and buy MDF cabinets in a radius-edge slab-door style and paint them aqua — we had them specked out, I’m not kidding, the retro decorating gods sent me a humongous aqua metal kitchen – 67 cabinets in all. I knew — well, I crossed my fingers — that they would provide enough variety for me to make the cabinets work in my space. And they did – but by a hair and only a hair, I swear. When I bought the cabinets there were too many for me to even keep track of, I kept losing count of the exact sizes. So when I got them home, I took all their measurements, and started playing around on Excel. The final layout is above. BTW, the reason this led to the blog? Over the five years of watching and waiting, I started buying brochures and other materials all about vintage steel cabinets on ebay. Then, bathroom stuff. Etc. My expertise really started to grow, my interest never waned, my projects turned out well. Blogs were “new,” and I thought that starting one would be a good way to share resources and experiences with others going through the same struggles.
Back to the cabinets.
So how to prepare if you are interested in looking for vintage cabinets and planning to install them in your space? Some thoughts:
- Start by taking complete measurements of your kitchen space. (You can use grid paper to scale, or not. I did used Excel, not to scale.) If you cannot move doors, windows or walls, you’ll only need one drawing. This will give you the basic outline to work with. Make a whole lot of copies so you can mark them up.
- Determine where you would ideally want to put key appliances — the sink, fridge, stove, dishwasher. Typically, the sink gets centered under a window. The dishwasher goes next to it. I think that the “textbook” place to put the fridge is close to the entry door where you bring in groceries — and, make sure that the door of fridge is swinging the proper way, creating the opening in a way compatible with your other kitchen work spaces. I also personally believe the fridge can go closer to wherever folks are likely to access it the most – say coming in from a family room to get drinks. The “textbook” place to put the stove is nearer to the dining room — with the idea that you serve from this spot. But in my mind, the rule for appliances need not be hard and fast — except for the sink, which I tend to think really works best under the main window. Think “functionality.” While you’re at this step, play around with the possibilities. You can even make little cutouts pieces for the appliances and move them around.
- Also, as you are trying to imagine your ideal layout(s), look to see where the working spaces between the areas are. You are going to be cooking – where will you mix stuff? Store stuff? Can you make space next to the fridge where the door opens to stage stuff that goes in and out? Can you make space to the right and left of the stove, which is ideal if possible? The “textbook” says to measure the number of feet in your work triangle — the space on the floor connecting the stove, sink and fridge, and that the sum of the three lines should not exceed 27 feet.
- Once you are comfortable playing with your core layout – measure the spaces left. Worry about the base cabinets first. Metal cabinets (and new ones, for that matter) were made in 3″ increments – 9″, 12″ 15″, 18″, 21″, 24″, 36″, 42″. Working with your “leftover” space – what cabinets would/could you put where – ideally. Also, do you prefer drawer-cabinets, or door-cabinets (most vintage door-cabinets have one drawer on the top.) A lazy susan corner cabinet usually has 12″ doors – one to each side of the L. Otherwise, plan for a corner filler piece. Is a lazy susan something you feel you “must” have? If you have a very small kitchen, I’d recommend holding out for one…but this may depend upon your patience.
- Now think about wall cabinets. These can be a little easier, I think, because it’s easier to fill in left-over spaces with open shelving.
- Think about symmetry and asymmetry and how they feel in this layout. For example, I think it’s good for wall cabinetry flanking the sink and both wall/base cabinetry flanking the stove to be symmetrical.
- Know that filler pieces may be necessary – these can be a real bear to find. I think there might be an alternate solution: Fabricate fillers in wood and then paint them high-gloss to match your cabinets; this would of course be easier if you are also repainting the cabinets.
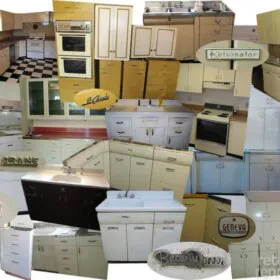
Once you go through all these steps, you should have a good feel for the number and size of cabinets you want — and also what alternatives might be acceptable. You can then watch sets for sale with more clarity. Even so — I’ll tell you, I think that a number of readers out there are collecting multiple sets to make their kitchen work, and you may need to do this as well. Scathing Jane, I believe, has three sets of St. Charles. I also think that she has been pretty brutal about not paying a lot. And you have that going for you – while you know I think these cabinets are very valuable – they do require this hunting and hassle, therefore, you can tell sellers “take it or leave it.”
I asked Jane for her comments as well, and here is what she said:
If you do want to collect multiple sets to create one complete set that fits your kitchen, I recommend focusing on a mainstream brand where you will find more availability – Youngstown, Genevas and St. Charles’ were the big-three brands. I think you might have best luck with Genevas and St. Charles’ because they seem to have longer runs of cabinets with the same basic lines and handles. In some regions, though, it seems like certain brands were more popular. Start looking- and paying attention – before you buy, and you will get a good feel for your local market. If you collect batches, you may be forced into repainting to get the cabinets all back to the same color. Please know that the paint on anything from this era can contain lead – please educate yourself, take appropriate precautions.
That is exactly why I bought 3 kitchens and have leftovers, and you bought a giant kitchen and had leftovers…
The answer is as unique as the kitchen.
The hard/important pieces for me:
- A good sink front. I am actually using the front grill to the radiator cover; the box for it was built from wood to hold the front by contractors (Montgomery Building Company). . It was 42 or 43 inches wide. I had two other sink fronts and one full cabinet. The cabinet was badly “injured” during removal. Neither of the sink fronts was as wide as I wanted, and frankly I love the design punched into the grill front I am using.
- The cabinet for the cooktop and the cabinet over it if you are going to vent that way. The upper cabinets can be trickier than the lowers. I ended up seeing the perfect over-the-range cabinets in a set for sale on eBay and negotiated for that one, including the original vent system. If I had not already purchased the cabinets I was using, that set would have been great (good condition), or the large green set up in Maine (?) from last year.
- Wall oven cabinet. You need to accept that you might be using a narrower oven than the one you are accustomed to using, and that it might not be perfect. My cabinet was originally for a single oven and was “expanded” lengthwise for a double oven. The second oven sits too low. I will be using the 24’’ wide oven that came with the cabinet (budget) so that was the cabinet to use. I do have a 30” cabinet, but not a 30” wide oven…
- Specialty cabinets. You have to think about where cutlery drawers or pan cabinets should be located. My husband did an original layout on paper based only on dimensions. The contractor assigned one of his guys (Sam aka Mr. Patient) to drag cabinets around for me one afternoon as I really looked at everything.
- Shim pieces. The cabinets you buy should come with “shims” the original installers had to use; these pieces can come in handy.
You really have to think about what different cabinets add up to the exact inches you have available while sticking to a work triangle. The direction doors open is also a factor: it needs to make sense.
And the all-important piece: the installer. Your installer needs to be patient, creative and experienced in carpentry and kitchen installations (Russ Carnes of the Cool tile installation in my Pink & Gray bathroom). In the end, my contractor built a set of shelves for one end of the install because none of the upper cabinets I had really fit. If you have the budget, you might also want to retain a Kitchen layout person to help you through those details.
Related posts very specific to steel kitchen cabinets:
- How much are my cabinets worth? (or in reverse, how much should I spend?)
- How do I sell my metal kitchen cabinets? (or in reverse: how to buy?)
- “The Hard Way” – this renovation stuff is not easy.


Lisa Conley says
Can I buy youngstown cabinets? I would like new ones.
Pam Kueber says
See this story: https://retrorenovation.com/2009/04/09/how-and-where-to-sell-your-vintage-metal-kitchen-cabinets/
You cannot buy any vintage brands made-new today.
For new ones try moya, see this story: https://retrorenovation.com/2013/06/24/genie-scientific-moya-living-cabinets/
Susan says
oops! I meant love the wine holder! Freudian slip?
Susan says
Pam, I can’t picture what you mean. An under-the-cabinet semi-circle kind of holder? And then a hook for the cutting boards? Any photographic evidence to help me? (I know my husband would live the wine holder!)
Thanks,
Susan
pam kueber says
Susan, what i mean is that if you have 6″ of space between your wall cabinets – as you install them left to right or whatever – then you could use the 6″ wide, 12″ deep wall cabinet opening to construct a wine holder. Hope that helps. Maybe I can do drawings of my ideas and post them – next week. This week: Historical kitchens!
Susan says
This photo helps me a lot. My Youngstown cabinets are going on one wall, as my current cabinets do, with the stove on the end (finally replacing that harvest gold 70s Magic Chef). No window for the sink–my windows are on side walls. But there are about 4″-6″ of extra space compared to the current set of cabinets. I will show my contractor (“design to build” firm, or whomever I end up hiring) the shim photo. I’m also thinking of suggesting a curved, formica-shelved end shelf, as so many of the great images in the gallery include! (See 1940s gol-coat-kitchen-crop in the 1940s kitchen gallery.) I’d love to see some open slot shelves (what else can we call them?) in current photos; these shelves also appear in some of the vintage images (e.g., above the sink in the pink and green kitchen on the right of the 1960s kitchen gallery page) .
I’ll have one 16x24x30 cabinet left over, which I hope will become a freestanding unit with some formica overhang. I’m leaning toward the red cracked ice formica with metal banding. It’s brighter than the vintage pictures, but I think it will provide the “pop” i’m looking for. Wait…I should be posting this part on a countertop strand!!! Can you tell I’m obsessed with this project? What about the brick mosaic tile backsplash I’m planning. Not really retro but in the fun, colorful spirit! Thanks for all of the help so far.
pam kueber says
Susan, with 4″-6″ you might be able to build a wine holder on top, a very narrow cutting board holder on the bottom. If these are at the end – as you say – you could build a what-not shelf on top.
Susan says
Hi,
Where can I see a photo of Scathing Jane’s kitchen? Or is it still in progress?
How do the shims help?
Does anyone have a photo of open shelving (a baking tray slot, maybe) created to account for leftover space in the cabinet layout?
Has anyone tried to install the custom storage features (pull out 2-sided pantry drawers, for example) in a vintage metal cabinet?
The wheels are turning…
pam kueber says
Susan — see image 1033 on this post on the Forum — https://retrorenovation.com/forum/showthread.php?tid=1430
You can see filler pieces (I would not call them shims) to the right and left of the sink base, and to the left of the cabinet to the left looking at the sink base. The corner piece is also a filler. These filler pieces could be purchased as needed, for base or wall cabinets.
I’ll try and get some photos up as some point of the built-in shelves we installed between metal cabinets. I see no reason why other cabinets can’t be integrated into steel cabinets – as the steel cabinets have the same dimensions as wood cabinets today (depth, height). The only issue, I can think of: Securing wood pieces to the steel cabinetry may require extra bracing. Good to work with a pro on this.
Lara Jane says
Pam,
Thanks so much for your thoughtful reply. Your eagerness to share your experience is so appreciated, and the knowledge therein is invaluable!
btw, You did not scare me off! haha! I’ve just been mulling it over. I will wait for those oft-mentioned “retro decorating gods” to send just what I need when I need it!
pam kueber says
You’re welcome, Lara Jane. This is a post I’ve been wanting to do. Hey — I just added Jane’s input, so you can go back into the main post and see what she has to say….
Joe says
I recently ran into this same dilemma when we went to install my Geneva set last month. It was like a giant game of Tetris. We found the best way to go was to start from the piece that HAD to go in one place: the lazy suzan. After a lot of measuring and figuring we got the entire kitchen squared up and in place, with one tiny exception. The small cabinets above the stove were missing a trim piece because the stove in the previous owner’s kitchen was only 38″ wide, and my Frigidaire Flair is 40″ wide. So, I’m only missing 1 little 2″ spacer. Other than that it looks great.