

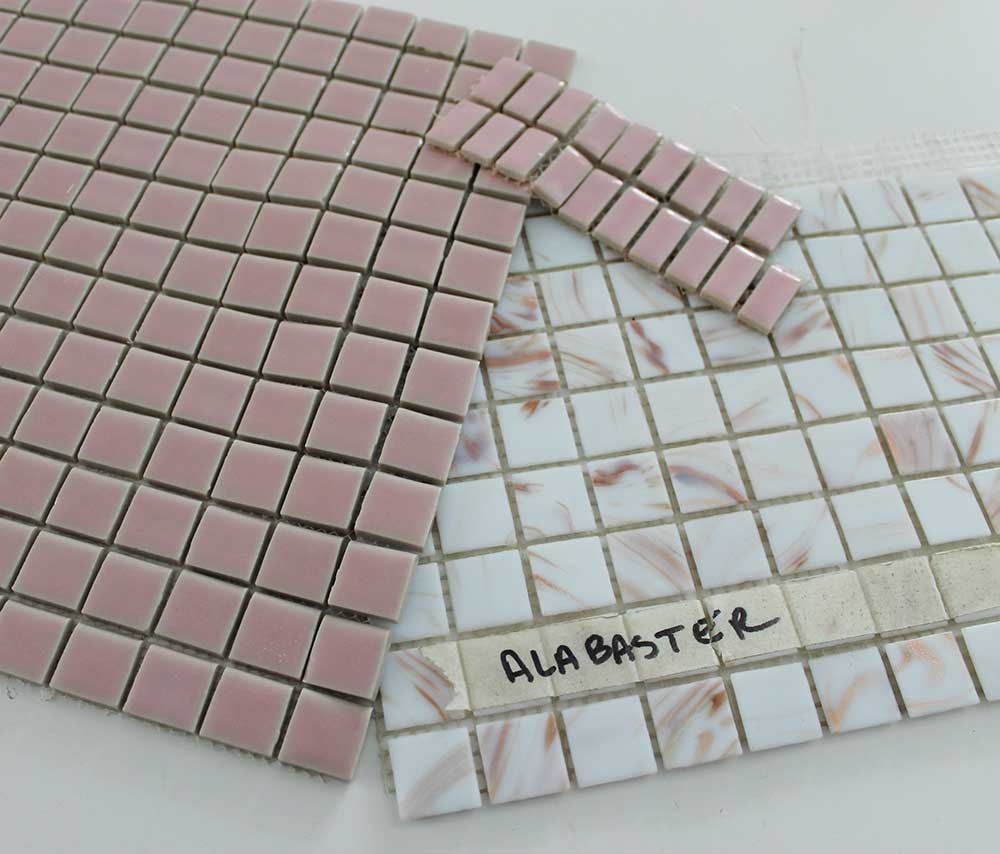
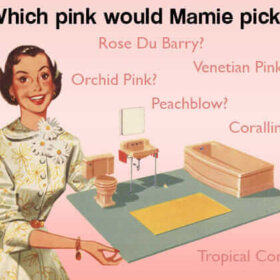
 Having built my own life-sized Mamie pink bathroom, it was no question that my 1955 Betsy McCall DIY dollhouse would get its own pint-sized pink potty. Fortunately, Pam was looking for something she “needed” when she went to World of Tile’s epic liquidation sale — and she picked up a variety of small mosaics for me to consider for various spaces within my dollhouse project. This included several sheets of the perfect itsy bitsy pinks.
 Pam also proudly pounced on streaky, shimmery white alabaster mosaic tiles that she had found. “Wait until you see them,” she told me on the google chat, “you’ll die.” She was right, I was in love, too. They are simply gorgeous.
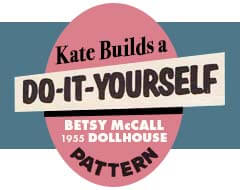
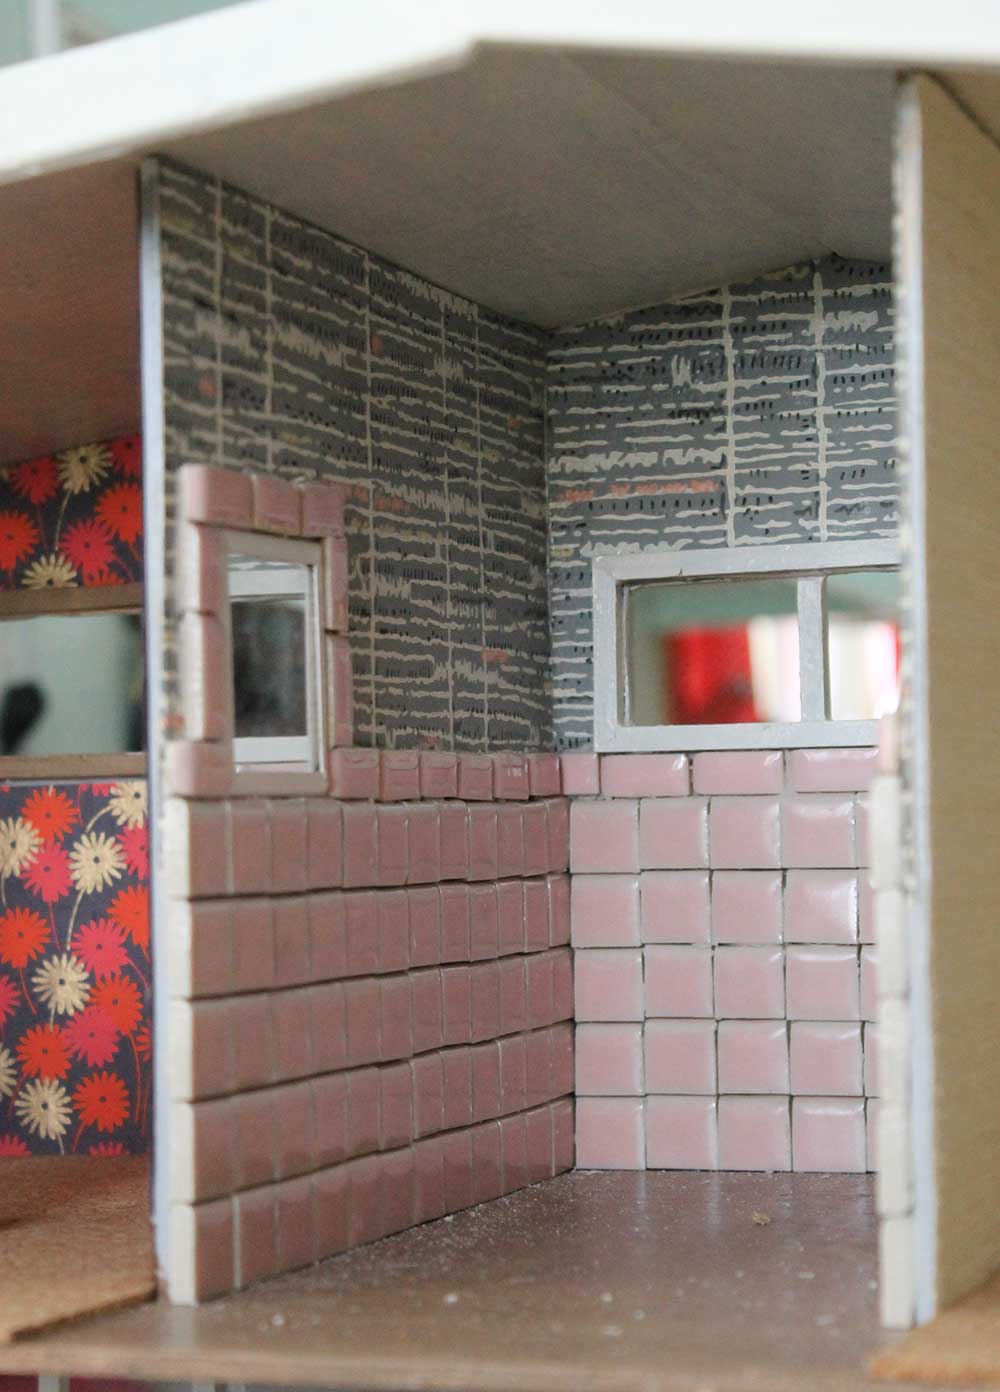 The first step was to tile the three walls of the room. I knew I wanted the tile to span from the floor to the bottom of the window frame — and I was super lucky that the math just happened to work out so five square tiles and a mini bullnose tile fit perfectly. Yay for less cutting of tiny tiles!
 I had pre-planned the layout of the room, so I knew where I wanted to put the vanity. I also wanted to pump as many retro design ideas into the space as possible.
I used a small pocket mirror — a freebee from the dentist’s office that has a toothpaste advertisement on the other side — to make a mini tiled-in mirror.
 With the walls complete, my next task was to install the luxurious alabaster floor tiles. Seriously, have you ever seen such a posh dollhouse before? Real alabaster, folks!
 I covered the rest of the upstairs floor with some sheet cork that Pam pulled out of her Mary Poppin’s handbag. Instead of continuing the bathroom tile floor all the way to the edge of the dollhouse, I opted to connect the cork to make a small hallway between the bedrooms and the bathroom.
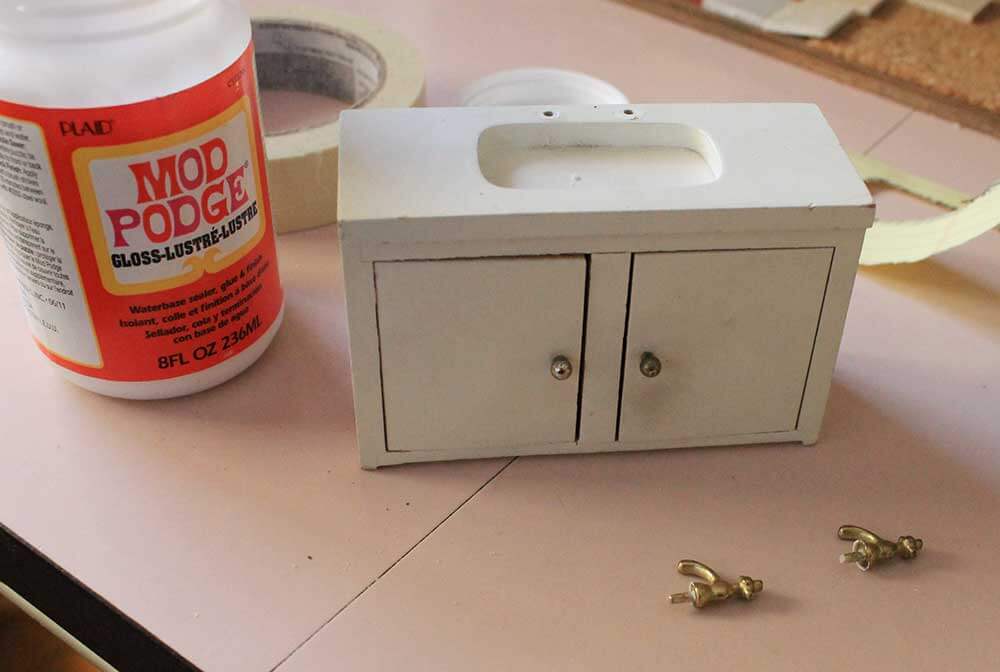 As you may recall, Pam gave me a $100 budget to completely furnish all six rooms in my 1:12 scale house. I can use only only vintage and handmade furniture. One of my tactics for making my furniture budget go as far as possible was purchasing Ebay lots with several pieces of less than perfect vintage dollhouse furniture and making them work for me. This strategy made me end up with two ‘kitchen sinks’ and no bathroom sink. Even though the furniture in the bathroom would be a tight fit with a spacious vanity like this, I decided that the inhabitants of the dollhouse — having to already share one bathroom — would much appreciate the added counter and storage space this vanity would provide.
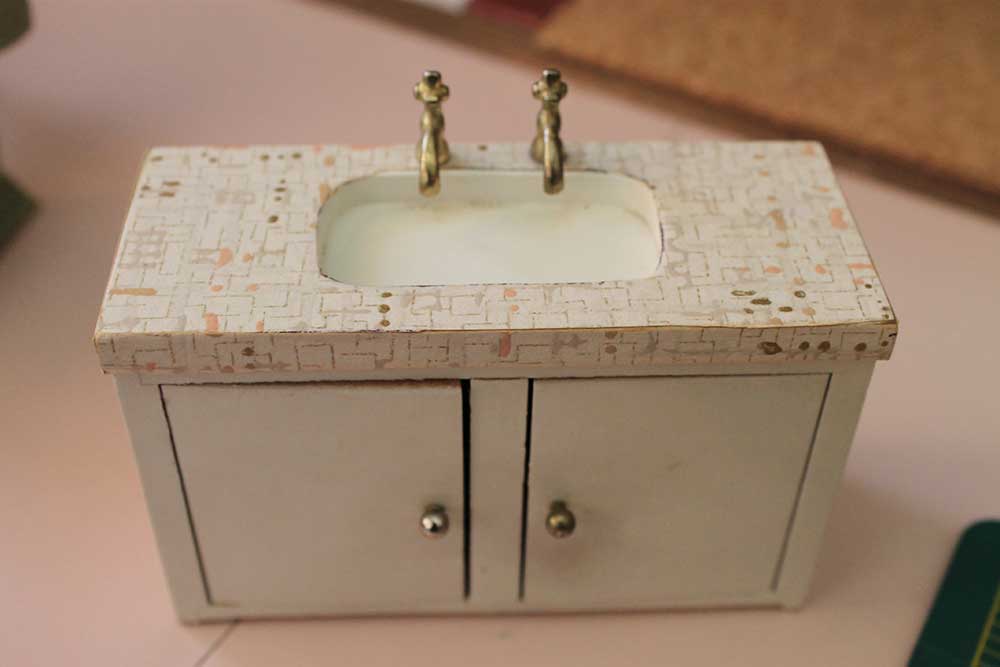 To give the vanity some mid mod pizzazz, I “laminated” the countertop using yet another scrap from Pam’s vintage wallpaper stash and topping it with Mod Podge. Ta-da! Instant retro upgrade. Don’t you wish we could get laminate that really looked like this?
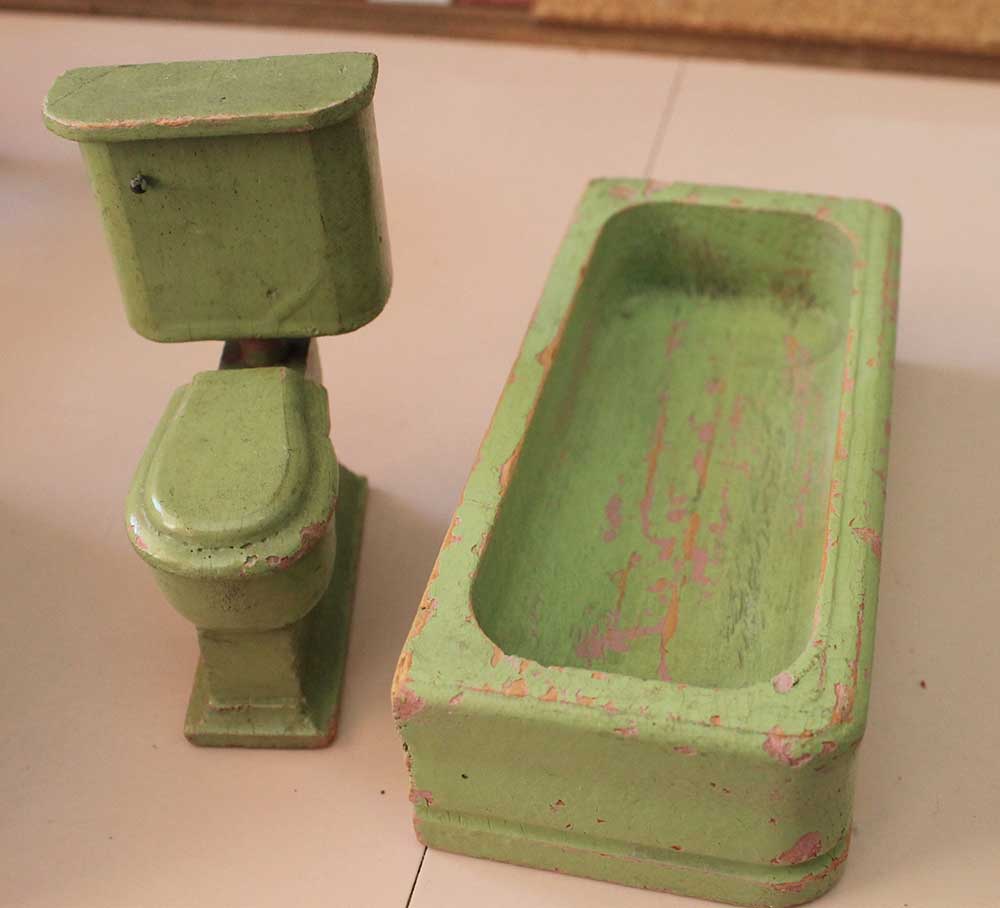 The toilet and tub were also pretty sad — and the wrong color for my room — but they had beautiful lines. Painting was in order. I realized that the pink walls in my den were just the perfect light pink to coordinate with the bathroom wallpaper and laminate-topped vanity, so I used some of my stash of leftover paint to give the tub and toilet a quick make over.
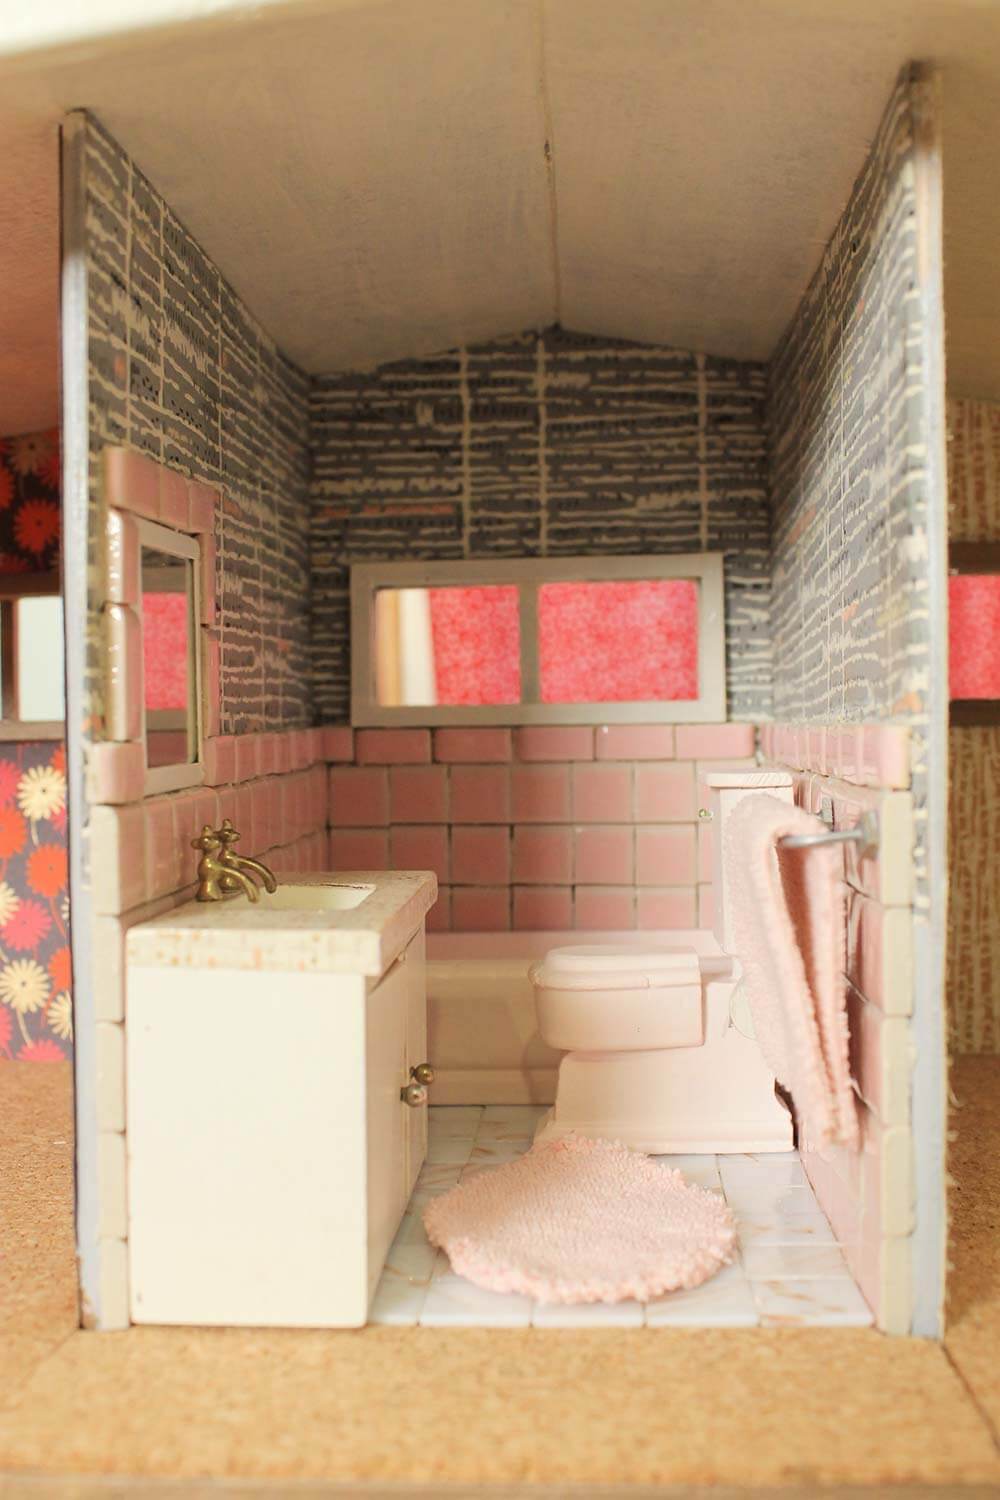
 By now, my pretty pink vintage bathroom was starting to give me a case of the smileys — it is so cute!
 But hey, something is missing…something very important…
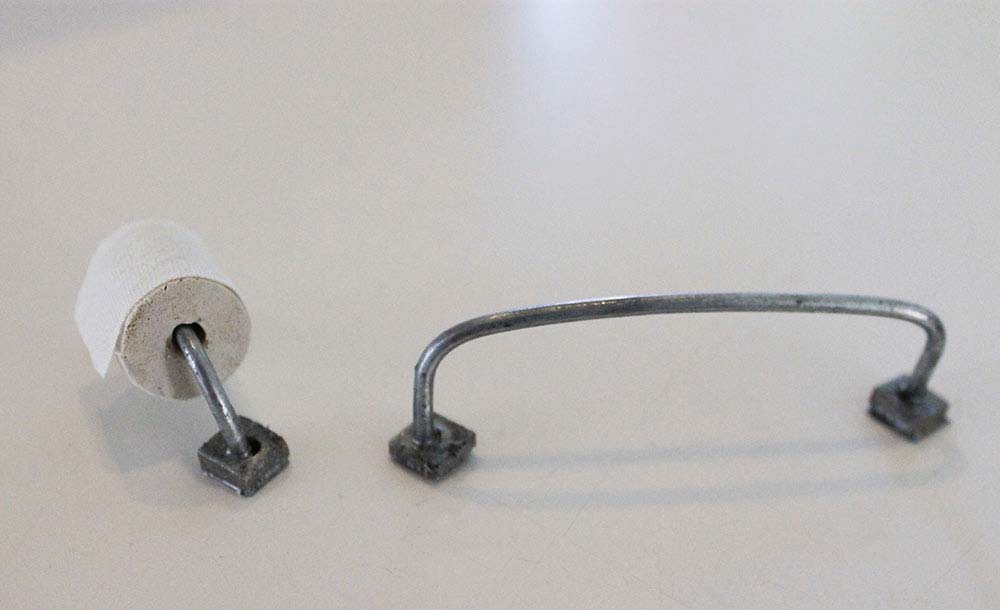
You guessed it — the toilet paper. How would the tiny residents of this home function without it? Also needed was a towel rack, towel and bath mat. I put my thinking cap on and quickly decided that I could make my own toilet paper, toilet paper holder and towel rack fairly easily using: a scrap piece of dowel rod with a hole drilled in it (for the toilet paper roll), a small scrap of white fabric to simulate the toilet paper, some carefully bent wire for the toilet paper holder and towel bar and a smaller square dowel (left over from making the window trim) with a hole drilled down the center, then cut into small slices to use for brackets. After painting the brackets with silver paint and getting the wire bent just so, I used super glue to attach the towel rod to the brackets and then super glued the completely dried and set bar to the wall.
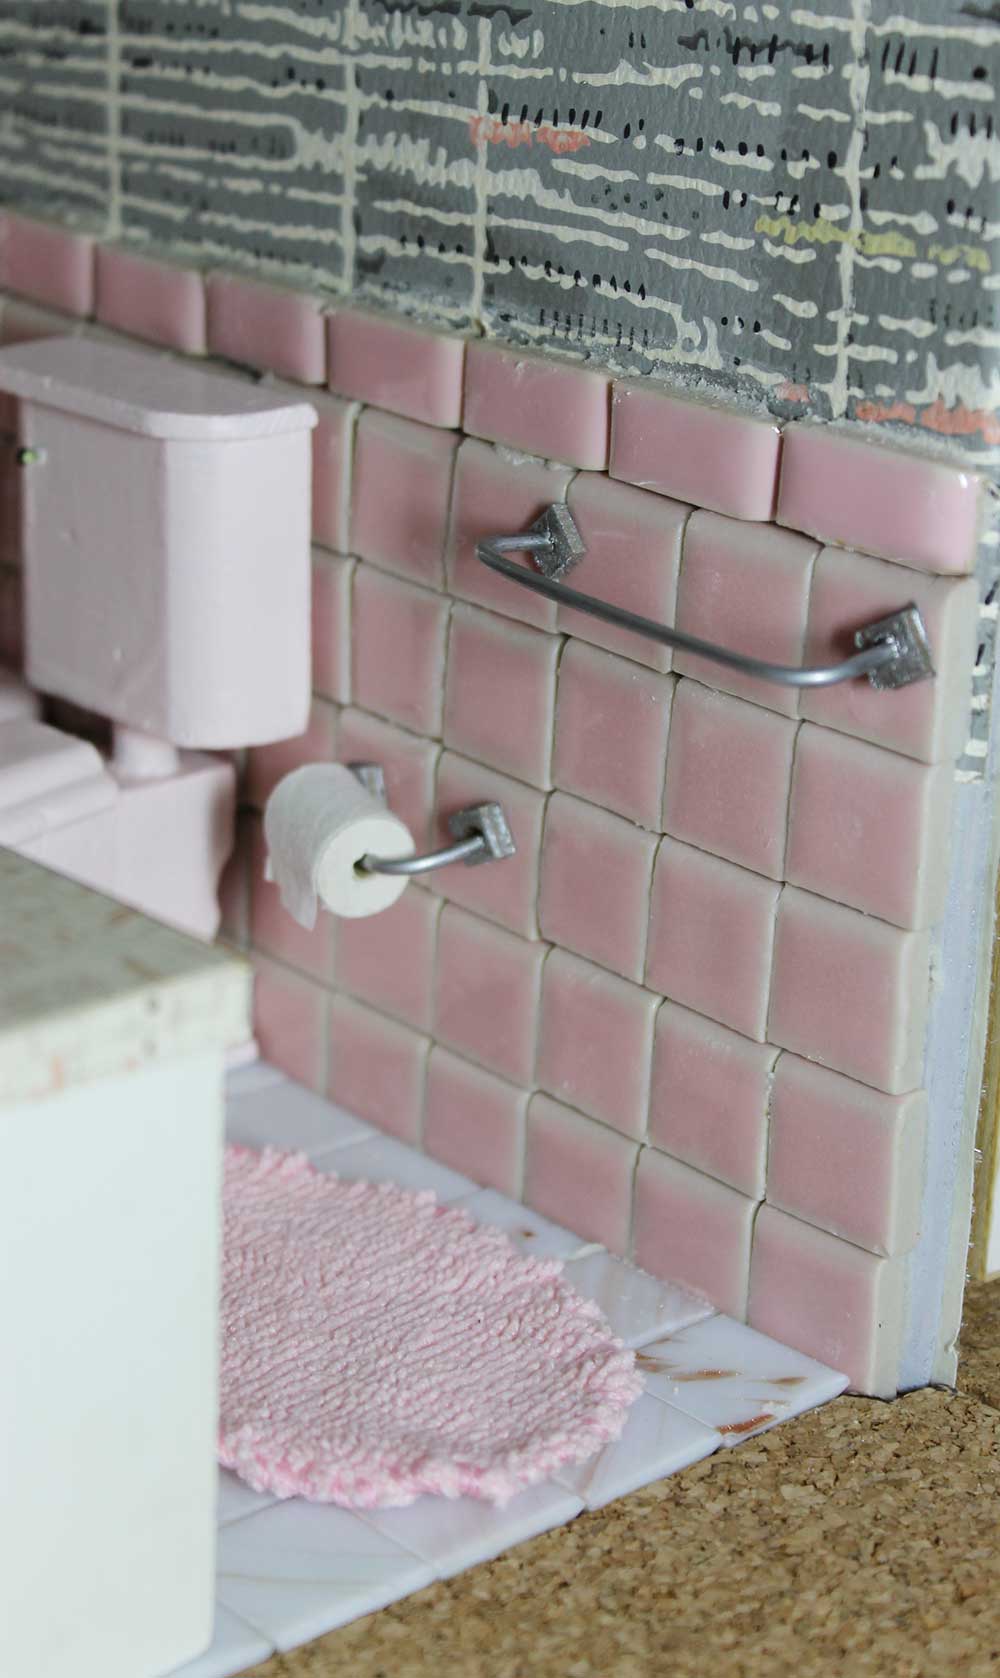 Presto — instant “chrome” bathroom accessories!
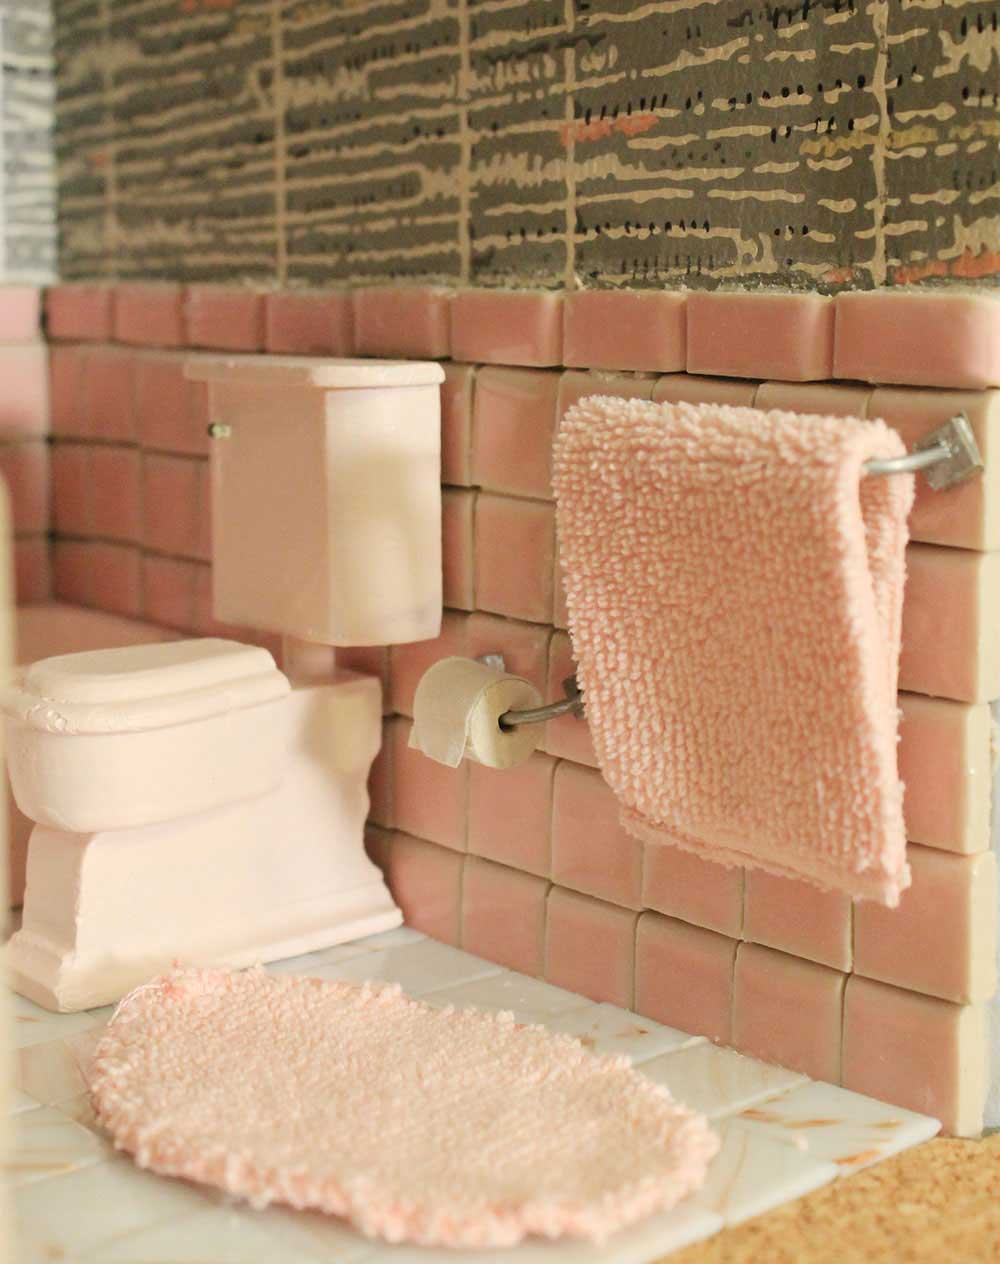
 Next it was time to find fabric to make a mini bath mat and towel: One of my microfiber cleaning cloths was just the right shade of pink.
 The tiny loops of the microfiber cleaning cloth are perfect to simulate a bath towel, don’t you think?
 I used a scrap of pink embroidery floss to hem the edges of the oval bath mat, but the towel is just a carefully cut rectangle. So far it seems that the hemming is an unnecessary step to keep the cloth from unraveling.
 By this point, my smileys had turned into full on giggles. I just made a tiny roll of toilet paper — hehehehehe. At just that precise minute, Pam called me and asked why I was so giggly. When I told her she just paid me to make a 1:12 scale roll of toilet paper for a tiny vintage pink bathroom she started to whoop it up too, too. Did I mention I love my job?
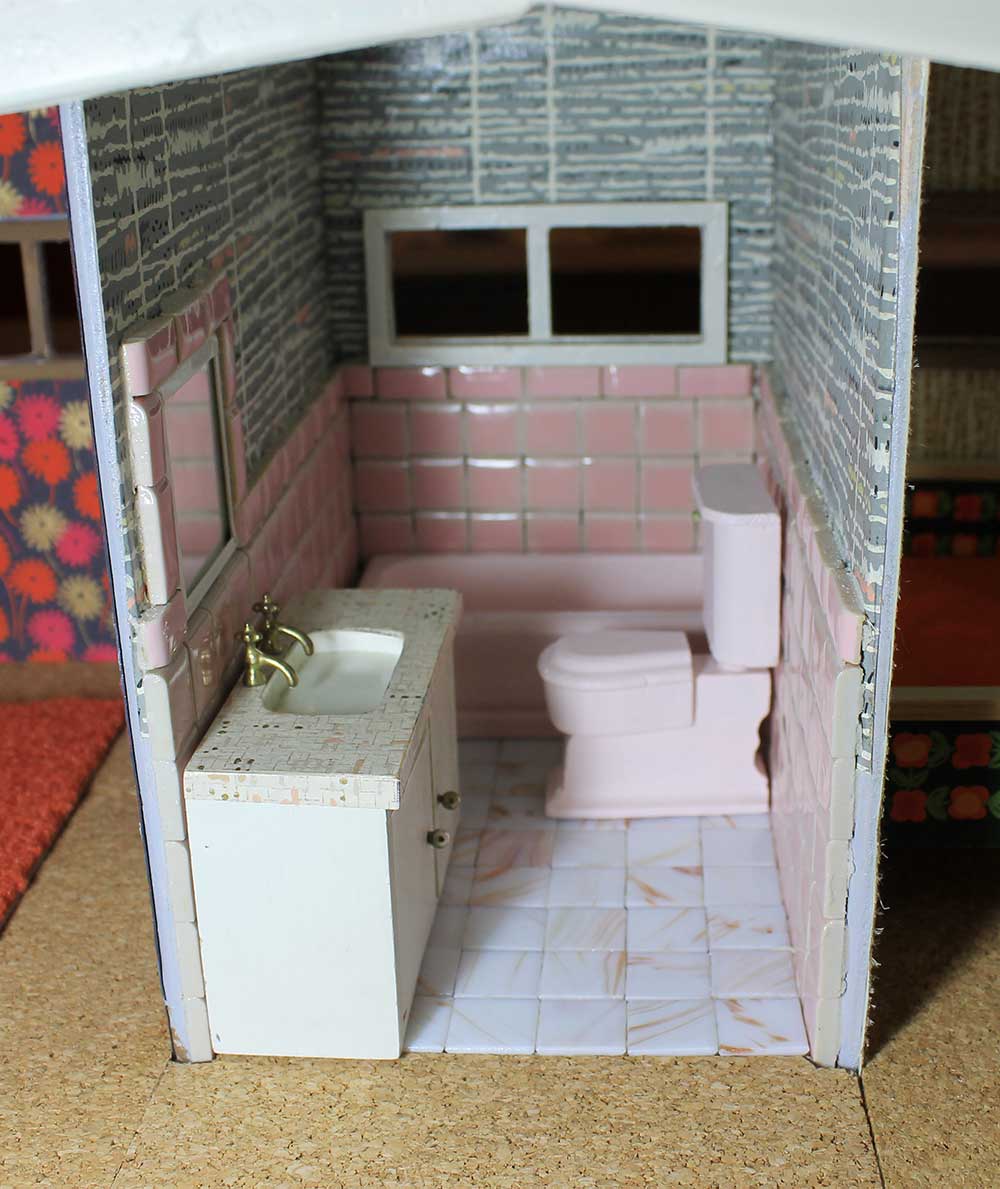
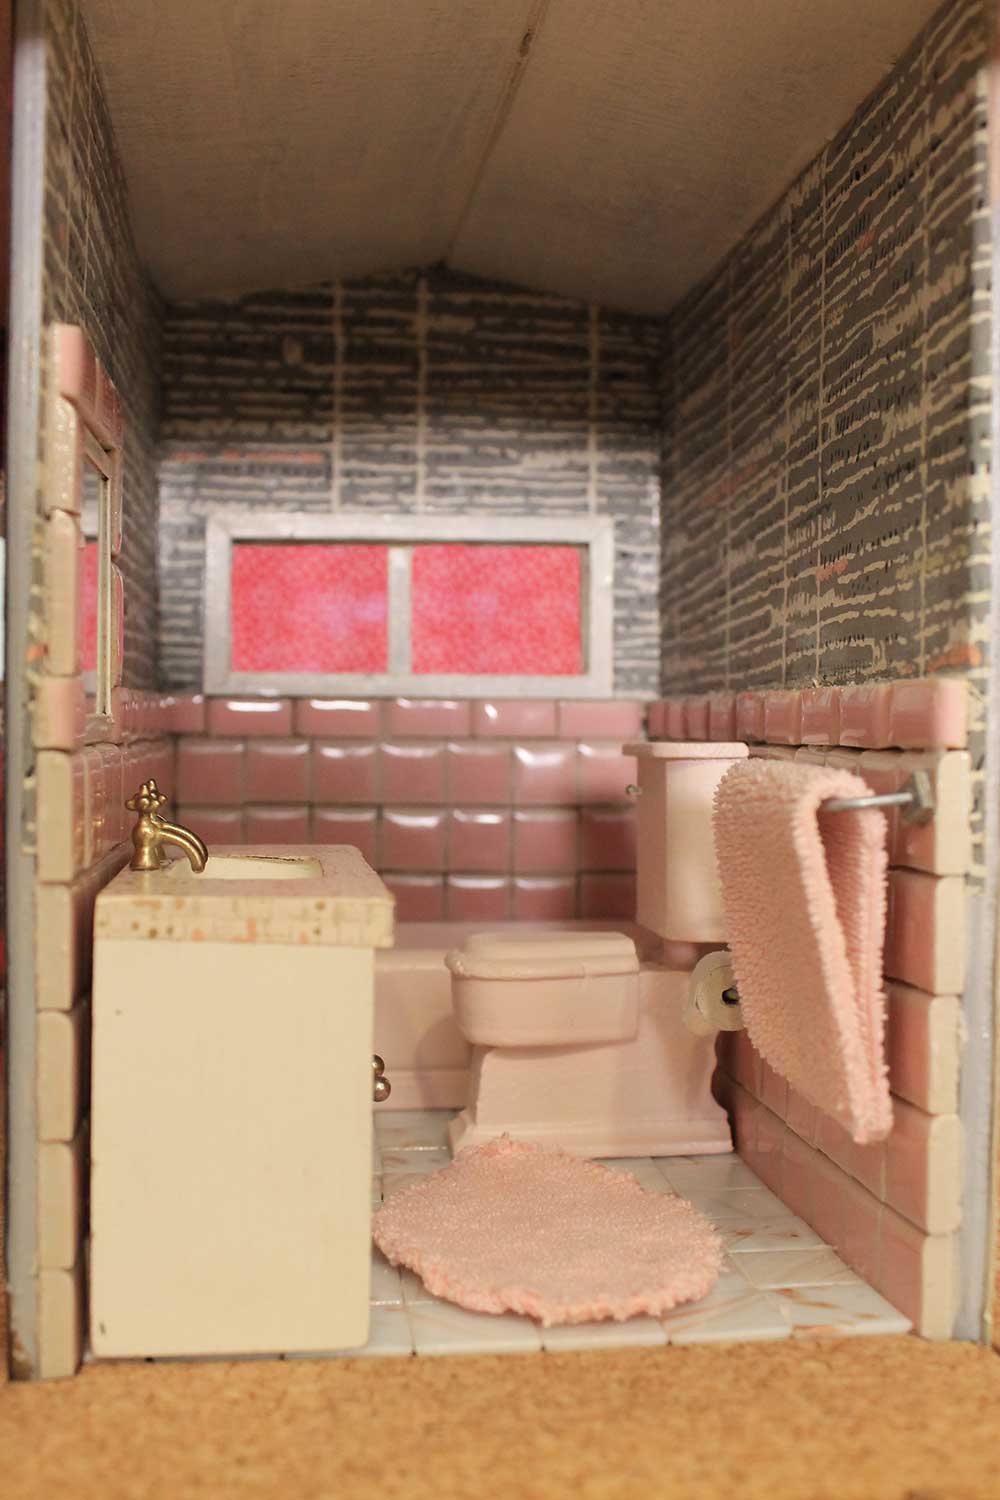 The bathroom could still benefit from a window curtain and perhaps some tiny chalkware fish, but for the most part, it is a totally adorable miniature pink vintage bathroom — the smallest vintage pink bathroom we’ve ever featured on Retro Renovation: A mini mid-century modest!
 Okay, readers, I’m all ears. Who has ideas on how to make a little chalkware fish set? What sort of fabric should I use to make window curtains? I’m also open to suggestions for other tiny finishing touches. Ready — go!
 And just to keep the scale of this pipsqueak of a pink potty palace in mind, here’s a shot of the dollhouse bathroom next to a standard roll of toilet paper.


tammyCA says
Too cute! For the chalk ware fish you could try the clays Fimo or sculpy..I use these for a lot of minis..after painting use clear nail polish for gloss finish
For more ideas: maybe food coloring cone caps could be for lighting (painted metallic)
Used Makeup compacts, eye shadows..carefully soak & pop out the mirrors to use
The jewelry making aisle at the craft store is great to make things from..there’s metal filigree, glass beads, wood pieces to make lighting, pierced earring backs for faucet handles.
Gracie Manasco says
You should be able to get some of those chalky Valentine heart candies cheap now…. then you can carve them into chalkware figurines! LOL!
Cynthia says
Kate, super cute and fabulous work, and it’s no wonder you love your job! I wish they still made that wallpaper. The tiles are about the size of big teeth, right? Excellent!
lynda says
Wow! Now you have another talent to add to your growing resume, Kate. I wonder if someone has a 3D printer and could create fish for you? As always you eye for style and proportion is just right. It looks like a very fun project.
Tikimama says
I never knew you could buy old Cracker Jack prizes (now destined to become a new obsession), so I hit eBay, and the first one to show up has 2 fish and tons of other bits and bobs that could be great for kids’ toys and decorations! See here: http://tinyurl.com/lwhjzxb
Tikimama says
I see playdough and Sculpey mentioned, but I wanted to also recommend Salt Dough – very easy and cheap to make, and will air dry. I think the ideas above are better for your fish, but the salt dough would make some wonderful, earthy mid-century pottery and sculptures! Your ideas so far are genius! I never would have thought of using dowels like that. I’m learning so much!
Diane in CO says
It’s just magical, Kate!! And your writing about the process is excellent and entertaining!
Jacki says
Kate you are so clever. I would never have come up with the ideas you have. Alas, I will have to happy with my Marx tin litho split level. Hmm, I wonder if you can “grout” the tile with quick dry wall spackling.
Jan says
Okay, again, I love it! Kate, what a lovely bathroom! At first glance before reading (always read the instructions, right?), I thought the little squares on the ends of the towel rod and toilet paper holder were square nuts! They look exactly like them. And I surely would have super-glued myself to the house if I were gluing such tiny pieces (as anyone I work with – I’m deadly with super glue, and I’m “not allowed” to use it here!). Great job!
Kate says
That would have also been a great idea Jan! Why didn’t I think of that… 🙂 I think I was trying to just use what was on hand, and I didn’t happen to have any small square nuts. Still, a great idea! I was VERY careful with the super glue!
Jan Also says
This has to do with nothing, but could come in handy for those of you who don’t do well with Super Glue – last time I used it, I got it all over my nose. I have no idea how. BUT if you get it on your fingers or hands, the brine from green olives will take it off. ( was making cream cheese and olive sandwiches the same night.)
Laura says
One thing I’d suggest is painting the faucets chrome to coordinate with the towel bar and TP holder. LOVELY! I myself put tiny fishy buttons on a baby sweater, so they’re definitely out there … not the right colors though, you’d have to paint them.
Nancy says
I’m a big fan of metallic Sharpie markers–so much easier to deal with than paints, and as long as there isn’t any friction on them, the marker should last. The finish is matte, though.
In related things, nail polish is a great substitute for enamels in small places. (I regularly use the pearlescent ones to change the color of the pearls on corsage pins when crafting.)