

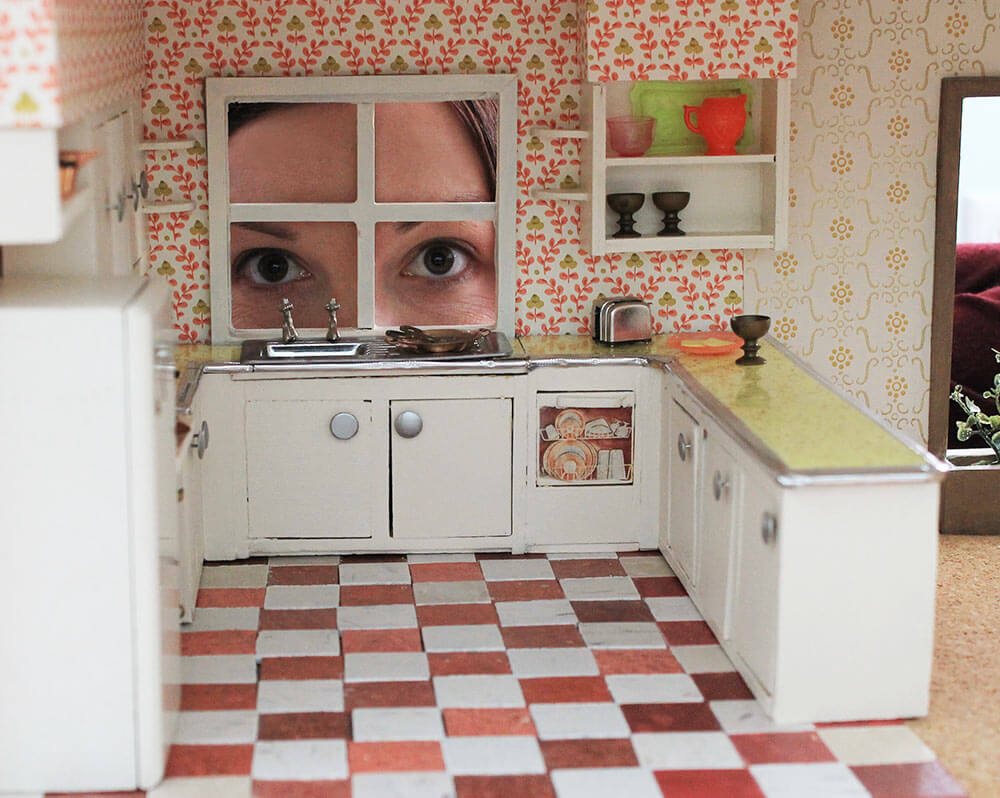
 We are several weeks into my Betsy McCall DIY Dollhouse build and finally — after hours of work — it’s time to take a look at what I’ve been cooking up in the kitchen. Yup, you guessed it — vintage cuteness — including a red-and-white Armstrong VCT checkerboard floor, vintage wallpaper and authentic vintage Formica sparkle laminate countertops with ‘aluminum’ edging. Let’s take a peek at how the space came together.
The kitchen has been one of the most challenging rooms to pull together thus far in the 1955 Betsy McCall DIY Dollhouse — probably because I chose build a completely fitted kitchen, complete with cabinet doors that open and close and custom glitter laminate countertops with aluminum edging. Figuring out the layout was fairly easy, but it took time to measure, calculate, build, paint and add finishing touches to all those teeny tiny kitchen cabinets! Here’s a breakdown of the steps I took to take this from an empty room to an adorable vintage red, white and yellow kitchen.
1. Creating the checkerboard floor for the dollhouse
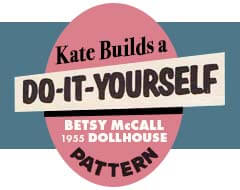
 I already decided that the kitchen would have a red, white and yellow color scheme, so the flooring choice had to coordinate. I knew that in order to make the dollhouse floor tiles to the correct 1:12 scale, they had to be one-inch square at the largest, which equates to 12″ tiles in real life. I briefly considered using mosaic black and white 1″ ceramic tiles, but I didn’t want to make a trip to the store and spend money unnecessarily, so I searched my stockpile of options. That’s when I realized that I had a few sample packs of Armstrong VCT flooring that I had acquired for Retro Renovation research. Each sample tile was 2″ square — too large to use without modification — so I trimmed each tile down into 1″ squares, which produced four tiles from each sample piece.
 Since I only had one sample tile of each color, I had to get creative to find a way to merge all of the ‘red’ and ‘white’ tile samples in a pleasing way. I separated all of the white, off white, light beige and light grey sample tiles to use for the “white” squares and gathered all of the varying shades of red tiles to use for the red squares. After some experimentation, I found that mixing the ‘white’ tiles up made them all appear to be similar in color — I saved the darker ‘beige-ish’ looking tiles for around the edges, where they would mostly be hidden underneath the cabinets. When it came to the reds, however, it looked better to have several of the same or very similar shades on the same diagonal line instead of randomly mixing the red tiles across the floor. Then I used hot glue to secure each tile. While not perfect, I think the resulting floor adds quite a bit of charm to the space.
2. Dollhouse kitchen cabinets and appliances
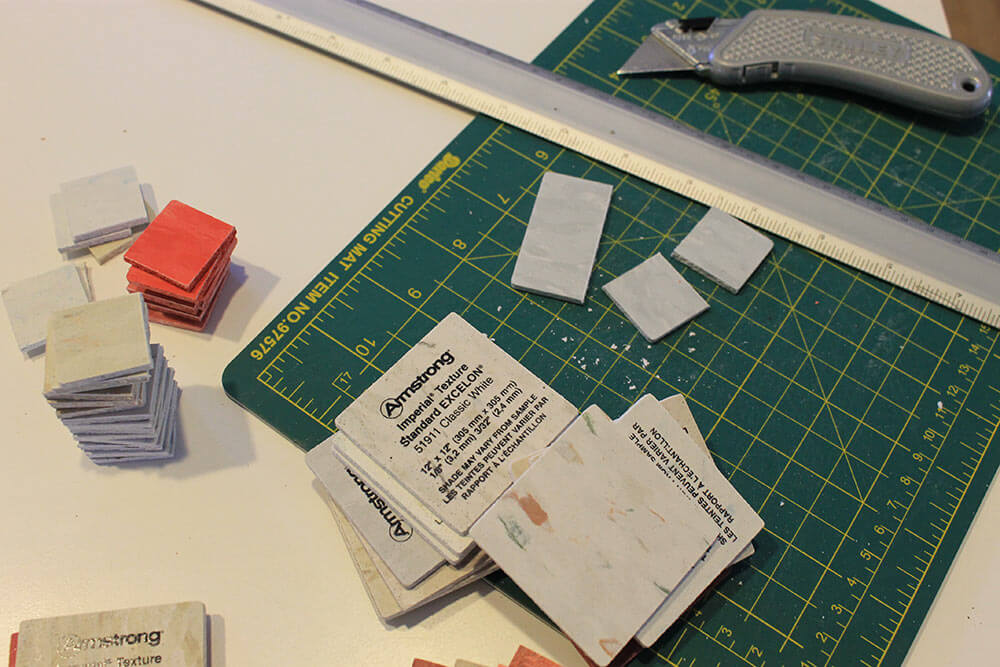
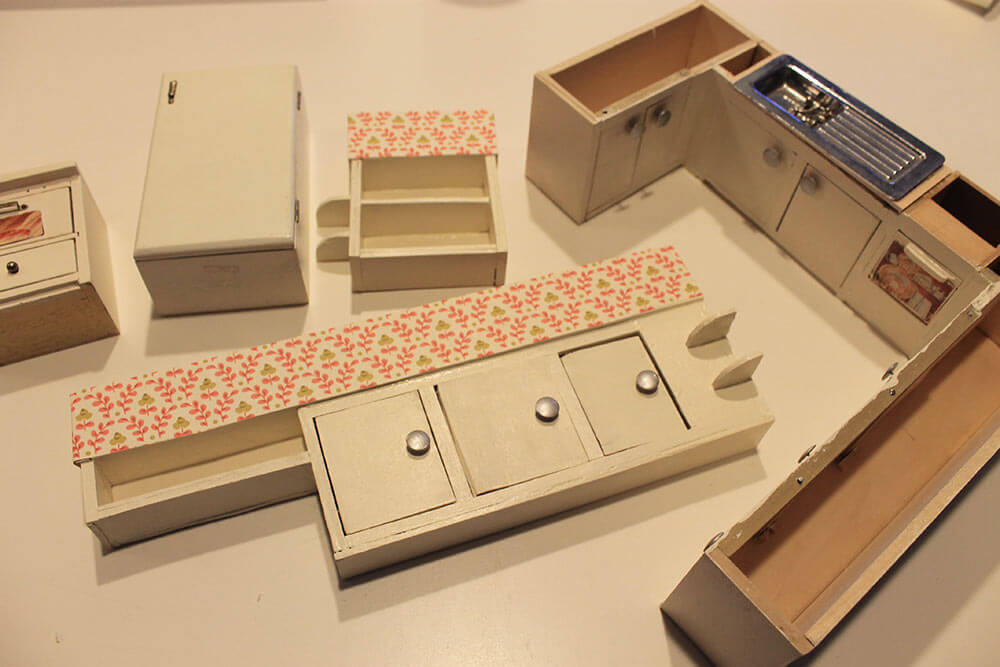
 Trying my hardest to remain within my $100 furniture budget for the project, I started out with an inexpensive lot of “fixer upper” vintage dollhouse kitchen parts that I found from one Etsy seller, which helped cut added shipping costs. The dishwasher, stove and sink cabinet each needed some TLC. The refrigerator — purchased from another lot of doll furniture — was in much better condition and needed no additional attention.

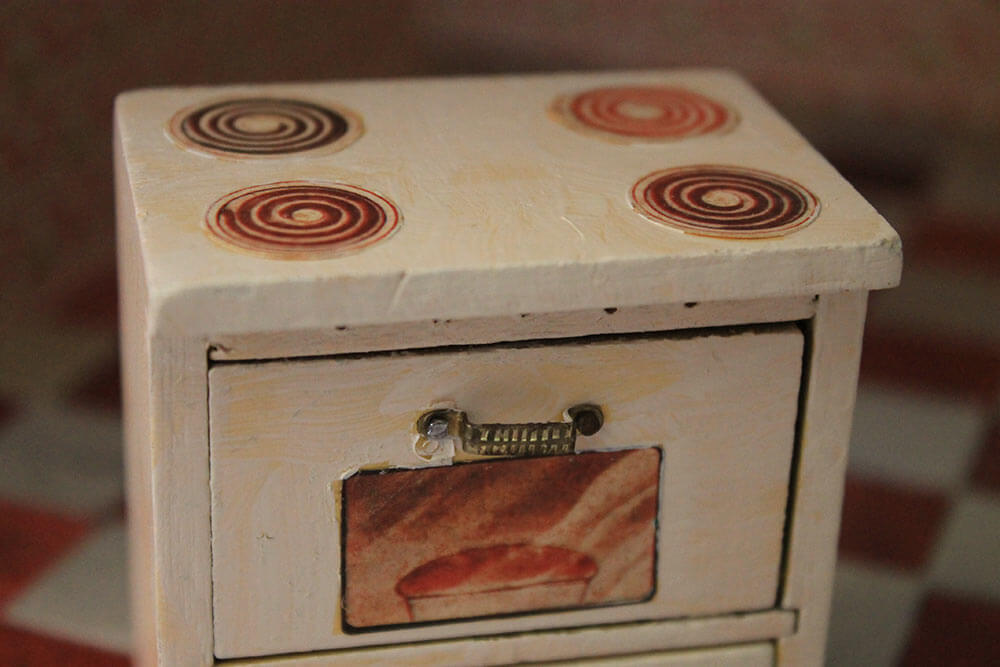 After making some needed repairs, such as reattaching the oven handle, and then, adding several coats of white paint carefully applied to retain the adorable vintage graphics…
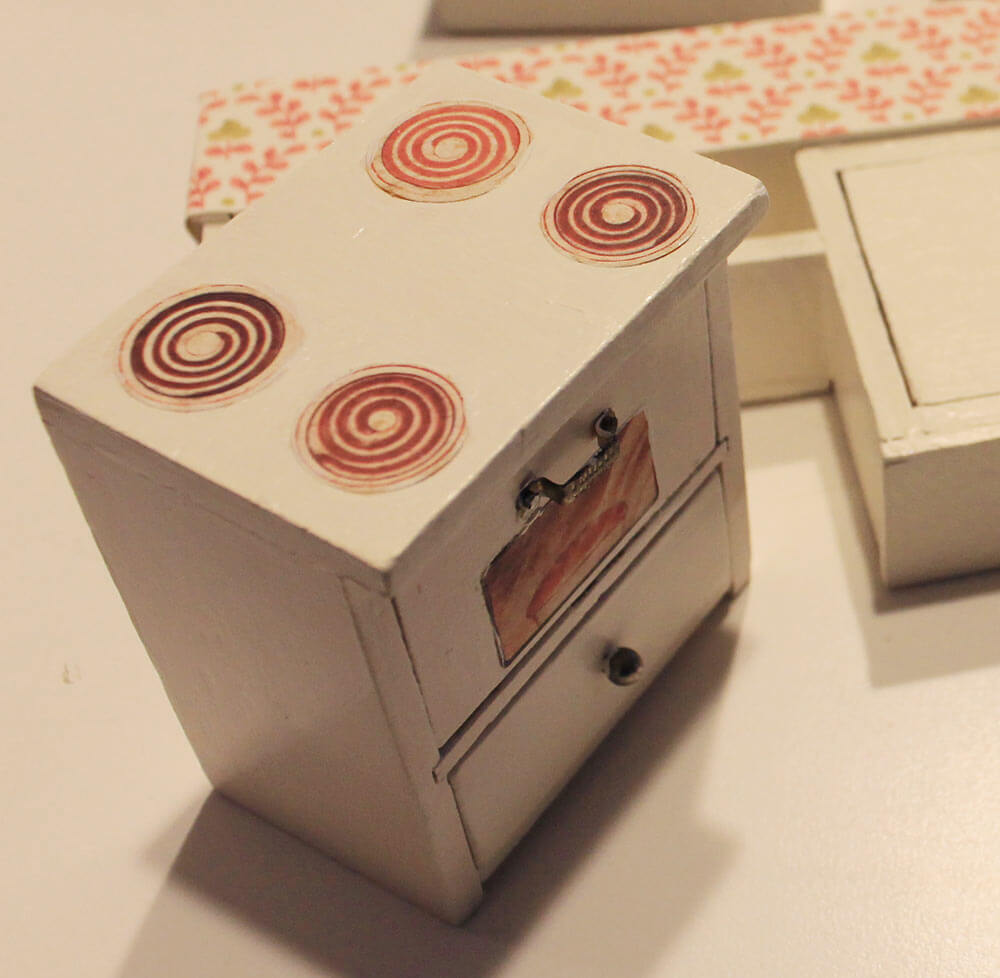 …The appliances were looking much better!
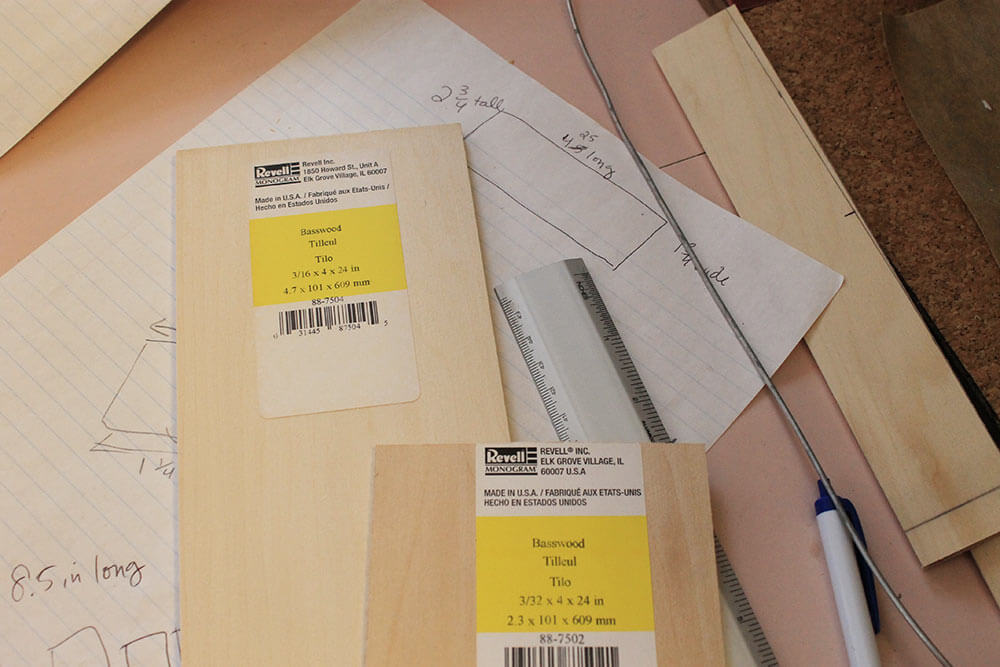 Then it was time to start figuring the kitchen’s layout and how to make the rest of the cabinetry needed for the space. I purchased a few pieces of basswood from the craft store, in the same thickness of wood used to make the existing kitchen sink base cabinet. For the soffits, I used some scrap pine lattice from another project. You know how Pam likes to see soffits in a midcentury kitchen!
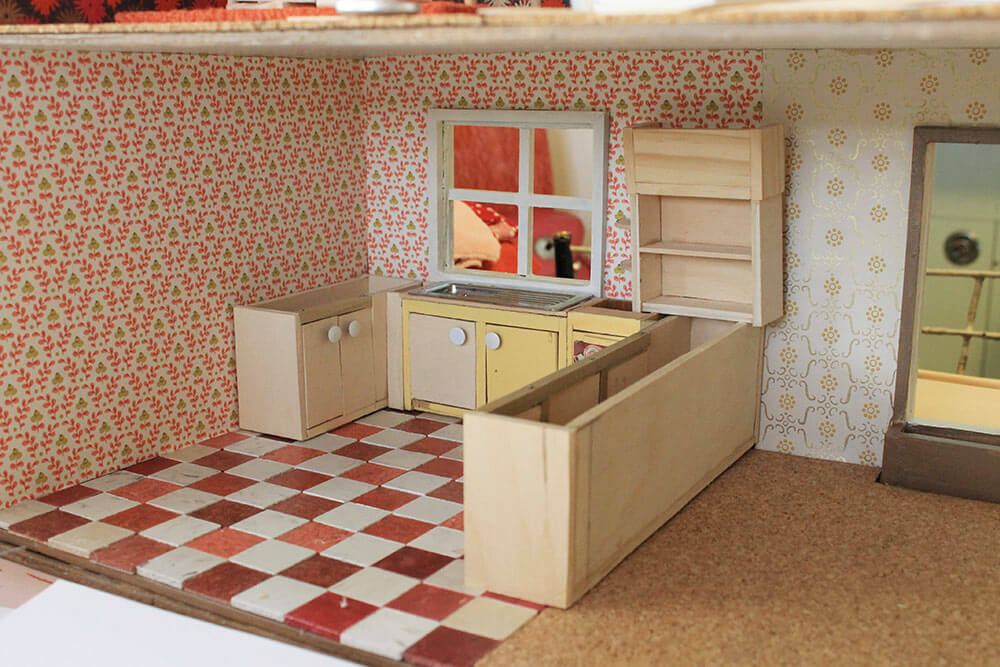
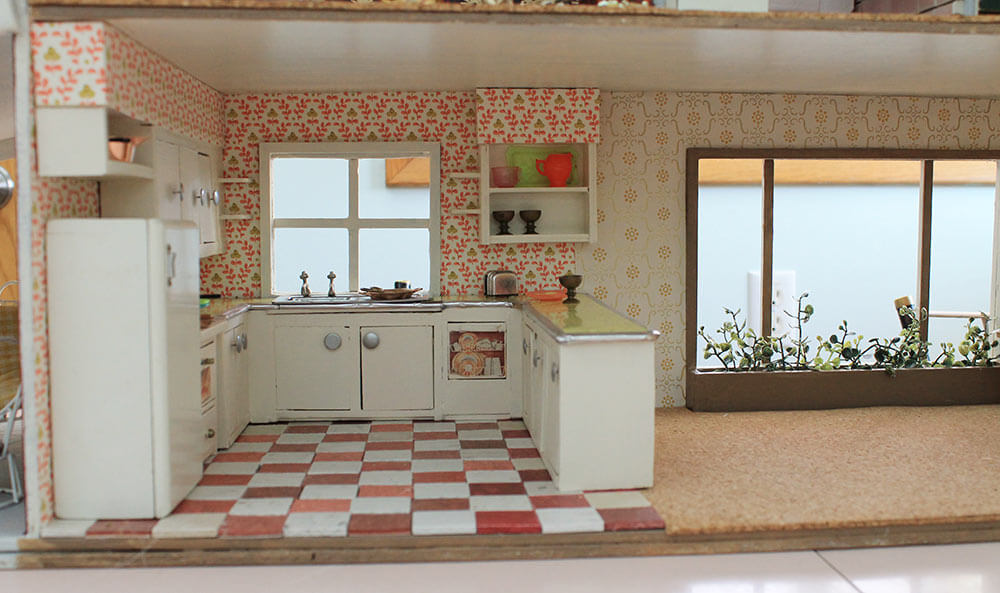
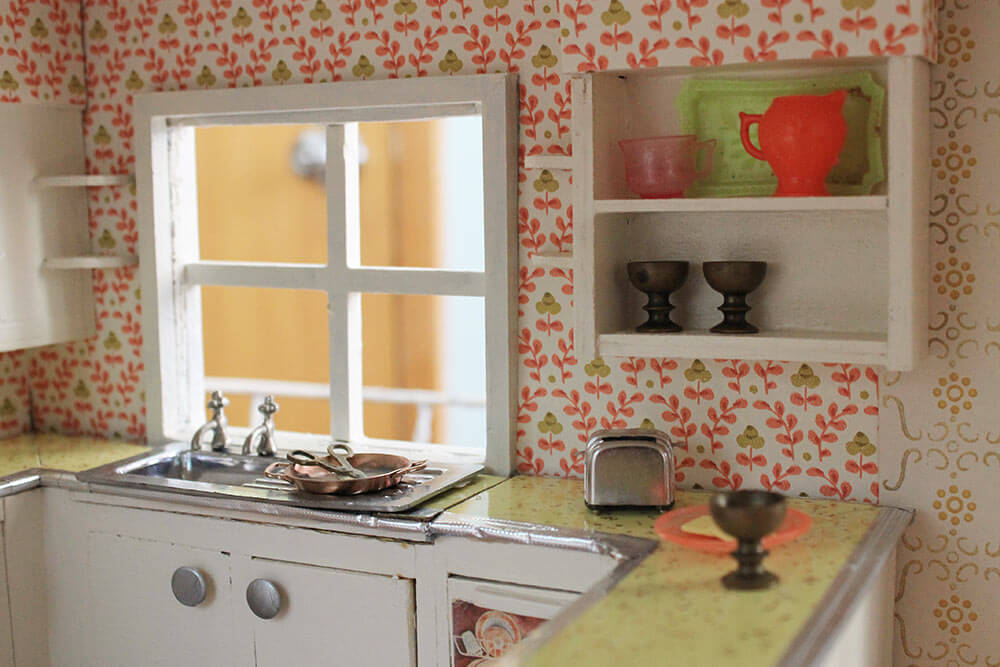
 In my opinion, a happy kitchen has a window over the sink, so placing the sink cabinet there was my starting point. Logically, this would force the refrigerator and stove to be placed on the outside wall, and allow for a long peninsula of cabinets on the opposite side of the kitchen, which would also act as a divider between the kitchen and dining room.
As I started to build the cabinets, it was slow going, mostly because I wanted to make as many of the cabinet doors function as possible. Building the “hinges” for each door required drilling tiny holes through the top and bottom of each cabinet door and frame with my Dremel, then using a small brad nail poked through both holes as the hidden ‘hinge.’ I’m not going to lie — some of the cabinets are a bit sticky. I don’t have the process perfected. What I have perfected though is making a huge mess in the process.
 I was able to patch the sink cabinet’s missing door with some of the basswood, though the cabinet frame was too damaged to make the replacement door functional. So, only the right side of the sink cabinet opens and closes. I used white thumbtacks for the cabinet knobs, and later painted them silver. I know they make shiny ‘chrome’ thumbtacks, but the only tacks I had on hand were white, so I made do and saved myself another trip to the store and a little more $$$. Heck — that’s what a thrifty midcentury Mom or Dad would have done in the same situation, right?
Once I had the cabinets constructed and pieced together, it was time for them to get a unifying coat of white paint.
I even wallpapered the soffits with some of that great small-scale vintage wallpaper from Hannah’s Treasures. You know how Pam likes to see wallpaper on those soffits in midcentury kitchens!
3. Gold sparkle laminate countertops with ‘aluminum’ edging
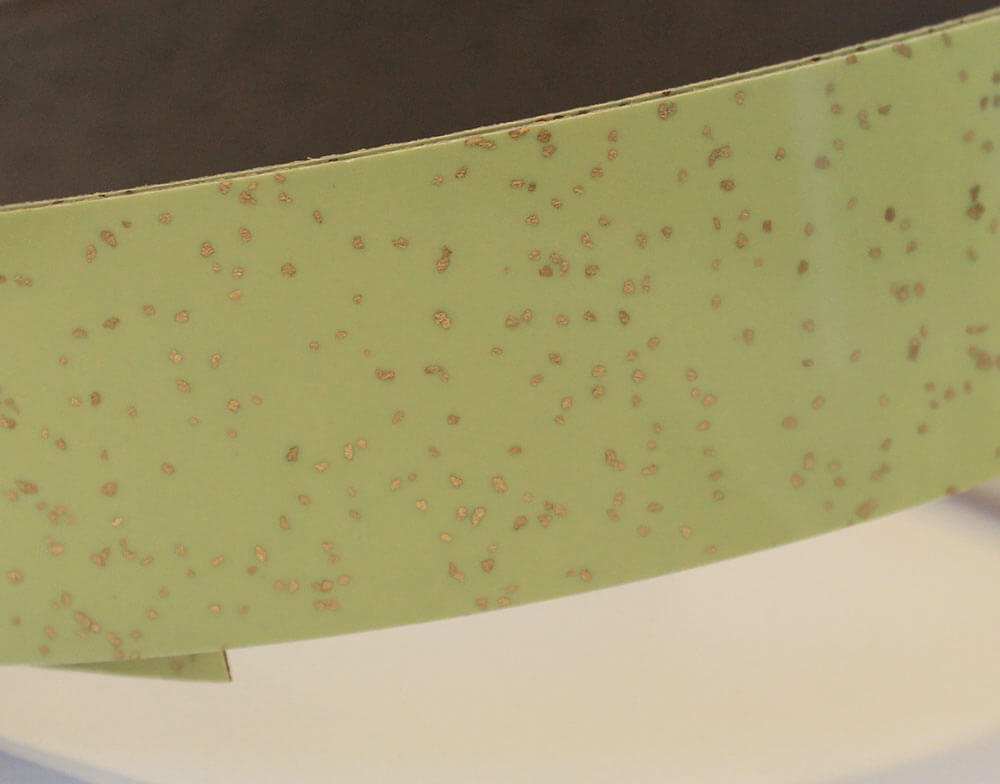 Next came the laminate countertops — which of course had to be gold glitter. Thanks to another care package straight from Pam’s
 hoard amazing collection [<-Pam wrote that] I had these New Old Stock vintage yellow and gold sparkle laminate edging strips to use for the countertop fabrication.
 The laminate edging strips were only 1.5″ wide — not enough to make the 2″ countertop that my 1:12 scale dollhouse required. So…I put on my thinking cap… and realized I could add ‘aluminum’ edging to make up the difference.
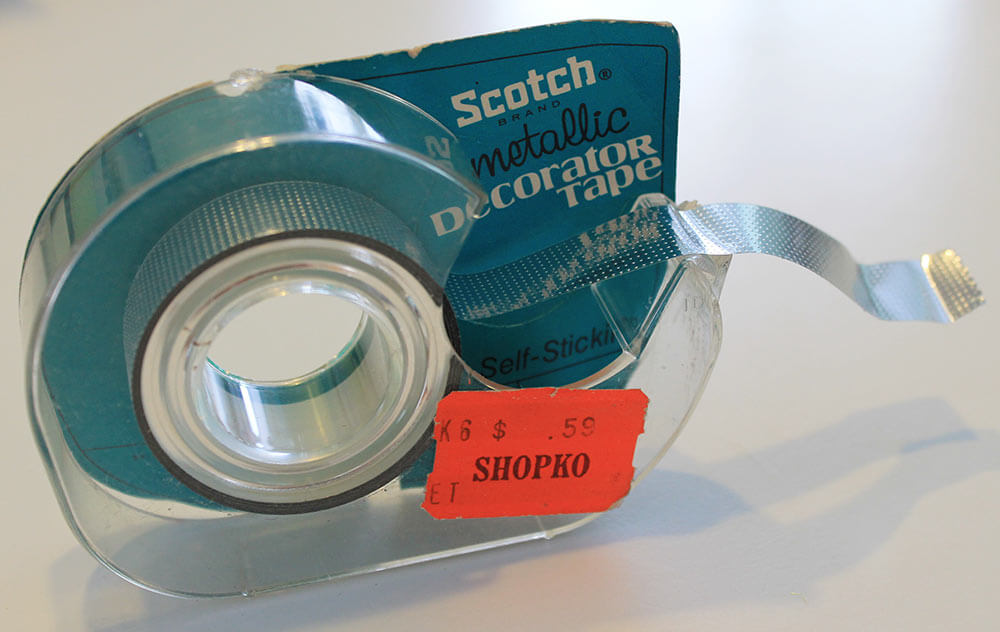 This time, I had my own collection o’ vintage odds ‘n ends to raid — I found this metallic decorator tape among a stash of vintage goodies saved from when we cleaned out my Grandmother’s house a few summers ago.
 It was just the ticket — though I also could have glued on aluminum foil for a similar effect. The decorator tape was nice because it was already sticky, no glue needed.
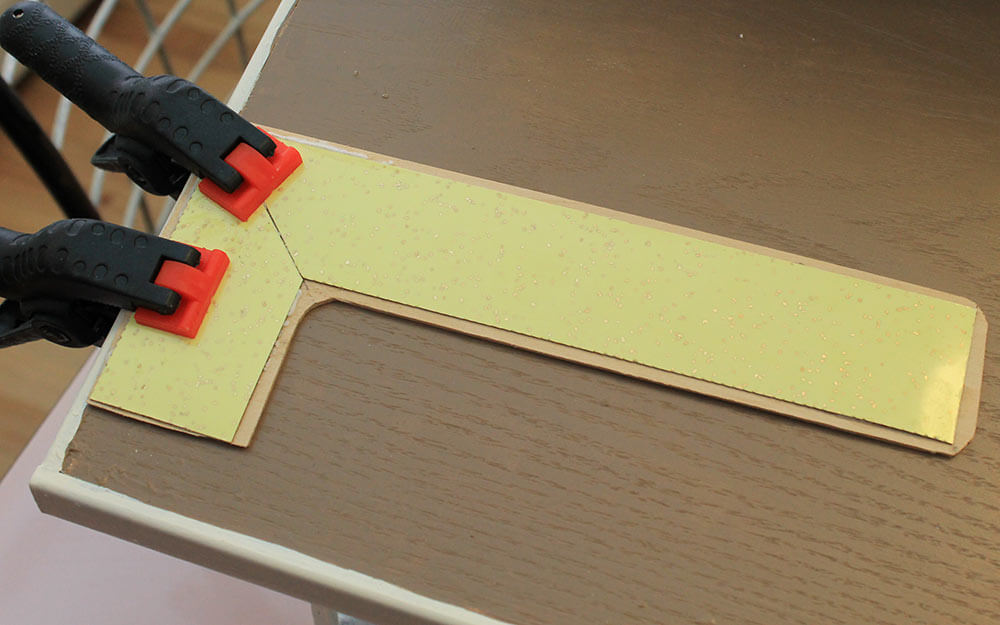
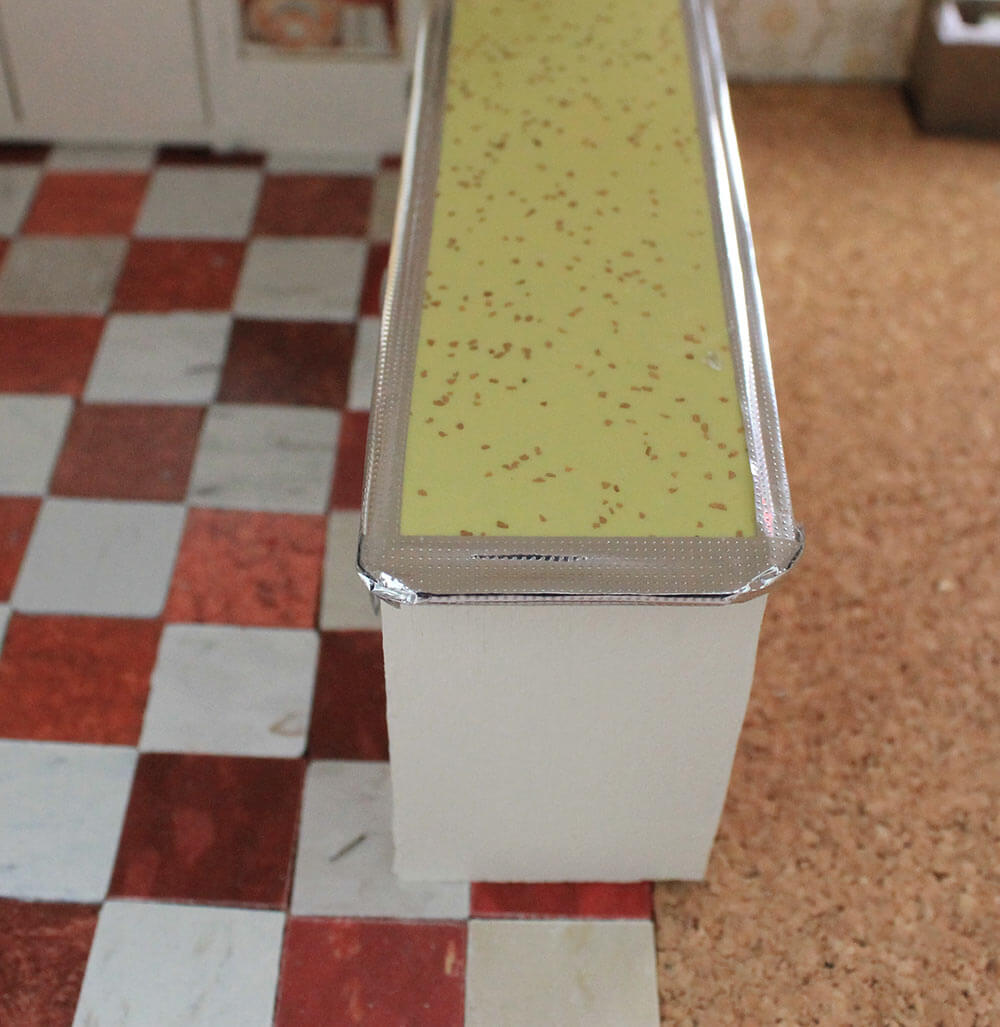 Ta-da — vintage sparkle laminate countertops with ‘aluminum’ edging!
4. The finished custom kitchen cabinets
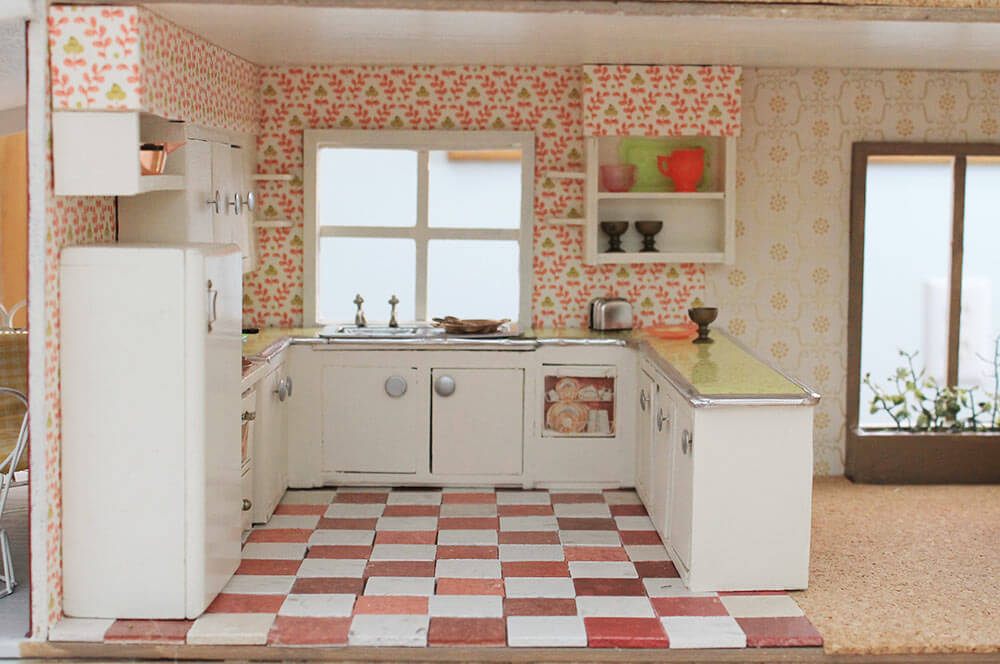
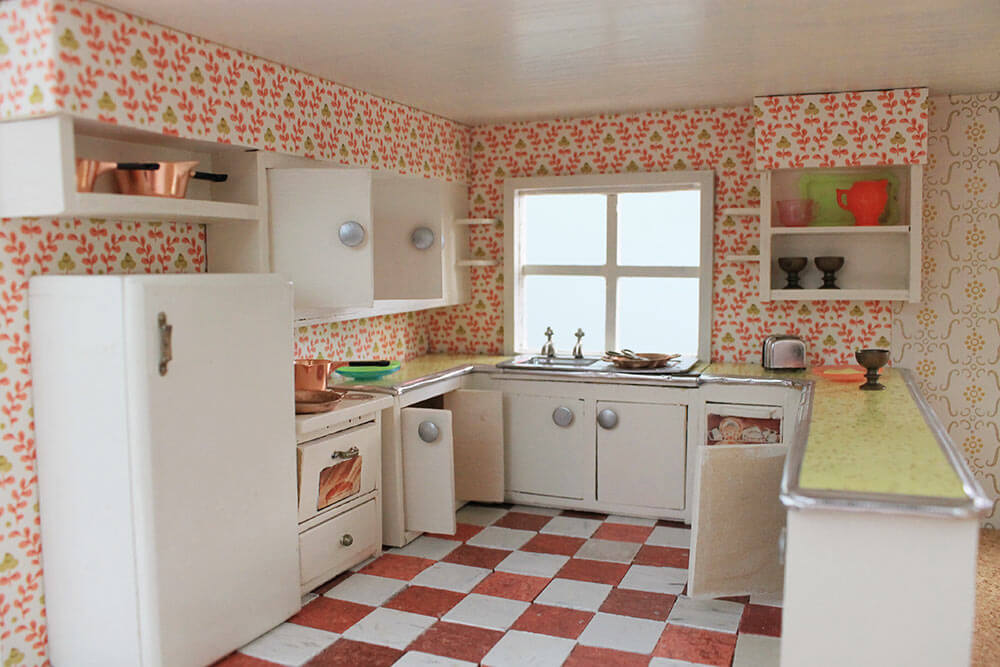 Building this custom vintage dollhouse kitchen — with cabinet doors that open — was a time consuming process, but I think it turned out super cute, don’t you? If the space were a tad bit larger…wink, I’d cook in there!
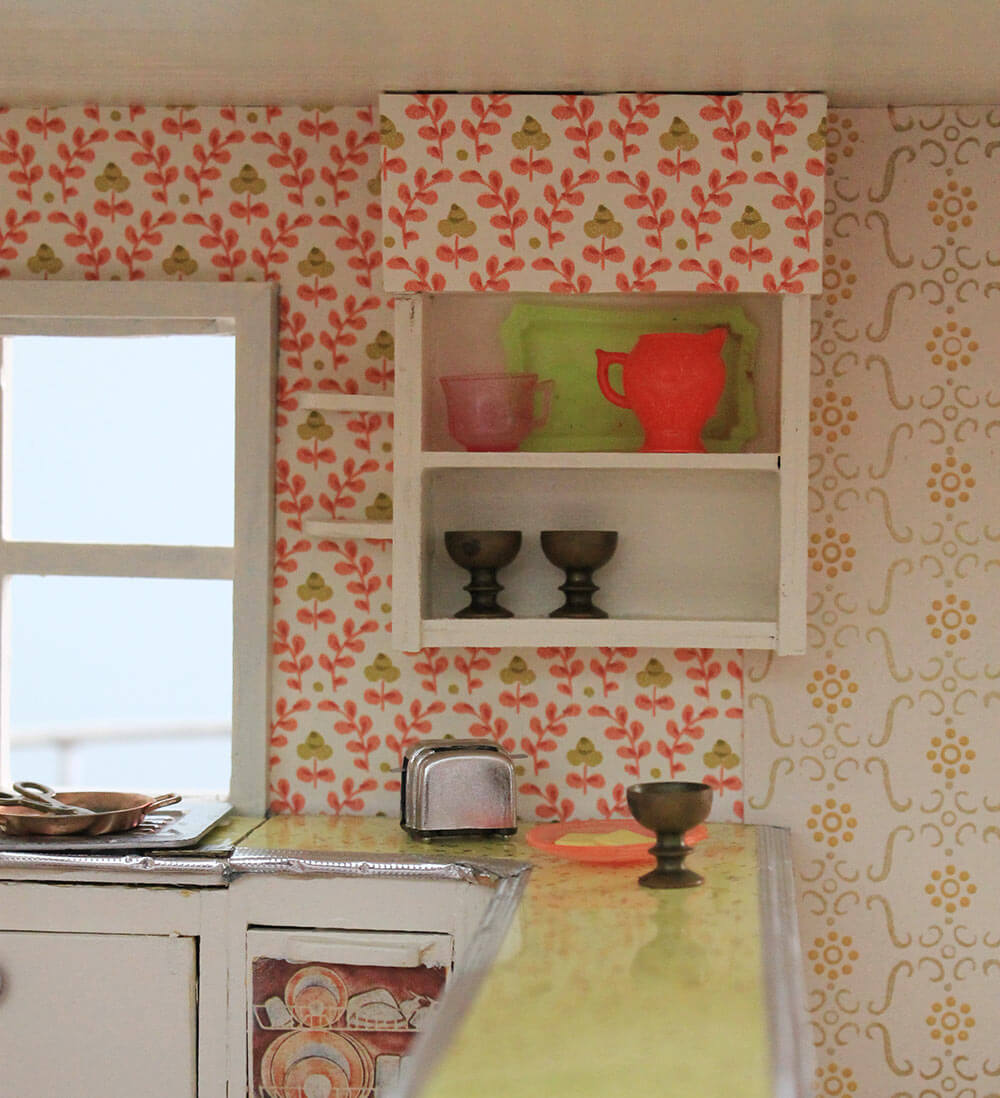 I’m not done adding little decor extras yet, but I did manage to find a few things to decorate some of the open shelving and countertops. The plastic plates, pitcher, tray and cup and the brass wine glasses were my Mom’s from when she was a little girl. I played with them when I was a kid, too.
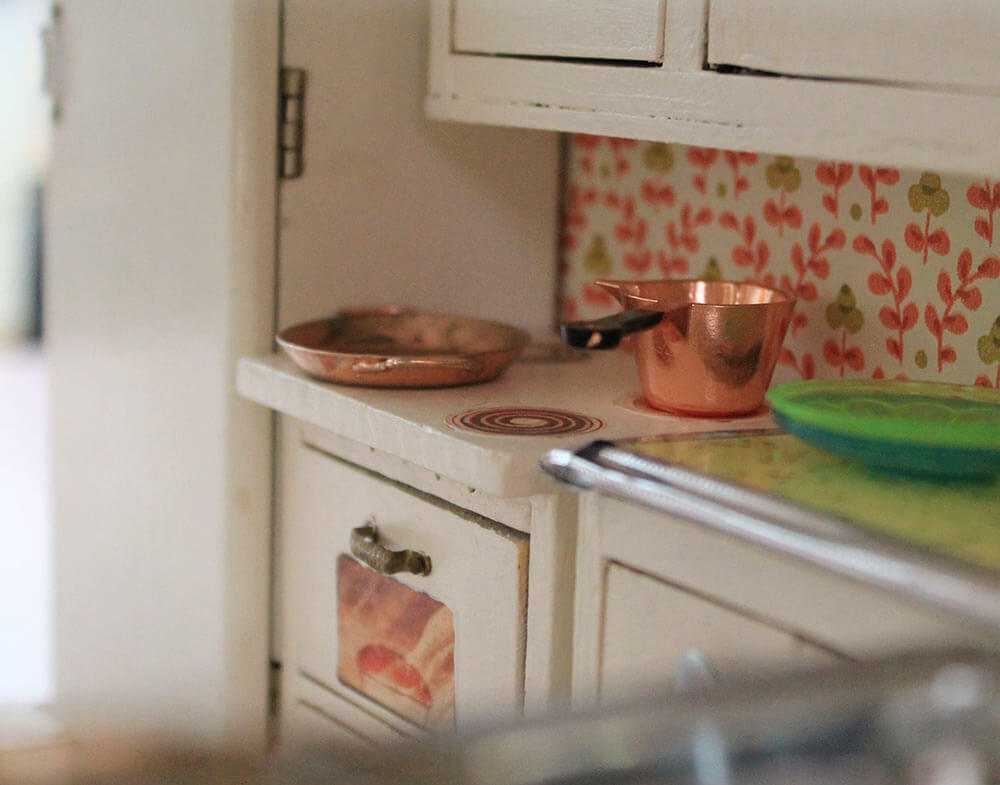
 The little pair of scissors and the shallow copper pans were part of my childhood dollhouse goodies.

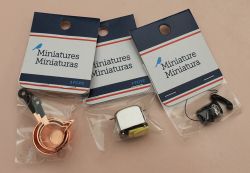 I found the set of three copper sauce pots and the little toaster at Michael’s. I know, they aren’t vintage, but I was having a hard time finding vintage kitchen goodies that were (A) the right scale and (B) not $$$$. So I ‘cheated’ and bought a few new miniatures from the craft store. Sorry, Pam, they were too cute (and budget friendly) to pass up. Note: I think the telephone is a little too small for the scale of the house, but I plan to use it anyway because it is adorable.

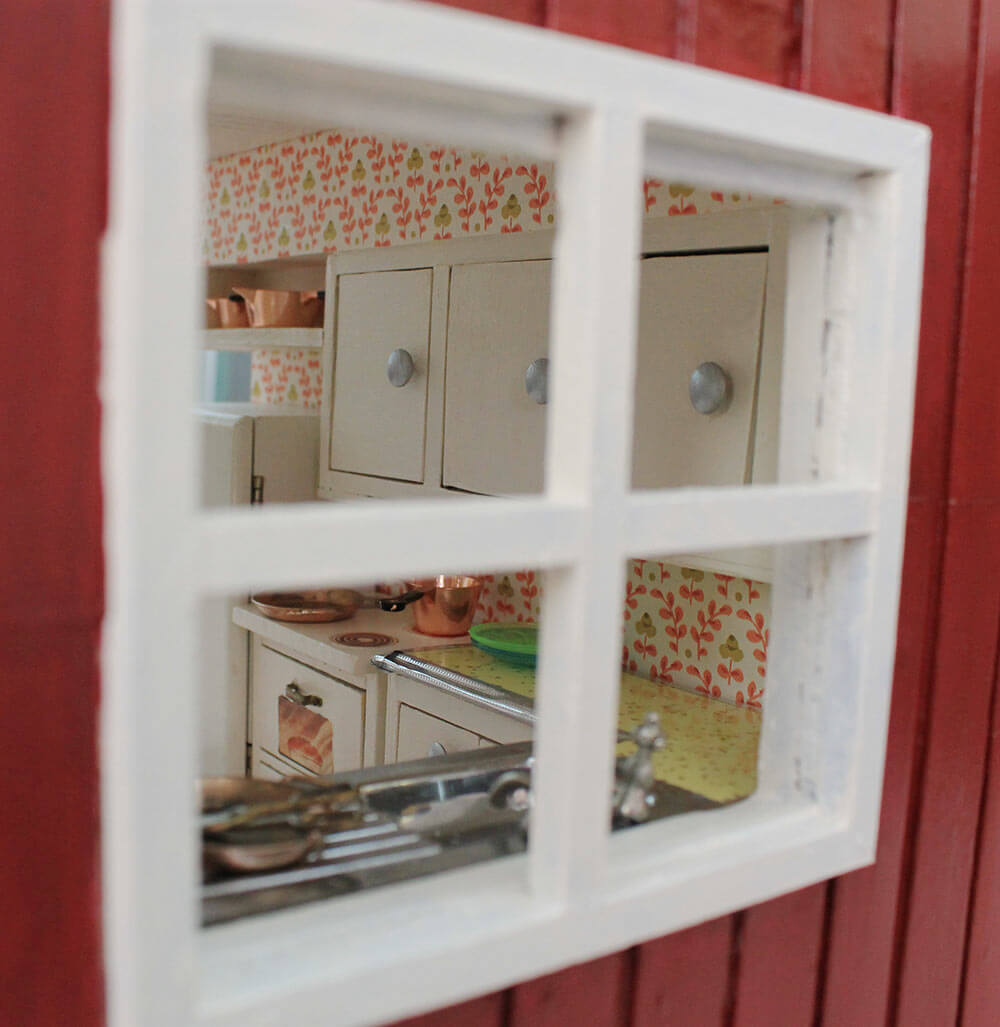
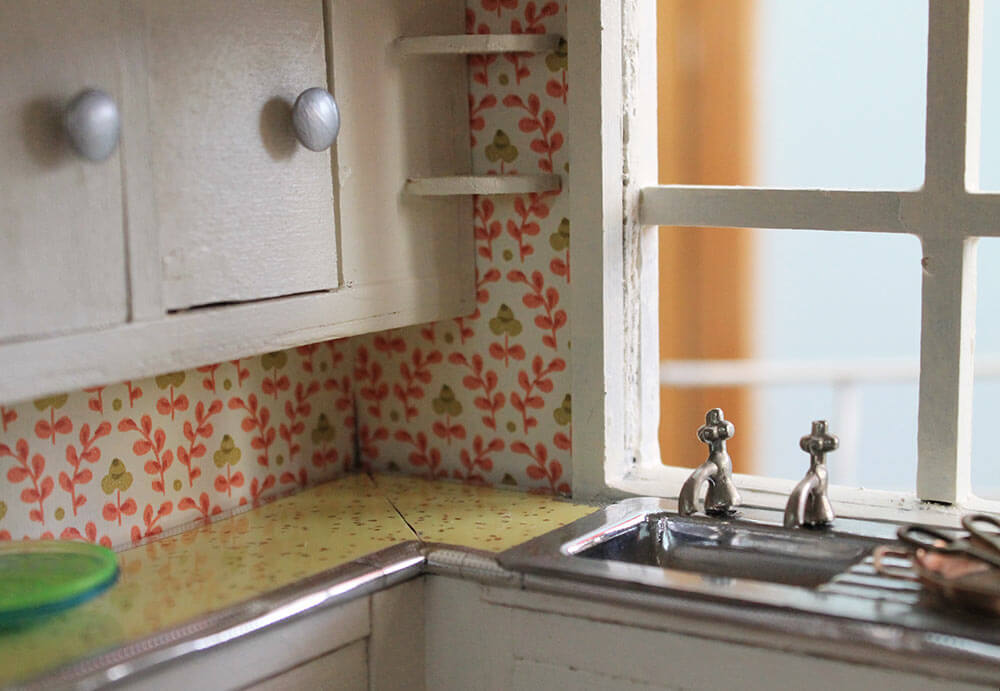
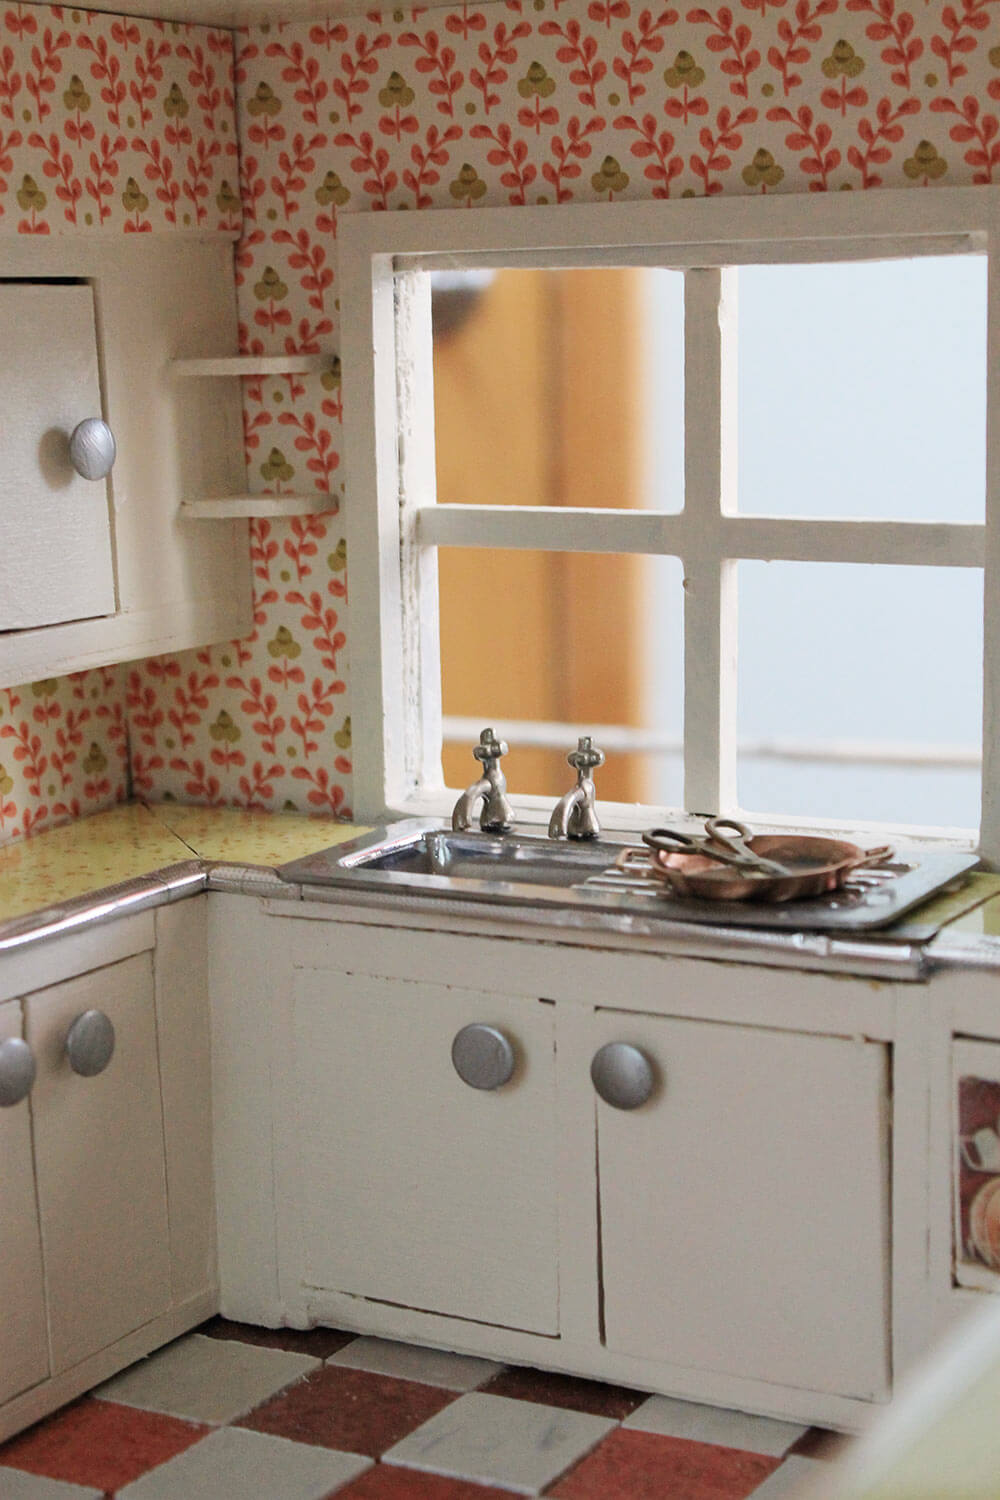 My favorite part of the whole kitchen is the scene around the kitchen sink. The way the light comes through the window, the sheen of the sink and faucets next to the metal edging on the countertops, and those cute little wall cabinet whatnot shelves that still need some tiny decorations — it is all so adorable it makes me swoon.


LuAnn says
Oh my goodness! This kitchen is adorable! The floor, the countertops, the working cabinets…it’s all awesome. I love the color scheme. The red, white and yellow seems like a nod to coolonial country. 🙂
Mollye says
Wow this kitchen is fantastic! All the work you’ve done so far is amazing. I’d like to shrink myself and move in!
Naomi says
This is beyond adorable!! I hope you get a Betsy McCall doll to live in it when you are finished.
Kate says
From what I’ve seen, Betsy McCall Dolls are not the right scale to live in this house — they are bigger than 1:12 and I think when I looked into their size they were 9″ dolls, which would mean they would be 9 foot tall giants in this 1:12 scale house!!!!
Mary Elizabeth says
Yes, Kate, you are right. Betsy McCall dolls were that size–I had one! Also had a Ginny doll, about the same size. (I grew up just about three to five years too early for Barbies.) Also, I had Betsy McCall paperdolls–tons of them!–as my mother got the McCall’s magazine, and there was a Betsy McCall doll and outfit in just about every issue. As I recall, there was a story about Betsy that went along with the dolls. I had two sisters, but one wasn’t interested in paper dolls at all and the other was too young to play with them.
How we made the dolls sturdy–we tore the page out of the magazine and glued the whole page to an old manila file folder. Then we used our blunt scissors to cut out around the dolls and the clothes. I kept all the stuff in a cigar box. In the summer, my friends and I would take it outside under a tree with a blanket and play with the dolls, using small rocks to keep them from blowing away during whatever drama Betsy and her friends were engaged in.
I think, if you can’t find vintage dolls to move into your house, you can get a Melissa and Doug set in the right size. They are generically dressed so that they don’t seem dated. Also, I think there should be a little real estate rental or for sale sign out in front while you are searching for tenants! 🙂 You could cut the logo it out of a real estate advertisement in the newspaper.
linda h says
My Ginny doll is wearing a coat my Grandma made, and she is sitting on a table in my guest room . And, no, I don’t guess she would fit properly in this dollhouse.
Kelly Wittenauer says
Try a Dawn doll from the 1970s. She should be about the right size, maybe just a tad tall. And there were other dolls in the series, but I don’t remember her friends names.
lisa in Seattle says
Dawn dolls are 6.5″, so I think they would work even if a little Amazonian. It’s a stylish house, so definitely could belong to a mini fashion model! And Dawn’s look goes well with the house, too.
Mary Elizabeth says
By the scale, Dawn would be 6.5 feet tall. Maybe you could make her a tiny UConn lady Huskies basketball outfit! 🙂
Don’t remember if there were any guys in that collection. It would be nice to have a couple live in the house. Little Tykes and Fisher Price Loving Family would be about the right size.
Robin, NV says
Kate this is just adorable! I’d be hard pressed to come up with a favorite feature but those countertops are the cat’s meow!
pam kueber says
Simply adorable.
My favorite parts are the (1) drainboard sink, (2) yellow sparkle laminate countertops with metal edging, (3) red and white checkerboard floor and (4) vintage wallpaper. Super duper sweet.
Yes, the kitchen — and some of the other rooms — seem to be crying out for light fixtures on the ceiling. Also, as you and I discussed on the phone last week, Kate, I think that behind the stove is crying out for a tile or some such backsplash … or, you can “build up” that stove to look more like a vintage Wedgewood etc. Would be super cute, if you wanna go for it.
And as Precautionary Pam, I speculate: Your stove placement may not meet local code requirements. (Landing pads on both sides may be required — check local building codes.) Of course, there are not 12:1 building inspectors or dollhouse construction permits required — so you’re off the hook on this one, per se.
SO INSPIRING. I am on the lookout for a vintage dollhouse to makeover, too! (Do not have the patience to build one from scratch like my Katiedoodle.) You rock, Kate!
Kate says
aww thanks Pam. 🙂 Yes, I know you are wanting a backsplash and light fixtures (note, I am not messing with trying to wire lights for this dollhouse — that is outside my comfort zone) but I’m sure i could rig up some for looks. 🙂
pam kueber says
What about one of those candle votive bulb thingies installed upside down (museum putty?) that is battery operated so you can light it from the source?
I don’t know much about these including whether they are the right style but it occurred to me…
pam kueber says
Like this, add a diffuser. http://www.batteryoperatedcandles.net/CA10290CR9-p-tea-lights.html
May be too big, still
ElectraChime says
First off, Kate’s kitchen is retrolicious! I can see the whole family congregating in there. Absolutely love the view through the windows.
Pam, how about an Aframe from The December 1961 Sunset magazine? Here’s a fabulous execution:
http://pimrakers.nl/2014/04/a-frame-doll-house/
I’ll build the house for you if you promise to furnish it with at least one miniature pull down lamp!
pam kueber says
In an A-Frame, that would be one awfully long pull down!
You are tooooo generous, Robert!
ElectraChime says
A pole lamp in an Aframe would be really, really, tall!
sherree says
Adorable! Great job Kate 🙂
Geronomom says
This is so much fun! I am going to be really bummed once this project of yours is over – I so look forward to the weekly updates. Even got my uninvolved DH curious & asking how the dollhouse is going – & offering up “guy suggestions” (he wondered where the rooftop,tv antenna was! ;-). )
Kate says
I still have at least 5 more spaces in the house to finish, so the project is far from over! 🙂
Gretchen in Greenwood says
The Teeny Tiny Toaster! The wallpapered soffits! Great Scott, you have absolutely made my Monday morning brighter! Now, what does the kitchen need? A. a ceiling light fixture- possibly to be made from a clear water bottle cap and more of the “aluminum” tape used to trim thecounter tops so cleverly. B. a percolator for coffee. C. the dog’s dish.
I can’t express how much I am enjoying the doll house saga. You never outgrow your need for play, I guess.
ElectraChime says
Great idea for the material for the ceiling fixture. I’m partial to pull down lamp fixtures myself.
pam kueber says
ooooh maybe over the dining room table?
ineffablespace says
What? No pink appliances? 🙁
😉
lynda says
As always, pretty darn cute, Kate. You are amazing. Artists have a lot of patience and fun. Such a fun project to follow.
Kate says
Awww thanks Lynda, it does take a lot of patience, that’s for sure!