

 I’ve had my awesome circa-1940 vintage dollhouse for about six weeks now. I count that as one year in real-house time — and used those weeks to obsessively research and puzzle and quandary the approach to take take with the dollhouse. Now, I have begun my restoration process in earnest.
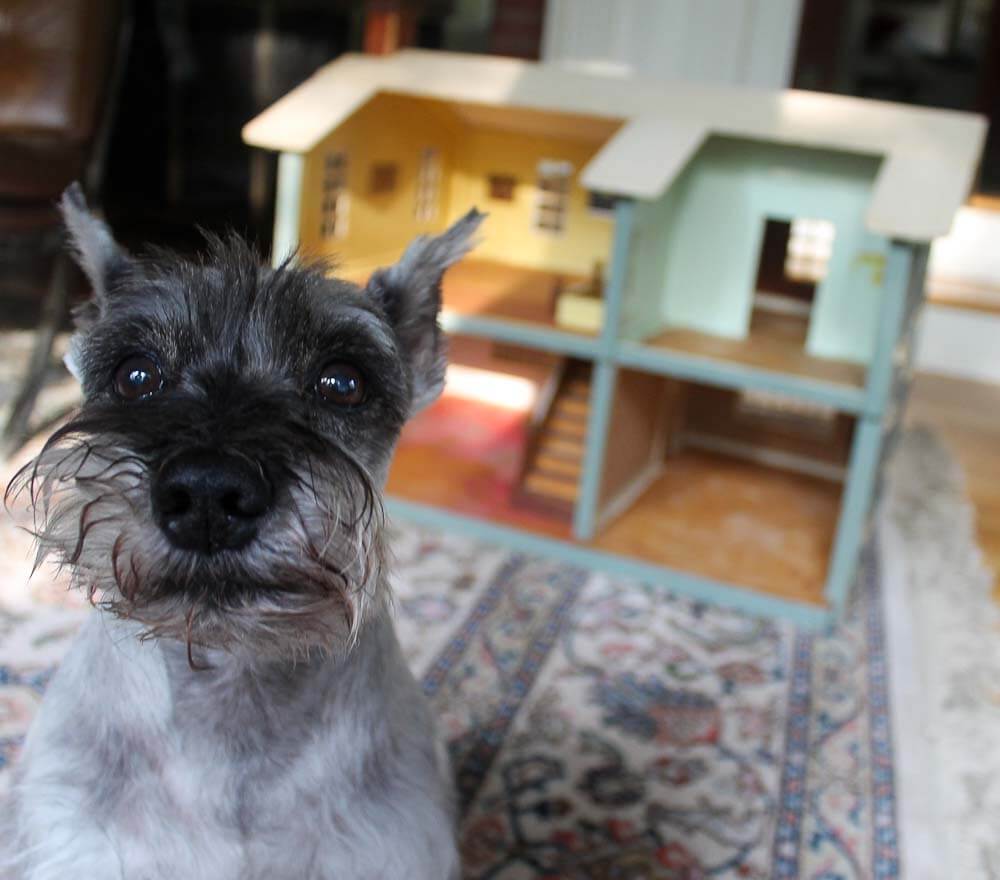
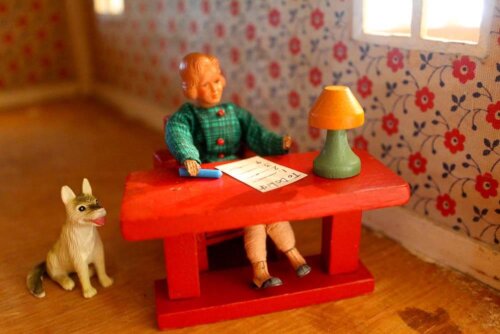
 Golly, restoring a vintage dollhouse is pretty much just like restoring a real house, except that you need to use even more old toothbrushes for cleaning. Read on for my plan and punch list and artsy fartsy photo session — and stay tuned for more stories as I share the process of restoring and furnishing my (believed to be) vintage Neely-Hall dollhouse. And, oh, in case you don’t know him already, that’s Astro, photo-bombing, above. Woof!
Tip: Click any photo and it should double in size on your screen.
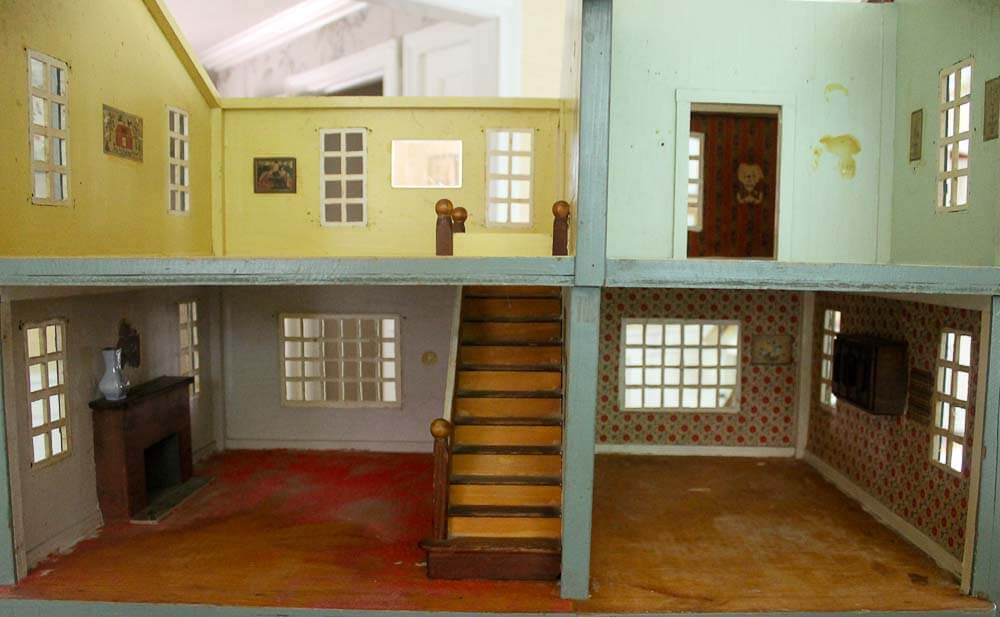
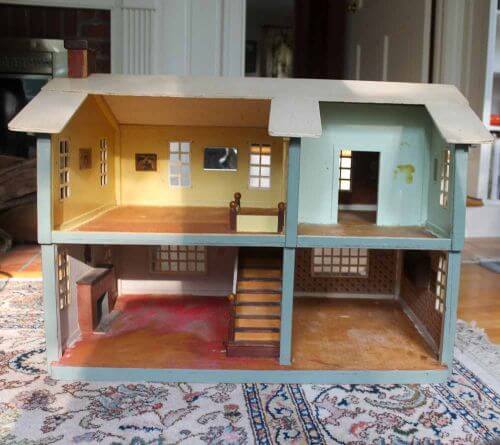 To start, let me say: I thought long and hard about whether to make any changes (beyond cleaning) to this dollhouse at all, considering that it was in such relatively great original shape. I ultimately decided that the only thing I would permanently remove would be the flooring, which was beat up and stinky and did not please me aesthetically. I also may poke a few holes here and there, for wiring. Other than these updates, all my changes will be removeably cosmetic, so that all the original remains, except it will be underneath wallpaper and flooring.
Restoring my vintage dollhouse — the action plan:

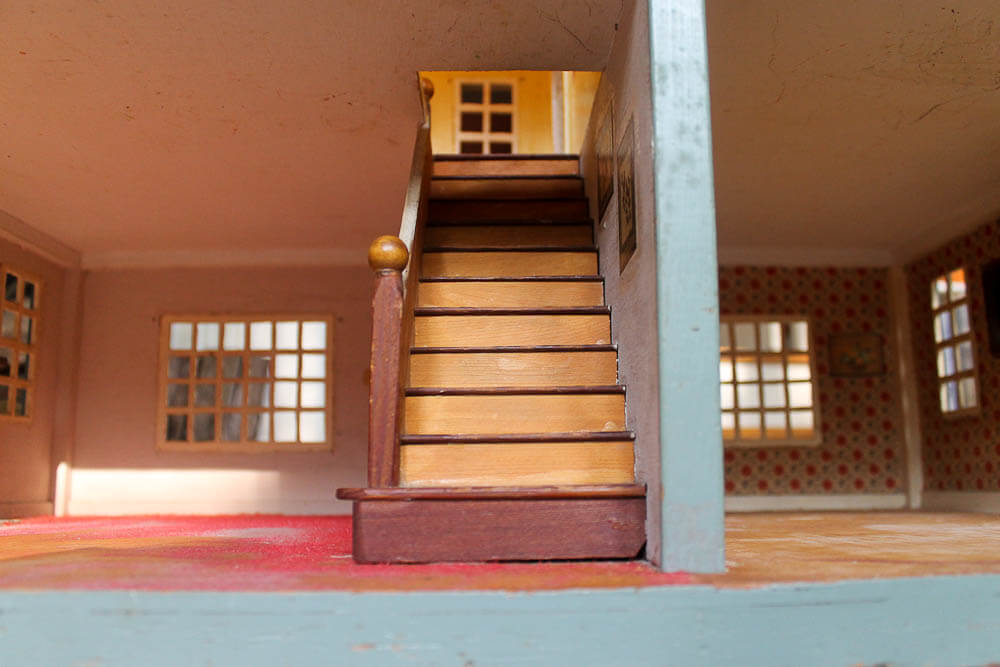
- Remove flooring — I have already taken up: the red wool “carpet” in the upstairs and downstairs parlors, the plaid wool “carpet” in the bedroom, and the cork flooring in the bathroom and kitchen. Before I pulled up the wood carpeting (it ripped right out by hand, the glue was quite old and dried out), I had vacuumed. Even so, the stuff was encrusted with dust. I got out a really good face mask and used it from then on. I also HEPA-vacuumed frequently as I proceeded.
.
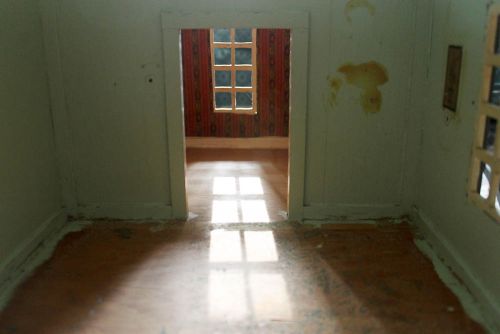
As I was prying up the cork flooring in the kitchen (which also came up easily) I found a mouse dropping under a corner. Ick. Now, I am getting the remnants of adhesives up, which has gone really fast. I may also use a paint remover to get the oil paint off the edges of all the flooring in all the rooms. I may decide to wax the wood floors everywhere to start and see how that looks as a flooring base. Precautionary Pam notes: I am cognizant of the risk of vintage nastiness in this old dollhouse — lead paint, for example. I have been and will continue to take precautions accordingly. I was not worried about the potential for asbestos in the flooring adhesives, I was pretty sure the stuff was just household glue — that said, I made this decision at my own risk, don’t take it as advice! Get with your own properly licensed professionals to determine what you are working with so that you can make your own informed decisions how to handle.
.
Do I feel guilty about ripping up the original 1940 flooring? Yes. It was not the righteous Historic Preservation thing to do. But I did it anyway, because I want to decorate and enjoy my dollhouse, I am not going to sell it, and with all the dollhouses in the world, I really don’t think it was some kind of amazingly rare historic relic that a museum would want. Onward. The flooring is gone. Don’t yell at me. I did think hard about this.
.
Status: Currently under way.
.

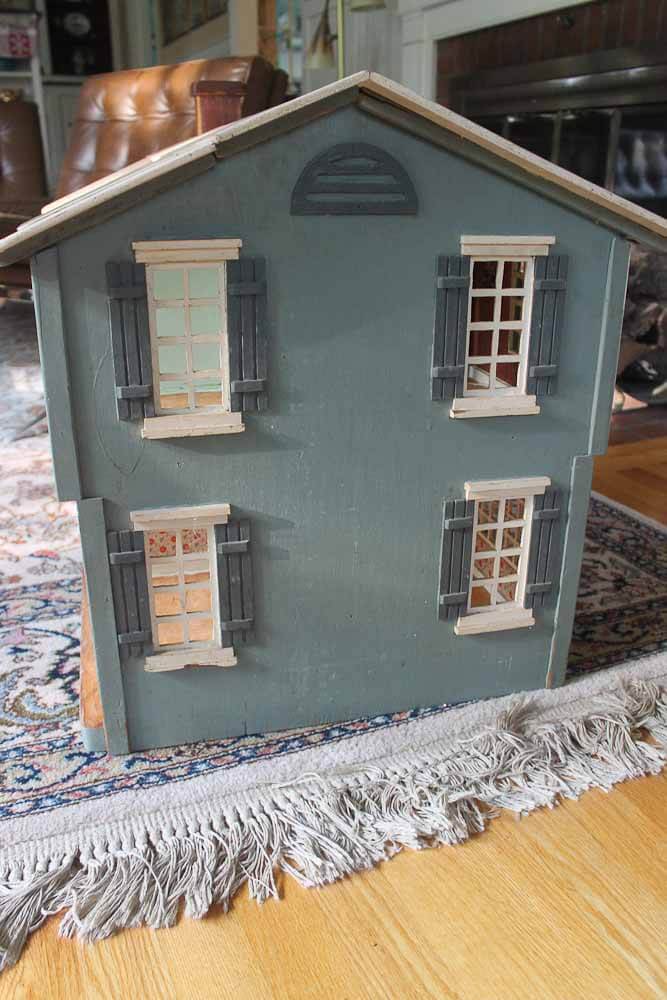
- Clean interior and exterior — I also have begun to clean some of the interior moldings as the flooring has come up. Goodness, the old oil paint is hardy stuff! It cleans like a DREAM with plain dishwashing liquid squeezed onto a Dobie. With a good scrubbing and rinse, pretty much all the lovely pastel paint colors lighten up about five shades. I love the patina of the old paint and do not plan to paint over any of the trim. Yes, there are imperfections and some worn away areas, but this contributes to the charm.
.
Status: Currently under way.
.
- Research and decide key decorating themes — Of course, I am most excited about the decorating. For the past… four weeks, I’d say… I have literally had a mania for looking at dollhouse furniture and accessories on ebay and etsy, to understand what’s available. I purchased a variety of items. While I made “mistakes,” having these real pieces of furniture in hand has helped me to understand the approach I will take with decorating the house. I am now refining my furniture-purchasing plans and am hot on the lookout for the key pieces of furniture I want/need.
.
Status: Completed.
.
- Decide what scale of furniture I will use — Key in my research: What scale of furniture to purchase and use in my dollhouse? As I discussed when I first wrote about my dollhouse, it is sort of weirdly sized. The door height indicates is it 3/4 scale. But the door width, ceiling height and furniture that came with suggest: Grand Rapids furniture-sized. Then, there is a sort of in-between I could go to — 12:1 scale — in which 1″ equals one foot. In my initial ebay and etsy shopping, I picked up furniture in all three scales. For now, I have decided I will furnish the dollhouse in 12:1 scale. This is a far easier size to collect, and I have certain brands in mind. That said, I may also collect alternate room-fulls of the other two sizes and switch things around every once in a while.
.
Status: Completed. - Decide basic furniture layouts — Now that I have decided on my scale, I can begin to plan furniture layouts so that I know what pieces of furniture I need to watch for. Even more importantly, furniture layout will be critical to designing my electric wiring plan.
.
Status: Need to finalize.
. - Wire for electric lighting — Kate built her 1955 Betsy McCall dollhouse from vintage plans — from scratch! It will be hard to beat that DIY baseline, but …. I will wire my house for electricity, how about that! I also have been doing lots of research on this process. I’ve acquired some materials and have read all the instructions. Yes, I read the instructions, very very carefully. I need to get a few more things in order to get started.
.
Status: Before I can start this project, I need to finish floor and wall cleanup and finalize furniture layout plan so that I can plan the lighting and purchase all required supplies accordingly.
. - Acquire or make sconces, lamps and chandeliers — I want to make my own lamps, sconces and chandeliers.
.
Status: I am trolling ebay for deals on existing lighting that I can adapt, and watching estate sales and thrift shops for “containers” for the lighting — ala “Put a bulb in it — or on it.” This will be a fun activity to accomplish over time.
,
- Wallpaper all the rooms — I will use vintage wallpaper on all the walls.
.
Status: I *think* I already have the wallpaper I will use, taken from mycollectionhoard.
.
- Add interior wood trim to the windows — The wonderful wood windows are trimmed on the outside, but not on the inside. Once the wallpaper is up, I would like to trim the inside. This will be “some therapy.”
.
Status: Keeping an eye out for possible materials.
.
- Add flooring — As I said above, I may try to just wax the existing bare wood floors to use as a base and then add rugs. Or, I may use wallpaper, vintage vinyl, or linoleum.
.
Status — Pondering options, eyes on the lookout.
. - Acquire key pieces of furniture — My focus is now on 1:12 scale furniture. I have some vintage brands in mind, but am open to options.
.
Status — Ebay is my prime source. Scoping two times a day! Some items purchased already, but I may trade up.
. - Make window treatments — I am pretty sure I will make the window treatments myself.
.
Status: Thinking about it, keeping an eye out for possible materials to use.
.
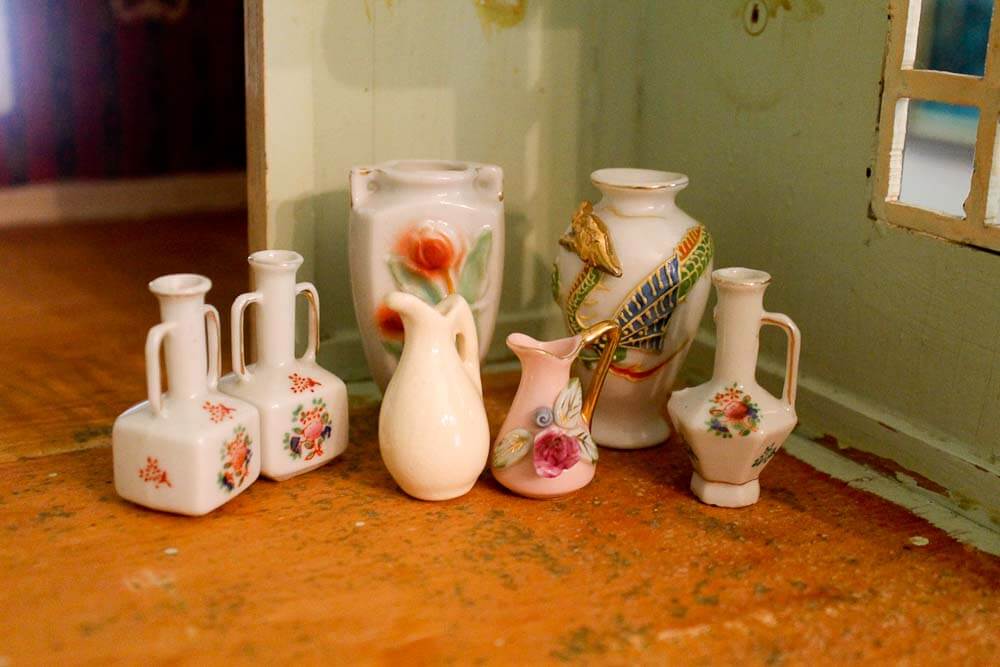
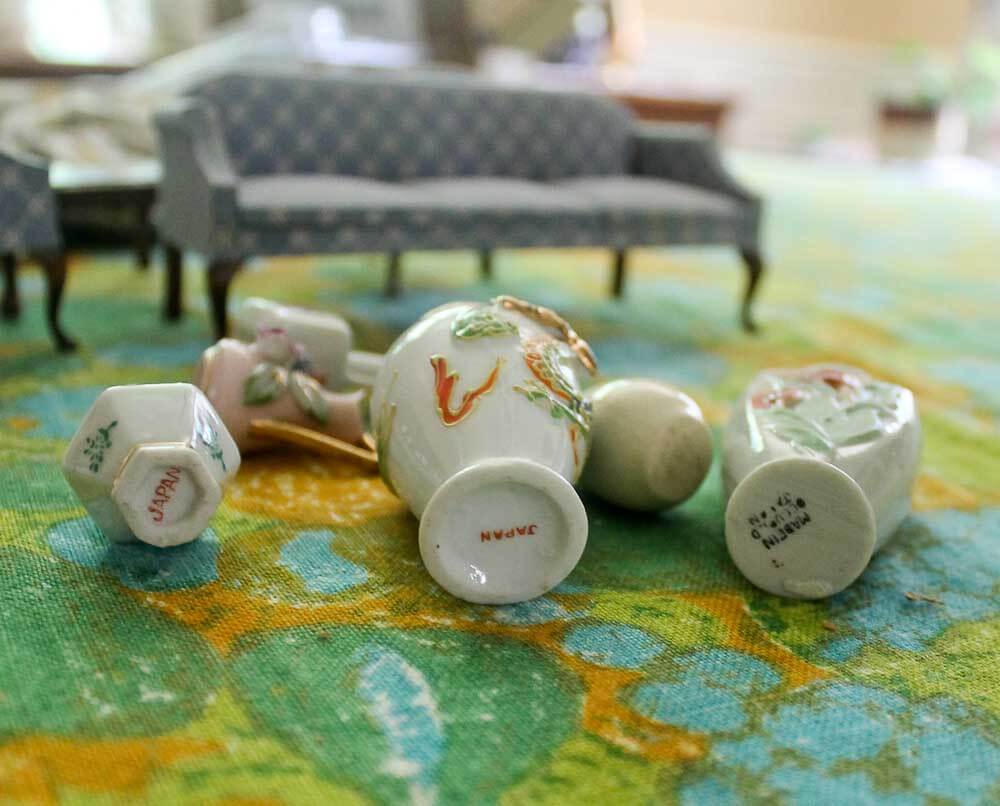
- Accessorize — Rugs… art… pillows… bedding… vases… dishes… This will be fun!
.
Status — I’ve acquired some stuff already and am keeping my eyes peeled for more — however, this is not a priority right now, I want to get all the basics in first.
. - Dolls! — Of course, I’ll need a family for the house — and maybe they will be having a party with all their friends over. Yes! Oh: Cocktails. They will need cocktails!
.
Status — I think I know the brand I’ll collect. I have a few already. Stay tuned!


Yikes. This list is scaring me. Like I said: This is a big job. If I am able to take one thing off this 14-point checklist per week, I’ll have the dining room cleared just in time for… ornie wreath-making season.


Diana says
Just finished scanning your blog/comments. I have the doll house my great grandfather made for me over 70 years ago. It went from me to my younger sister, then to the children of a family friend and back to me. It has been moved numerous times and is desperate need of refinishing. I plan to refinish it and hopefully find a home for it with a child who will enjoy it. Thanks for all the tips and ideas.
Cocoaknits says
There is a really cute dresser for your dollhouse that you may be interested in here. https://www.ebth.com/items/2107446-vintage-wood-toys
ebethnyc says
This post made me sooooooooooo happy.
My dear departed daddy was an interior designer and builder extraordinaire of dollhouses. We had (real) wallpaper samples from the “D&D Bldg” in NYC, as well as Laura Ashley fabric covered walls. Every time our room was redesigned and reconfigured, so were our dollhouses. Once, the steps leading up to our beds contained cubby holes which were the dollhouse and the steps, when not in use by us, became the dollhouse people’s patio(s)!
And one of the best dollhouses ever lived on our terrace. It had a working elevator! (I’m fairly certain my sister and I each had our own.)
But very best of all, was the time spent on Saturdays w/my daddy, watching Mission: Impossible and building dollhouse furniture from kits. The smell of Duco Cement makes me sentimental. :’ )
PS: either my sister or my father came up w/this genius idea: for (dollhouse) cocktail glasses, heat (warm) clear push pins (classic shape) enough to pull out metal pin, turn upside down et voila!
cocktail (martinish) glasses!
Thank you thank you thank you for the smile this morning.
PPS: Astro is a d o r a b l e.
ebethnyc says
PPPS: we had the dollhouse people featured in your photo. German (like Mom) and expensive back in the day. Shockingly so, now. (FAO Schwarz carries* them still, along w/many other dollhouse accessories which we had – the lumber and electrical brands I remember. *they’re about to go out of business. again.)
Perhaps they’re a little less expensive post-reunification, but doubtful.
pam kueber says
Caco dolls — I believe that’s what these are!
pam kueber says
Gonna go find me some clear push pins!
This dollhouse project most definitely is fun FuN FUN!
Chris says
I’m so happy you have this blog! Every day is a treat when there are so many fun projects to read about!
I can’t wait to see the progress on your doll house!
(Hmmm, does this fit into the “tiny house” movement? LOL)
pam kueber says
Yes, the Very Tiny House movement!
ebethnyc says
: )
Anna says
Pam, if you have a Michael’s craft store near you, they sell strip wood in a variety of sizes. I use one size in particular – 3/8″ wide, 1/16″ thick, 24″ long – for window/door trim, floorboards, wainscoting, etc.
Hairspray bottle caps, if you don’t mind cutting off a good bit of the top (a small mitering saw works well for this), are a pretty good size for 1/12 lampshades.
Hard-wiring a dollhouse is challenging, especially if a light malfunctions (put it this way: I’ll never do it again!). If you are concealing wires behind wallpaper or under floorboards, it’s a good idea to cut a piece of cardstock or mat board to fit the wall/floor, apply your wallpaper and trim/flooring to that, and don’t glue it in permanently (a few dabs of regular white glue can hold a wall into place without making it impossible to remove). For my bungalow dollhouse, I made four battery-powered lamps using model train LED light components (which are much cheaper than store-bought battery-powered dollhouse lights). The battery packs will be concealed under furniture or hidden outside in the house’s landscaping.
For curtains, look for vintage handkerchiefs! After years and years of washing, they are soft and hang realistically (it’s a nice bonus if you find some in a period-correct small print, or with embroidery). I plan to make tiny roller shades for the bungalow, but I’m saving my grandma’s old hankies for dollhouse bedding.
pam kueber says
Thanks for these great tips, Anna!!! I was just looking at those clear plastic tops on my small cosmetic spray bottles for this purpose. And my grandmother’s vintage hankies, too — although I would never cut those up! Thanks also for the tip re: wallpapering. I may indeed take this advice!!!