

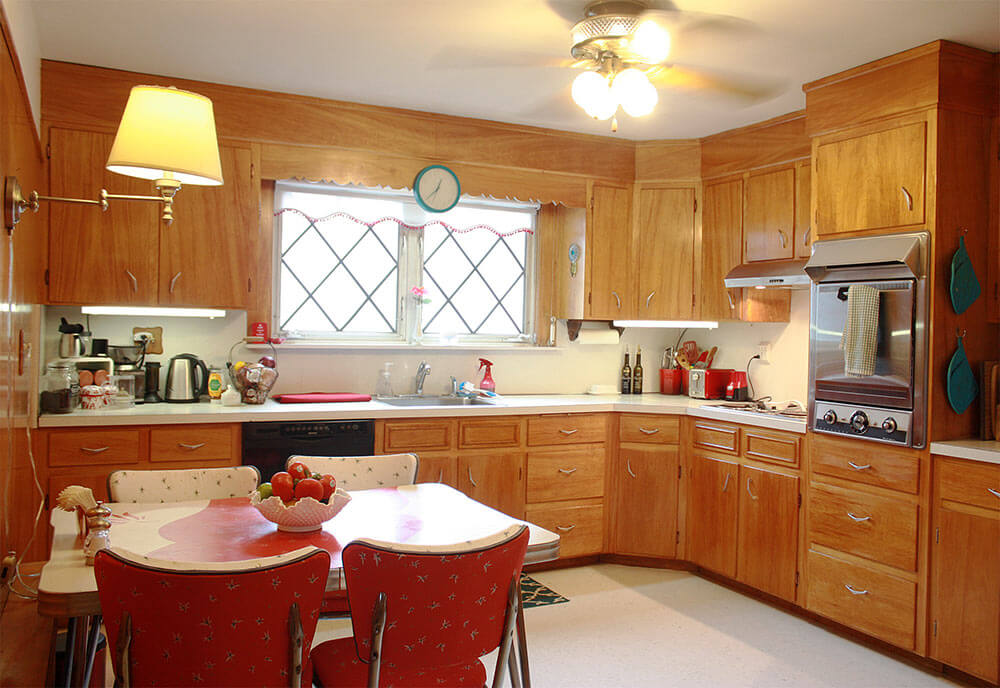
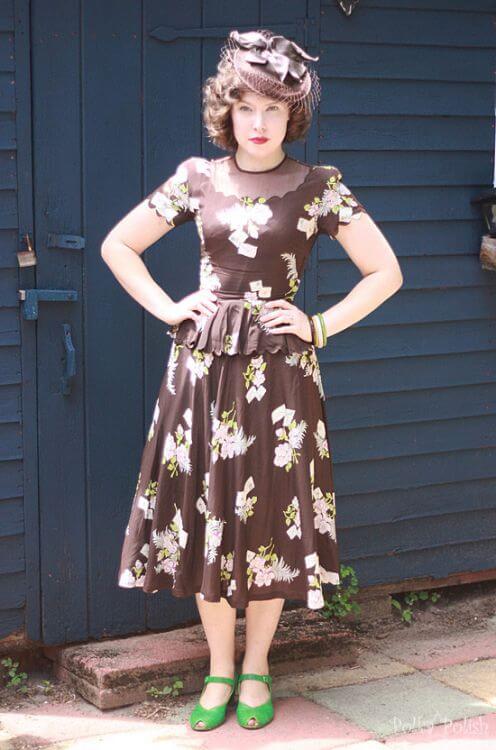
 Frances and Doug became caretakers of a 1950s time capsule house two years ago. The couple already appreciated vintage style — Frances writes about vintage fashion on her blog Polka Polish — which is terrific! They loved the home, but the kitchen was feeling tired and in need of a refresh. On a tight budget, they looked to thrifty vintage finds and solutions to restore the kitchen affordably. After a few key fixes — including a charming vintage dinette set, Armstrong VCT flooring, and pom poms (!) — their kitchen once again feels warm, inviting and ready for another 60 years of happy service.
 Frances writes:
My fiance and moved into a time capsule 50s or 60s house two years ago. Hardwood floors under ancient carpet, yellow and black tile bathroom, wallpaper, pinch pleat curtains, about nine chandeliers, the works. We don’t own it, but we’re its babysitters in a way (it’s an investment by his family while he and his sister attend graduate school), so while we work on improving it we’re trying to be thrifty and to strike a balance between modern sensibilities and what the house wants. Naturally, Retro Renovation has been a huge help.

Once upon a time, our kitchen had salmon walls, a copper vent hood, copper drawer pulls, copper switch plates, copper contact paper with starbursts, and copper-sparkle linoleum. Unfortunately, time was not incredibly kind to our kitchen. By the time we got to it, the vent hood was broken, the linoleum was a sad and worn-down brown and muddy green, and someone had painted the salmon walls white. Unfortunately, the contact paper and floor had to go, but we did keep the sparkle laminate!
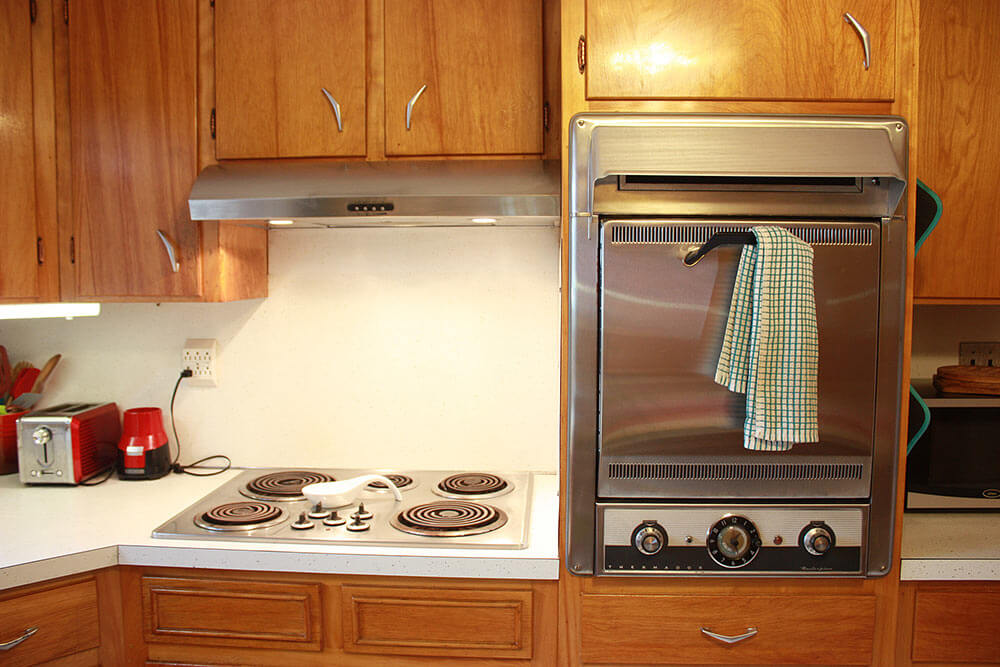

We worked with what we had. Our starting points were the wonderful Thermador Masterpiece oven, the fantastic Ajax drawer pulls, the gold-flecked linoleum countertops, and so much Amber Shellac. The goal was to keep the kitchen true to its origins and the style of the house while making it just modern enough to please the less-vintage-inclined.
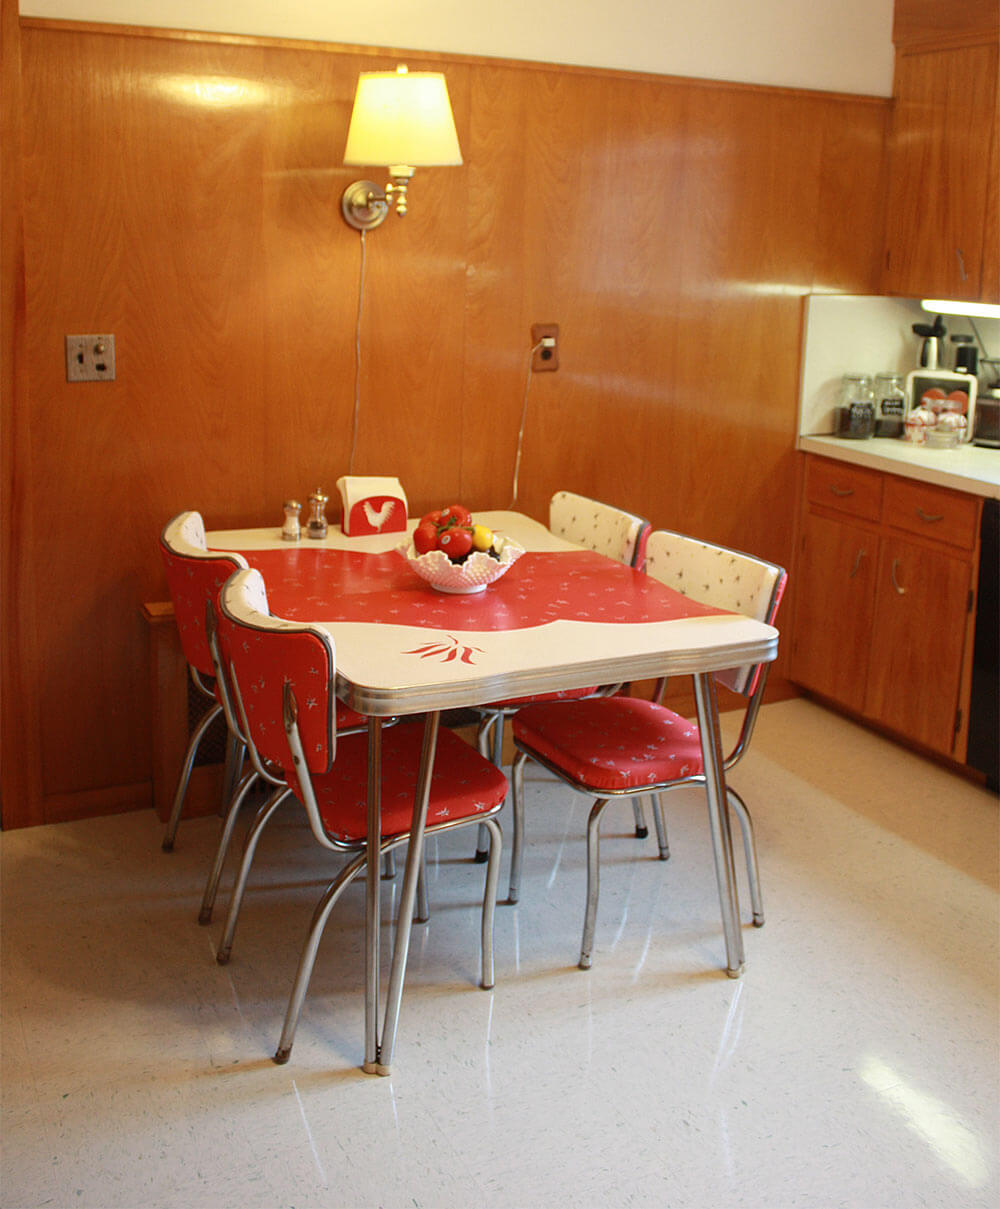
The kitchen is quite spacious, so I was determined to find the perfect dinette for it. I found mine via Craigslist, and (although I may be biased) I think it’s one of the niftier ones I’ve seen.
[Want to see more vintage red dinettes — see 23 here!]

The chairs were pretty badly torn up, so I reupholstered them with upholstery-weight cotton fabric from Spoonflower in my own copy of the original print.
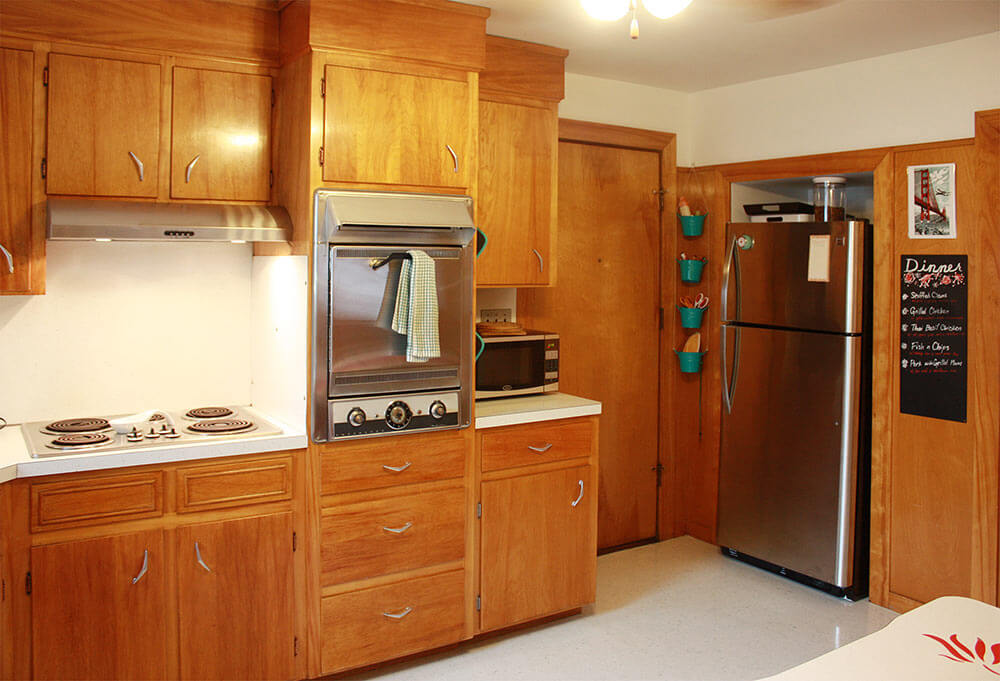
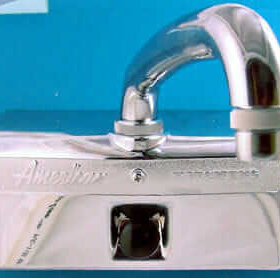
With the Thermador as our centerpiece, we decided to go stainless. When the fridge died we replaced it with a shiny stainless model. When we finally decided to remove the copper range hood, a Whirlpool model from Lowe’s completed the set. Now that we’ve scrubbed 60+ years of grime off the oven, it’s a perfect match! The vent fan is strong enough that not even a burning tortilla will set off the fire alarm, so that’s always a plus in my book.

I wanted to spiff up the peeling and worn Ajax boomerang cabinet drawer pulls so I had to first remove all 27 (!!).
I tried to polish the pulls, but the original copper plating was flaking and wearing off. Since the centerpiece of our kitchen is easily the original built-in Thermador Masterpiece oven, it made sense to switch our metal choice slowly to stainless or chrome. Early on I had tried redoing the pulls in silver leaf, but it was wearing off so I looked up spray-on chrome options. You can get really dang expensive and fancy with the process, but I ended up just going with Rustoleum in the end.
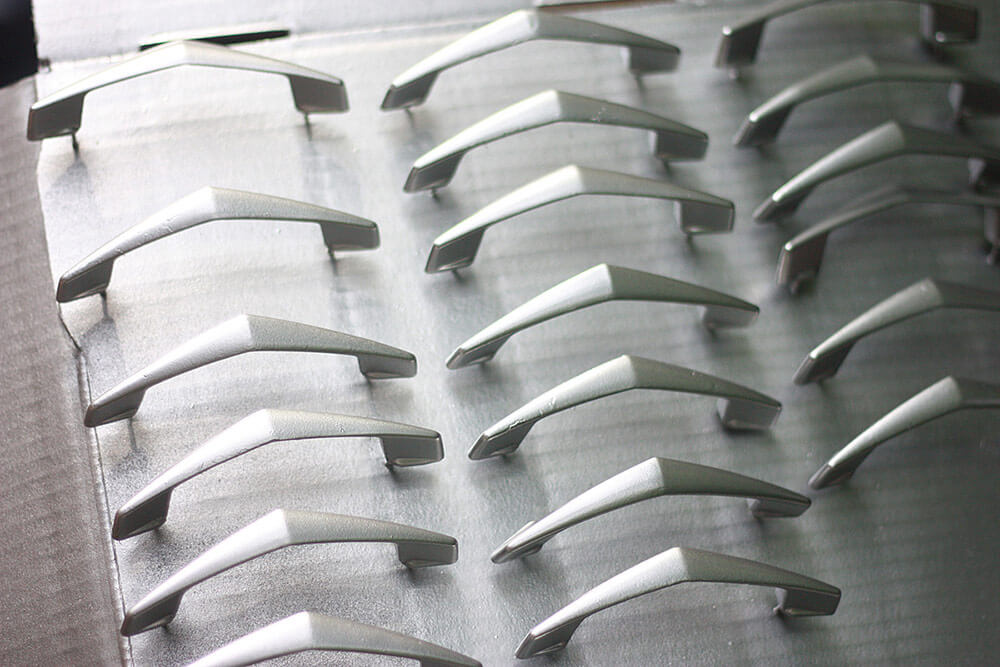
Each pull was scrubbed thoroughly, and I prepped a piece of cardboard with nails poked through as a little drying rack for my pulls. Each pull went on a pair of nails, and everything got a good coat of gloss black. Once that was dry, I spray painted metallic silver in light coats until they were shiny enough for my liking.
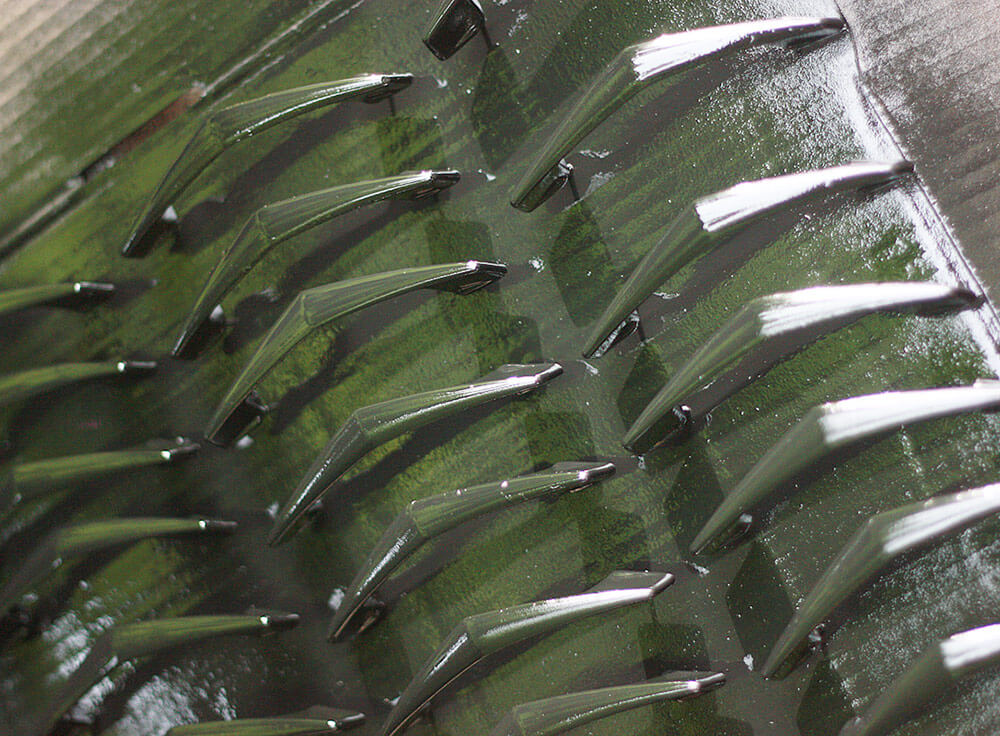
For extra kitchen durability, everything got a coat of clear gloss at the end. I let the pulls dry overnight before putting them back on, but if one could bear it, they could use to dry longer… a few of mine are dinged already from not being dry enough, and I’ll have to pull those off again and repaint them.
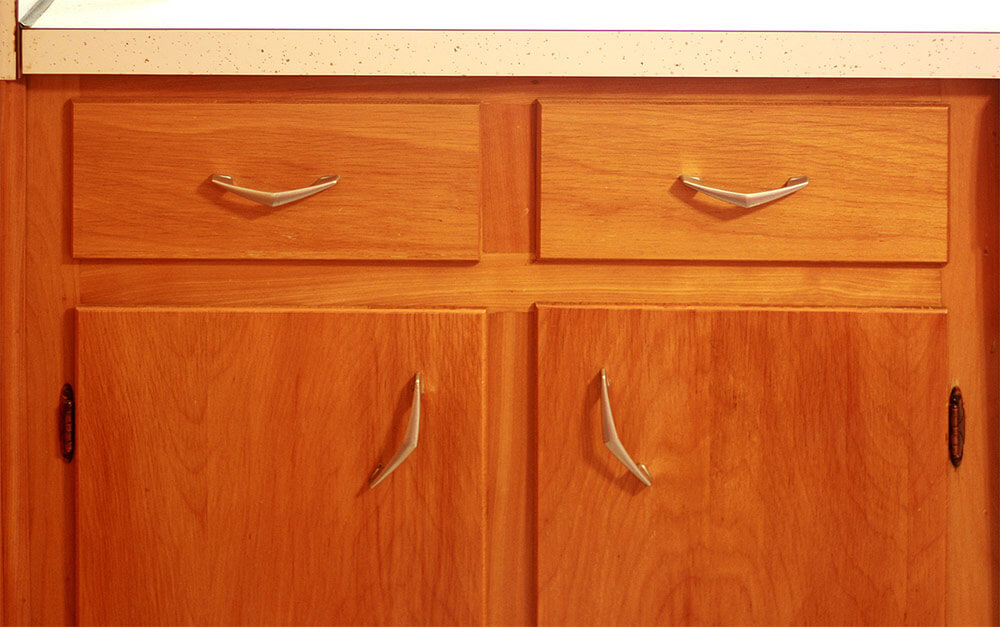
All in all, I’m really happy with the project and they give the kitchen a bit of new life. Just don’t ask what I’m doing about the door hinges.

Red and aqua seemed like natural accent-color choices. I had two pieces of color inspiration going into the project: An art print of the Golden Gate Bridge and the collection of three plastic flowers hanging by the sink. The red table solidified the choice, and I looked for other places to bring in those two colors as I went through.

I replaced the original roller blind with a custom-cut Levolor one, with scallops to mimic the original.
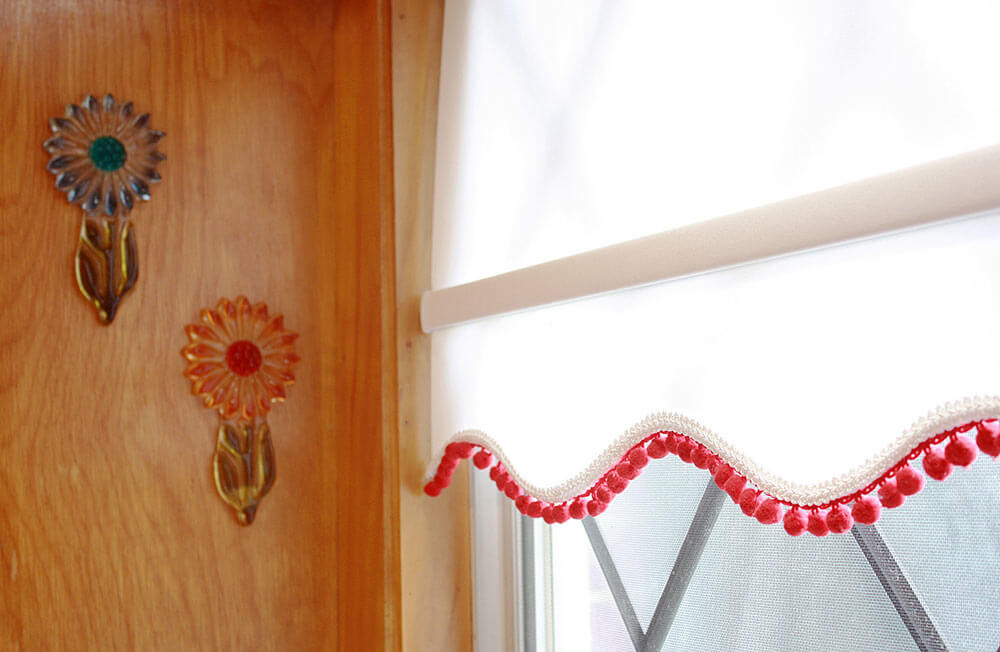
I added the red pom-pom trim myself after getting it home to inject a little more whimsy. The pom poms were just about the easiest part of the whole kitchen.
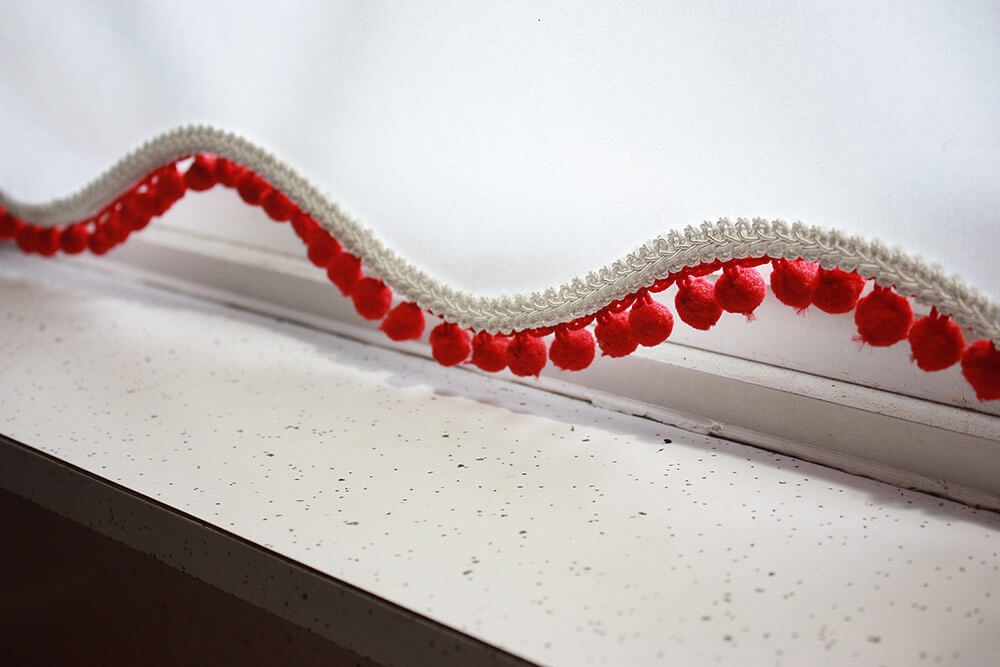
I just got a couple rolls of pom-pom trim from JoAnn fabrics (with the 50% off coupons, naturally) and hot glued them along the back side of the roller blind so that just the poms would be visible on the front. I felt like I should be doing something more high-quality to attach them, but the factory trim was hot glued so if it was good enough for them…
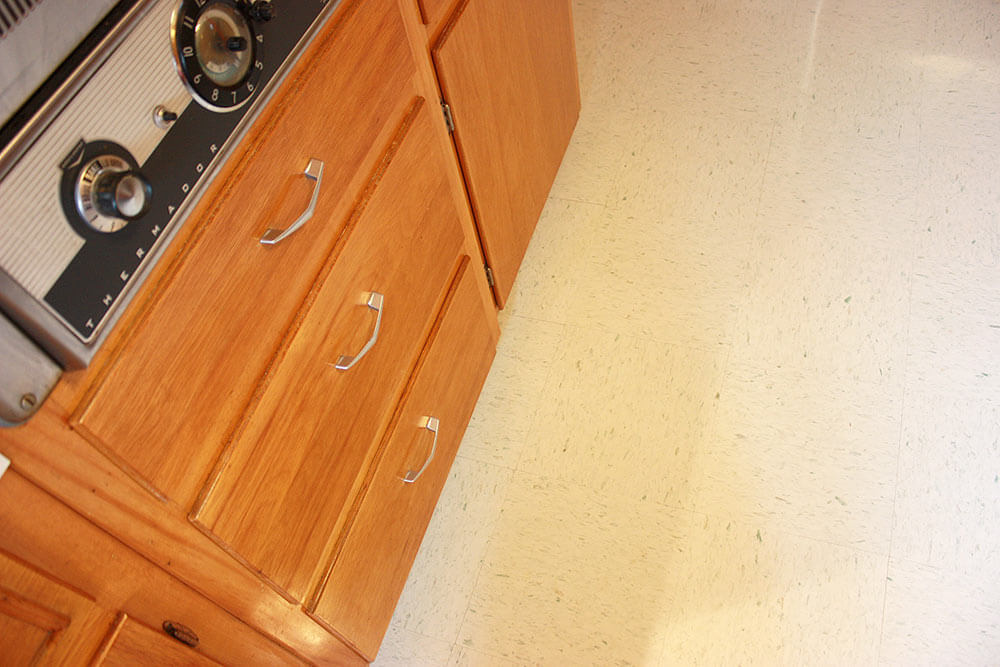
Following the advice of many other Retro Renovators, we went with Armstrong VCT for the floor. We were told there was a good chance our linoleum was attached with asbestos glue, so [Precautionary Pam here: I edited this part because I want every Retro Renovator to consult with their own properly licensed professionals regarding how to handle. Read more about the various hazards in old houses: Be Safe / Renovate Safe.] We ended up settling on Emerald Haze, a white base with dark aqua and pale grey flecks. Installation was much more painless than I had feared, and the floor looks so wonderful and shiny!

So, for now, our project is at an end. I just need some finishing touches—I would love some new floor mats, and I’m still holding out for a better light fixture to go above the table… maybe a cone light sort of sconce?
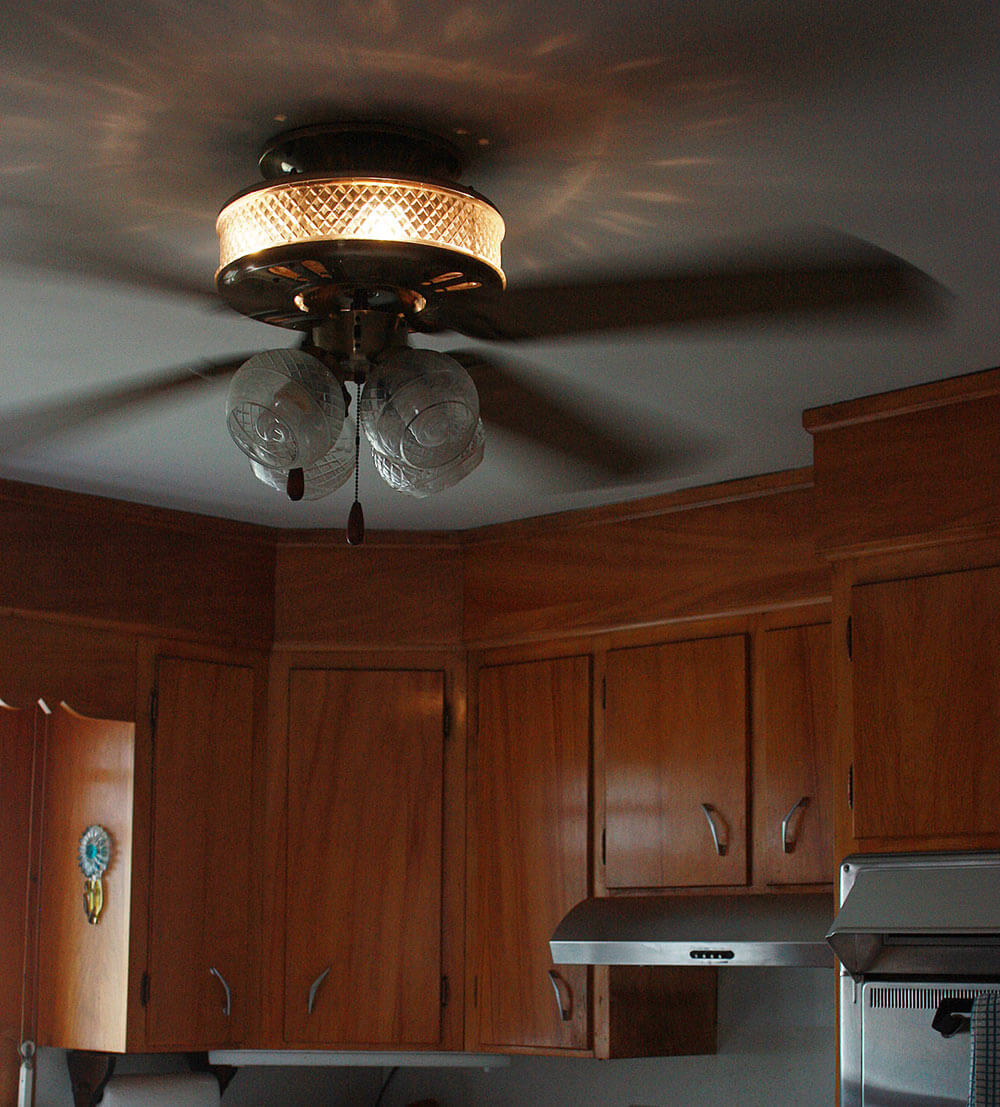
P.S. We discovered a bit of a Woddity while we were tidying up… our ceiling fan seems to have a night light! I’ve certainly never seen anything like this before, but I am not a ceiling fan expert.
 Frances and Doug — you did a fantastic job refreshing your vintage kitchen! The cabinets are so glowy, and the floor looks great and that dinette set is fabulous. Both Pam and I agree, we are IN LOVE with the red pom poms on the scalloped roller blind — absolute happy genius! Pam also says she adores your medium-tone wood cabinets — this is such a classic material and color — such a classic, livable, and here she wants to say it — a timeless 20th Century kitchen. Perfect!
Update — Immediately after this story published, we received a few inquiries about how Frances used Amber Shellac. She replied:
I have done absolutely nothing with the Amber Shellac. Yet. The recent Shellac articles on the blog led me to do a few spot checks and confirmed my suspicions that every bit of wood in the house is coated in Amber Shellac. Floors, wall panels, cabinets, doors, trim… Everything.
Pam also notes: As noted in yesterday’s story (read the details to see how I-XL finished wood vanities) — and consistent with reader comments on this recent story about Amber Shellac — it seems like a best practice to make sure the shellac does not get affected by moisture may be to top it off with a coat of varnish, which is more water resistant. Do more research — something to consider.
Congratulations on a job well done and mega thanks for sharing your process and fabulous final results with all of us!


Diana says
Very pretty kitchen. I too like the Pom Pom trim on the shade, very clever and era appropriate. And I love all the wood and had to chuckle to myself about the abundant use of shellac. My grandfather used to put shellac on everything! Furniture, cabinets, doors, anything and everything!
Amy in Sacramento says
Fantastic restore! Bravo!
Kara says
I lover everything about your kitchen. It’s so warm and cozy, I could move into it and call it my “tiny house”.
Joan Yost says
I recently spoke with a professional furniture refinisher about sprucing up my cabinets. He cautioned me to be careful when applying a new finish on top of the old one because some newer products do not play nicely with more traditional finishes. It is important to know if you have shellac, varnish or laquer (all of which can look essentially the same). You can check by testing each of the relevant solvents to see which one softens the finish. Then you can pick a suitable new top finish that is compatible with the original.
tammyCA says
My favorite kind of kitchen..charming, cozy, warm, glowy wood, scallopy trim and a cool table with chairs (never will be a fan of the ubiquitous island in a vast open kitchen)..well done! And, love your vintage style, too. 🙂
libbyontheprairie says
LOVE the dinette set! Is the fabric now available on spoonflower for purchase as well or was it just made for you? Thanks!
Emily says
Just wanted to interject: I LOVE spoonflower, and have used them for many projects over the years, and will continue to do so, but their upholstery fabric doesn’t hold up to heavy use. I used it for my dining room set, which we rarely sit at, and 3 years later those chairs look pretty good. But I also used it for an office chair which we use daily, and within a year the print faded dramatically, and within 2 years the fabric simply wore through, revealing the padding underneath. I was especially bummed because I’d had that chair done professionally (costing nearly $100). That said, maybe they’ve changed their fabric stock since then; I have no idea.
One really cool idea a friend of mine (with kids) had was to use a fabric of her choice when upholstering her dinette seats (it was a sweet fabric but not super sturdy/washable) and then stretching clear vinyl over it for protection. Those have held up beautifully. I plan to copy her idea (with Spoonflower fabric, probably) the next time I do dining chairs.
pam kueber says
look up: Wyzenbeek method.
For upholstery, you need lots of Wyzenbeeks.
Emily says
Ha, Pam, that last sentence read like it was straight out of Harper’s ‘Findings’. I love it 🙂
pam kueber says
🙂
Frances says
I really wanted to cover the chairs with clear vinyl over the Spoonflower fabric but the vinyl I got was NOT the right weight. I might take another whack at it with a thinner grade of vinyl next week.
(And I did make the print available for sale, should anyone else need some very authentic starbursts. They’re listed as Tabletop Starburst white and red)
Marta says
Heating heavy clear vinyl with a hair dryer or heat gun as you are wrapping it over chair seats and backs makes it more pliable. Works best with a helper to hold the hair dryer so you have both hands free to stretch and fold the vinyl.
Mary Elizabeth says
What a great job! Did you just put the new amber shellac over the old, or did you do any prep for it? It came out all glowy and beautiful.
Here are a few inexpensive hanging lamp options you might want to look at:
http://www.homedepot.com/p/Trademark-Global-14-in-Single-Shade-Red-and-Silver-Hanging-Lamp-1200S-RED/202879871
http://www.lowes.com/pd_394657-77383-18251-000___?productId=3745475&pl=1&Ntt=hanging+light+red+cone
http://www.homedepot.com/p/Hampton-Bay-1-Light-Red-Hanging-Mini-Pendant-ES723BAR/100323279
Both of the “big boxes” also have affordable multiple-bulb hanging light fixtures that might suit your space.
Kate says
Hi Mary Elizabeth,
I asked Frances about how she used the Amber Shellac and have updated the story with her response.
Mary Elizabeth says
The cabinets look so good–I can’t believe they didn’t refinish them! The camera is very kind to the cabinets.
Frances says
You know, I suspect the cabinets were either refinished at some point before we came to the house or that the original owners didn’t cook much… aside from a little of the usual streaking and wear you get under the kitchen sink from water damage, most of the cabinets are in amazingly good condition.
Marta says
My friends with original varnished floors and paneling swear by Wood Preen. It is strictly for old school varnishes. Their wood is gorgeous.
Vince says
Oh wow, I love that so much!
Jay says
What a beautiful painstaking rejuvenation. Glad to hear you worked with your original oven as the centerpiece – it sets the vintage tone. I think “tight budgets” are the saviour of many a vintage kitchen that otherwise might get gutted (personal experience). As so many RR fans can attest, DIY saves big $$. Nice how the fridge was given its own niche. The milk glass fruit bowl on the table is a great period perfect accent. Thanks so much for sharing.
Steve H says
I totally agree about tight budgets. I think they make you more disciplined in planning and weighing your choices. Too often people just throw money at a project without really thinking it through. You have a beautiful kitchen. I really love the almost to the ceiling paneling and wood soffits that match the cabinets – those are great details. It’s such a warm, glowing space.
Erin says
This is awesome! They did such a great job enhancing the kitchen’s natural charm.