


 One of the most enjoyable parts of our trip to KBIS 2016 in January was meeting some of our readers there — like Roger. When we met, he mentioned he had recently remodeled his 1953 kitchen featuring St. Charles steel kitchen cabinets. We followed up — and oh my! — hold onto your hats, we’ve got one epic look at Roger and his wife Lynsey’s kitchen renovation. “After” photo above courtesy of Che Bella Interiors and Spacecrafting.
After Roger and Lynsey sent me photos of their home and kitchen renovation, I had lots of questions, which they were happy to answer:
Q. When you bought the house, were you looking for a home with midcentury features?
Yes. Lynsey had been interested in mid-century modern design for a while—and after we started looking at MCM homes in the Twin Cities, Roger started falling for the style as well (although he had always been interested in Frank Lloyd Wright’s work). Because we were open to living nearly anywhere in the Twin Cities (both of us worked from home at the time), we waited for the “right” MCM home to come along.

Q. What made you decide your house was the one?
Insanity?! There was really no good reason to buy the house upon inspection—absolutely everything needed upgrading, from the leaking roof and crumbling 500-foot long driveway, to the out-of-compliance septic system and electric. The house had been on the market for more than a year and a half, but hadn’t been occupied in more than five years. So it was in very rough shape when we first looked at it (cobwebs everywhere, a dead mouse in the water softener, water damage, and years of dust and grime).

At the same time, we thought it was cool. The home had everything we were looking for—MCM style, lots of land (10+ acres), privacy (yet still in the middle of a major suburb), and a lake! We were attracted to the home for its “prairie modern” feel—MCM meets Frank Lloyd Wright. (In fact, many of the homes in the surrounding neighborhood were designed by John Howe, who was Wright’s principal draftsman.) Additionally, the striking living room fireplace (plus one in the kitchen and another in the den), abundance of windows, unusual layout with interesting angles, St. Charles cabinets, and original light fixtures were all draws.
We actually found the home when it was shared by the listing agent on our local MCM Facebook group. Lynsey saw the listing and kept an eye on it—and when the price dropped significantly, we made our move. The buying process was long and drawn out, given negotiations around a new septic system (required before closing) and other required repairs. We closed in November 2014 and had a few months to begin work on improvements before selling our old house and moving in at the end of January 2015.

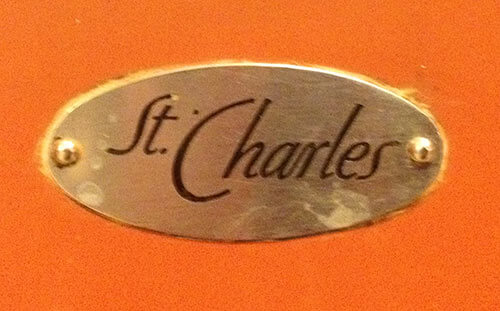
Q. Did you know right away that you wanted to keep the original St. Charles cabinets?
Yes! In our quest for an MCM home, we became familiar with St. Charles cabinets through Retro Renovation. So, during our first viewing when we saw that this home had St. Charles cabinets, we were sold. We knew that we would be able (someday) to restore them to their original glory. (We had no plans, however, to start a major kitchen remodel. Funny how that worked out!)
Q. Tell us about the cabinet repainting process, as well as buying the extra blue cabinets to fill in your set.
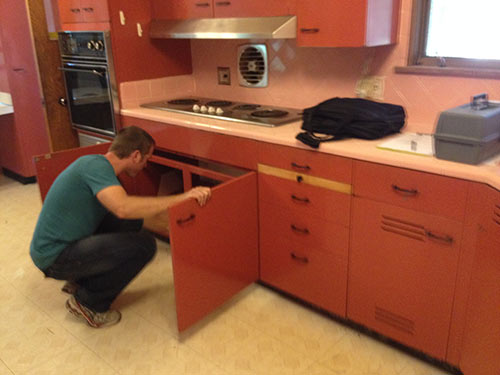
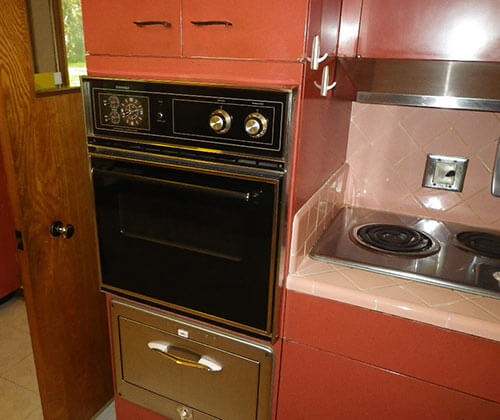
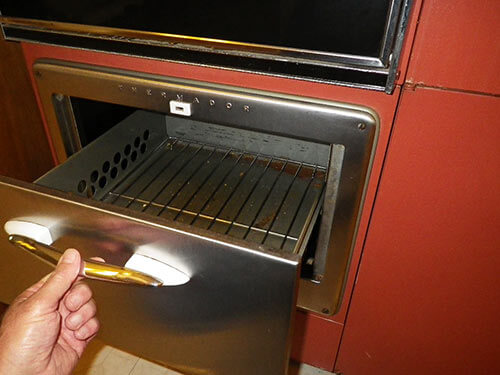
As part of our home’s purchase, we wrapped some of the major improvements into our loan—the new driveway, roof, electrical upgrades, and appliances. Given the structure of our loan, we were on a deadline to get new appliances, but couldn’t find a wall oven small enough to fit into the existing St. Charles cabinet 24” opening. (The original oven worked, but it was just. so. small.) So, we decided that we would fabricate an “oven box”—basically a framed and dry walled box to house a 27” wall oven. On a late Saturday afternoon we removed the tall St. Charles cabinet with the original wall oven and warming drawer so we could start figuring out how to frame this “box.”
However, after the tall cabinet was removed, we found ourselves liking the open feel of the kitchen—and started thinking about a more traditional range/oven combination rather than a wall oven and drop-in range top. We couldn’t figure out a way to rearrange the existing cabinets to make the appliances work, so early the next morning Roger hit Craigslist. By the time Lynsey got out of bed, Roger had found an entire kitchen of blue St. Charles cabinets in Omaha, Neb., that had just been listed! We secured the measurements, spent an entire day calculating and drawing, and determined (essentially on the back of a napkin) that we could blend our existing cabinets with the new “Omaha cabinets” to make a new configuration work. There was only one cabinet missing (above the microwave), but we thought, “Oh, we’ll just figure something out.”
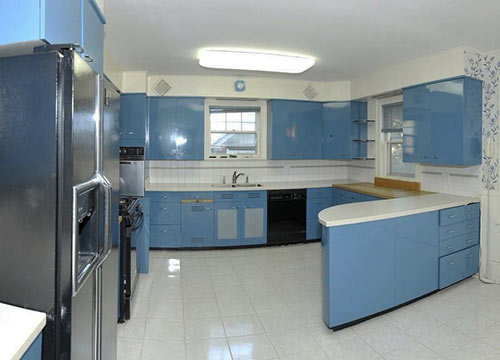
Just a week after moving in late January 2015, we rented a U-Haul trailer and drove to Omaha to get the cabinets. While the cabinets were shown installed in the original photos, by the time we arrived the kitchen was completely gutted. Our first task was to match the 20+ cabinets with their drawers and shelves to ensure we had a full set. As the sun set and the snow started to fall, we frantically packed up the cabinets in our U-Haul and headed back to Minneapolis in a full-fledged blizzard.
The cabinets resided in our garage for at least a month while we figured out what to do. In mid-February, we attended Modernism Week in Palm Springs, and upon returning, realized we probably needed to call in the professionals to make our kitchen plans a reality. So we engaged with Che Bella Interiors (a local design firm) to assist us in drawing up the new kitchen (including raising the soffits to accommodate the taller Omaha cabinets), selecting finishes, and serving as a general contractor for the remodel. Additionally, Roger was able to secure yet one more St. Charles cabinet to fit above the microwave from—believe it or not—Omaha! (His coworker, who resides in Omaha, was gracious enough to bring it to the Twin Cities for us.) When all was said and done, between our cabinets and the Omaha cabinets, we had enough cabinets for our new kitchen and a new mudroom!
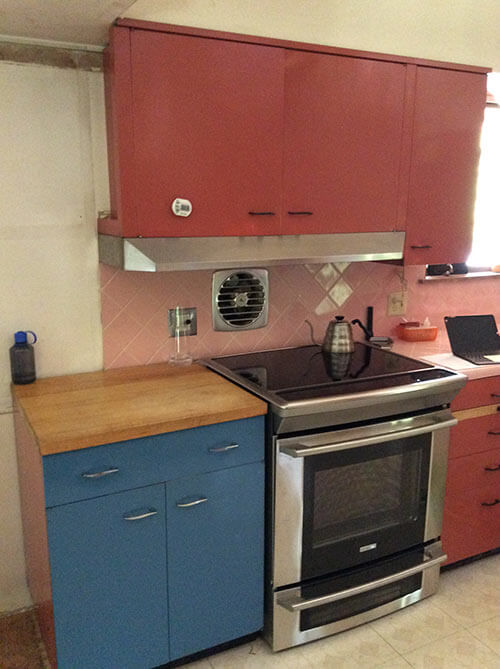
To repair and paint both our existing cabinets and the Omaha cabinets, Roger worked directly with Advanced Coating Systems (ACS) in Roseville, Minn. Almost all of the cabinets (except for a very large broom closet cabinet)—from both the original and Omaha kitchen—were taken to ACS’s shop and painted using two-part epoxy. The kitchen cabinets were painted green (Benjamin Moore’s “Thicket”), and the mudroom cabinets were painted red (Benjamin Moore’s “Mayflower Red”), almost an exact match to the original Terra Cotta red finish on the original cabinets and underneath the blue paint on the Omaha cabinets.. (Ironically, the blue Omaha cabinets had originally been Terra Cotta before they had been painted blue.) He also worked with LSV Metals in Spring Lake Park, Minn., to fabricate new metal trim (at the top of the cabinets) and any required “filler strips” between the cabinets to make everything fit. Those were also sent to ACS for painting.
As noted, ACS repaired and painted all of the cabinets in their facility, which were then installed by our contractor. (That was another fun challenge—especially figuring out how to reconfigure the metal frames which the cabinets sit on!) Upon installation, however, some flaws remained on the uppers (no surprise!), so ACS ended up coming to our home to re-paint the installed cabinets. The in-home painting process was done electrostatically. (The masked-off kitchen looked a bit like a Dexter kill room!)
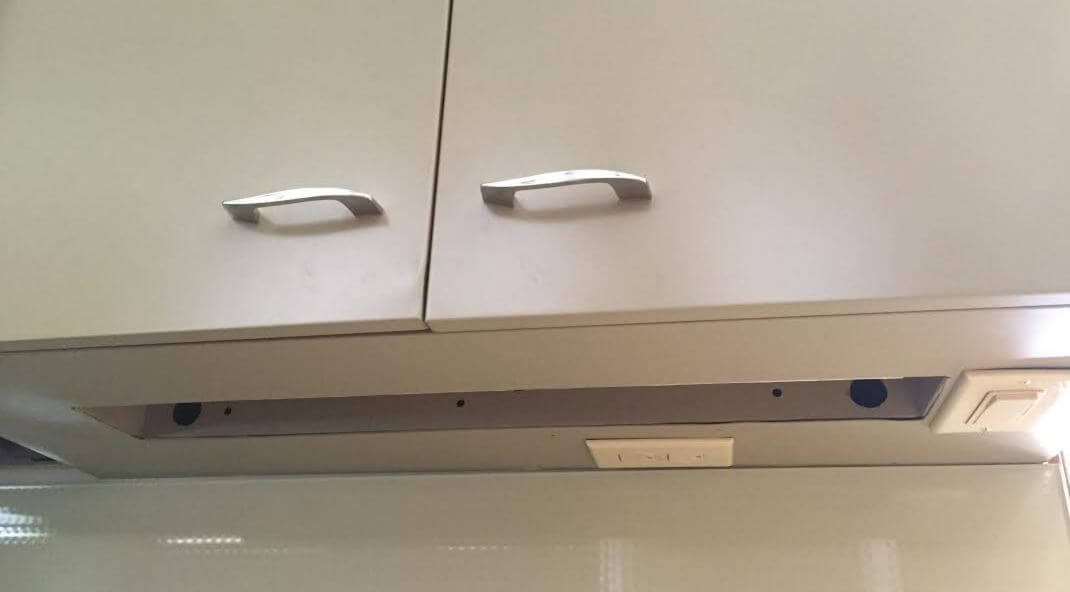

Roger also coordinated with ACS and our electricians to add cut-outs for outlets and LED lighting—utilizing the false bottoms that originally housed under-cabinet lights [shown above with- and without the LEDs lit]. (Between the under-cabinet lighting, the abundance of roll-outs, and the mixer stand, the St. Charles company thought of everything!)
St. Charles challenges (that turned into victories):
- Getting the right finish on the paint (embracing character flaws vs. expecting a ‘perfect’ finish repainting vintage cabinets considering their age and condition.)
- Measuring/cutting the holes underneath the wall cabinets for the outlets and lighting
- Measuring for the trim pieces above the cabinets, and determining how it would all fit together
- Figuring out the filler strips
The finished kitchen:


We love the boomerang laminate pattern on this original built-in desk area, with hairpin legs and a neat-o china cabinet topper.

Q. How long did your kitchen remodel take, from start to finish?
We officially started demo in mid-June and wrapped up the majority of the remodel by early September (so, about 2.5 to 3 months). One major delay was caused by the Minnesota weather! Our home doesn’t have central air, and Minnesota summers are humid! We struggled to find a solution to get our humidity under control so that we could safely install the new hardwood floors. We also faced a few other delays typical to home remodel projects.


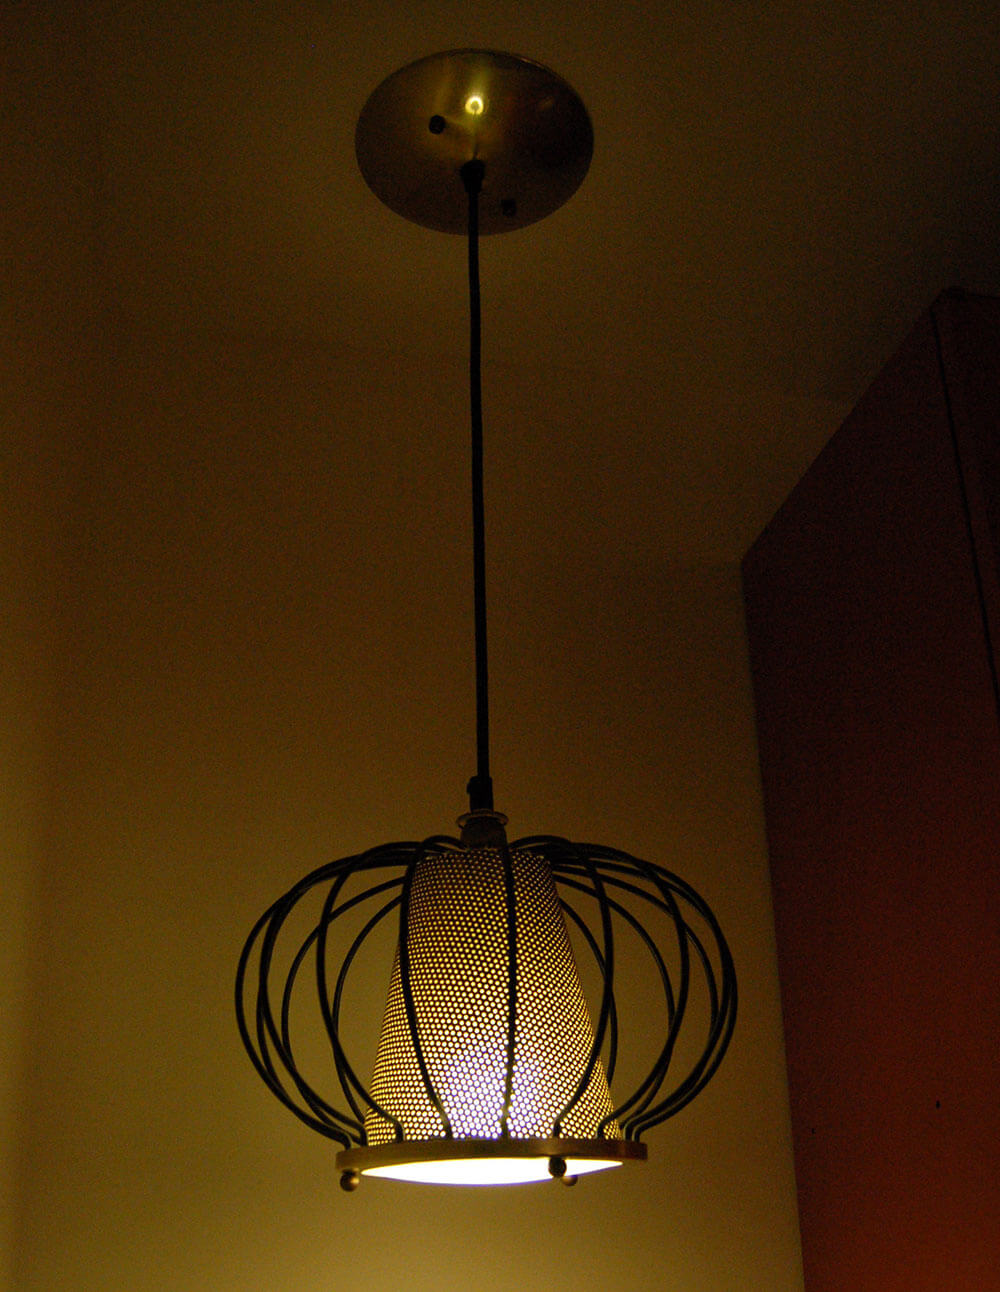
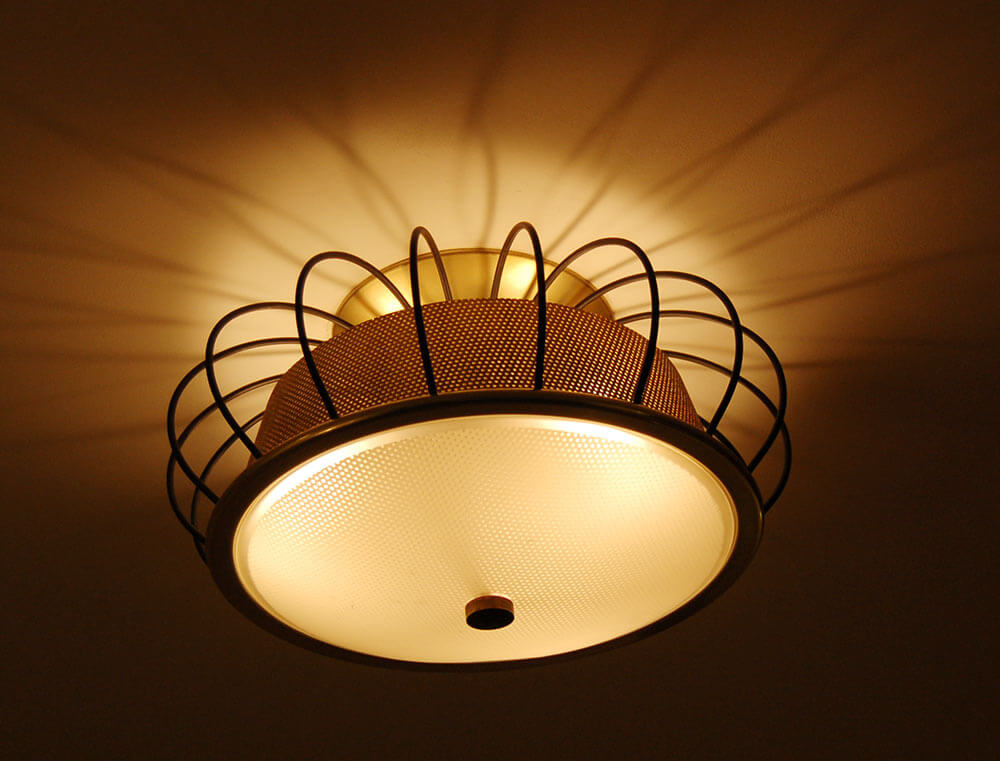
Q. Are the pendant lamps in the kitchen original to the house?
Yes—the pendants are original, as are the three(!) sputnik chandeliers. Additionally, we repurposed the flush-mounted lighting found in the upstairs hallway and bedrooms for new mudroom pendant lights.
 Above: Notice how outlets are placed underneath the wall cabinets so that the backsplash is completely free of intrusions.
Kitchen resource list:
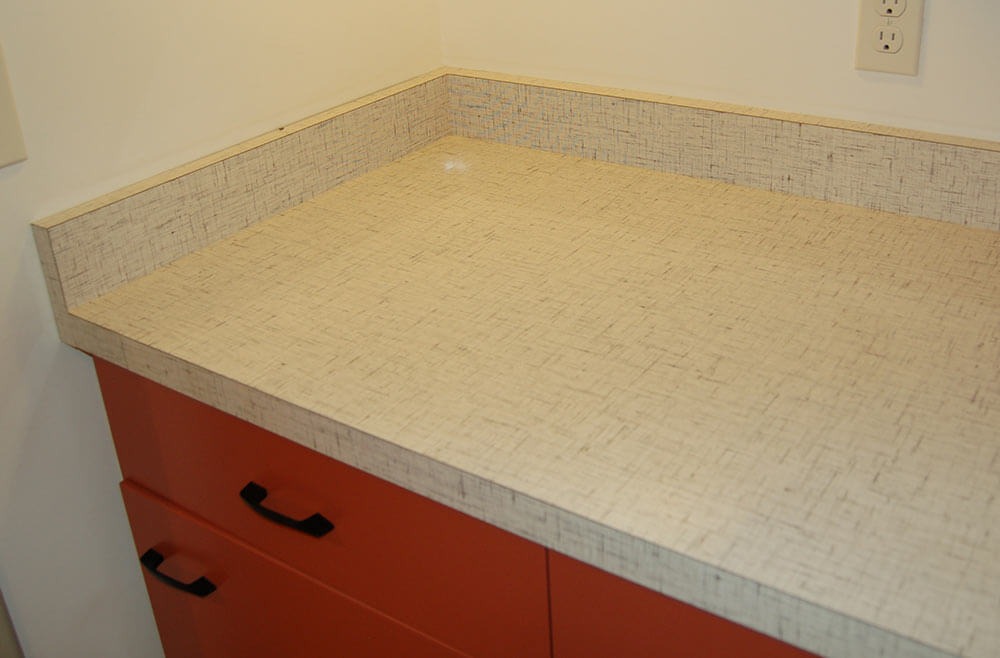
- Kitchen countertop laminate — yes, that’s laminate!: Formica Crème Quarstone, matte finish, 6218-58
- Kitchen cabinet paint color — Benjamin Moore’s “Thicket”
- Backsplash: Come back tomorrow for a look at Roger and Lynsey’s unique backsplash and how they created it.
Bonus — the mudroom:
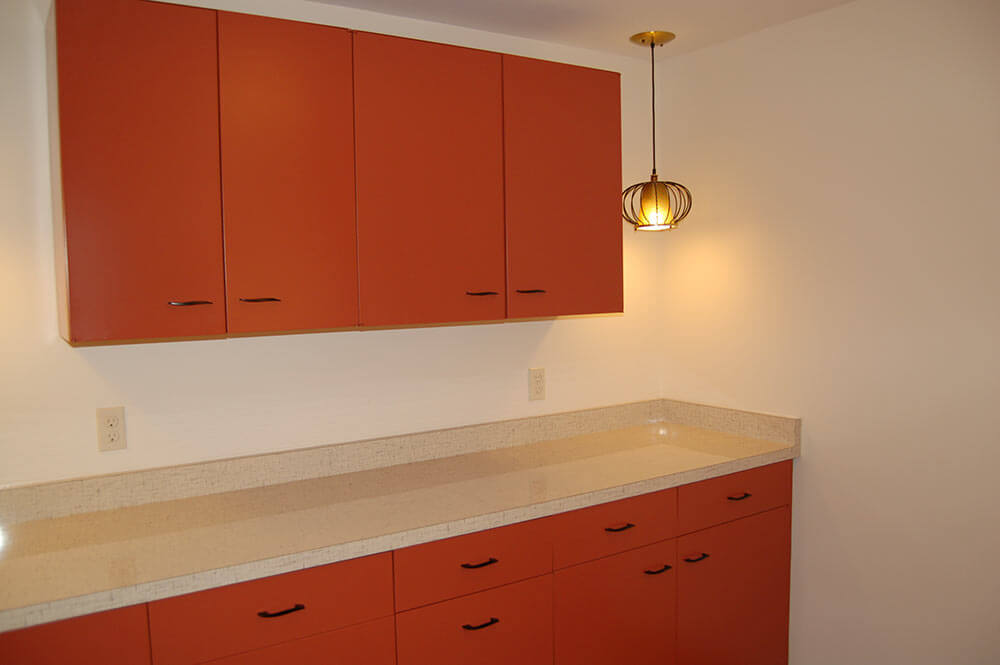
Roger and Lynsey had enough leftover steel cabinets — a mix of the two sets — to give their mudroom a serious upgrade. As mentioned above, these cabinets also were taken to Advanced Coating Systems (ACS) in Roseville, Minn. and painted using two-part epoxy. This color is Benjamin Moore’s “Mayflower Red”, almost an exact match to the original Terra Cotta red finish on the original cabinets and underneath the blue paint on the Omaha cabinets..
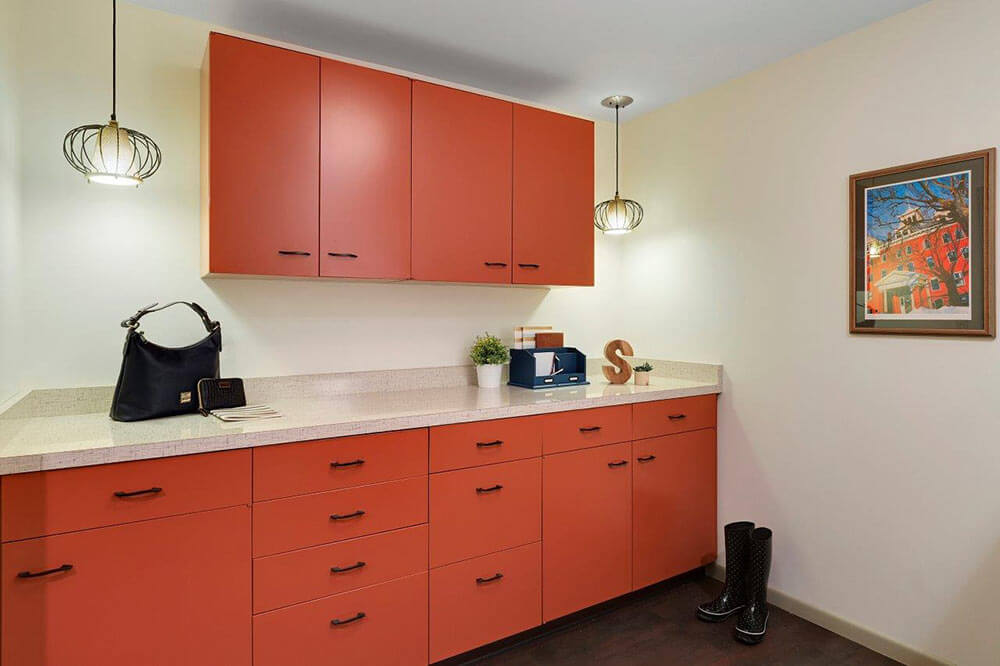

Mudroom countertop laminate:Formica® Laminate Jonathan Adler Collection Crème Lacquered Linen, gloss finish, 9488-90 (Roger found it at the Kitchen and Bath Show shortly before moving into the house in January 2015.)

 Such an improvement, and we love the original light fixtures!
Mega thanks, Roger and Lynsey, for sharing photos of your wonderful home and for taking the time to answer all of my many questions! I think we can all agree that your house is amazing and that you’ve both done a terrific job of keeping the original feel of the kitchen with your renovations. Here’s to another 60+ years of happy service from all those delicious St. Charles kitchen cabinets!
And readers, come back tomorrow, because we’re doing a standalone followup on their ingenious kitchen backsplash.
Link love photo credits:


Julie says
Gorgeous before and after. I love the commitment to saving what could be saved while making the kitchen functional for you. Also, 5 years unoccupied and 1.5 on the market?! I hate to think what could’ve happened to this house had it fallen into the wrong hands. How fortunate it landed in the right ones. 🙂
Lynsey says
Thanks, Julie! The original listing said something like, “prime for teardown, or restore this modern classic.” We’re glad we went with the latter!
Jay says
How lucky you folks were to find a true diamond in the rough. Not one but three original Sputniks. WAHHHHH!
The long run of backsplash without a receptacle or switch in sight is quite a tour de force! Enjoy and thanks for sharing.
Mary Elizabeth says
Excellent planning and execution! Enjoy your new/old kitchen. Love the fireplace, too.
Would you mind sharing the cost of the project, separating out the design help and the cabinet coating costs?
Lynsey says
Thanks, Mary Elizabeth! I honestly have a big binder of estimates and invoices labeled “The Money Pit.” Here are some approximate cost figures:
* Design services: $3,000. Included AutoCad drawings of the kitchen and mudroom cabinet layouts, as well as selections for flooring, countertops, backsplash, colors, etc. Che Bella also served as our general contractor; project management fees for that were outside of the design fees. We’re really glad we pulled someone in to help so that we wouldn’t be second-guessing our selections, and so that we had someone to help guide more complicated decisions around HVAC, plumbing, etc. (lots of complexity in this old house with the slanted rooflines, etc.).
* Cabinet repair and painting: $3,000. Included both picking up and delivering the cabinets, and the cost of the production of the trim and “filler strips.”
* Contractor services for kitchen and mudroom: $11,000. Included demo, new framing and sheet rocking (all new in both areas), and installing the cabinets. (The cabinet installation was a big chunk of this; I don’t think the contractors knew what to expect because they had never done a project like this before, but they did an awesome job and I’m so glad we hired someone to do it.)
* Countertop: $1,700 (both kitchen and mudroom)
* Backsplash: $1,800 (more on that tomorrow)
We also had HVAC, plumbing, electric, painting, and flooring expenses — which are a bit harder to break out since we did additional work throughout the house that involved those contractors as well.
Hope this helps!
Lynne says
Stunning. Just absolutely stunning.
deb says
Wow! Amazing job…
linda h says
Are we ever going to get to see their whole house. It looks pretty cool.
Nancy says
Absolutely spectacular.
Carolyn says
From what I’ve heard over the years, it’s a major coup to find tradespeople who have a “can-do” attitude to move projects forward. They’ve got a name – “old guys” – and they can be male or female, of any age. What makes them old guys is the ability to look at a project and find some way of doing it. If they can’t find a part, they make it.
No such thing as “too many” cabinets, there’s always someplace they can be used.
Can’t wait to see what else there is to see in the next post!
Julie says
I LOVE this. Exactly right.
Reader Deb says
I get so many great ideas from this site! When the electrician looks at me cross-eyed for asking for something like surge protector strips mounted under the cabinets instead of the boxes in the backsplash I’ll show him this. Thanks for sharing your beautiful kitchen.
Lynsey says
Deb, we worked with Pride Electric out of Maple Grove, Minn. They were fantastic and committed to making it work. Not once did they look at us like we were crazy (although who knows what they said behind our backs!).
Barbara says
Love it! Great job. I love your color choices and how seamless it all looks.
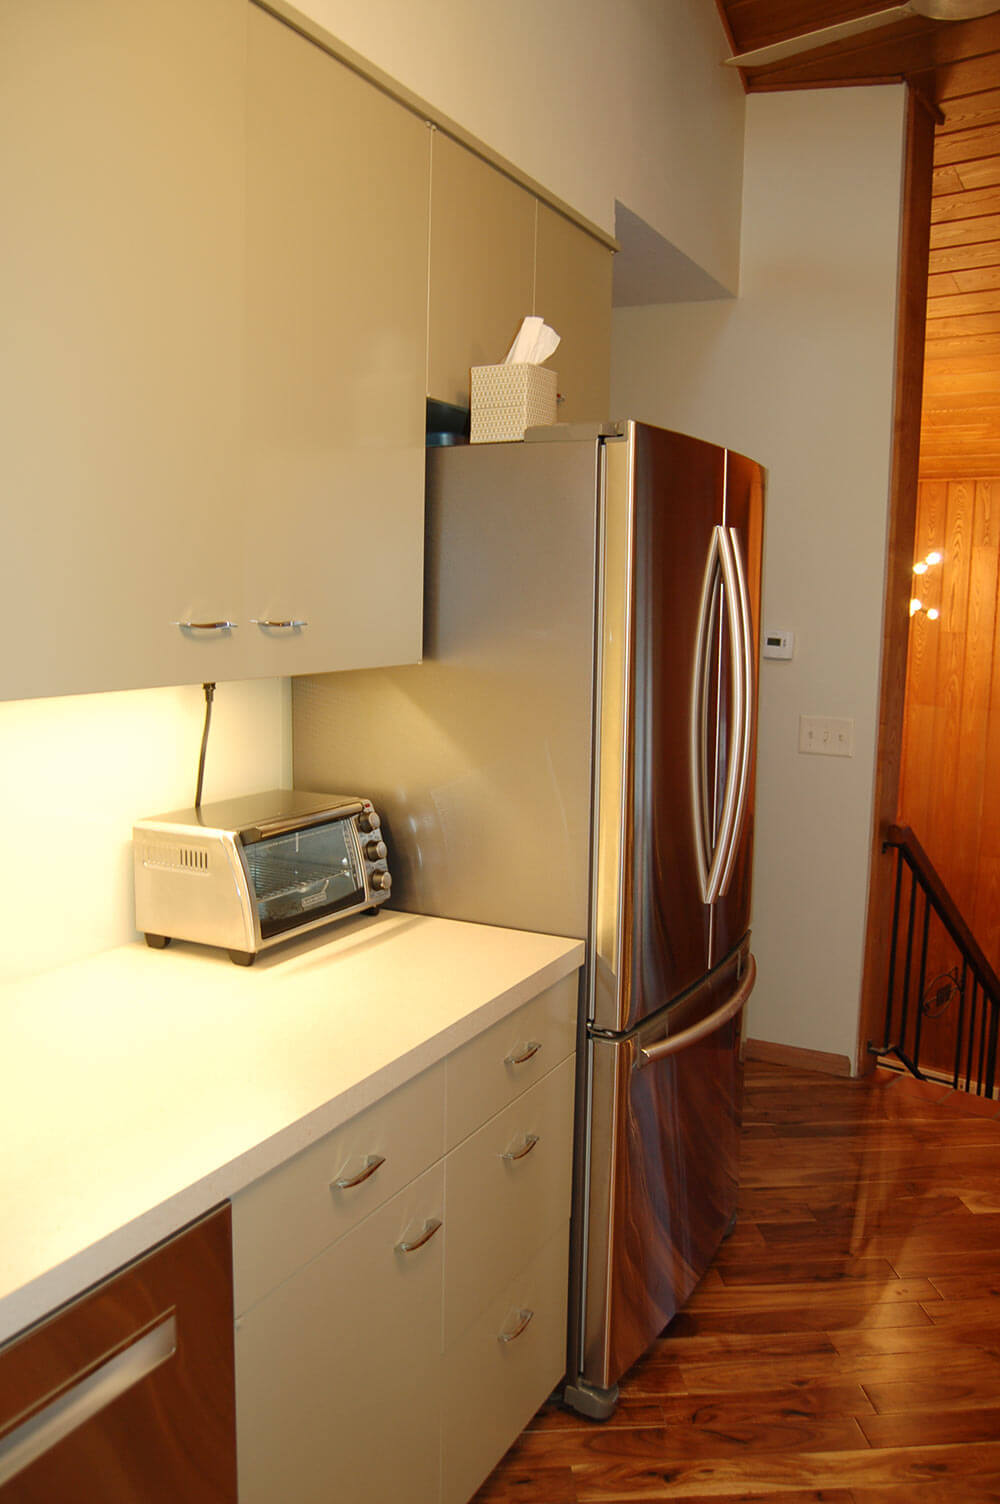
Only suggestion would be to see of you can reverse the door on the refrigerator in the mudroom to open the other way. Then you can rest things on the little counter as you take them out. The design of the space is perfect.
Everything looks beautiful.
Lynsey says
Great idea, Barbara! The fridge was left with the house and is pretty old (and not exactly energy efficient), so I’m not sure what we can do with it. But we’ll check it out!