

“My mother’s advice was to find one or two things you LOVE and have to have, and then work everything else around that.” — Drew
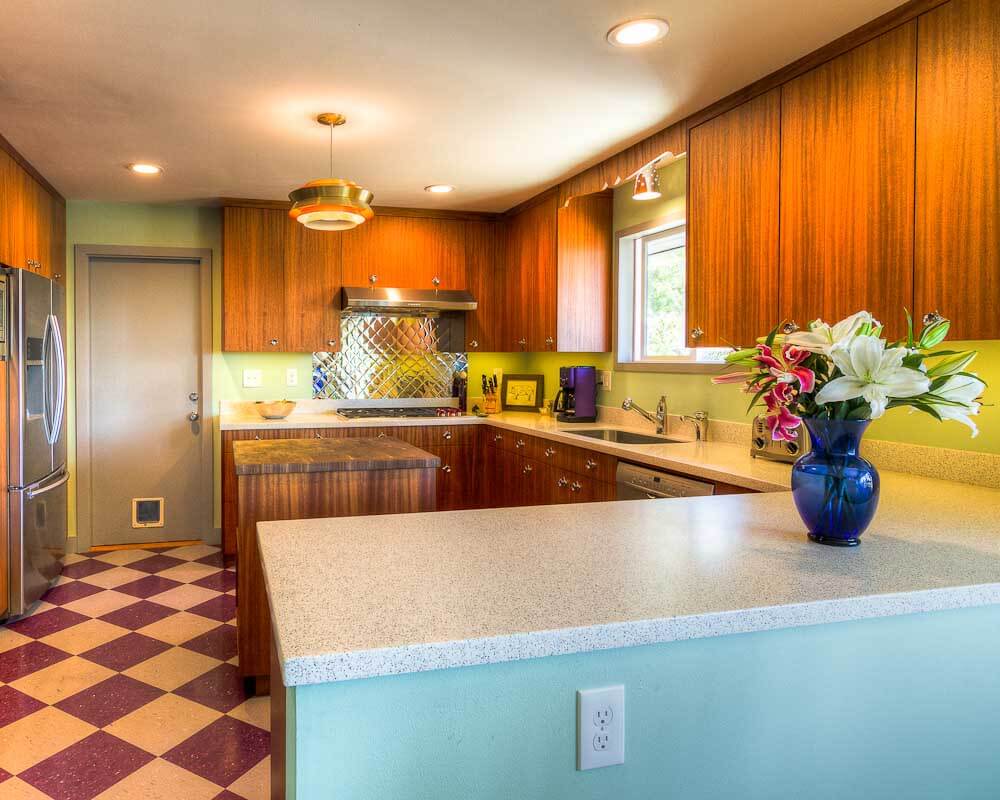
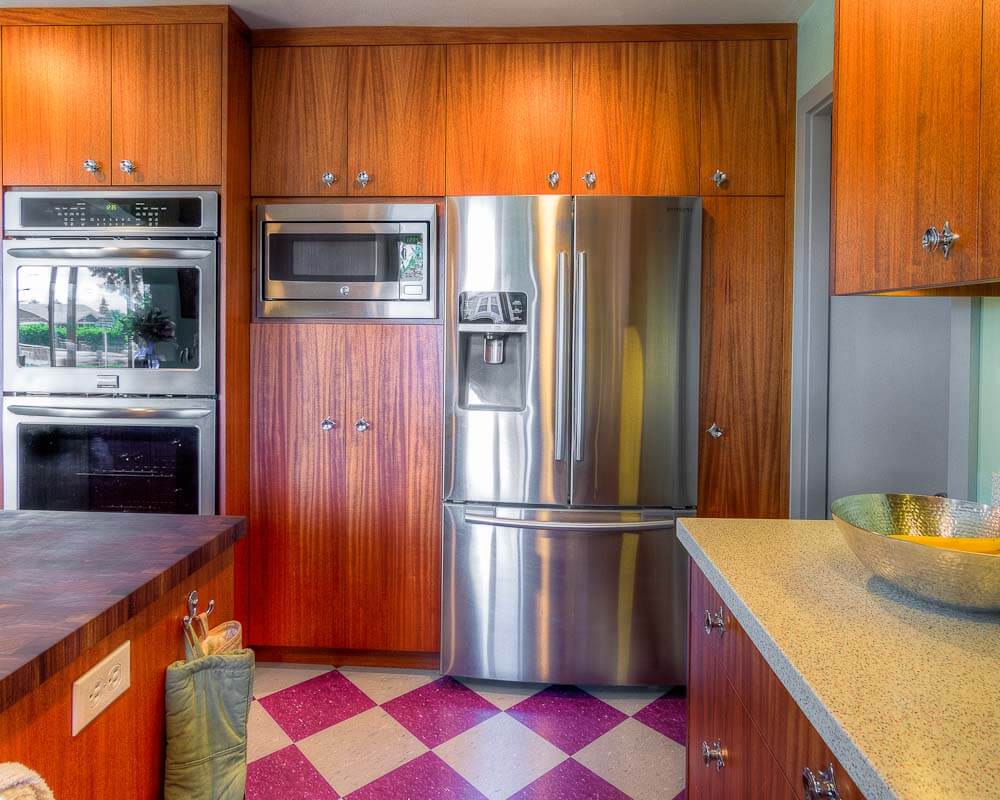
 Newlyweds Drew and Amy bought their fixer-upper — a parsonage built in 1960 — three years ago. Smart folks, they tended to fundamentals first. But all the while, they were planning for the fun stuff — a necessary kitchen remodel. Their design mixes modern with retro — all the while aiming to be sympathetic to the original architecture of the house. It’s always fun to see what readers come up with: Yes, those are purple VCT floor tiles — purple is Amy’s favorite color, and that was one of starting points for their design decisions.
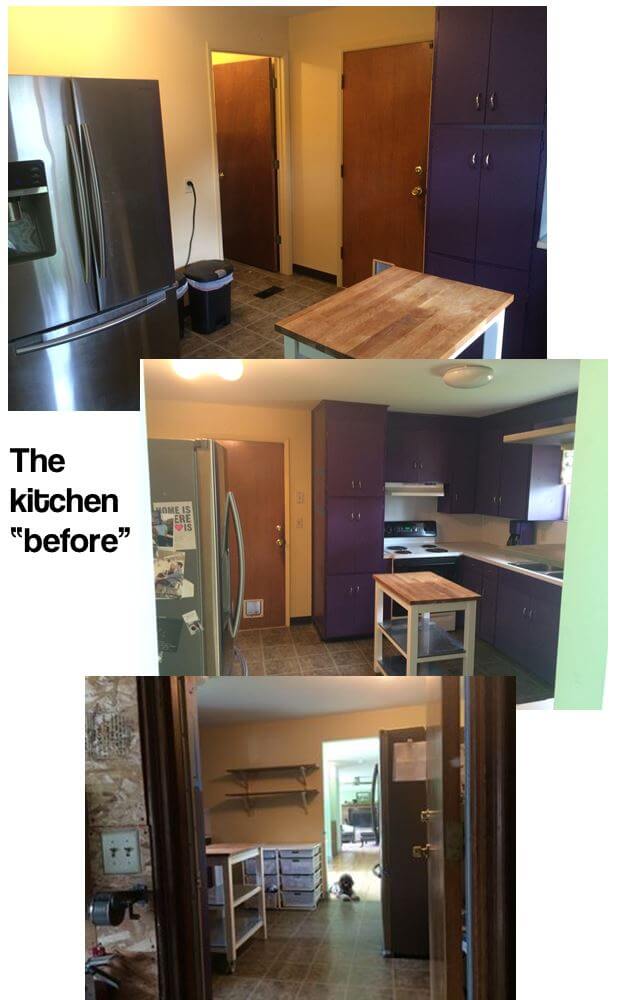 Drew writes:
Hello! My wife and I finished a very custom atomic inspired kitchen remodel early this summer and would be thrilled to share our pictures with your site!
We were married in June 2013, and we found our house in August 2013. Previously we had been renting a nice (contemporary) condo in downtown Seattle.The way that we found the house was SUPER lucky. Seattle real estate has been brutal for buyers since probably late 2012, with a dearth of inventory and a huge influx of well-heeled buyers. My mother is a real estate agent and was showing us a house that had a good floor plan and plenty of space, but was pretty grungy — a contractor pulled up and said that his boss had an offer in on the house (to flip), and he was there to measure for the soon-to-be-new fence. We got to talking with him and he said he did some work for a local church nearby that owned what used to be a parsonage — he had been doing some work on it as the church was looking to sell it in the future and he asked if we wanted to see it.The house (built 1960) is a raised rambler — four 4 steps up to the front door — simple rectangle in shape with a single gable roof. There is a full basement that is 3/4 to 1/2 below grade so you cannot walk out of it (though there is a separate entrance with stairs on the side of the house. At any rate, the house was most recently used a day camp center for some program that the church ran, so the whole house was covered in either commercial grade carpet or faux bamboo vinyl strips, instead of baseboard there was rubber sanitary molding throughout, and various unfortunate things had been done like walling in the lovely raised hearth fireplace.We knew right away that we wanted the house. Even though it was going to be a big project to make it our own, it was at least in the meanwhile clean and tidy (if rather commercial feeling). The floor plan was good, the house is large enough that we never need to move to accommodate a future family, and we liked the neighborhood. (It’s in West Seattle, which is like the Brooklyn of Seattle — traditionally unappreciated, but rapidly gaining popularity as mainland Seattle gets too crazy.)The fact that the house was pretty much still in a semi-commercial state and that it was unlisted allowed us to get it for a very good price — along with the fact that my mother waived the sales commission.Since moving in we have been constantly working on the house. The basement was roughed in for a kitchen, so right away I put a basic but functional kitchen in down there and rented the downstairs (2bed 1ba) to my brother. It’s been great, as he is getting a place to stay for a price he can afford on a cook’s salary, and we have gotten some extra money for house projects! For now the upstairs (3bed 1.5 bath) is plenty of room for my wife and me. novating the kitchen has been a goal since day one, but we knew it would be a while before we could get to it, as there were other (boring, but important) things to get to before the fun stuff — plus we knew it was going to be the most expensive so we have been saving for it for a long time.Completed projects prior to kitchen:– New roof– Uncovered and refurbished fireplace on main level– Installed kitchen downstairs– Replaced original aluminum windows– Poured patio area and fenced the yard (previously no outdoor space!)– Installed 2nd laundry in attached garage (on main level – original is in basement and used by my brother)– Removed commercial floor coverings and refinished the original oak flooring underneath– Reinstalled baseboards– Painted throughout– Re-piped the whole house (was original galvanized before!)
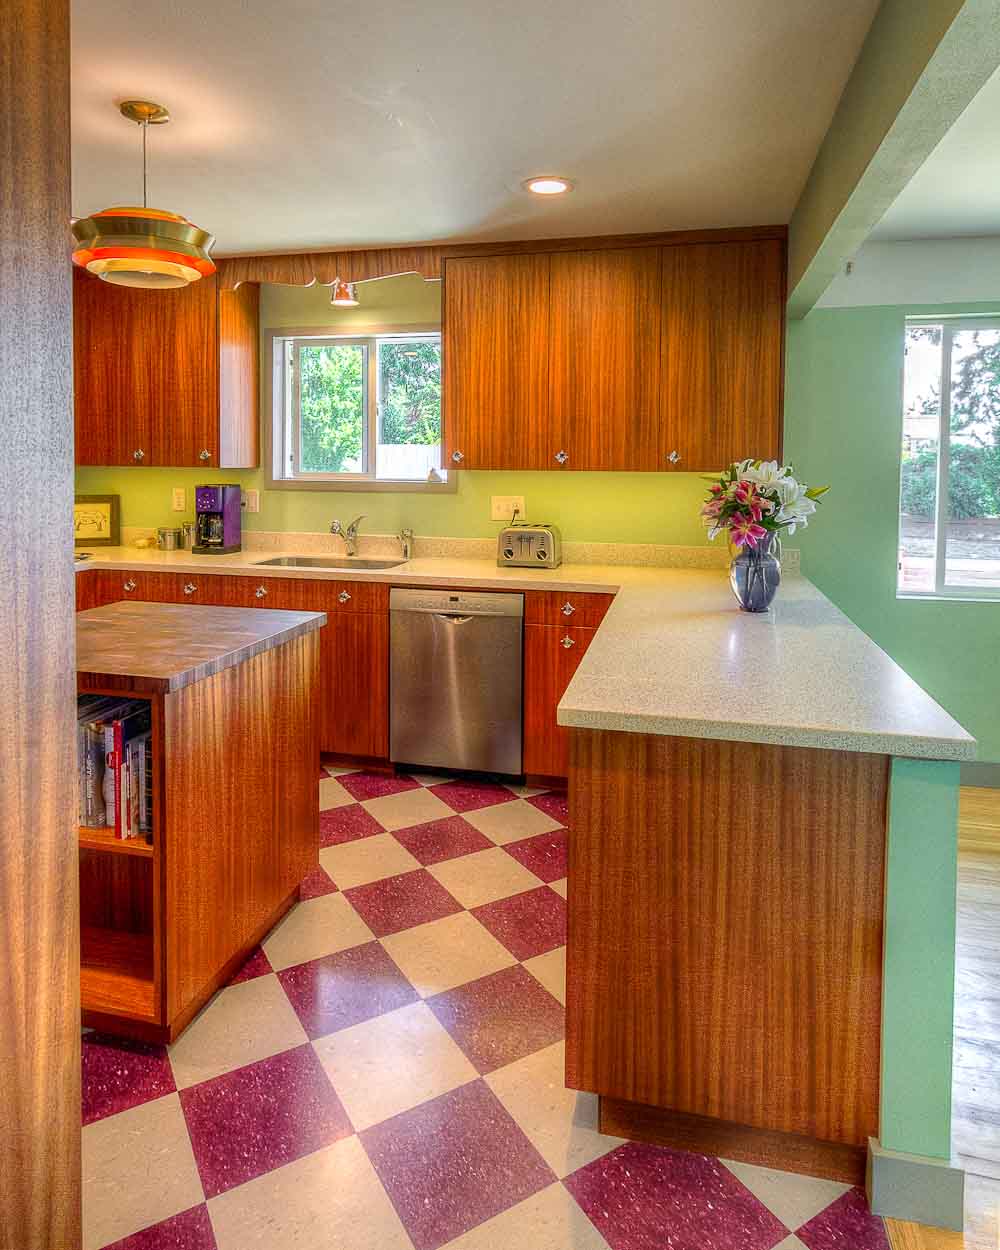
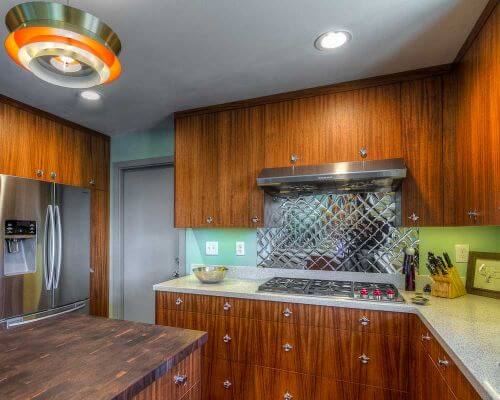
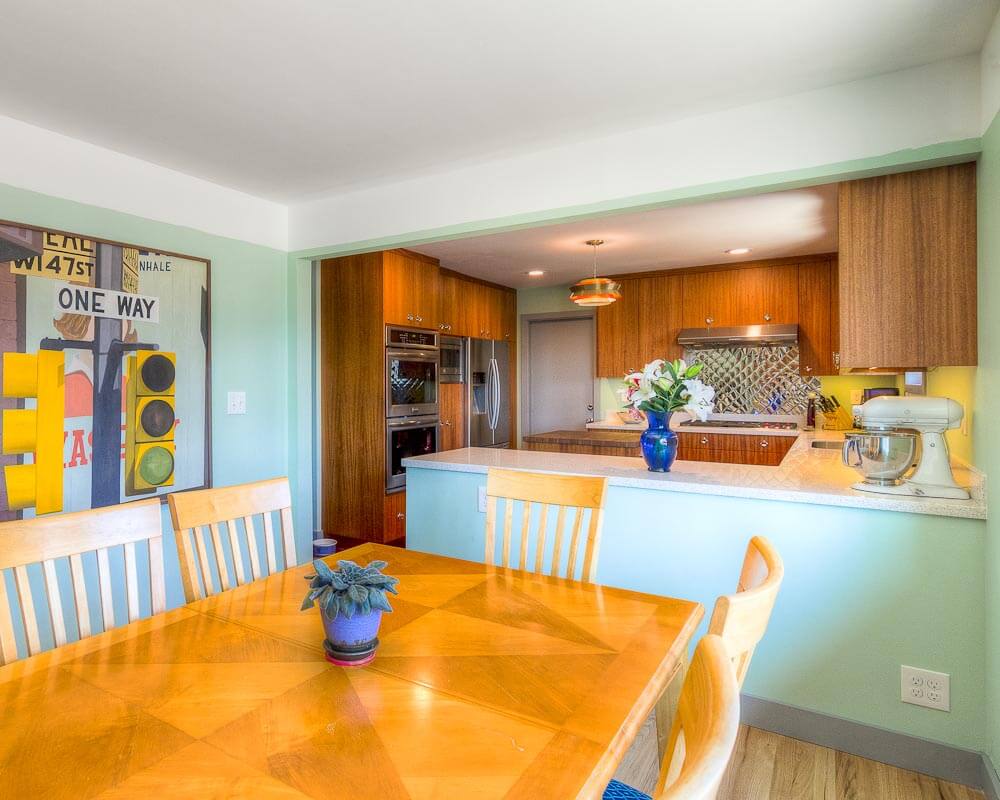
As we started finishing up parts of the house like the living room and choosing a style of decor we eventually settled on a midcentury aesthetic. I’ve been a fan for some time, but also, it made a lot of sense as the house has a handful of mid-century design details – long, low, construction, midcentury stone fireplace in the living room, midcentury (roman?) brick on part of the exterior, mid century door casings, midcentury hardware on original kitchen cabinets and built-ins.So, by the time we got to the kitchen, we knew that we wanted to do something that would fit in with the design and decor of the rest of the house. We knew that we wanted to modernize the floor plan somewhat and open up the kitchen a little bit, but we did want to retain a separate space for the dining room, which led up to keep the header of the wall we removed, as well as keeping the lower portion of the wall. The result is that when sitting the living room, you can see into the kitchen, but there is still a clear transition from kitchen to dining room — we love it and think it keeps the floor plan from feeling too modern.
In terms of picking all of the finishes for the kitchen, it was really just a ton of research (thanks, Retro Renovation!), negotiation, arguing, compromising, etc. Until we arrived at the end result.My mother’s advice was to find one or two things you LOVE and have to have, and then work everything else around that.
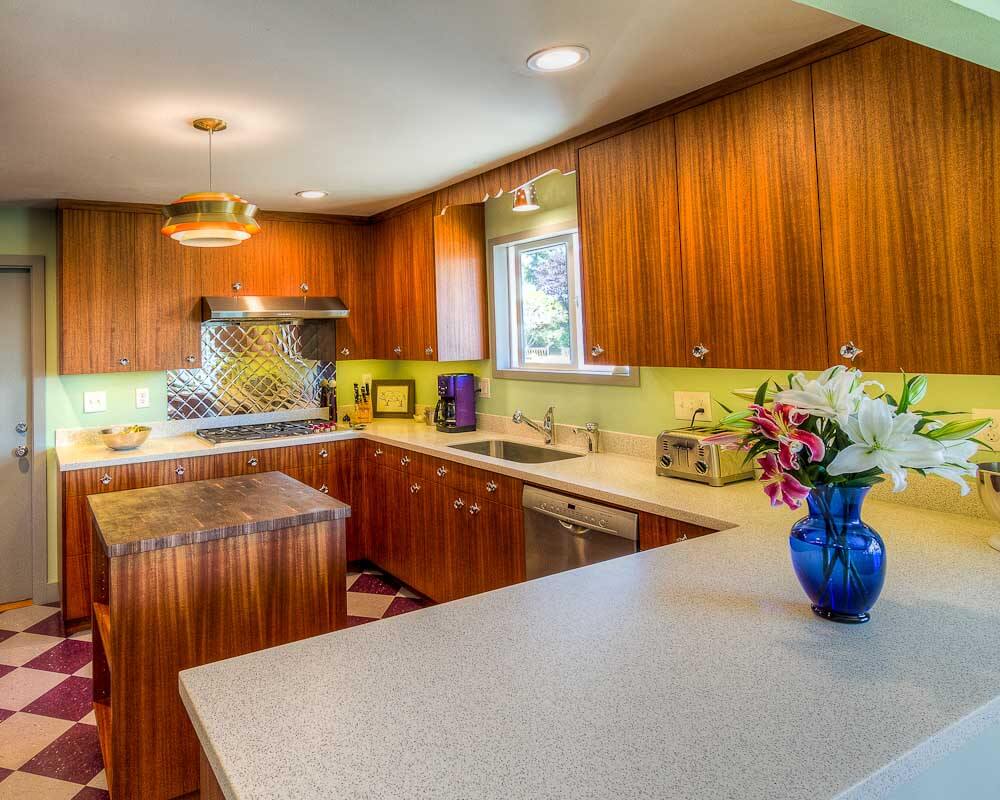
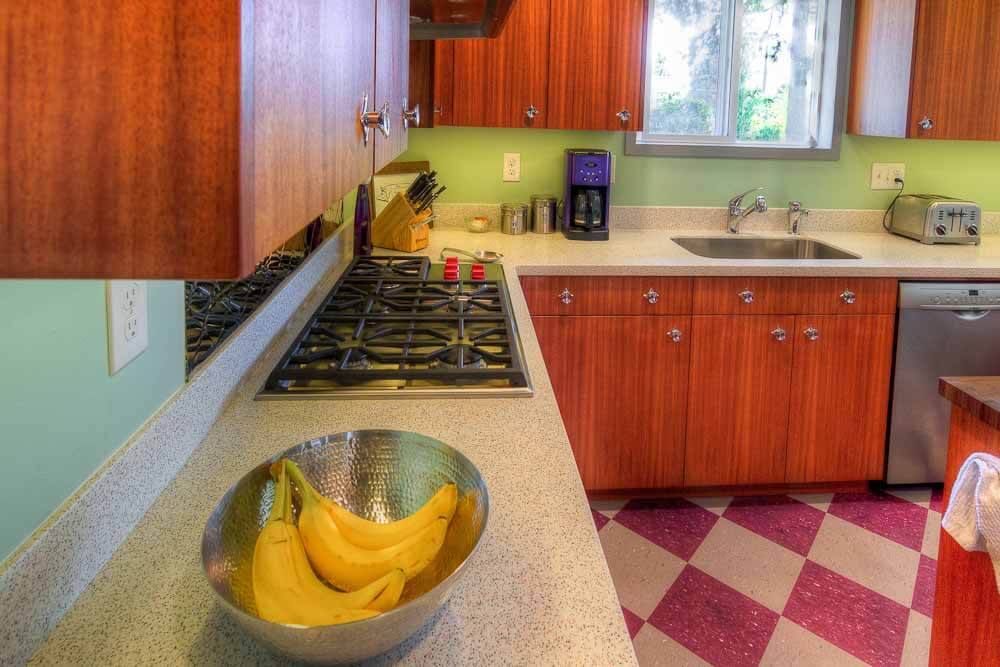
I originally wanted laminate countertops with edge banding, but my wife Amy didn’t really want laminate, and she fell in love with the Formica Solid Surface pattern that I discovered (while researching laminate). Amy is also freak about the color purple, so we knew we wanted to incorporate something purple into the kitchen. We were already pretty much set on some kind of vinyl tile product for the flooring so I just ordered a ton of samples and went out and looked at I think ALL of the chips until we found the right purple, then quickly found a good shade of gray (that matched our gray trim in the rest of the house) to go with it.I guess that’s pretty much the whole design process — it was a lot of work. We found a couple of things we loved, and then took a lot of time to explore all the options to find things that look good (or make sense) together, that we both like, that we could afford. In the end, it was SO worth it!
Resources for Drew and Amy’s atomic-inspired kitchen remodel: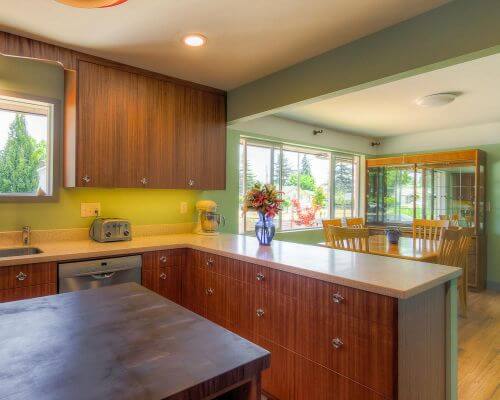


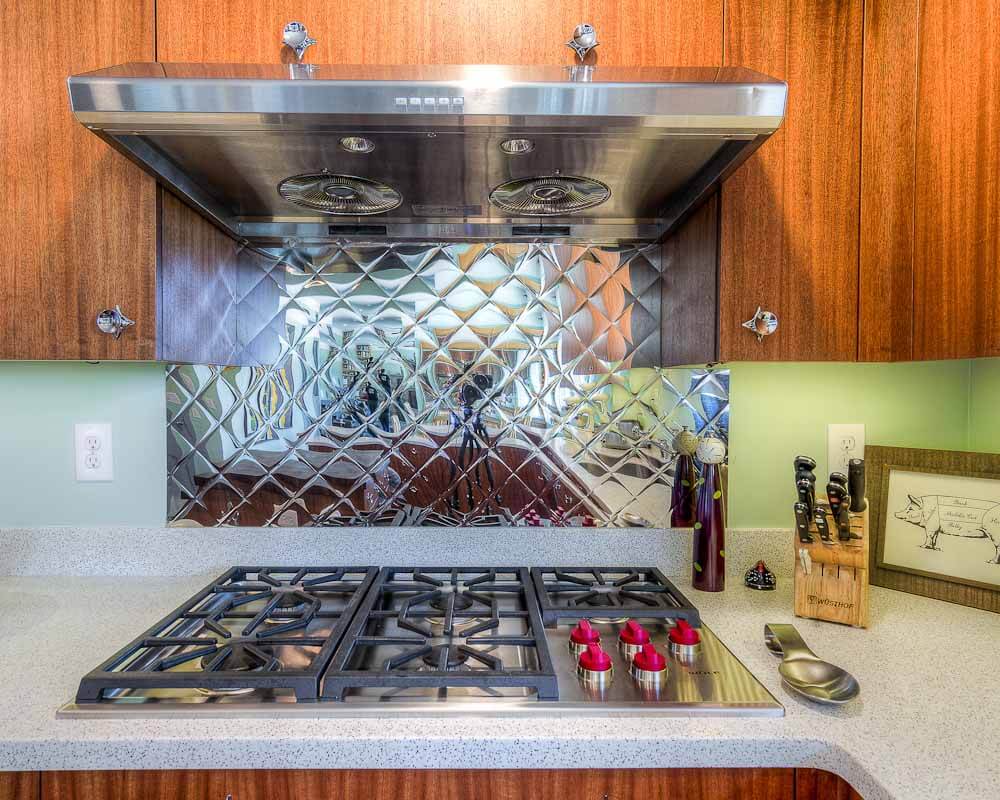
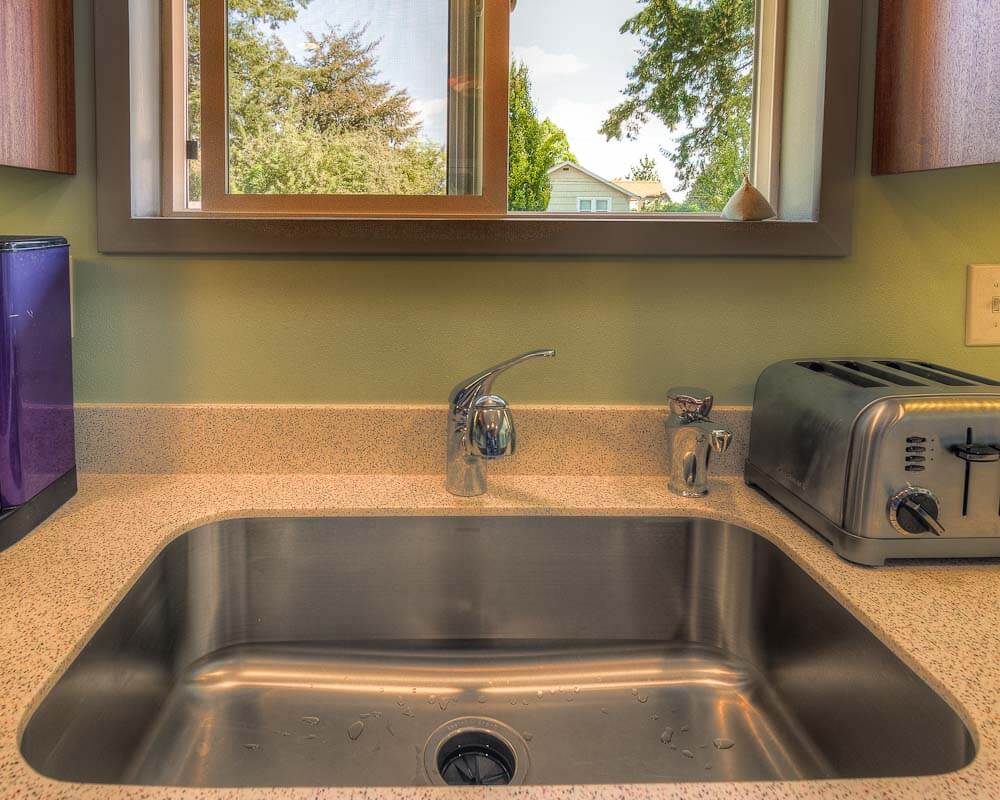
- Cabinets: Custom from James Wanamaker, he runs a one man shop out of South Park in Seattle. My wife and I refer to him as “the cabinet whisperer.” The pricing was very competitive with “custom” and semi-custom lines from the big national brands. Wood is quarter-sawn Khaya (african mohogany). We especially adore the sink valence!
- Cabinet Knobs: Rejuvenation stainless round dish with star backplate – we paid through the nose – I wanted to find vintage, but wasn’t able to come up with a matching set of 60!
- Countertop: “All that Jazz” from Formica Solid Surface. It’s off white with multi color “sprinkles”. We went with it because it hides crumbs well and it makes no attempts to look like stone or any other natural product. My wife wanted to find something with sparkles in it, but we couldn’t that didn’t also try to look like stone
- Island Top: Staggered end grain walnut from Chop Bloc
- Backsplash: Bright Quilt Stainless from Quickship Metals. This was sort of a happy accident as I meant to order brushed stainless, but when it came and I opened it up we absolutely loved it!
- Floor: VCT from Congoleum, colors are Plum and Iron Gray
- Lighting: Island light is a danish modern repro in the style of Carl Thore. Over the sink is from Rejuvenation.
Drew says:
The design/floorplan was drawn up by my mother (who has been doing her own drafting for 30+ years) and required considerable deliberations from her, my wife, and me. It’s a fairly small space at 12 x 13. We ended up getting a lot out of that space. Figuring out where to put the double ovens was pretty tricky, and my mother came up with the idea of tucking the fridge back into what used to be the pantry pre-remodel (the fridge is 36″ deep, but the surrounding cabinets are only 18″ – with the exception of the double ovens which are 24″) The areas to the left and right of the fridge are now pantry cabinets.
When opening up the wall that previously divided the kitchen from the dining room, we elected to retain the lower portion of the wall (rather than use cabinet backs as the bulkhead) and to keep the header as a visual separation between kitchen and dining room. We wanted to keep some of the original floorplan of separate kitchen and dining room and not go full modern open kitchen/dining, and I am super happy we made that choice. Eventually, there will be a thin piece of gray trim separating the green wall color from the white ceiling color in the dining room (the same color scheme extends through to the living room).
Special thanks to Brendan Ramsey Photography — a friend of Amy’s, who took the great photos.

Thanks, Drew and Amy, for sharing the story of your kitchen, along with all the details resources — and the advice from your talented mother. I approve wholeheartedly!


E.D. Degenfelder says
Absolutely beautiful result! We are restoring a 1947 ranch style and are facing the same issues you have faced. I will be giving some serious thought to your approach to the floor! Love it!
jacque says
I just love to see the younger generation embracing the past. Hopefully in the future; more houses will be spared the cookie cutter update and just embrace what the house is. This young couple did a great job and I love the flooring.
Melissa P says
Love this so so much! We too have taken care of the “not fun things” first (roof, repipe, windows, gas line) and often we get odd looks for it. Happy to see another couple do the same 🙂
We too are finally to the kitchen and bathroom that need love and this is very inpiring. Thank you so much for sharing! Looking forward to sharing our own before and after photos!
Mrs. FMV says
Love the kitchen. Now I want to see the rest of the house! More before and afters of this home, please!
CD Ellis says
WOW. Everything looks great, but those cabinets are MAGNIFICENT!
Tammy M. says
Love your kitchen!!!! I’m in West Seattle too and we are renovating/retro-vating our 1946 home (by ourselves, mostly, while working major hours at our jobs, so it may take some time). But you have inspired me! I hope we can post pictures on RR someday like you! Thanks for the cabinet whisperer’s name – I may have to call him! Your kitchen is beaut-ee-full!
Amy J says
Yay West Seattle! We LOVED working with James – beyond his amazing work, he’s just a really great guy! Best of luck with your projects, it’s a ton of work and feels like endless waiting but it’s been soooo worth it.
Lari says
Another West Seattle retro renovator here!!! We moved into a very original 1-owner 1968 midcentury mod house about a year ago. You two have great taste–love the kitchen. Those cabinets are amazing.
Stephanie says
How did you “replace original aluminum windows?” I have a 1956 rancher with original aluminums and at least one window has a seal broken. I SO DO NOT WANT TO buy white vinyl windows, but I thought that was my only option. Most of the locks on our aluminums are broken too. Would love to learn more about getting replacements.
Your house is a dream! Love it all.
pam kueber says
Hi Stephanie, on repair issues, I prefer you consult with professionals…
Regarding awnings, we have a story on where to find them. https://retrorenovation.com/2011/06/27/11-places-to-buy-aluminum-awnings-including-from-two-companies-in-business-since-1946-and-1948/
Mary Elizabeth says
Stephanie, yes, you do need to consult professional window installers. But just so that your contractor/consultant doesn’t steer you only toward white vinyl replacement windows, shop in the physical stores and/or online sites of window companies such as Marvin Windows and Anderson Windows to see what is available. Both of these companies supply replacement windows that can be stained or painted to match your interior and exterior woodwork.
You can also have the entire window, frame and all, replaced, although the cost to do that is higher. My former home was a condo, built in 1978, with aluminum frame windows, most of which were double paned. By the mid 1980s, all the original windows had broken seals, and the replacements were the unit owners’ responsibility, although the condo board’s insurance supplied part of the replacement cost of the broken windows. The expense of buying all the windows at once, however, seemed daunting. So over a period of 20 years, my husband and I replaced every window and deck slider door in the home with Anderson windows, each of which had wood interiors to match our woodwork and vinyl clad exteriors that matched the siding and framing chosen by our condo board. Even the first window was still in excellent shape when we sold the place.
Melissa P says
Stephanie, you could potentially have the aluminum windows reglazed. Our window folks were true experts. When I went to their shop they had a ton of old windows and I asked about them. They said for some houses the owers want to keep the frames so they remove the windows, reglaze them (a fancy way of saying put in new glass), fix the hardware and then reinstall. The bad news is that is crazy expensive. You can also get a new metal window but they also go on the expensive side.
What we ended up doing was getting white vinyl casements ( these are the windows that swing out) that look a lot like what the house would have had originally and we get all the new low energy features.
Marilyn Watson says
Great remodel…you really thought it out. Your Cabinets are fantastic…love the Khaya wood. I love these size and type of Kitchens….very mid-century.
Vince says
I LOVE the ribbon mahogany cabinets!
Laurie says
I have a 1959/60 ranch with the Ribbon Mahogany Cabinets. When getting estimates for a remodel, every carpenter said “Keep them!”. So we did!
You rarely find custom cabinets in this beautiful wood anymore. It’s all oak, maple or cherry.
Laurie says
How can I post a photo of my cabinets?
Suzy says
I could easily go with the same solid surface countertop .. thanks for sharing the name and brand 🙂 Your kitchen look FABULOUS!!