

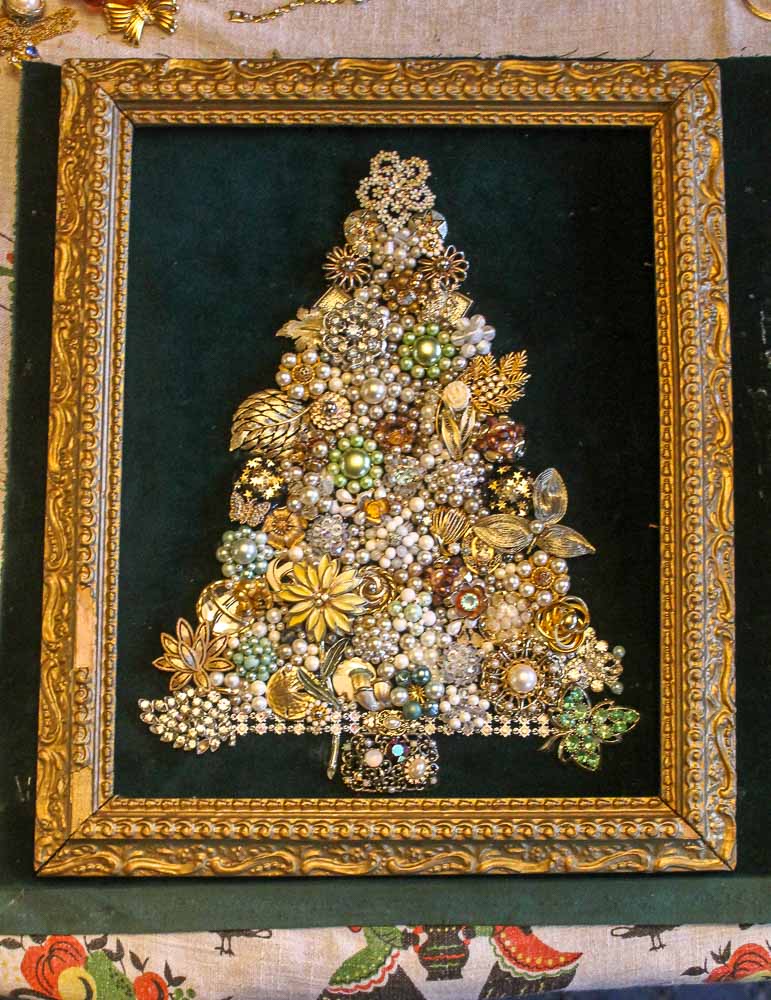
I’ve been collecting broken vintage costume jewelry for several years — with the goal to make a lifetime-achievement crafty: A costume jewelry Christmas tree. This weekend I gathered all my supplies, took over the dining room, and got down to gluing. This project was not easy — like making ornament wreaths, it’s another effort in juggling colors and shapes in three dimensions — made all the more stressful by the fact that it takes a lot more jewelry than you think. That said, I’m pretty darned happy with the result!

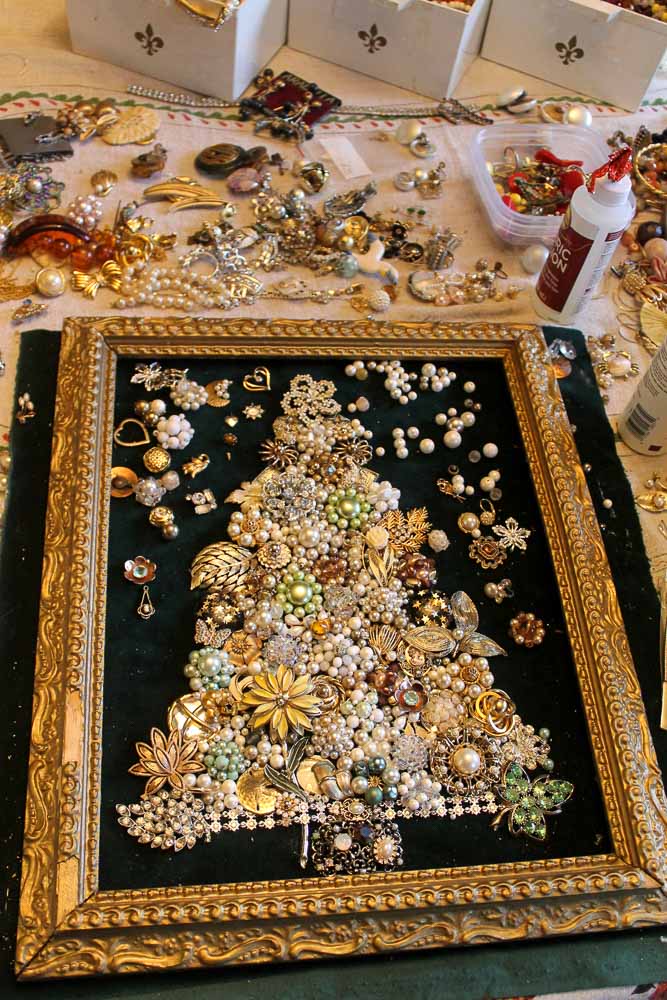
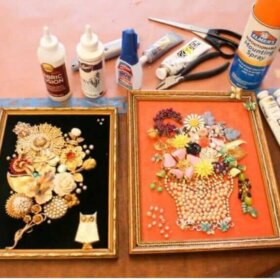
Scene of the crime. Things to collect over time to make this project possible:
- Broken costume jewelry.
- Vintage picture frames.
- Vintage velvet.
Artsy fartsy.
Story and tips continue >>
Meanwhile, you might also enjoy our famous tutorial how to make a Christmas ornament wreath + video:
Voila! My weebit has a new mommy-heirloom!
My tips to make a costume jewelry Christmas tree:
- Start by reading my DIY story from earlier this year (it includes the glue I used): Making art from broken costume jewelry.
- Jewelry pliers or a set of very wide tweezers are important to have on hand. Note: Links to Amazon net me a wee commission if ya end up buying something.
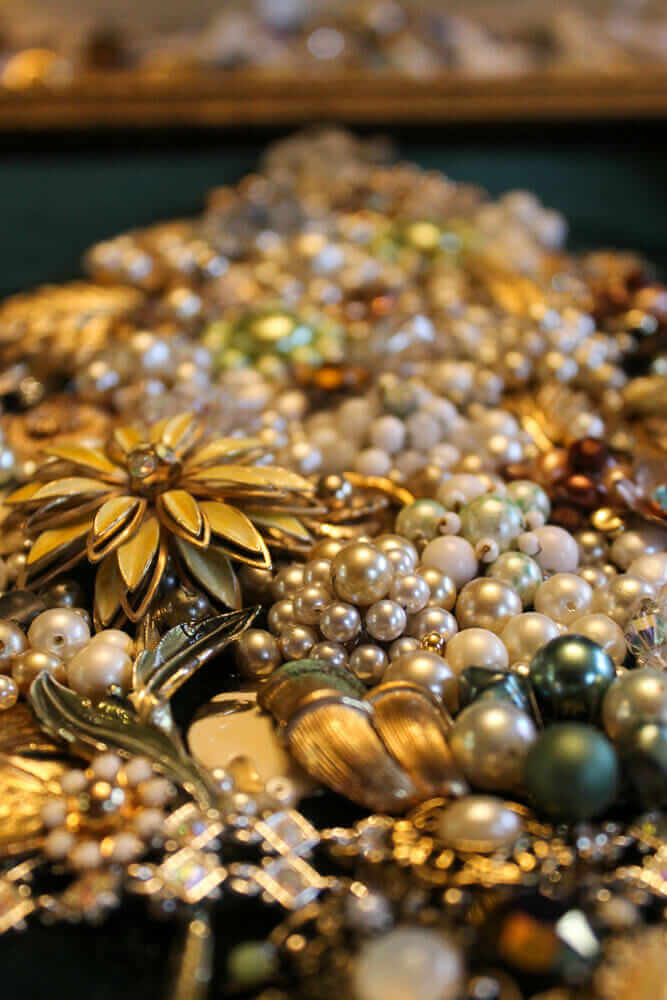
- Golly, you never knew how handy it would be to have so many old broken pearl necklaces in your stash. I find these at most every estate sale. Use the pearls — all sizes, all designs, all colors and sheens — to fill in the in-between spots.
- I thought about it first and decided I preferred to not have a “straight” edge to the right- and left-hand sides of the tree. I think it’s more interesting that way. To start, I created my “outline”. Then, I filled in from there.
- Think about your colorway: I wanted the tree to be primarily gold. But then, I realized that I did not have enough jewelry — big pieces — to fill in the tree. So I began to add light green, which I thought worked well because gold has some green in it.
- As you go, keep scanning the tree clockwise, starting at the bottom left, to ensure you are creating focal points, combining colors, “breaking your edge”, and then “building up” in a way that keeps your eyes moving — in way that gives the piece visual dynamism.
- Take it slow. I came back to my wreath probably 10 times over three days to keep working on it. I’ll bet that I worked at least 10 hours on it. My goal-mode when I do projects like this is to Enjoy The Process. So I take my time. It’s cheaper than therapy.
- Next: I am going to paint up the frame a bit more, and probably add some bling to it, too. And, I will reorganize all the jewelry left into colors and decorative pieces so that I can assess what I need to look for in the coming year as I prowl estate sales.
- Throw out all my rules — and make your own!
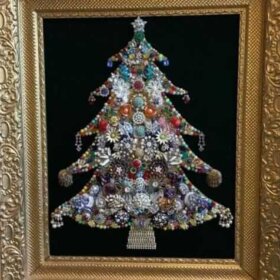
More link love:


CarolK says
That is just stunning, Pam! It makes me wish I had enough of my mom’s broken costume jewelry to make one. With the broken jewelry I have, my tree would be lucky to 1″ tall.
When mom died, I wondered what happened to her button box. I always used to play with her button box as a girl. My niece has the box and made a lovely wall hanging for the nursery with many of the old buttons. I’m glad that my niece has and used it and it wasn’t just thrown away.
Mary Elizabeth says
Yes, buttons! Just what I was thinking when I read this story, Carol. My mom’s button box was full of bling and pearly buttons, and they would make lovely trees. Also, I have seen button boxes at various estate sales and wondered if I should buy them for something creative. I love how this site makes one idea lead to another.
Jay says
Very nice and yes I think that dining table has seen a lot of crimes committed in the name of creativity.
Elizabeth from Texas says
Pam, that is absolutely breathtaking! You have a true gift. And the scene of the crime photo–wow! That really shows what was involved! It looks like a jewelry factory exploded!! Thanks for sharing your talent.
Felicia Alexander says
This is exquisite work, Pam. The different sizes and colors of pearls add interest in addition to the asymmetry. Thank you for sharing it with us!
Rebecca says
You did an awesome job. Very pretty. Do you attach with glue? If so, what kind?
Pam Kueber says
Hi Rebecca, yes, glue. I identify the different types in the first story https://retrorenovation.com/2017/02/27/making-art-broken-vintage-costume-jewelry/
I was using the clear one mostly on this project – it worked great (so far!)
Robin, WA says
Gorgeous!! I saw one of these at a local antique store last year and hemmed and hawed over buying it. By the time I decided to buy it, someone else had already snatched it up. Darnit! Only $10 too.
LuAnn says
Wow! That is stunning! The green highlights really add to the beauty of the piece. ❤
linda h says
The posts about jewelry trees has made me
re-think asking my Dad’s widow if I could please have the two that my Dad made (or at least one of them ). I used to think that they were ugly, but you have changed my mind.
Wendellyn says
Beautiful!!
Samantha says
So beautiful!! I dont know how much you have leftover now, but how amazing would a matching tree garland be! Thanks for sharing!