

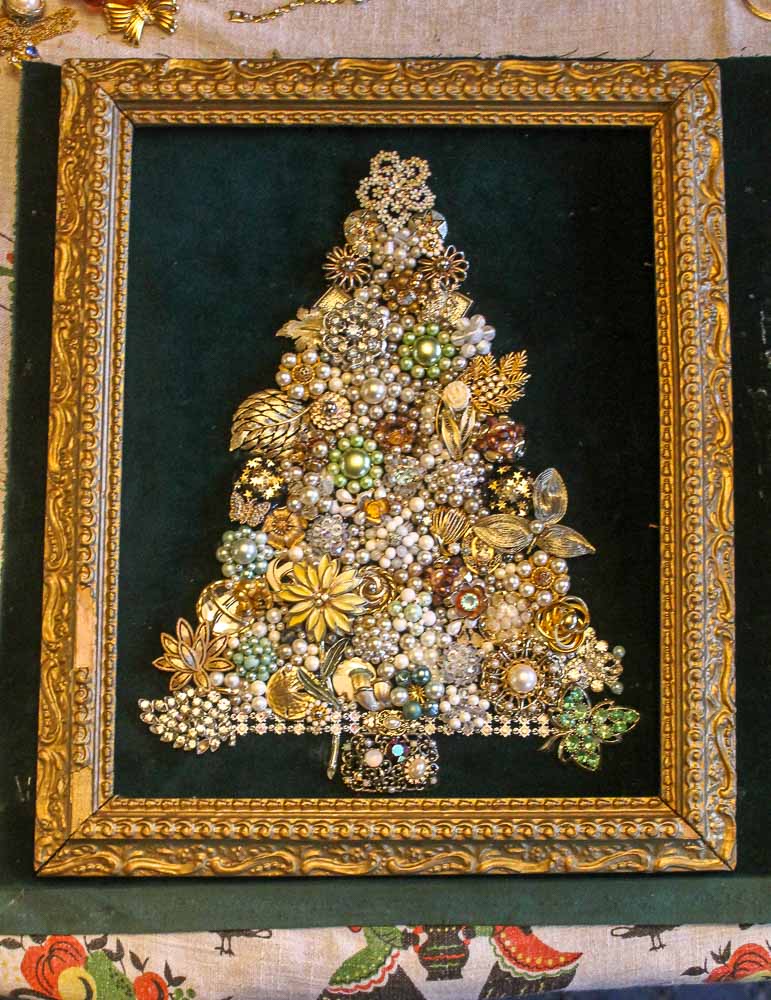
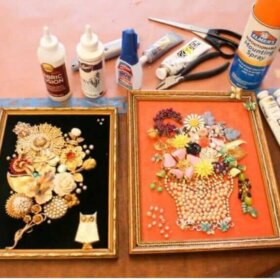
I’ve been collecting broken vintage costume jewelry for several years — with the goal to make a lifetime-achievement crafty: A costume jewelry Christmas tree. This weekend I gathered all my supplies, took over the dining room, and got down to gluing. This project was not easy — like making ornament wreaths, it’s another effort in juggling colors and shapes in three dimensions — made all the more stressful by the fact that it takes a lot more jewelry than you think. That said, I’m pretty darned happy with the result!

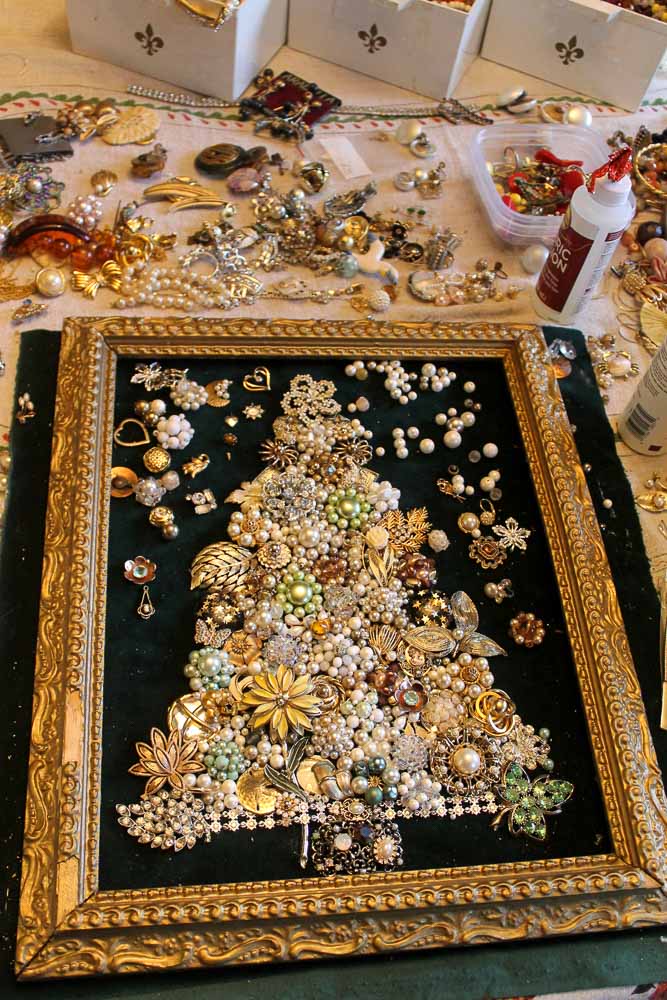
Scene of the crime. Things to collect over time to make this project possible:
- Broken costume jewelry.
- Vintage picture frames.
- Vintage velvet.
Artsy fartsy.
Story and tips continue >>
Meanwhile, you might also enjoy our famous tutorial how to make a Christmas ornament wreath + video:
Voila! My weebit has a new mommy-heirloom!
My tips to make a costume jewelry Christmas tree:
- Start by reading my DIY story from earlier this year (it includes the glue I used): Making art from broken costume jewelry.
- Jewelry pliers or a set of very wide tweezers are important to have on hand. Note: Links to Amazon net me a wee commission if ya end up buying something.
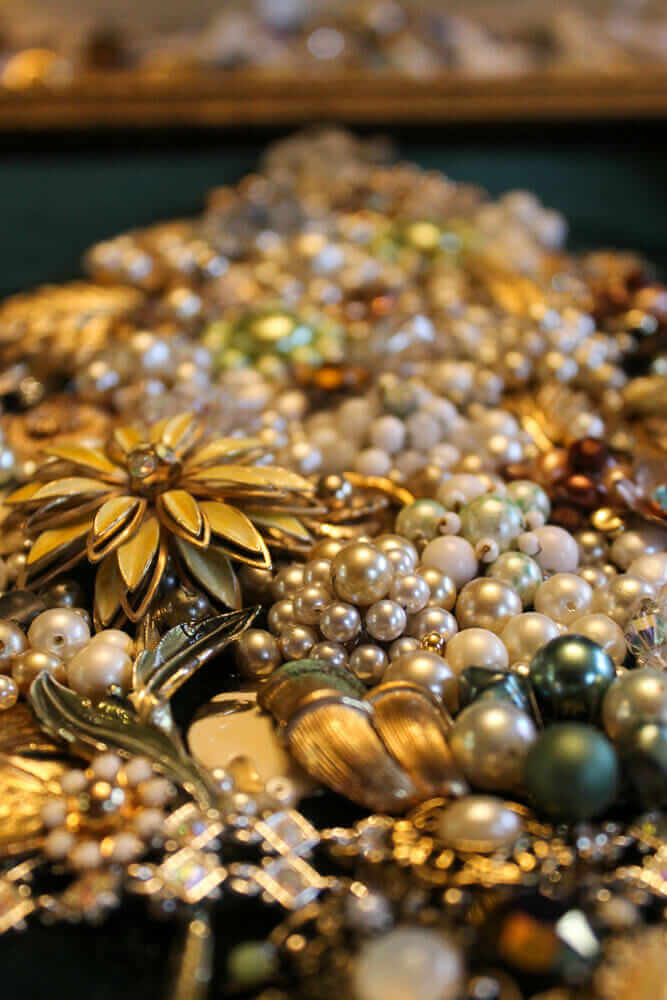
- Golly, you never knew how handy it would be to have so many old broken pearl necklaces in your stash. I find these at most every estate sale. Use the pearls — all sizes, all designs, all colors and sheens — to fill in the in-between spots.
- I thought about it first and decided I preferred to not have a “straight” edge to the right- and left-hand sides of the tree. I think it’s more interesting that way. To start, I created my “outline”. Then, I filled in from there.
- Think about your colorway: I wanted the tree to be primarily gold. But then, I realized that I did not have enough jewelry — big pieces — to fill in the tree. So I began to add light green, which I thought worked well because gold has some green in it.
- As you go, keep scanning the tree clockwise, starting at the bottom left, to ensure you are creating focal points, combining colors, “breaking your edge”, and then “building up” in a way that keeps your eyes moving — in way that gives the piece visual dynamism.
- Take it slow. I came back to my wreath probably 10 times over three days to keep working on it. I’ll bet that I worked at least 10 hours on it. My goal-mode when I do projects like this is to Enjoy The Process. So I take my time. It’s cheaper than therapy.
- Next: I am going to paint up the frame a bit more, and probably add some bling to it, too. And, I will reorganize all the jewelry left into colors and decorative pieces so that I can assess what I need to look for in the coming year as I prowl estate sales.
- Throw out all my rules — and make your own!
More link love:


Maria says
That is gorgeous! You did an amazing job!
Michelle says
WOW, this is so beautiful! What a cool idea!
Ashley says
I love this! Absolutely gorgeous!
judy h. says
That’s so glamorous!
C says
It is gorgeous, Pam!
Love it.
Bonnie says
This is one of the prettiest ones I’ve seen. Now I remember why I’ve been looking for broken and costume jewelry in flea markets for the past two years!
Sharon says
Luv It! Gorg! I have the jewelry, not so much the talent.
Laura Ainsworth says
This is just magnificent, Pam! Very artfully done. But remember, all, to WEAR — or let your wife/girlfriend wear — the intact (or even mostly-intact) vintage pieces you were lucky enough to find or inherit. I wear my grandmother’s and great-aunt’s costume jewelry with pride and am rewarded w/many compliments and started-conversations. (One season several years back, there was a short-lived fad of pinning big brooches on fabric handbags; I’m set if that comes back in style.) Anyway, thanks for sharing your wizardry — love this!
Karen from Philly says
Oh My Gosh, Pam…Your creativity is ASTOUNDING. I could study the pictures of your ornament wreaths and now this jewelry tree till I’m blue in the face and still have NO IDEA how you do this. I admire your abilities with shapes and color and am truly humbled by your spatial relationship skills! Beeeeuuuutiful results on your heirloom jewelry tree!
Pam Kueber says
Thank you! 🙂
Siobhan Greene says
I love the end results! Your Christmas tree is fab!
I just told a friend I am hunting for THE piece of velvet to begin mine….for next year! I have gathered broken jewelry and the single earrings from my Granny and other special ladies in my family. I will share when complete! Yes, crafting is cheaper than therapy!
Pam Kueber says
Thank you! Send me a photo next year after you finish yours!