

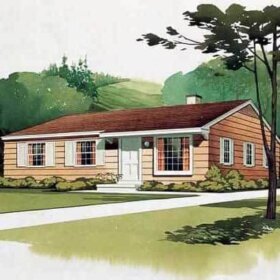
 With so many readers ohhh-ing and ahhh-ing over the 740 s.f. “Tom Thumb” Cape Cod American dream house that we recently featured, it made sense to offer a similarly styled Putz pattern. Since all five of my other Putz patterns are modeled after homes from the 1950s-1970s, throwing in some 1940s action also is a fun way to mix up the “neighborhood.” Put a sharp blade on your X-acto knife, because you’ll need it to cut out all the tiny window panes on this adorable cottage.
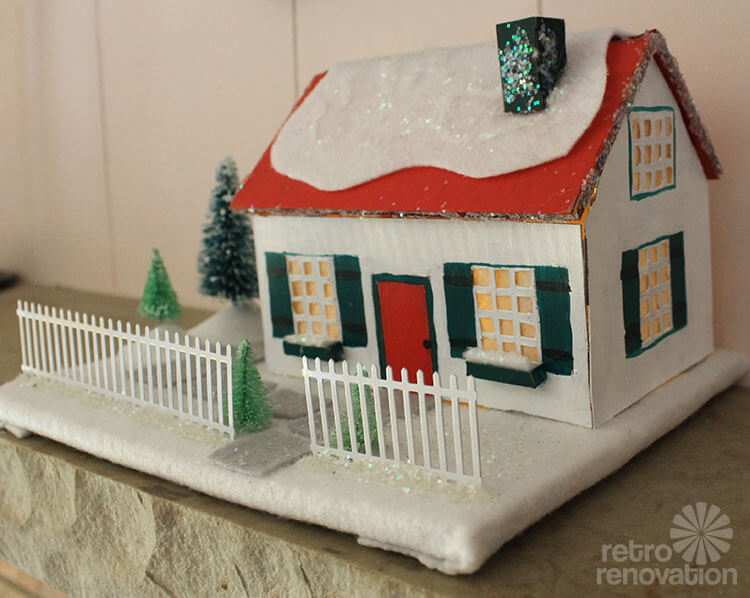
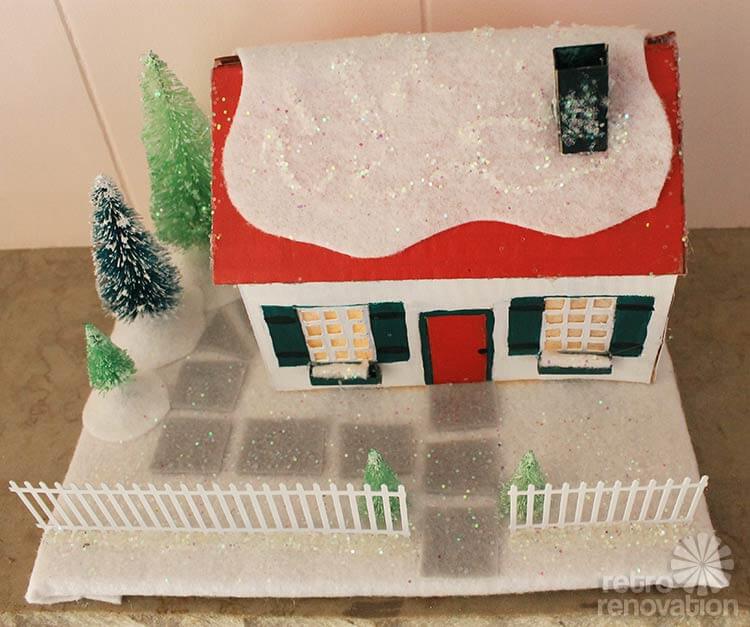 The white picket fence really makes the front yard. Thankfully, I found it ready-made at Michael’s, though I suspect if you had a steady hand and a lot of time, you could fashion one yourself out of cardstock or paper from a cereal box.
See all those window panes? They are cut out one by one. With 12 panes per window, six windows and one, four-pane door, that’s 76 small squares to cut. It takes time and dedication, but the windows are what really make this house design. If you don’t feel that skilled (or patient) with the X-acto knife, cutting out the front two windows and painting the panes in the rest of the home would look fine, too.
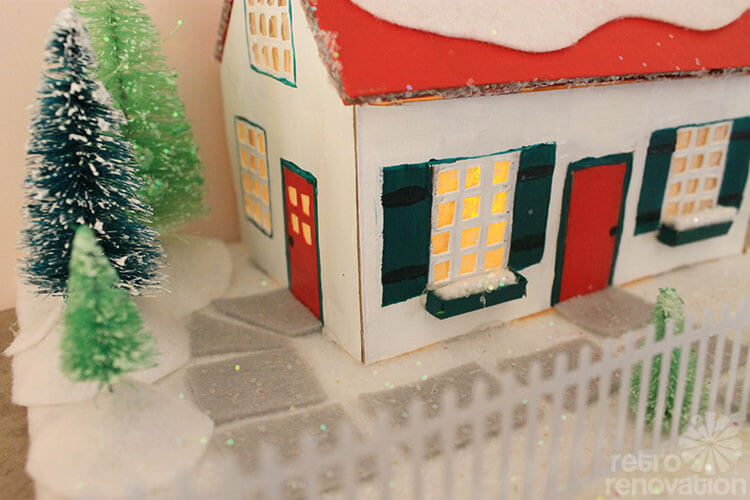 Another meticulous detail on this design — two tiny window boxes filled with snow. It is easiest to put these on the house while it is still flat, before assembly. Again, if this detail proves to be too difficult, the window boxes can be painted on the house instead, although I think this three-dimension detail is really worth the extra effort.
Click here to download Kate’s free Putz house pattern
Make more mid century “Putz” style houses:
- See all the designs
- Want to know why these houses called “Putz”? Read our vintage Putz house history and online guide.


Joan Mooney says
Whats the best glue to use for this project?
Pam Kueber says
I use different glues for different things:
– I have found that a glue stick or Elmer’s/pva works pretty well for cardboard-to-cardboard and felt-to-cardboard; I brush Elmer’s/PVA underneath the felt on the top of the substrate where the house and decor sit to bond the felt to that surface.
– I use Elmer’s for glitter on the edge of roof and for adding glitter wherever.
– I use hot glue if something has to adhere super fast and strong — for example I usually use glue gun for putting chunky roof onto the house… for adhering the felt on the bottom when you ‘wrap’ the felt onto the substrate… for adhering the house to the felt… for glueing down things that need to stand up fast… and sometimes I do use it glue the house together – careful though, it sets pretty much immediately so there is little room for error… I typically use high-heat hot glue, because that’s the kind of glue I have on hand; low-heat might work well too.
Different glues have different pros/cons — I’m not an expert, have mostly learned from trial and error.
Chris says
These are awesome! I can’t wait to make one! Thank you so much for sharing!
Jeanne says
Getting ready to modify this pattern and create my annual Putz! My boyfriend has a cabin in the woods in the Upper Peninsula (built in 1957) and I’m going to modify this pattern to look like his cabin. 🙂
Kate says
Awesome Jeanne! Glad you are enjoying the Putz patterns…stay tuned — I just finished making three more for this year! 🙂
tammyCA says
So cute! I know how hard it is to cut the tiny square windows, I did that on mine last year. I even searched for a hole punch that would make it easier and nothing like that to be found.
I’m a ’40s lover so if I could shrink myself teeny, tiny this one and the storybook house would be my little home…but, I love them all & intend to make some soon (after I finish my other crafty projects).
Jay says
Wow, this one really does evoke the cardboard putz houses of yore with the bottlebrush trees and the glittery snow on the roof. I’ll take a half dozen of these, thanks!
Robin, NV says
Aww, so cute. Love the little snow filled planter boxes. It really needs an itty bitty federal eagle over the front door.
Have you made one with clerestory windows yet? Now that would be a challenge!
Kate says
I’ll put that on the wish list for next year Robin! 🙂
Tam Francis says
So, cute and right up my alley. I’m working on a vintage novel set in the 40s http://www.girlinthejitterbugdress.com and this is just PERFECT for me. I try to live a vintage lifestyle and this will be a wonderful project! Thanks!
Kate says
Very cool! 🙂
Anne-Marie Cory says
Ah! I have been waiting to see if you were going to do one of these this year! This one is a charmer! Thanks for sharing.
pam kueber says
Anne-Marie, Kate has done three this year (that’s it for this year) – Check them all out at the bottom of the story!
Puddletown Cheryl says
Sweeeet!
Morag says
Thanks so much. I love the 1940s vibe best of all and have been missing hearing quite so much about it lately, though I do enjoy your explorations of the 50s thru 70s too.
Will make this pattern asap and note on the bottom that you and RR were the pattern source. For future generations to be able to trace the origins, don’t you know.
pam kueber says
Ah, that’s sweet — you are creating an heirloom!