A family rebuilds and restores a 1953 kitchen to its former glory
Kate - Updated: August 9, 2021
Retro Renovation stopped publishing in 2021; these stories remain for historical information, as potential continued resources, and for archival purposes.
Luke and his mom Joyce (his dad Robert was behind the camera).
Reader Luke’s parents’admired the 1953 ranch home next door to their house for 18 years, and the day it came up for sale, and they decided to make it their own. The home had fallen into disrepair over the years and would need lots of TLC, so with help from their son Luke — and grandma, too — the family began their group restoration effort. Instead of gutting the damaged original cabinets and replacing them with something contemporary, Luke and his father lovingly repaired the original cabinets, saving as much material as they could. The results are beautiful.
Luke writes:
I have read your blog for about two years now, and I became rather interested in retro remodeling when I started helping my parents fix up their new-old house. My parents purchased a 1953 ranch home in Oklahoma about two years ago. The house they purchased was in a disastrous state… [including having been] flooded about three times in its life from a nearby creek. My parents had lived next door to the house for 18 years and decided to purchase the house when it became available. The house was larger and also was situated on a double sized lot, which my parents liked. Looking at the photographs of the home when they first purchased it, I wonder why we were all drawn to the home. After repairing, fixing, and cleaning everything in the house, it now is a happy home.
Before: The cabinets had suffered severe water damage….
When my parents first purchased the home, we were all unsure what would be done about the kitchen. The original wood cabinets in this kitchen were so old and not very well cared for that we had thought about gutting the entire kitchen and putting contemporary cabinetry in its place. However, we did not do that, and I am very glad that wasn’t done. I believe new cabinets would have ruined the character of the home.
We had also talked about just refurbishing the cabinets on one side of the kitchen where the fridge and stove sit. After rebuilding those cabinets we realized that the whole kitchen really needed to be fixed. Most of the cabinetry has new doors and new facing around the doors. (The only section of cabinetry that is 100% original is the section above the sink. By the time we finished the other cabinets, we were really sick of all of it, so the cabinets above the sink were left and refinished. They were actually in the best shape compared to the rest of the kitchen.)
My father and I removed all the old birch plywood facing, put new birch hardwood facing on, constructed new birch plywood doors, edited the layout of the kitchen a bit, and ended up with what I believe to be a pretty wonderful result.
Before: Adorable oven, but quite small…
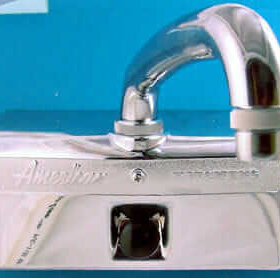
By peeling back of these old layers, we were really able to see what the original kitchen would have looked like. The flooring was a white vinyl tile with red, yellow, and blue splotches. The tile seemed like it would have coordinated well with the dark blue countertop. The countertop also had metal trim with a grey rubber insert. The original kitchen had an electric cooktop and a beige electric wall oven, the oven was actually still in place when my parents purchased the house along with the copper colored Vent-a-hood. We might have repaired the oven, but it was so small you could hardly fit a normal sized cookie sheet in it. It sits in our storage shed; we don’t quite know what we could do with it. We also had a good reason to believe that the original kitchen was equipped with a dishwasher which would have been quite a luxury item. We also removed three or four layers of wallpaper off the walls, all of them were beautiful vintage patterns.
Before: Structure of the cabinets in good shape.. but it was time for structural repairs to the birch and new doors.
The pictures I am sending are of the original kitchen, a few construction pictures, and the final product. The pictures of the old kitchen are from before we purchased the house and people were setting up for an estate sale. I unfortunately never took photos of the kitchen after it was emptied out. They really don’t show the extremely dilapidated state of the kitchen. At one time there was about 20 inches of floodwater through the entire house. All of the lower cabinets were peeling and splitting apart. The cabinets near the stove were coated in grease, and it looked like there had been a fire in that area at one time.
When we rebuilt the cabinets, we took out the area for the wall oven and cooktop and put a normal slide in range in its place. We also brought the fridge out of the corner because the doors on the fridge would not fully open when the fridge was up against the other wall. That was the largest change to the layout. The rest of the kitchen stayed pretty much the same. The construction photos show how we rebuilt our cabinets. We removed the old exterior of the cabinets, we pretty much saved everything on the interior because it wasn’t in too bad of shape, and then we replaced it with new birch hardwood and plywood.
Luke and family moved the refrigerator from its previous position, which abutted the wall, so that the doors could open fully.
On the finished kitchen my parents thought about going with the new GE Artistry appliances, but they didn’t offer those appliances with features such as a water dispenser in the fridge door and a self-cleaning oven option. If my mother had the option she would have picked turquoise appliances, but it seems that stainless is really the only thing on the market anymore.
The countertops were called Sea Glass, from Wilsonart. It kind of has a muted pattern on it, but it adds a nice pop of color and keeps the kitchen from being so incredibly stark with all of the stainless steel. We stained the new portions of the cabinets to blend with the older portions, and I think we did a fairly decent job matching the new and old. The wall paint was from Sherwin Williams, and the color is 7692 Cupola Yellow.
We love LoVe LOVE the cafe curtains made by grandma!
Finding window treatments for the kitchen was also a challenge. My mother wanted something that wouldn’t hide the look of the windows and something that could easily be moved out of the way. My mother thought about using woven wood shades or something similar, but she found the post on your blog about café curtains, and she went with the pattern that seems to resemble a keyhole pattern. My mother picked the fabric, and my grandmother created what you see in the pictures.
We would love to share more of the house with you and the Retro Renovators, but my parents are still in the process of moving and getting everything arranged. I am also going include two pictures of our two preserved vintage bathrooms, which we had professionally cleaned and grouted.
Your blog has not only been helpful in our remodeling and fixing of my parents’ house but also thoroughly enjoyable to read.
Luke, you and your dad did an excellent job repairing the original cabinets. Kudos to you for taking the time to think about what the house needed instead of just gutting the space and starting over. I love that this project was a family affair, that everyone pulled together — even granny — to help which makes the finished space that much more wonderful. Thanks so much for sharing your story with us!
It’s perfect: it’s “original” to the house but subtly adapted for current appliances and ergonomics. You are lucky to have the talents to make it all happen.
This style of kitchen reminds me that there were transitional periods of different lengths of time related to geography–region and “city” vs.”country”. The style of this kitchen isn’t quite what comes to mind first when thinking of post-war MCM: the cabinets are reminiscent of the deco-moderne and streamline furniture of Heywood Wakefield from before WWII. It’s a very cozy comfortable type of modernism, imo.
Melissa L.says
Those cabinets are beautiful! I prefer birch to knotty pine and so these are right up my alley. Looks like your folks got a wonderful house with many original features. I hope we see more of it.
Jennifersays
I agree that you can work with stainless steel in a retro kitchen. And For those of you who want your modern appliance features but bemoan the lack of color, it’s definitely worth considering getting something powder coated or else simply using brush-on appliance paint that you have tinted. This doesn’t work for high-heat items (range, oven) but dishwasher, vent-a-hood, fridge can all go this way!
virginiasays
Congrats on this lovely restoration. Looks fantastic — and, yes, to those great, great curtains.
Roundhouse Sarahsays
Great save! The wood is glowing it looks so great. I’m especially fond of the sweet scalloped detail above the sink. And even though we just got a glimpse of the bathrooms they look so sharp with the professional cleaning and grouting. Lovely preservation work! Did y’all’s old house next door have similar features? Was it from the same era?
Lukesays
The house next door is actually a few years newer than this one and was built by my grandfather. He was a contractor after WWII into the mid-1970s. The house next door had similar features only it was about 800 sq ft smaller. The great thing about this house is it has tons and tons of storage! This house was more of a custom built home in the 1950s and the house next door would have been a typical 1950s builder home.
Jaysays
Very nice indeed! Beautiful blending of the old with new. The appliance tweaking was a very practical choice and makes for a more worker freindly kiitchen. Stainless was a material used in 50s kitchens so it’s not an incongruous choice.
Nice bathrooms! Hope your parents have many happy years in their new *old* house.
Pamela H.says
Please ensure Grandma gets her props – the curtains take the kitchen to another level!!
lynda davissays
Very nice job. I can see days and days of labor in that kitchen. The cabinets should be an inspiration to others with cabinets like this. Great choices for the new kitchen. What did you end up using for the new flooring? You are all brave to tackle that big of a job. What is the finish coat on the cabinets? It looks like a gloss poly. Your parents are lucky to have you help with this project.
Lukesays
The flooring is a porcelain tile, I am not sure what brand… We had it professionally installed. The finish coat on the cabinets is a high gloss poly.
Wendy in St. Louissays
What a wonderful job you all did! My favorite? Those cafe curtains! Really, really perfect!
Mary Elizabethsays
Luke, Joyce and Robert, and Grandma, what a lovely kitchen! It seems like a perfect restoration combined with updating in the areas you needed. The new stainless steel appliances seem very much at home with the vintage-look curtains, the laminate counter and the stainless sink. Thank you for sharing it with us. Love the bathrooms, too.
Contrary to your concern about the “before” photos, I think they did show in what bad shape the kitchen was–I could see the water damage and the way the cabinets were warped and couldn’t be closed properly. The rebuilt cabinets are “glowy,” with just the right mid-century finish. I’m curious what stains and varnishes you used.
My favorite touches, besides the curtains, are the vintage canister sets and the red stepstool/chair–lovely.
Don’t you all think that the kitchen is a generous sized one for the 1950s? There seem to be a lot of cabinets. I love that the peninsula cabinets open on both sides. Not all do. It’s a great use of the deep space and makes it convenient to store items that will be used in the dining area.
Just remember, Luke, in my experience the family that renovates together–well, keeps renovating. It’s like an itch that needs to be scratched. Next time, maybe it will be your own house!
Lukesays
The kitchen cabinet space seems to be slightly less than the old house next door mostly because the soffit takes up so much volume. However, we have floor to ceiling cabinets in the laundry room which makes up for that. We do love the layout of the kitchen, it is very similar to the old kitchen next door.


 Luke writes:
When we rebuilt the cabinets, we took out the area for the wall oven and cooktop and put a normal slide in range in its place. We also brought the fridge out of the corner because the doors on the fridge would not fully open when the fridge was up against the other wall. That was the largest change to the layout. The rest of the kitchen stayed pretty much the same. The construction photos show how we rebuilt our cabinets. We removed the old exterior of the cabinets, we pretty much saved everything on the interior because it wasn’t in too bad of shape, and then we replaced it with new birch hardwood and plywood.
The countertops were called Sea Glass, from Wilsonart. It kind of has a muted pattern on it, but it adds a nice pop of color and keeps the kitchen from being so incredibly stark with all of the stainless steel. We stained the new portions of the cabinets to blend with the older portions, and I think we did a fairly decent job matching the new and old. The wall paint was from Sherwin Williams, and the color is 7692 Cupola Yellow.

We would love to share more of the house with you and the Retro Renovators, but my parents are still in the process of moving and getting everything arranged. I am also going include two pictures of our two preserved vintage bathrooms, which we had professionally cleaned and grouted.


ineffablespace says
It’s perfect: it’s “original” to the house but subtly adapted for current appliances and ergonomics. You are lucky to have the talents to make it all happen.
This style of kitchen reminds me that there were transitional periods of different lengths of time related to geography–region and “city” vs.”country”. The style of this kitchen isn’t quite what comes to mind first when thinking of post-war MCM: the cabinets are reminiscent of the deco-moderne and streamline furniture of Heywood Wakefield from before WWII. It’s a very cozy comfortable type of modernism, imo.
Melissa L. says
Those cabinets are beautiful! I prefer birch to knotty pine and so these are right up my alley. Looks like your folks got a wonderful house with many original features. I hope we see more of it.
Jennifer says
I agree that you can work with stainless steel in a retro kitchen. And For those of you who want your modern appliance features but bemoan the lack of color, it’s definitely worth considering getting something powder coated or else simply using brush-on appliance paint that you have tinted. This doesn’t work for high-heat items (range, oven) but dishwasher, vent-a-hood, fridge can all go this way!
virginia says
Congrats on this lovely restoration. Looks fantastic — and, yes, to those great, great curtains.
Roundhouse Sarah says
Great save! The wood is glowing it looks so great. I’m especially fond of the sweet scalloped detail above the sink. And even though we just got a glimpse of the bathrooms they look so sharp with the professional cleaning and grouting. Lovely preservation work! Did y’all’s old house next door have similar features? Was it from the same era?
Luke says
The house next door is actually a few years newer than this one and was built by my grandfather. He was a contractor after WWII into the mid-1970s. The house next door had similar features only it was about 800 sq ft smaller. The great thing about this house is it has tons and tons of storage! This house was more of a custom built home in the 1950s and the house next door would have been a typical 1950s builder home.
Jay says
Very nice indeed! Beautiful blending of the old with new. The appliance tweaking was a very practical choice and makes for a more worker freindly kiitchen. Stainless was a material used in 50s kitchens so it’s not an incongruous choice.
Nice bathrooms! Hope your parents have many happy years in their new *old* house.
Pamela H. says
Please ensure Grandma gets her props – the curtains take the kitchen to another level!!
lynda davis says
Very nice job. I can see days and days of labor in that kitchen. The cabinets should be an inspiration to others with cabinets like this. Great choices for the new kitchen. What did you end up using for the new flooring? You are all brave to tackle that big of a job. What is the finish coat on the cabinets? It looks like a gloss poly. Your parents are lucky to have you help with this project.
Luke says
The flooring is a porcelain tile, I am not sure what brand… We had it professionally installed. The finish coat on the cabinets is a high gloss poly.
Wendy in St. Louis says
What a wonderful job you all did! My favorite? Those cafe curtains! Really, really perfect!
Mary Elizabeth says
Luke, Joyce and Robert, and Grandma, what a lovely kitchen! It seems like a perfect restoration combined with updating in the areas you needed. The new stainless steel appliances seem very much at home with the vintage-look curtains, the laminate counter and the stainless sink. Thank you for sharing it with us. Love the bathrooms, too.
Contrary to your concern about the “before” photos, I think they did show in what bad shape the kitchen was–I could see the water damage and the way the cabinets were warped and couldn’t be closed properly. The rebuilt cabinets are “glowy,” with just the right mid-century finish. I’m curious what stains and varnishes you used.
My favorite touches, besides the curtains, are the vintage canister sets and the red stepstool/chair–lovely.
Don’t you all think that the kitchen is a generous sized one for the 1950s? There seem to be a lot of cabinets. I love that the peninsula cabinets open on both sides. Not all do. It’s a great use of the deep space and makes it convenient to store items that will be used in the dining area.
Just remember, Luke, in my experience the family that renovates together–well, keeps renovating. It’s like an itch that needs to be scratched. Next time, maybe it will be your own house!
Luke says
The kitchen cabinet space seems to be slightly less than the old house next door mostly because the soffit takes up so much volume. However, we have floor to ceiling cabinets in the laundry room which makes up for that. We do love the layout of the kitchen, it is very similar to the old kitchen next door.