

 Want a checklist of key elements to create or recreate a 1940s style kitchen? Reader Carolyn recently wrote to us asking for ideas to help repair and decorate her 1947 kitchen. Long story short: I think that Carolyn has the need for a significant remodel on her hands. If she goes this route, to help I put together a list of key items for her to consider to get an historically appropriate look.
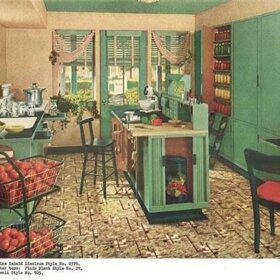
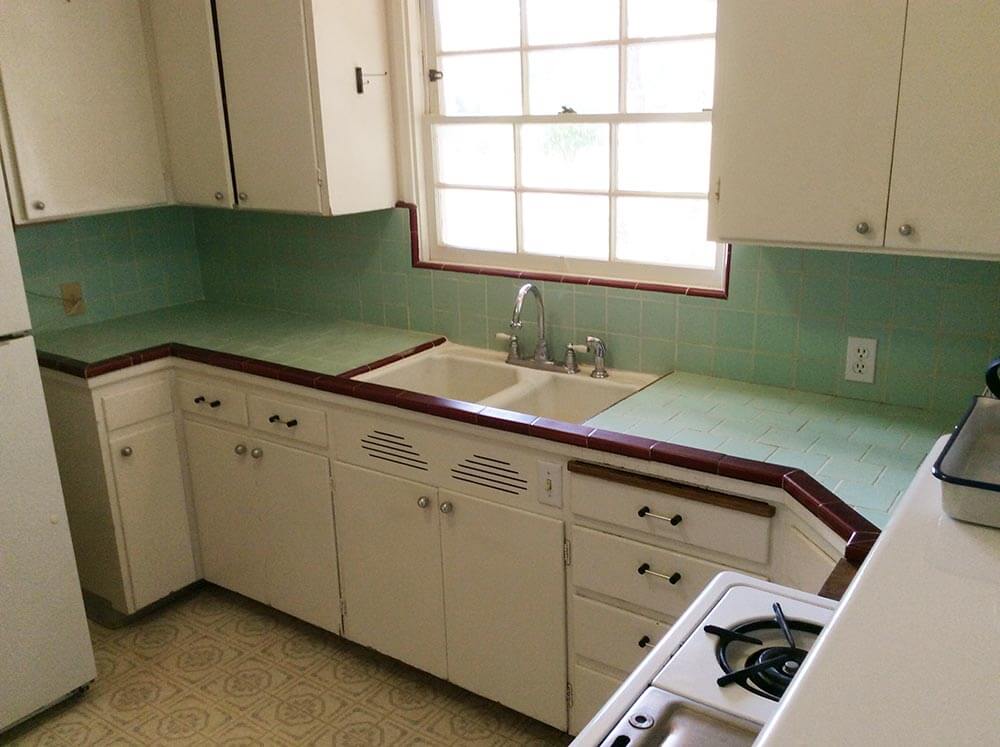 Carolyn’s kitchen looks pretty adorable in these photos, but she told us that 60-year-old tile countertop has “twisted, cracked and the wood underneath has bent to expose the grout more than an inch on 2 sides of the sink. We had our grout cleaned and re-grouted just last year!”
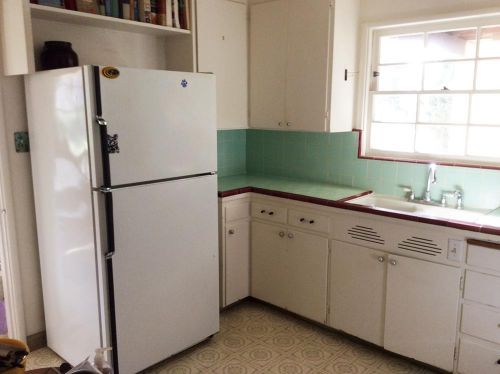 In addition, the sink needs to be reporcelained… the lazy susan is broken and impractical… they need a new refrigerator… the cabinets need a new paint job… and the floor needs to be replaced.
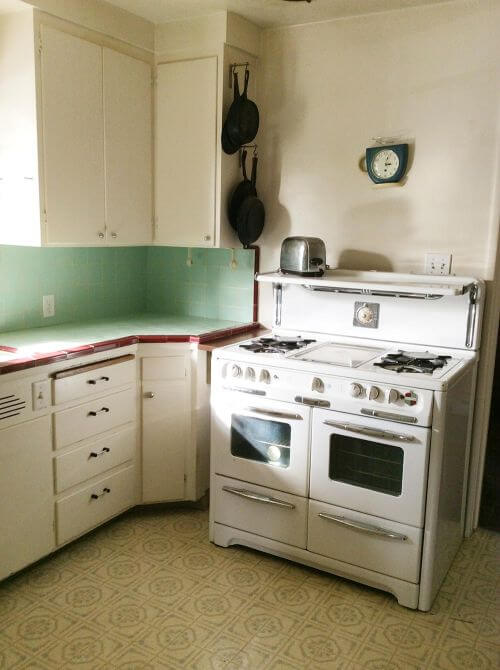
But two pieces of good news: Carolyn loves her 1940’s Wedgewood stove. “It is large for our kitchen but, it is a work horse, and I love how it looks”…
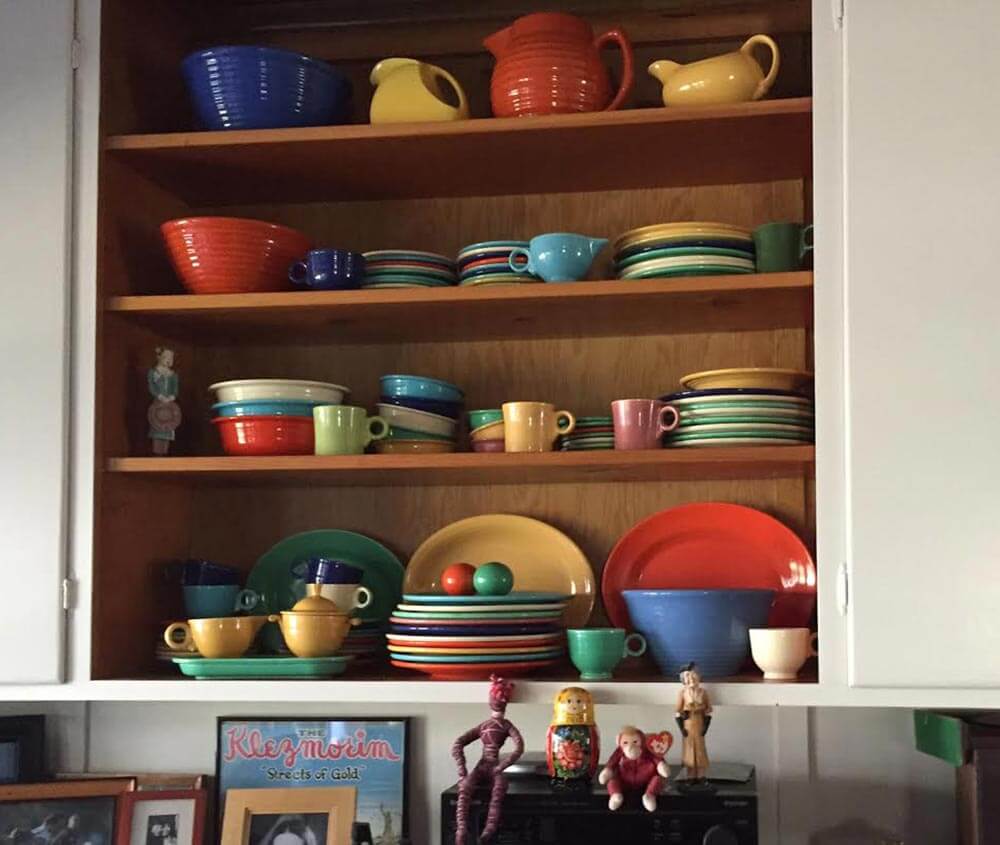 …And she has plenty of color inspriration, in her big collection of vintage Fiestaware.
Carolyn, once you pull out that tile countertop and backsplash, I think you are going to be left with an enormous mess. In addition, your cabinets are not sized correctly to match up with your stove and a modern countertop-depth refrigerator. Since you are planning on replacing so many elements already, I’d say: Save your dough re mi and plan for a gut-remodel or near gut-remodel — and recreate a 1940s style kitchen set to endure for another 70 years. Just do what you gotta do.
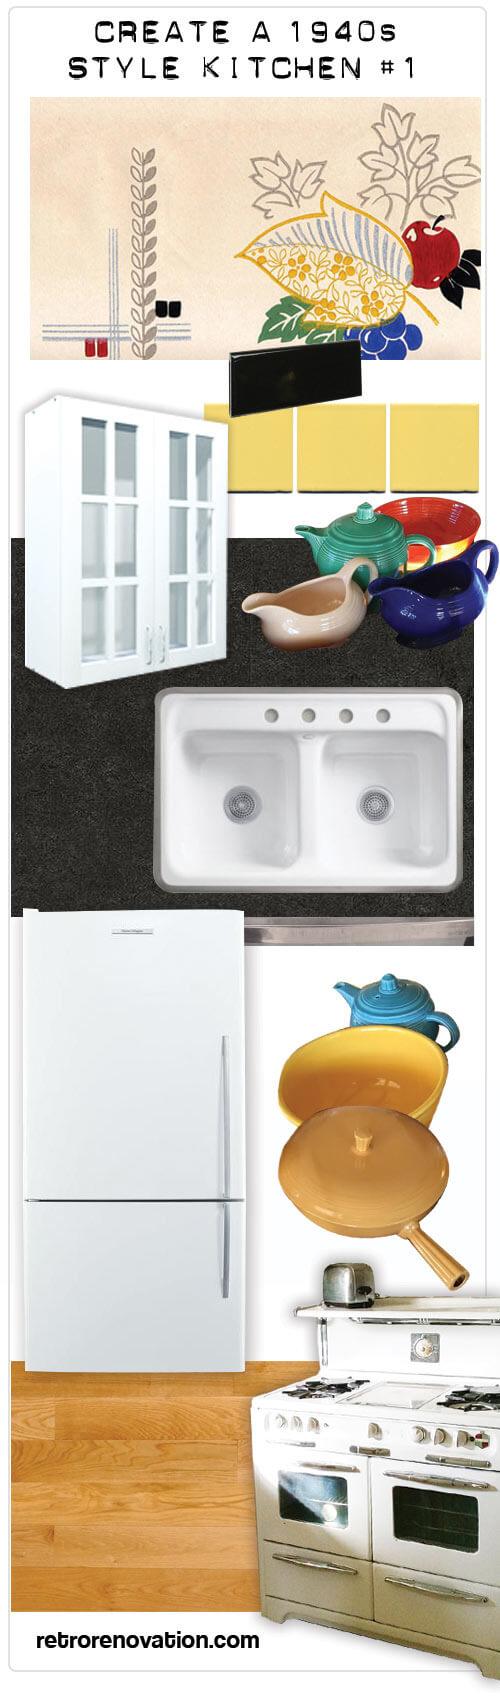
Pam’s Design Formula #1 to Create a 1940s Kitchen
I think that the basics of a 1930s and 1940s kitchen are pretty easy to identify and pull together. I would even go so far as to say this is a “formula” — one that’s very adaptable, though, in particular as it comes to selecting colors, patterns and of course, decor. In addition, there are other alternatives (above and beyond those shown today) for sinks, flooring, countertops and appliances — I’ll do another design board with Formula #2 and maybe even Formica #3 soon…
But for this one, the impetus was Carolyn’s wants and needs. In our email exchanges, Carolyn indicated an interest in a yellow-and-black tile color scheme. I also think that yellow tile works well with her yellow Fiestaware. So that’s where I started with this Design Formula:
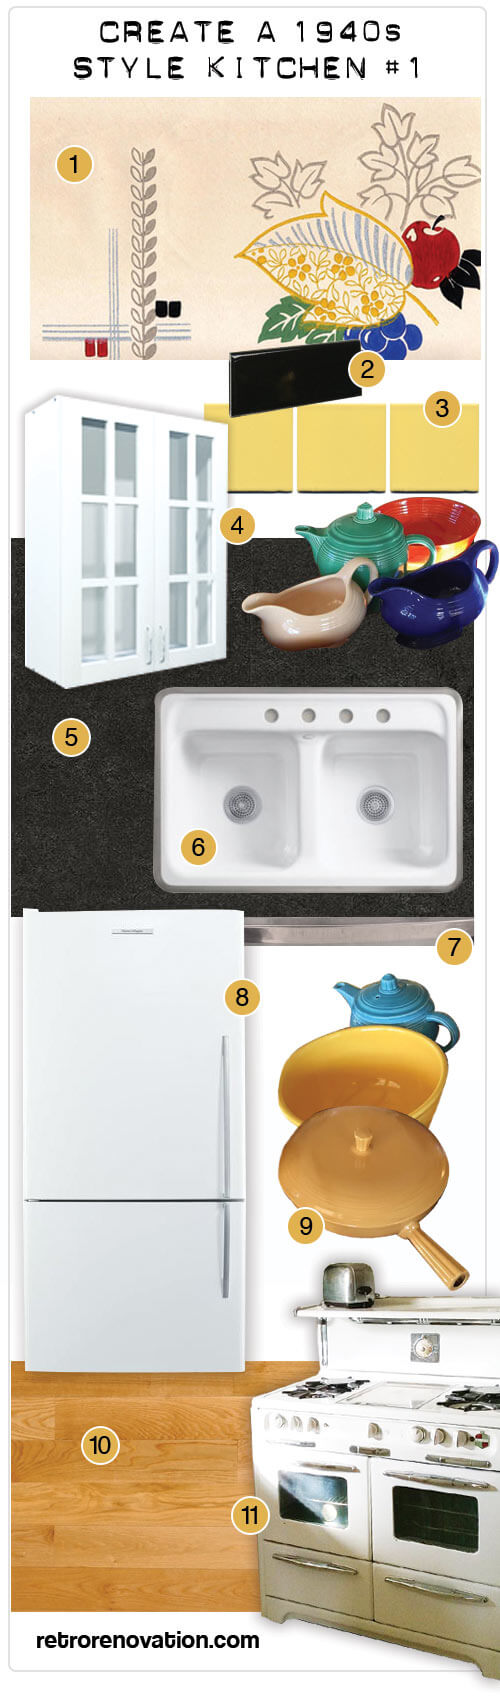
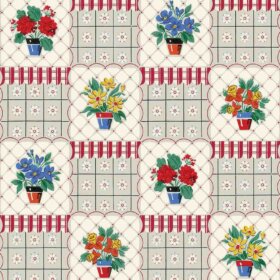
- Wallpaper — This vintage wallpaper from Second Hand Rose looks like it would coordinate nicely with the yellow-and-black tile scheme… and, it picks up the other colors in the Fiestaware — but without competing or adding too much extra pattern to the small space.
- Tile edging — You can get black bullnose tile right from Home Depot or other big box stores.
- Backsplash and wall tile — Yellow 4″x4″ tile from B & W Tile. You can see all the color for B&W Tile at Clay Squared. You can buy from either place. Or, choose this lovely soft yellow tile from Classic Tile, I think it’s even less expensive. Note: It’s gonna cost more — but in a 1940s kitchen, in addition to tiling the backsplash, I would likely lean toward tiling the entire room. That is, tile about halfway up the walls, with bullnose trim.
- Cabinetry — White cabinetry is appropriate. This example is from Barker Doors, which can custom-size you anything. Yes, Carolyn, you can have glass in the wall cabinets — just know: You must keep what’s behind it super tidy — even “staged” — or else it will just look a mess. Note also: Soffits, please, above all those cabinets and the refrigerator, too, for a built-in (and easier to keep clean) look. I even believe: Soffits make a kitchen look bigger.
- Countertop — Linoleum. That’s what they used in the 1940s, along with tile and wood countertops. Shown here: Marmoleum linoleum. I believe that black linoleum countertops were the #1 most common color in the 1940s. They would look great in the color scheme of this kitchen, I think.
- Kitchen sink — Kohler Delafield with hudee ring. The kitchen sink o’ choice here on Retro Renovation. I did not specify a kitchen faucet — but peoples, enough with those goosenecks that sit super high — they are too splashy once the water hits the base of the sink. Me no get it. Here’s the faucet I have in my kitchen (affiliate link), and I love it, the spout is 10″ long so it sticks well into the center of my sink, and it is not high like a gooseneck, so I get minimal splashiness outside the sink:
- Countertop edging — For linoleum, I would likely go with stainless steel edging from New York Metals because this edging has a big lip to grab onto the linoleum.
- Refrigerator — Okay, it’s not retro looking — but I like this size and color of the this Fisher Paykel refrigerator I discovered when researching this story. It’s counter-depth, not too tall, not too wide. The think about small kitchens like Carolyn’s is that if you have too big a fridge, it just takes over like a big white elephant in the room. Yes: A vintage fridge from the 1940s or early 50s also would be great, if you have the patience and tenacity for it.
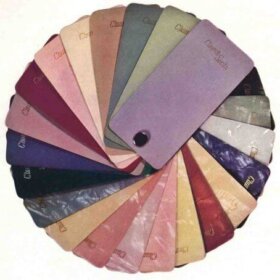
- Decor — When designing a kitchen, it’s always great to start with an inspiration item — a curtain fabric, a rug, whatever — to drive a color palette. In this case, Carolyn’s Fiestaware does the trick quite nicely. That said, I would pick only one color — in this case, the yellow, as described — to ground the whole look.
- Flooring — Carolyn said that the rest of her house has wood floors. So yes, continue them into the kitchen.
- Stove — Yum. This vintage Wedgewood stove = The star of your show. Lucky Carolyn! Be sure to consult with properly licensed professionals about placing and installing it in your kitchen in accordance with local building and plumbing codes.
Other 1940s style kitchens with useful ideas for Retro Renovators:
- Lauryn and Dennis’ sunny 1940s kitchen makeover
- Dave and Frances’ 1938 kitchen
- See how the tile is done on the wall in Kristen’s original 1940s kitchen.
- Maile displays her dishware beautifully in glass-front wall cabinets in her 1940s style kitchen.
- Vintage metal cabinets are appropriate too — and lookie the best cafe curtains ever in David’s kitchen.
We hope this is helpful to you, Carolyn, and to other readers working to design a 1940s style kitchen. A few more Formulas yet to come!
See all of our 1940s kitchen design boards here


Richard says
What a fun project! Here are my humbly opinionated curmudgeonly recommendations:
*I would keep the cabinets – they look like 1940s as they are, except for the tile counter tops. Tile counter tops seem more 1950s than 40s to me. Linoleum would be more authentic, with formica for late 1940s. Fix what needs to be fixed on the cabinets and keep the look. You might change the doors on the uppers to glass front, (a 1930s look) but as mentioned, you would have to be very disciplined with keeping them neat.
*The stove, while not 1940s, has a great look. I’d keep it unless you found a much older one you like.
*The floors. I have to disagree on the wooden floors. Almost everyone had linoleum floors in the 1940s. There are great patterns, or non patterns to choose from. Putting wood floors in a 1940s kitchen is way too trendy and it will look dated as soon as it is installed.
*The fridge. An early 1950s GE fridge might work for you, if you want to go purist. They are very reliable and can be found with a freezer section. I have a GE from 1935 and it is still working perfectly. But it does have to be defrosted and has very little freezer capacity.
*Other stuff. Revere Ware pots and pans were high end and very popular in the 1940s. If you want more yellow, look at yellow Descoware. Most people in the 1940s used cast iron for frying. Look at Ekco Flint kitchen utensils with wooden handles. Very 1940s and high quality. There are lots of high quality 1940s kitchen tools out there at reasonable prices. And take a look at Julia Child’s kitchen photos. Great ideas there.
*A nice touch would be a 1930s/40s art deco Telechron wall clock. GE made them, too, among others. But you have to figure out where to plug it in so it looks good. Most people in the 1940s just ran the cord down the wall to a wall plug – ha, ha! Primitive by our modern standards.
I am slowly doing my own kitchen as a 1939-1941 non purist kitchen, so I have a bit of feel for yours.
Good luch with your project!
pam kueber says
Note, Formica (and other laminates) not introduced to the masses for countertops until after the war. The technology was not invented until 1938, then, the war intervened and prevented mass market intro.
In the 40s, countertops would have been linoleum, vinyl, wood or tile. Plenty of 1940s tile countertops out there — this would have been a very widely available materials.
pam kueber says
Hey Carolyn, one more note — and I am also adding this as an update within the story — I am glad to hear you are working with an architect and a contractor; they can advise you as to local building codes and whether the placement of your stove (in particular) conforms…. Always important to consult with properly licensed professionals on these issues.
Barbara says
Love this kitchen! Wouldn’t work for me in my 1960 split level, so I get to live vicariously through you. I would LOVE to see a similar story done for each decade, 40’s through 70′ s. Just think of the fun Pam could have with a flower power kitchen!
Pat says
I sorta disagree with “once you pull out that tile countertop and backsplash, I think you are going to be left with an enormous mess.”
We had to pull the entire countertop and backsplash in our 1926 kitchen and it wasn’t a big mess at all (although we had formica, not tile). We also saved our original cupboards. I say try to save your cupboards at all cost. Old stock wood should not be destroyed! If you can remove them and save them for another use, and have a craftsman build cupboards to replace them, then go for it. I just hate to see original cupboards destroyed, I think the kitchen looks fine except for the condition of the countertops, and the floor of course. You can repaint your cupboards with high quality paint and they will look great. By the way, I’m so jealous of your stove, it’s been on my want list for many years!
pam kueber says
I think that there is likely going to be big mess difference between pulling out mud-set tile and pulling out laminate…. You will only know, of course, once you do it. And while I also like the original cabinets, they don’t meet up with the stove, in particular, in a practical way. As Carolyn has said, the lazy susan is essentially useless — lost space. And look at that gap. A small kitchen — more so than a large kitchen — needs every inch to be optimized.
Chris Suda says
We have a similar 1940’s kitchen. We chose to repair and sneak in updates. The cabinets were painted and we replaced the chrome hardware (knobs/hinges). The bottom cabinets were mostly replaced with drawers. Kept the cracked green ice counters. Our stove/oven is similar to yours. (1953 O’Keefe and Merrit). He made a stand for it with wheels and the ability to adjust for the gentle slope in the floor. We got a 28″ counter depth fridge from Summit (freezer on the bottom) that works great for us. Cabinets were built over the top. He also found a stainless steel hood that was damaged, so he built a cabinet around it in the same style as the rest. On our blank wall, he put up stainless shelves to hold the pots and bits of copper items. It was a lot of work for him (years) but it came out perfect and we enjoy it very much.
tammyCA says
Cute kitchen..and, so love your stove. That yellow/black tile combo looks pretty sharp if you go that route. When we eventually redo our kitchen I’ll be sticking with ceramic tile, I love the ’40s vibe of it & it really takes a beating from me..I always put hot pots & cookie pans on it (not to mention my hot glue gun).
Marguerite says
Great ideas, Pam. I had a 1940s colonial once with the tile all around the kitchen walls half way up. Yellow with burgundy bullnose. It was very striking. I found wallpaper in a Sturbridge Village print that had yellow and burgundy designs in it. The matching fabric I used for curtains.
As to the Fisher Paykel fridge….I have that same model now in my 1958 knotty pine kitchen. It does have a retro look. Great size and depth for older cabinets.
J D Log says
Forgot to mention a common feature was a small round bakelite/plastic vents were placed in each door for ventilation you can still get these from ebay as lizard and snake collectors use these for ventilation on their cages
J D Log says
Most kitchens over here in Australia for the 1940’s used red, yellow, green or white in various colour combinations. Marbled formica/laminex or lino was popular for the period for counter tops.
Bakelite handles for cabinets were more commonly used then the metal ones and can be painted to blend into the colour scheme. Although the downside is it might take a while to build a matching set with working mechanisms but they are easy to restore with patience. The wooden framework was usually painted white and the doors a feature colour, the kick board at the bottom was painted black to hide shoe marks.
If you know a good carpenter it should be restored depending on amount of water damage and rot.
If you have to gut out would recommend some glass cabinet doors to show off your best kitchen wares.
Amy Dietz says
I agree with Pam that soffits make a kitchen look ‘fitted’ and I shudder to see recently built homes with an empty, dusty, space above the upper cabinets.
However, my 1940’s home had original cabinets that reached the ceiling. This, to me, was much better than wasted space in a soffit, and in that kitchen, every inch counted.
My current home (1965) had 2″ x 2″ mudset tile for the counter top. It was pretty much bulletproof. It was also a cleaning nightmare. I love mid-century design as much as you all do, but if it’s not a good idea, let’s not try to bring it back just because it’s ‘retro correct.’
Some friends of mine had a bad experience with prefinished engineered wood floors in a kitchen. Vinyl tile might be a more economical choice if ‘real’ wood proves too pricy.