

![]() Designing a well-functioning furniture layout for a room is one of the most challenging — and arguably the most important — aspects of interior design. I’m changing the furniture in my living room as part of its transformation into my Mahalo Lounge. So before I got too deep into the fun stuff (decorating), I am working to finalize the furniture layout. I am not a professional designer, and don’t know how to use such software (and honestly, I have no desire to learn yet another computer program). Instead, I design my furniture layouts (ala my kitchen cabinet layout) using Excel and Powerpoint and … scissors. Hey, it works well enough for me!
Designing a well-functioning furniture layout for a room is one of the most challenging — and arguably the most important — aspects of interior design. I’m changing the furniture in my living room as part of its transformation into my Mahalo Lounge. So before I got too deep into the fun stuff (decorating), I am working to finalize the furniture layout. I am not a professional designer, and don’t know how to use such software (and honestly, I have no desire to learn yet another computer program). Instead, I design my furniture layouts (ala my kitchen cabinet layout) using Excel and Powerpoint and … scissors. Hey, it works well enough for me!
Photo viewing tip: If you are on a desktop, once page is fully loaded, click on any photo and it should double in size up to 1,000 pixels for a better look at details.
Use Excel and Powerpoint to create room layouts
My process to do a furniture layout like this is so basic, it really doesn’t need a step-by-step. But, okay, here are the principles:
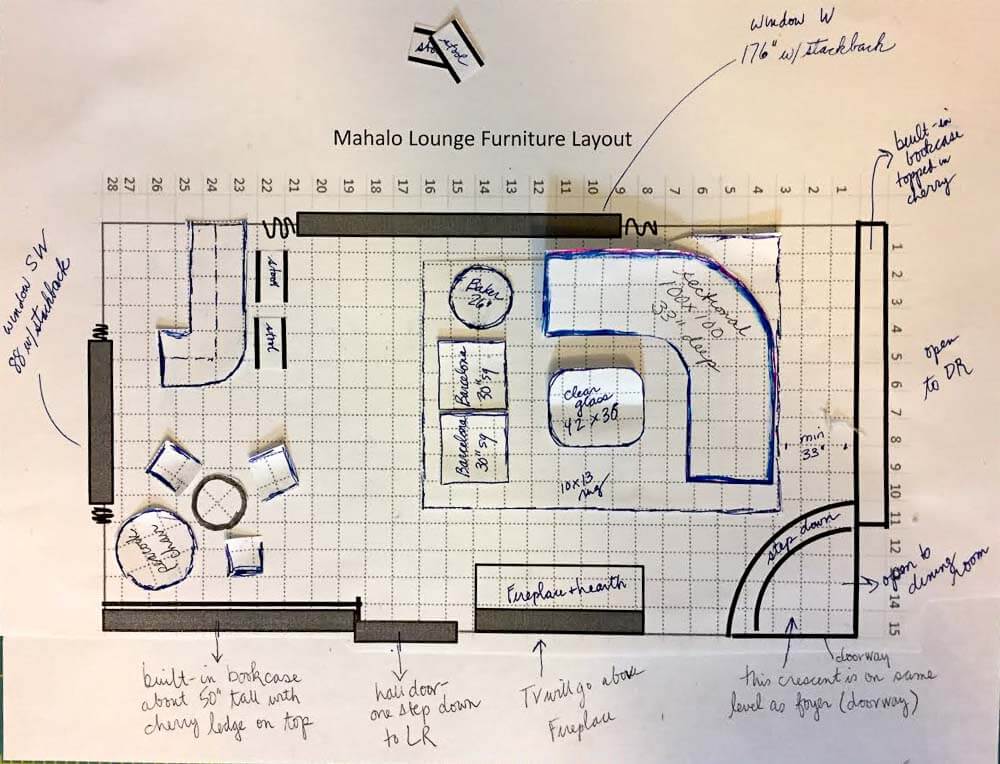
- Measure the four walls of your room, and then use these dimensions to outline a grid on Excel; on mine, one foot = one box. Important: Adjust the pixels within your grid so the height and width are the same — that is, square. Add interior grid lines that will show when printing and lighten the grid lines up to your liking. Add the bold exterior outline to your overall grid. Take a screen shot of your grid and transfer it to Powerpoint; enlarge or reduce it as needed to fit the page. Print out your first copy/worksheet.
- With your worksheet in hand, measure all the fixed elements of your room — draw the windows, doors, projections, etc., by hand right onto your worksheet.
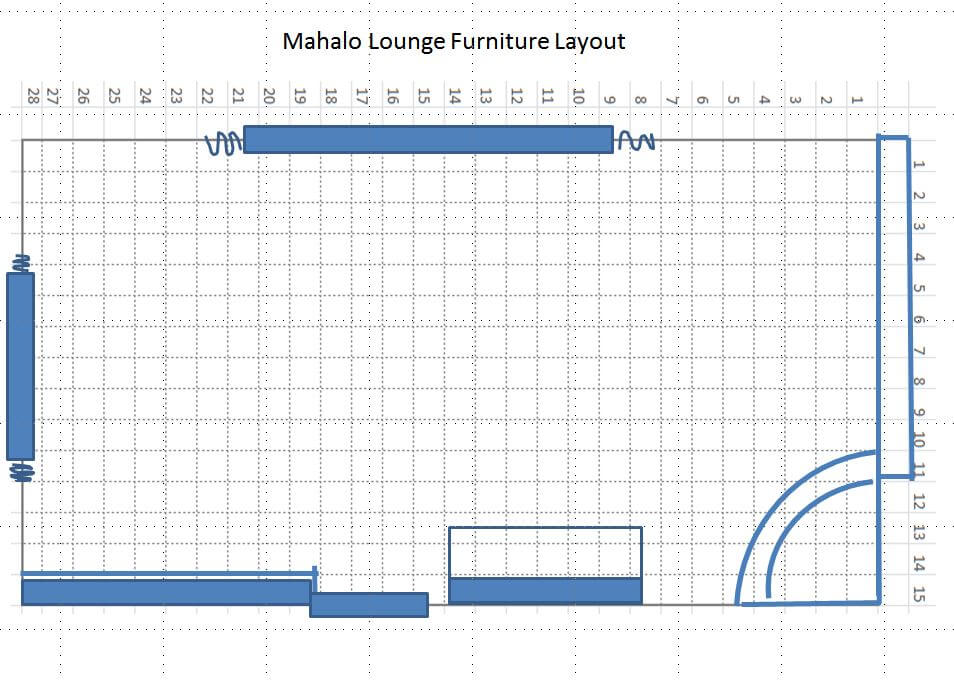
- Return to the computer. Now, using the tools (e.g. boxes and lines, etc.) in Powerpoint, add your windows, doors, projections, etc. At this point, you may need to re-measure — I did — when numbers/boxes don’t add up. Keep working on the Powerpoint page until you believe it has all the fixed elements in place, measured accurately. Print out your final copy and a few extras to cut furniture from. Note: I hand-wrote notes on my copy after printing, but you could also add these in Powerpoint.
- Now, it’s time to do the furniture: Transfer the measurements of your furniture onto the same grid. Draw heavy lines around the edge of each piece (I used regular pens or markers) and then cut them out.
- Start playing: Move your furniture around until you get it right. Pay attention to the space available for moving through the room safely and comfortably. Maybe you will “create” several furniture pieces not knowing what size you will ultimately choose. Lay out your furniture on a separate piece of grid paper to play with rug sizes, then cut the rugs from that paper.
- If you like, use bits of museum or poster putty to hold furniture down once you get a design you like. You might also strengthen the pieces by gluing them to cardstock / old cereal boxes etc.
- Alternatively: You could even use Powerpoint to make little pieces of furniture — “cut” the furniture from your grid” and use PPT tools to outline each piece, etc. — and move them around on-screen. Still, for me, there’s nothing quite like moving little pieces of furniture by hand — dollhouse!
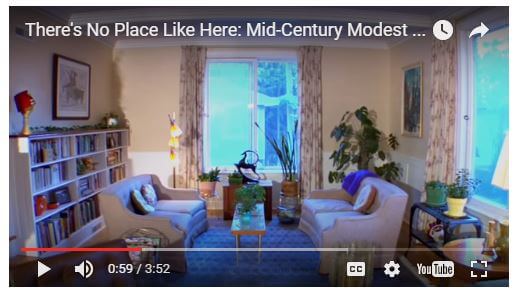
All the “Before” photos:
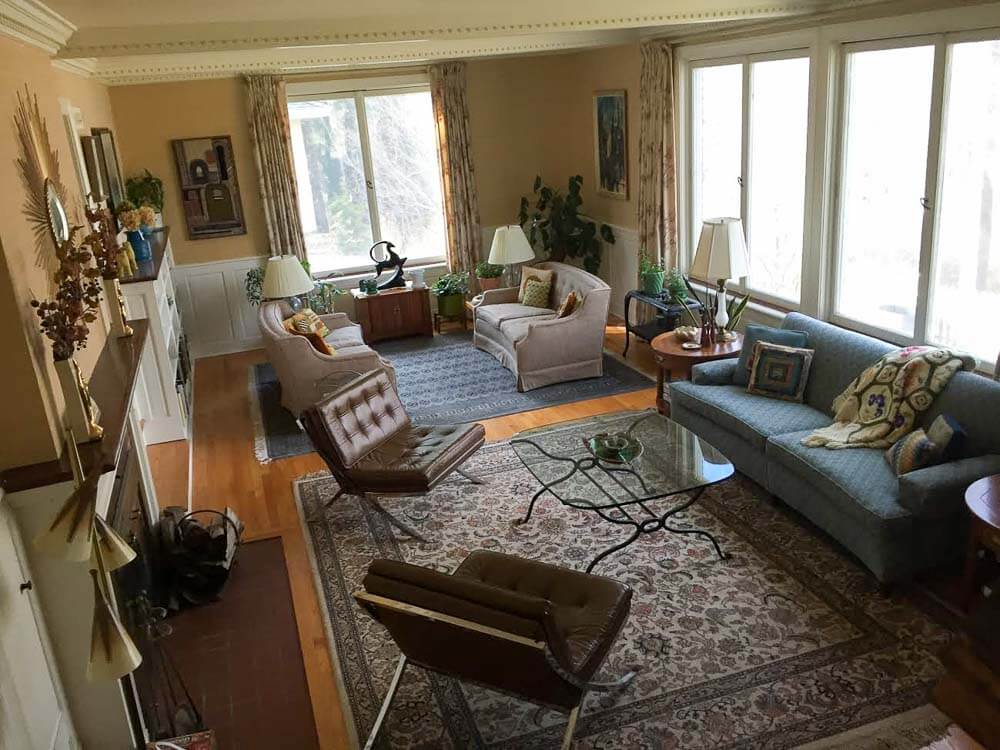

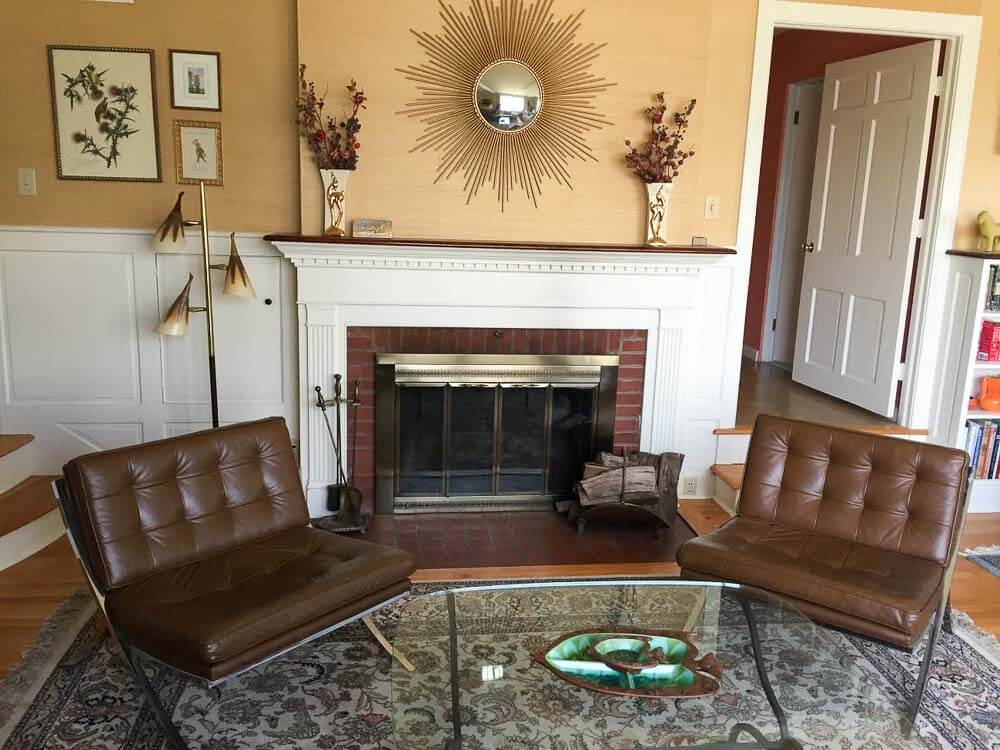
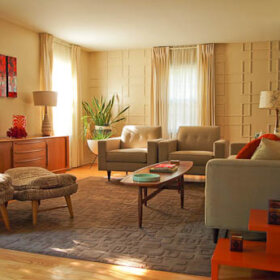
Above: The space “before”
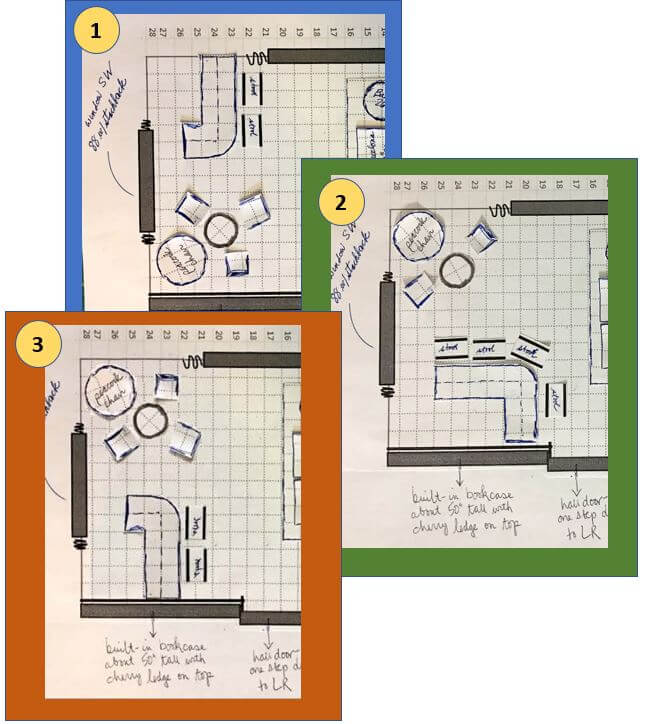
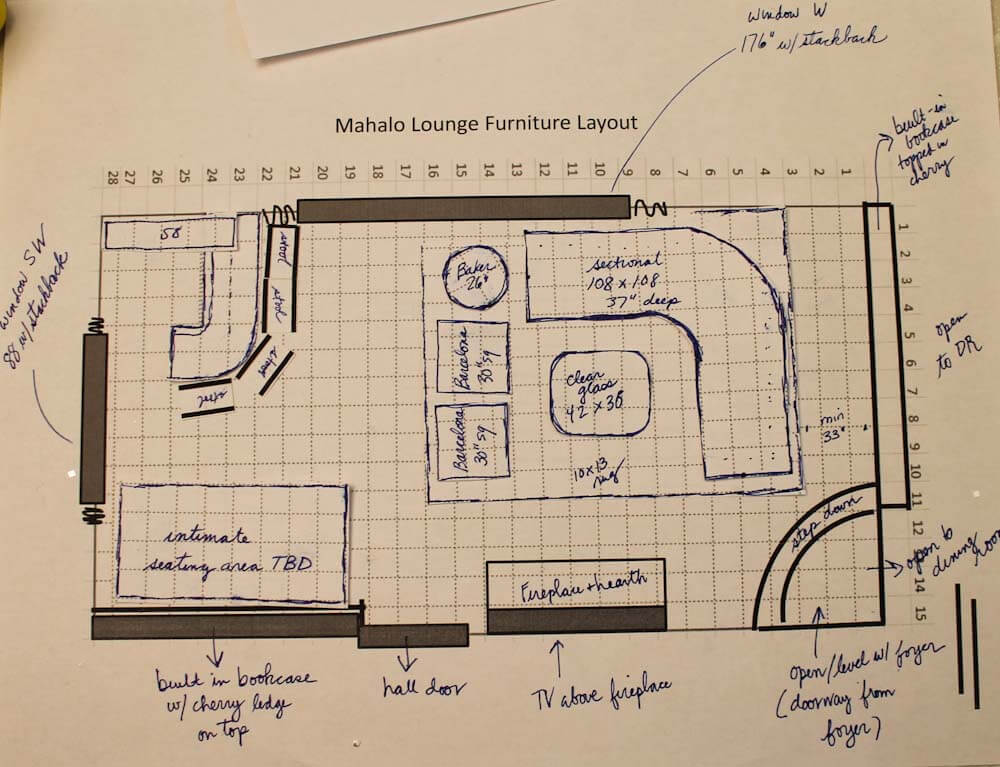
My Mahalo Lounge furniture layout:
My goal with this room is to make it a convivial space for relaxing and especially, for entertaining. I hope to have at least one good cocktail party every month — and to be remembered as that crazy old lady with the amazing Polynesian pop living room/dining room. So, I need places for people to sit and talk and enjoy their drinks and each other.
 As you can see, my first step is to create a main seating group facing the fireplace. Alas, there’s a fair amount of asymmetry to the original architecture. I am probably not going to be able to center this seating group on the fireplace, because if I did, it would create too much of an empty galley between the sectional and the bookcases. I’ll work toward “balanced asymmetry” using decorating tricks.
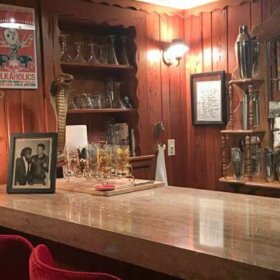
 Above: Per Jay’s suggestion, I added thsi photo: A “before” version of the bar area I’m about to talk about. This image was taken from the etsy video on my Pam’s Kitchen page.
Bar Area Version #1:
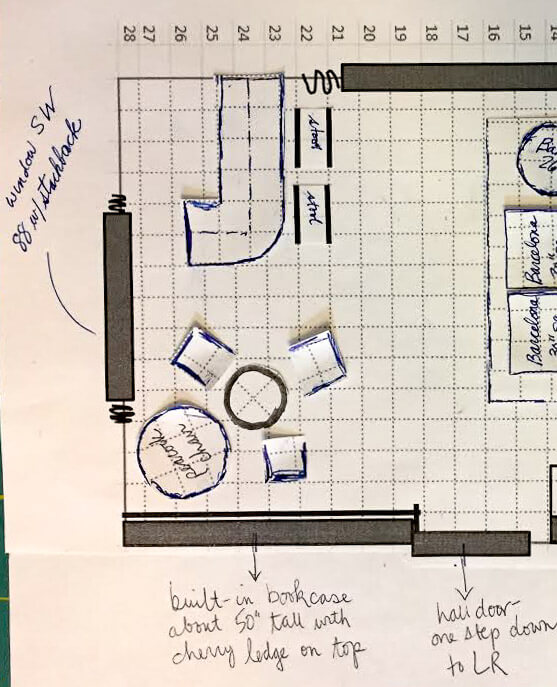
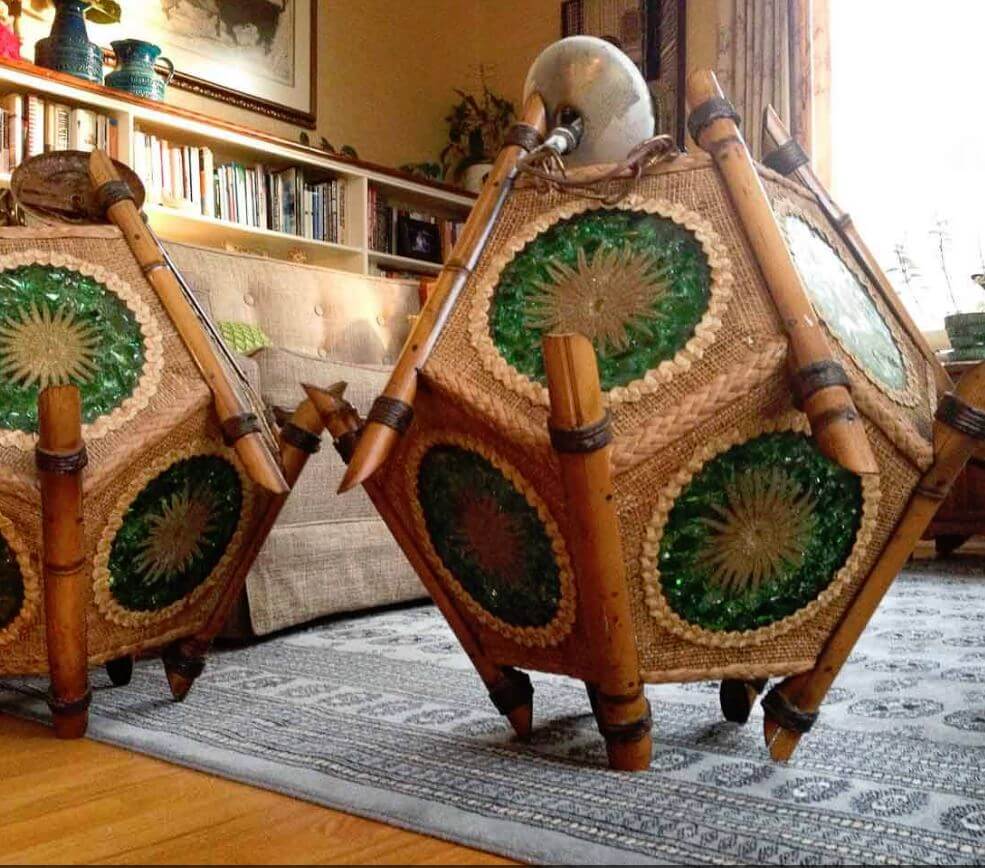 On the other side of the room, I’m still playing with ideas. As shown above, I like the idea of having a smallish bar that is rounded… which you see right away when you enter the room…. and which gives the bartender a bird’s eye view of everyone in the room, as well. The bar is going to be a real focal point — I gotta get one of my Orchids of Hawaii lights over it for sure (ugh, the lighting plan, talk about nerve-wracking!)! In this version, my peacock chair, a 25″ rattan table that I picked up at a nearby used furniture store, and three vintage wood captains chairs (originally used at a kitchen table) from my husband’s family would go over by the bookcase.
Advantages of this option: My two lamps have natural places to go: One dangling above bar… the other, dangling lower above center of table in front of the peacock chair. Note, I have very high celings i this room. And, as I mentioned, bar tender has great view of everyone coming into the room. Finally, I don’t really know how much room for stuff I will need inside or adjacent to the bar (it’s not a wet bar). So maybe it’s best to keep that big built-in bookcase open for decor, etc.
Bar Area Version #2:
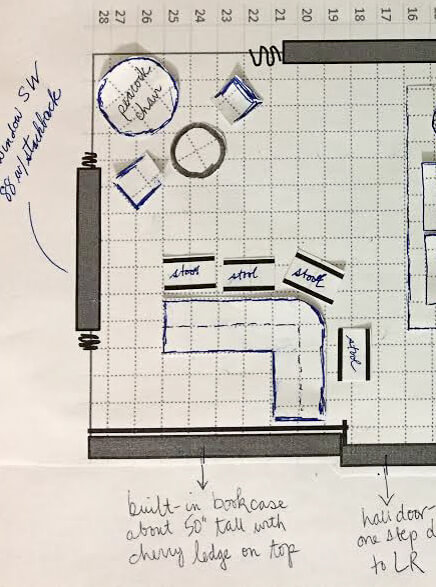 Above: In the second version of this design, the bar would be set against the bookcase. Advantages of this version: More space to store glasses, booze, display items (including on the wall)… Disadvantage: When you first enter the space you’d see the side of the bar; I kinda don’t like this idea.
Bar Area Version #3:
 And (shown above) over on our Facebook page, Kelly through some miracle of Adobe Illustrator or some such (me no know) came up with this third version, saying:
Layout idea for Mahalo Lounge, combines the best of both of your initial plans. The bar is next to the bookshelf where it provides lots of display space for fabulous glassware , but you still see the front of the bar coming into the room.
Thanks, Kelly!
Meanwhile, in either case, I’m still noodling how to make either or both of these areas cozy and clearly differentiated from the main seating area. Indeed, nooks and crannies and surprise spaces are a hallmark of well-designed tiki bars. Maybe lower the ceiling with fish netting in on of the two areas?
Help!!!
I welcome your ideas, dear readers, on my furniture layout dilemma:
#1. bar in the back corner by the big window…
#2, bar by the bookcase…
or Kelly’s idea, version #3?
Photo viewing tip: On a desktop, click on any image and it should double in size on screen so you can see the detail better. Hit ESC to go back to story.
- Read all the stories about my Mahalo Lounge project here.


Jenny says
I love that you do this for layouts! I draw it up on my iPad in ProCreate so I can get an actual feel for what it’s going to look like. Great minds think alike. I’m going to combine your method with mine for designing out basement lounge and playroom.
Richard Douglass says
Mahalo Pam!
There are already so many good suggestions on your tiki room that I will pass on my 14 cents worth. But I did want to comment on the room planning with scissor cut pieces.
My father worked for big companies, so we moved every few years during the 50s and 60s. We were a corporate version of a military family. Early on my mother made 1/4 inch to the foot paper cutouts of all our furniture pieces. When we were about to move and the new house was acquired, my mother would draw all the rooms out on 1/4 inch grid paper, which was available in pads.
By the time the movers arrived at the new house the room planning was complete, and she knew where everything would go. She had it down to a science. The movers seldom had to position anything more than once.
Doing it on paper may be even faster than on the computer, and I think more fun.
Can’t wait to see your tiki room complete.
Richard
Patti says
I vote #1 so as you enter the room your guest’s attention will be drawn to the bar area or the fireplace. The bar across the room will also “draw” them into the room, out of the doorway and ready to socialize
Heart says
Agree
Tesa says
I agree with Patti, #1