• Bathroom remodeling — a checklist of 84 costs to consider

    bathroom design ideas remodeling checklistBathrooms are the smallest rooms in the house, but they pack a lot of utility into every square inch, so they can be complicated — and expensive to remodel. I thought it would be fun haha to compile a list of every piece of a bathroom remodel that you need to plan, budget and spend. I am going to take a first run at the list based on my experience with several bathroom renovations — but welcome your additions, as I may not have been hit with every possible expense. Here goes:

    Permits and testing

    • Building permit
    • Electrical permit
    • Plumbing permit
    • Lead testing, as required
    • Asbestos testing, as required

    Demolition

    • Contractor bags
    • Dumpster, if required
    • Disposal fees
    Abatement
    • Surcharges for lead abatement, if required
    • Asbestos abatement, if required
    Unexpected expenses
    • Wood rot
    • Mold
    • Old plumbing
    • Bad wiring
    • Bug infestations (we just found a nest of carpenter ants while the walls were open on my office renovation — $350 exterminator, cha ching)
    • Anything that’s not to code that you weren’t anticipating.
    Framing and prep
    • Wood for framing
    • Insulation
    • Vapor barriers
    • Energy efficiency sealants
    • Window(s), if required
    • Door, if required
    • Drywall
    • Greenboard/concreteboard for under tile
    Plumbing work
    • I always use professionals who give me a bid, who bring the stuff, and give me a bill when it’s all done. Their costs usually include cost of permit and inspections. If you move your plumbing, costs are higher than if you keep your plumbing where it is. Also, if you have an old house, it’s probably wise to bring in a licensed plumbing contractor in any case — now that you have the walls open, have them take a look at everything and if it’s necessary to repair and replace so that the house is good for another… 50 years … well, suck it up and do it.
    Electrical work
    • I always use professionals who give me a bid, who bring the stuff, and give me a bill when it’s all done. Their costs usually include cost of permit and inspections. If you move your electric, costs are higher than if you keep your electric where it is. Also, in old houses, you may need to do some rewiring or upgrading to the wiring anyway — see plumbing section above regarding doing a complete inspection and any necessary maintenance/repairs now that you have the walls open…. Actual electric thingies to consider include:
    • Lighting around sink
    • Lighting center of ceiling
    • Lighting above tub/shower
    • Exhaust fan (In a tiny bathroom I like combo lighting/exhaust fan above tub/shower).
    • Timer for exhaust fan on its own switch.
    • Electrical outlets and switches.
    Bathroom fixtures (finally, we get to the fun stuff)
    • Sink
    • Sink legs or vanity and vanity top
    • Different hardware for vanity, if required
    • Repaint vanity, if required
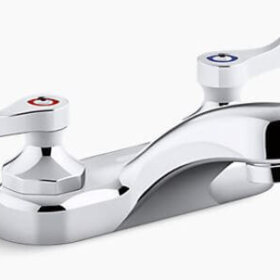
    • Faucet and associated parts
    • Toilet
    • Toilet innards
    • Toilet seat
    • Tub or shower pan
    • Tub/shower faucet set
    • Towel bar  in tub/shower, if required
    • Shower curtain rod, or shower door
    • I always like to add a diverter to a handheld shower head
    • Handheld shower head
    • Towel bar for bath towels
    • Towel bar, ring or hook for wash towels
    • Towel bar or hook inside tub/shower for washcloth
    • Robe hook for back of bathroom door and maybe also by tub/shower
    • Soap dish in tub/shower
    • Toilet paper holder
    • Medicine cabinet

    Tile and finishing

    • Floor tile or other flooring material
    • Grout for floor tile, or adhesive for a resilient floor.
    • Wall tile
    • Grout for wall tile
    • Shower pan tile (if less slippery surface is desired)
    • Grout for shower pan tile
    • Mortar to apply tile
    • Sealer for floor tile. Some ambition people also seal their wall tile
    • Liner strip, if desired
    • Bullnose in same or contrasting color
    • Tile-in soap dish and/or toothbrush holder for above sink, if required
    • Different floor tile for shower pan, if required
    • Recessed shelving forms, such as Tile Redi (there are other brands, too) and any unique tile pieces required to edge them
    • Marble threshold for shower pan, if required
    • Marble or other type threshold for bathroom door, as required
    • Wood trim for windows and doors
    • Wood trim for floor if wall is not going to be tiled
    • Primer for drywall
    • Primer for wood trim (if trim is to be painted)
    • Conditioner, stain, finish for wood trim (if trim is to be stained)
    • New cover for heat and air conditioning vent?
    Decor
    • Paint for walls and trim
    • Wallpaper
    • Wall size, if wallpaper is used
    • Window treatments
    • Shower curtain or doors
    • Shower curtain rings
    • Coordinating towels and rugs
    • Soap dish for vanity
    • Shelving and artwork for walls, as required
    • Wastebasket
    • Plunger – After all this time, money and grief, you’ll want a clean start.

    Hey, if thi$ checkli$t doe$n’t make you want to Love the Bathroom You’re In, I don’t know what will.

    Want to noodle bathrooms more? Check out my three videos about my blue bathroom renovation:

    What potential or for-sure expenses did I miss, dear readers?

    Or, what bathroom remodeling expenses caught you by surprise? Do you have a nightmare that you need to process and forewarn? How about ideas that saved you lots of money? Bathrooms as Money Pits: That’s today’s topic.


  • Get our retrolicious free newsletter.

    Newsletter-sign-up-2NMAS

    Comments

    1. James Owens says:

      Hi Pam
      Over the years I have developed a rule of thumb when it comes to home improvement jobs like this. Figure how much it’s going to cost and how long it will take and triple it. That way when it comes in at just double you feel better about it. Recently I’ve added to my rule, figure how many trips to the hardware store any given job will take and triple that. With an old house even simple jobs seem to expand.

      • Chris says:

        That’s my rule of thumb, too!!!!

        Same with how long the project will take — however long my husband estimates, I multiply by 3!

        It’s a magic number!

        • MIFroggies says:

          Always triple the cost. At least 7 bathrooms of experience attest to that.

          Can I post my brown bathtub picture Pam, as an example of obvious Bathroom remodel woe?

    2. JamieAbe says:

      This past year we converted one of our bathrooms into a laundry room and completely renovated the other one in our ’56 ranch. We ran into an interesting dilemma when we took out the old vanities. We found that when they originally poured the foundation, they poured the bathrooms about 2 inches lower than the rest of the house. Then they set the tub shower and vanities before pour the sub-floor to bring it up to the same level as the rest. So, we had to pour more concrete to level out the floor before we could tile. I tried researching the reason for doing this, but could find anything. The only thing I can guess would be for drainage encase there was ever a flooded bathroom. It amazes me the amount of skill and thought that they used to put into the building process of these homes.

      • pam kueber says:

        Woah, that’s a good one! Let me add to the list: If you are adding floor tile where there was previously resilient flooring, you may need to add structure to the floor in order to support the weight of the tile.

      • FortiesFan says:

        Before the advent of thin-set grout, tiles were laid in a mortar bed that was usually ~2″ thick. The slab under your bathrooms was probably recessed to allow the tile to sit flush with the flooring that was to be used in the rest of the house.

    3. Mary Tatum says:

      My approach is similar to James. Everything will cost twice as much and take twice as long. Triple is probably more like it.

      When we pulled up the carpet (yes, carpet) in our upstairs bathroom, we discovered the subfloor was basically powder. ewwww.

    4. As a professional designer I find that bathrooms are always the hardest to design as they have to do so much in so little space. If you realize you have made a mistake half-way through the job, or change your mind on anything it is always going to be expensive to rectify.

      Nobody should commence a bathroom renovation until they have drawn up to an accurate and large scale (I prefer 1:20) the floor plan and the four internal elevations.

      Is there enough room to hang towels, or do they drop down next to the toilet? Does the door swing open and hit the new toilet? Is there enough room to move to when you close the door behind you? Is there a power point near a mirror? Does the ceiling light mean that your face in the mirror is always in shadow?

      If you are no good with dimensions, drawing scales and maths, then you need to engage somebody who is! The extra cost at the start will save money if you have to rectify your mistakes half-way through the project.

    5. Meridith says:

      When we tore out some broken tile in our old bathroom, we discovered that the technique used to set tile in the 1950s was very different than what they show on TV today! They nailed wire mesh to the studs, then used a VERY thick bed of mortar to create the substrate onto which they laid the tile. It essentially makes your tile walls into walls of concrete that cannot be removed easily, but would be very handy in a tornado! Simply removing old tiles isn’t as easy as it is in newer homes because these suckers were built to last and last and last.

      Also, don’t forget to add in your therapists bills when you realize that the tub, tile, and vanity that the previous owners had refinished in boring white was originally PINK and there is nothing you can do to save it.

      • pam kueber says:

        Great add, Meridith — that old technique is called “mud set” and yes — it’s built to last, so it’s doubly or triply or even more work to demo…

        • Jill says:

          That’s why I decided to not even try. I have plaster walls with those thick 1950′s 4″ tiles…black wall tiles with seafoam green trim…original 1950′s. I’m putting in a new floor (octagon-and-dot with black dots), an American Standard Skyline washstand with Retrospect sink, and a new white old-fashioned medicine cabinet. I was able to patch my green tub with Porc-a-fix filler and paint, got it to shine again with Bon Ami followed by a Magic Eraser, and it’ll be quite nice when it’s done.

          Now my 1968 upstairs bath with the crappy sheetrock with the nail pops, the white-and-tan flecked tile and the olive green tub? That’s another story.

      • JamieAbe says:

        Ditto Meridith! When we moved in, our bathroom was pink and black. It would have been amazing but through the years had been sadly rehabbed in several ways. All the original fixtures had been painted black (could not have been professionally done), and there was overspray on everything. The all pink floor had vinyl tiles glued to it and to be honest the layout was weird. We tore out everything, lathe walls, wire mesh and all! But I was most looking forward to repainting that black tub. When the paint guy came and started stripping the black off, I was sick to see the most lovely shade of pink (with no chips what-so-ever). I couldn’t understand how/why someone would paint over that pink. Anyway, I couldn’t win the battle to have a pink bath again, but I have tried to stay as true to the house as I can.

    6. Charlotte says:

      What a handy list! I am probably going to have to redo my bathroom (ugh – not happy about it!) and this is a good overview. One thing I most likely will have to do that isn’t mentioned here is a new subfloor. My ceramic tile flooring is cracked and there’s a dip in the floor, so my guess is that the subfloor is not up to snuff. I’d imagine that’s a pretty common thing that needs to be redone in older bathrooms. water + wood = misery

    7. Gwen says:

      During a remodel of a 1925, pier and beam house bathroom:
      1. Found wood rot all around the toilet when we pulled up the old tile. The rot involved the floor joists so we replaced/added more of those. We replaced all of that and then came back with more concrete supports (mini-piers?) under the bathroom = $1000.
      2. While we had the exterior wall open we added bat insulation and Tyvek. I know you already have insulation on the list, but I assumed that was insulation in the interior walls. We did that too, and insulated extra for sound as the bathroom wall was shared with a bedroom = $300.
      3. My bathroom included a wonderful built-in vanity with triple mirrors. The silvering was a mess due to age and humidity. After getting a price for resilvering, I decided to replace them altogether (cheaper and better end-result). This involved removing the trim that was holding the mirrors in place, which involved about 7 layers of paint and therefore affected the rest of the mirror framing. After stripping, sanding and repainting, replacing the mirrors, purchasing, cutting, priming and painting the new trim strips, I added supports to the 6 vanity drawers, repainted the entire vanity and added new/old hardware (which I also had to refurbish). Total cost of the vanity was about $500 and I did most of the work.

      In December I purchased a 1955 home with one original bathroom in great condition. This is my first home built on a slab. Before purchasing the home, I paid for a plumber to scope the pipes. We found two breaks in the cast iron under the slab. My purchase negotiations included re-routing or repairing the plumbing which the seller did – at a cost of $6700. I got the house for my original offer. Last week I found termites – your next forum perhaps?

    8. Lynne says:

      In every remodel of any room, we always remember the old saying:

      Measure Twice, Cut Once

    9. Jana says:

      Just finished a bathroom remodel and the big surprise for us was the extra work when using black grout. Had no idea the tile guy would be here for days on end. Love the results, but it cost more than using white grout.

    10. Annie B. says:

      I am SO loving the bathroom I’m in – warts and all.

    11. Cynthia says:

      Good list, thanks. We are about to start minor renovations on two of our bathrooms. One was remodeled by previous owners maybe 10 years ago…it’s pretty icky…don’t think it can be restored to the original charm it probably had back in the day (at least, not with our budget) but we can at least put in a tile floor and tile tub surround, and a toilet that works. ;-) The other one is my kids’ bathroom, and it’s small and we just need to keep it simple, simple, simple. Again, it was remodeled by previous owners somewhere along the line…it’s not as bad as the other one, though. It already has basic white tile on the walls and around the tub, so that just needs some cleanup. The tub is a Kohler Villager which is fine, so that’s staying…just needs new fixtures. The vanity and toilet are horrible. We have a salvage vanity, sink, and medicine cabinet that we got off craigslist; vanity needs to be painted but otherwise they are wonderful, solid items. Tile on the floor and new paint on the walls will go a long way. Kids have already said we need to leave the fish-motif shower curtain. Fine…it’s their bathroom, they get some say. ;-)

      Thanks again for the list! Have a great day!

    12. Linda says:

      Pam, your list could not have bee posted at a better time as my husband and I are going to remodel our small bathroom very soon! It was “renovated” back in the 80s and we want to make it look 50s again.

      I would also second Secret Design Studio’s suggestion of drawing up the room in 3D if possible, I used Google SketchUp and it was so helpful to help visualize the space.

      • Thanks Linda, I agree Google Sketch-up is a great product to help visualize a room in three dimensions, but sometimes the fine accuracy you need in a bathroom renovation just isn’t there with Google Sketch-up. The smaller the space the more accurate you need to be with the planning of the job. Fortunately many sanitary ware suppliers allow you to download their products in an AutoCad format which makes my job a lot easier with precision when designing a tight bathroom renovation.

    13. Sherree says:

      Something we ran in to with our 1951 ranch: The stand up shower in our 3/4 bath has a poured concrete shower base. I mean they just probably hauled it in in buckets and poured it, sloping it to the center drain. The drain and all it’s parts are cemented in there for good. The base is painted with white floor paint. We have found aqua and red paint under there, so this has been around awhile.
      The plumber (here doing other work) said that when we needed to change that drain assembly the whole thing would have to be busted up and taken out! I am sure it will not easy or simple
      Has anyone else ever seen that? Was that just a handyman job or was that common practice back then?

      • Jay says:

        Yes, in my 57 ranch the master bath has a stall shower instead of a tub, which occupies space between closets for other rooms. The stall shower base was built in place at the time the house was built. It had to be busted up when I remodeled the bath several years ago, the only difference was that my stall shower was tiled.

    14. pam kueber says:

      Wood putty.

    15. Jackie Toye says:

      Thanks! My tiny bathroom is on my To Do List. Concrete block outerwall … and I’m sure there’s chicken wire and concrete backing for the tile … O Lawd!

      Thanks for the Handy Dandy List

    16. Amanda says:

      A few days ago I emailed you about renovating my bathroom and today this list appears….coincidence? :)

      Thanks for sharing as this will help me out tremendously in planning and budgeting for my project. After reading all of these comments I’m getting a little nervous about what little surprises I may uncover once we get started……!

    17. pam kueber says:

      Caulk for the tub-to-tile seal.
      Caulk for the wood trim to prepare for painting or staining.

    18. Stacy says:

      I have one that’s not on your list:

      Cost of paying first contractor for supplies and then having said contractor get in serious car accident and losing memory after cashing your check. Cost of paying new contractor 2 weeks later for same supplies to finish your gutted (and only) bathroom. I know that you’re supposed to plan for the “unexpected,” but I am always caught by surprise and totally stressed out when it happens. And, yes, the accident really happened. He wasn’t actually trying to rip me off, but I was out and extra $800 I hadn’t planned for, and I don’t think I’m getting it back.

      • Stacy says:

        I thought of more advice to add to this. If you have to hire someone in a hurry, don’t panic. I wish I had taken a few more days to hire the right person, instead of the person who could get there first. I now have another expense-hiring a third person to fix the mistakes of the second person who was very available, but not too skilled.

    19. Katie says:

      I’ve found that a way to get very high quality work for a reasonable price is to find a electrician, plumber ect. who has a day job doing commercial work, and makes extra money doing residential work on the side. Ask for references and an estimate upfront, or if you know someone in the building trades, ask them for a name.

    20. FortiesFan says:

      What a timely post…I was just thinking about finally gutting my bathroom next winter. I hate its layout, as well as its 1990s “Home Cheapo” renovation from the previous owners.

      I want the new design to look appropriate to my 1940 house, so I will probably just keep it simple with 4″ ceramic tile and classic fixtures. I am torn between a white/black color scheme and a mint green/black color scheme.

      Aside from the dreaded loss in potential resale value (sarcasm), is there generally an up-charge when ordering colored tile or fixtures?

    21. Michele says:

      Hey,

      We just finished (about a month ago) our “new” 1950;s style bathroom…yup, the 2-3 month job took us 9 months since we had to take over the reno’s, as the contractor didn’t know how to do the tiles (walls, shower or floors)…we did pay more (a lot more) for coloured tiles as they had to order them in and “nobody” does coloured 4×4 tiles anymore! It was worth it though, I love my bathroom!

      I hope you do a list of what is needed for kitchens as that is our next project…our living room is almost done (why, “hello gorgeous orange and cream vintage wallpaper!”)…

    22. Peggy says:

      Refinishing 1955 very large and deep cast iron tub that would cost a lot of money to remove and would entail removing the ceramic tile floor set in wire mesh and concrete. A lot cheaper to refinish the tub, plus it’s a much better tub that those made today.

    23. Estelle Page says:

      Wow, you’ve really thought of everything, down to the garbage bags!!! Will be printing this one off and pinning it to my wall, about to start renovating my bathroom at home next month (more antique than retro though – trying to stick to the theme of our Victorian era flat!)

    Leave a Comment --

    If you are under 14 years of age you may read this message board, but you may not participate.
    Here are the full legal terms of use you agree to by using this comment form.

    (required)