Jon & Trixi create a 1970s avocado kitchen with Rust-Oleum Cabinet Transformations
pam kueber - Updated: January 20, 2021
Retro Renovation stopped publishing in 2021; these stories remain for historical information, as potential continued resources, and for archival purposes.
Jon and Trixi — we’ve seen portions of their project under way — have finished remodeling their kitchen, and are mostly done with the bathrooms. And in a twist that I am sure the folks at Rust-Oleum were not anticipating, the epicenter of their “Retro Renovation story” is that they freshened up their kitchen cabinets by painting them warm brown on the top — and avocado on the bottom — using Rust-Oleum’s Cabinet Transformations kit. No, avocado ain’t a stock color in the Rust-O kit — Jon is intrepid, and had it custom-tinted avocado at his local store. Jon wants me to emphasize that all of the work they did throughout the house cost less than $2,000 — because they (1) used their existing, functionally sound cabinets (2) uncovered the vintage countertop and floor (3) hunted down salvage and vintage fixtures and furniture and (4) did the work themselves. I luv it! Click on through for their compete story along with 21 photos live from the scene. Photos by Glenn Suckow and Trixi Hunt — many thanks!
The “before” kitchen — original countertops were covered with stone tiles… original floor was covered with another layer of vinyl… cabinets were brown
Jon writes:
Dear Pam:
This here is a folder full o’ photos of our house — kitchen (before and after), living room (before and after), bathroom (before and after) as well as our office, bedroom and exterior — including our next project, the rec room in the basement!
The one thing I’d love to stress if you write about us is that we did this ENTIRE THING — I’m taking furniture, paint, accessories, etc –for UNDER TWO GRAND. Almost every single item is from a thrift store or a salvage yard or a Reuse Center. The hard work, of course, came from me and Trixi!
Trixi says it *only* took 15 hours to install the vintage sink with hudee. Not kidding.
KITCHEN: In these photos, you can finally see the finished cabinets, using the Cabinet Transformation Kits from Rustoleum. You can also finally get a good look at the dining area, with our 1967 Chromcraft dining set which we LOVE. There’s also a great shot of the “corner o’ chrome” — our cool Lincoln Beautyware canisters and paper towel dispenser, plus the NuTone food center and cutting board.
Trixi says: Greige walls get a bit of a retro-redo. I could only get 5 yards of the paper (vintage from Etsy), so we had to be creative with how we used it. I looked through a TON of 60’s interior pictures, and got the ‘framing’ idea from there. Also- we have NEVER wallpapered before, so please be forgiving on closer inspection. Because the paper is vintage, we had to make paste. Add that to Jon’s list of talents!
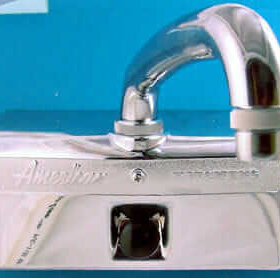
BATHROOM: The countertop is a reclaimed counter from the Reuse Center with gold fleck formica which we cut to fit. The sink is from a salvage yard. The American Standard peach toilet (which matches the tub exactly!!) is from Reuse Center, we got it free to take it off their hands. The floor I put in myself, just some cool hex tile from Menards. [Pam corrects: That’s call octagon-and-dot — super affordable and available at most of the big boxes.] The wall has groovy stencils done by Trixi which match the atomic design on our light bar. The curtains are vintage, from Etsy. The wallpaper is also vintage, from Etsy. Still to be done: tiles in the tub area.
LIVING ROOM: Our pride and joy is the vintage Preway cone fireplace, which we haven’t yet hooked up but which we HOPE will eventually work. You can see, in the general shot, our cool surfboard-shaped coffee table. The chair in the one shot is a Jens Risom from 1968, we got it for FOUR DOLLARS from a thrift store. The end table is Adrian Pearsall, and IT TOO was under ten bucks. The only non-vintage stuff in there are the armoire (which is Baker — Trixi used to work for ’em) and the couch, which is a Daffa.
OFFICE, BEDROOM: The office is just the one shot of the main office area, with our vintage stuff, and another of a weird 70s vinyl chair that sits on the other side of it. There’s also a shot of our bedroom, which has the curtains Trixi made with vintage fabric from Etsy.
BASEMENT: This is our next project! We’ve got a full set of JC Penney whiskey barrel furniture from the late 60s and that cool vintage fake fireplace, plus the Shag prints on the wall. We still have to wallpaper and paint down there — it’s a-coming.
OUTSIDE: A couple good shots of our house (PINK AND BLUE!) plus our DIY rock and flower garden. All the materials in the garden were salvaged from various sites in the Twin Cities — we have bricks and such from demolition sites that used to be cobblestones. Even the rocks are vintage — Trixi’s folks got them from the Mississippi
riverbank in the 1960s.
So there you have it! THANK YOU — of course we couldn’t have done it without you!
Jon & Trixi — yay on you! Just yay! I wish I were closer, I’d for sure be over the mix you up some Margarita celebration. And, Jon, thank you so so much for all the sharing you’ve done as you’ve worked on your house. A bundle of stories from last year were all due to you:
Finally, a Precautionary Pam reminder: Be sure to consult with licensed professionals before you start ripping old stuff out; there can be vintage nastiness like lead and asbestos in materials and layers of old houses.
I’d love to get some opinions on two-tone cabinets in smaller kitchens. Mine is 9.5 x 17, but the cooking area is your basic 10 x 10-ish L-shaped area. I’ve refaced my tops (oak — I like oak, so sue me, I was going for Craftsman-type) and they are perfectly fine, but the base cabinets are stick-built like the tops, but have blind corners and a cooktop that I’d like to replace with a range. I’d thought of ripping out the bottoms (easier to DIY replace than tops) and replacing them with unfinished wood cabinets which I’d prime and paint with Cabinet Transformations. My sister the realtor says two-tone only works with large, higher-end kitchens. What do you guys think?
And while we’re on the subject of kitchens, check out the Betty Draper kitchen in this estate sale house in Hillsdale, NJ:
Very impressive! I love the kitchen canisters – my mother received the same as wedding shower presents in 1962 and I still use them. Unfortunately I no longer have the paper towel dispenser; I remember it going at a garage sale when I was a kid. ):
Good job all around!
Annie B.says
Yours is one fabulous home! Congratulations to you both.
Your Formica is of the same pattern my parents chose back in 1964 for their first house. I wonder if you might know the name of the pattern? I’ve seen it only this one other time.
I’ve been a lifelong fan of avocado. In fact, in 1964, I almost persuaded my folks to paint the trim of their house avocado. Might’ve actually worked with its orange-y old brick.
Your kitchen is ……. Holy Guacamole…….great!
Jaysays
What a great house! You folks are one talented creative duo. I like green for the home – inside and out. I find it amazing that the original countertop and flooring were underneith and could be salvaged. Nice thrift shop finds. Alas, I make the rounds of Good Will and the Re-Store but usually come up empty. I do have a trio of Adrian Pearsall tables but they were my parents. Best wishes for many happy years in your home.
Pam, where are you today? No post?
Julie P.says
I had the perfect avocado dishwasher for your kitchen. I also will soon have access to an avocado double oven and electric cooktop from a house I recently sold. Too bad you aren’t in the Pittsburgh area. They would be perfect for your kitchen!!!
Jon Huntsays
Oooh — I’m certainly not gonna let THAT go — we might be able to arrange to have them shipped to us! Don’t throw ’em in the rubbish bin, definitely talk to us first! flyingsauceronline@gmail.com.
(most) Vintage ovens are wonderful appliances. I find that their thermostats are more accurate, and that they tend to be better insulated. The General Motors era Frigidaires are particularly good. And they are no less energy efficient than most new models.
That said, they do have asbestos insulation. But it is covered by the steel outer shell, and there should be no reason to open that part up.
Just remember, if the oven doesn’t work, first check to make sure the element is plugged all the way in, and then make sure the feature on the clock for programmed cooking is not turned on. (usually, that means setting it to “manual” or “off” – depends on the manufacturer)
Mary Elizabethsays
Also, Dan, most of the old electric ranges (I had a 1960s one in my St. Charles kitchen in my first house) have snap-in burners and oven coils. When mine went bad, I went to my local appliance store with the old coils and the numbers on the stove, and they were able to sell me replacements that worked. The models of electric ranges haven’t changed that much since the 1950s and 60s, unless you get a glass-topped range. And gas ranges never really wear out but if a repair needs to be made, have the professionals at the gas company do it. Either way, I would advise people (as Pam would) to get a professional to evaluate what needs to be repaired.
Patti Cannansays
I too have access to an avocado dishwasher. I’ll email you pics.
Melaniesays
Love. Love. Love.
You guys did a great job on that kitchen. The wall mounted phone in green is a fantastic find!!!!
OK everyone! I am so overwhelmed with the responses here. Thank you so much! This was the most fun (and amazing project) I’ve/we’ve ever taken on. I have greatly missed working in the home interiors industry, and I have loved (nearly) every minute of this project. Thank you, all, for the kudos. And especially thanks to Retro-Reno Pam for running such an uber cool site that has both helped and inspired us along the way! I want to do this for a living!
Even our 12 yr old daughter has gotten into it. She went from eye rolling and grumbling with every weekend visit to the local thrifts, salvage and ReUse Centers, to becoming a fan of the retro lifestyle. She wants to have parties to ‘show off’ the house. Apples from trees, I tells ya 😀
It’s very fitting that this post happened this week, as Sunday marks one year since we left a friend’s MCM time-capsule gem only to come home and start pulling up that pesky bit of our own flooring. We were just going to look and see what lay underneath. That’s all. Really! We were lucky, and would have ran for the hills if there was the slightest hint of asbestos or lead lurking underneath any of the layers. We’re both about DIY, but NOT DIY-ing. Safety first!
A few quick notes on some of the above questions (sorry if I miss anything – there’s so much GREAT feedback here!):
*The template for the stencil was made out of solid plastic stencil sheets from Michaels Crafts. We just mimicked the pattern from our atomic bar light that’s in the bath (not really pictured…sorry 😮 ), and used a finer tip artist knife to cut it out. I used gold acrylic fabric paint, which was very easy to clean-up if I had to step away for any length of time. If it dried onto the stencil tools, I just peeled it right off and kept going. It took the better part of a day to do the stenciling – but even that was fun!
*The wallpaper came out much better when it dried (the close-up was taken when it was very wet). We ‘water proofed’ it with spray-on Mod Podge (is there a better label/font around? Even their packaging is retro cool!). A lot of scrap bookers sell vintage wallpaper by the yard, and many are willing to make an offer for their entire stock. Atomic patterns in vintage are very hard to come by though, and it took me months before I found what I was looking for.
*As for color – I love color! I have never been one for keeping it neutral. If you can’t surround yourself with your favorite colors, then you aren’t really living in your home, you’re just visiting it! All of the colors in the living room were inspired by that crazy floral oil painting in the picture with the bottles (which are actually made out of wood dowels and metallic gold planks slipped into the notches). The fact that our living room is now TARDIS blue pleases us greatly.
*Any time we had to ‘cheat’ and buy new – we went for items that were actively being manufactured in the 60’s/70’s. There were a couple cheats here and there (the rug in the living room is from *cough* Target).
For finishing the office, I want to go disco, lava lamps and love beads. That vinyl chair demands for nothing less 😀
Thanks, again, for letting us share our story Pam. And for reading and supporting and tagging along the way to everyone else 🙂 I’m loving the house I live in!
Even our wee Dachshund, Lilly, likes it. And she said ‘thanks for the compliments’ too 🙂
Excuse me while I gush but Jon and Trixi are very dear friends of mine and I flippin’ LOVE THEM. It warms my heart to see all the love in the positive comments that have accumulated here in just one day. OK, moving on. I know that this reno project has been a real labor of love and one that they have been insanely committed too. I’ve been obsessively following the progress via photos on a couple of those social networking sites, but how awesome to see the full deal here. I have an extreme chair/sofa envy and I would kill to own any of the (bargain!) chairs and sofas they own. The ‘Tardis blue’ on the living room walls is a brave choice, it packs a punch and it really works. I’m glad that they didn’t hold back and go for any ‘safe’ options in any element of the design and lay-out. I want more info on some of the wall-art! I agree with Jon too that the seventies really began in ’67! I always enjoy looking for the smaller details and I love the wooden(?) vases in the living room. And that fireplace? WOW!
Is that McCartney on the cover of Life magazine? And of course what reno would be complete without a copy of Smile lurking in the background? Although the overall vibe is late 60s/70s, I also like the little MCM touches that I can see. I think that is a perfect outlook in renos anyway: choosing style elements from more than one era. The house is so pretty from the outside too. Gotta go now, because I’m booking flight tickets to Minneapolis…apart from amazing interiors, I happy to know that Jon & Trix can plan a damn good party. 12 out of 10, you guys. Love!
Thanks, doll! The one who got married at Graceland, of all places, should know! 😉
xo
Peggysays
Good on you!!! Love your mid mod furniture and your groovy house. I cant beleive you managed to save those orginal features. And…what you said about the “lets sell this dog” reno…man, people just dont have a clue! love it!
Ann-Marie Meyerssays
Congratulations Jon and Trixie. Your hard work has gotten you a lovely home.


 Jon and Trixi — we’ve seen portions of their project under way — have finished remodeling their kitchen, and are mostly done with the bathrooms. And in a twist that I am sure the folks at Rust-Oleum were not anticipating, the epicenter of their “Retro Renovation story” is that they freshened up their kitchen cabinets by painting them warm brown on the top — and avocado on the bottom — using Rust-Oleum’s Cabinet Transformations kit. No, avocado ain’t a stock color in the Rust-O kit — Jon is intrepid, and had it custom-tinted avocado at his local store. Jon wants me to emphasize that all of the work they did throughout the house cost less than $2,000 — because they (1) used their existing, functionally sound cabinets (2) uncovered the vintage countertop and floor (3) hunted down salvage and vintage fixtures and furniture and (4) did the work themselves. I luv it! Click on through for their compete story along with 21 photos live from the scene. Photos by Glenn Suckow and Trixi Hunt — many thanks!
LIVING ROOM: Our pride and joy is the vintage Preway cone fireplace, which we haven’t yet hooked up but which we HOPE will eventually work. You can see, in the general shot, our cool surfboard-shaped coffee table. The chair in the one shot is a Jens Risom from 1968, we got it for FOUR DOLLARS from a thrift store. The end table is Adrian Pearsall, and IT TOO was under ten bucks. The only non-vintage stuff in there are the armoire (which is Baker — Trixi used to work for ’em) and the couch, which is a Daffa.
OFFICE, BEDROOM: The office is just the one shot of the main office area, with our vintage stuff, and another of a weird 70s vinyl chair that sits on the other side of it. There’s also a shot of our bedroom, which has the curtains Trixi made with vintage fabric from Etsy.
BASEMENT: This is our next project! We’ve got a full set of JC Penney whiskey barrel furniture from the late 60s and that cool vintage fake fireplace, plus the Shag prints on the wall. We still have to wallpaper and paint down there — it’s a-coming.
OUTSIDE: A couple good shots of our house (PINK AND BLUE!) plus our DIY rock and flower garden. All the materials in the garden were salvaged from various sites in the Twin Cities — we have bricks and such from demolition sites that used to be cobblestones. Even the rocks are vintage — Trixi’s folks got them from the Mississippi


")


 Jon & Trixi — yay on you! Just yay! I wish I were closer, I’d for sure be over the mix you up some Margarita celebration. And, Jon, thank you so so much for all the sharing you’ve done as you’ve worked on your house. A bundle of stories from last year were all due to you:


Jill says
I’d love to get some opinions on two-tone cabinets in smaller kitchens. Mine is 9.5 x 17, but the cooking area is your basic 10 x 10-ish L-shaped area. I’ve refaced my tops (oak — I like oak, so sue me, I was going for Craftsman-type) and they are perfectly fine, but the base cabinets are stick-built like the tops, but have blind corners and a cooktop that I’d like to replace with a range. I’d thought of ripping out the bottoms (easier to DIY replace than tops) and replacing them with unfinished wood cabinets which I’d prime and paint with Cabinet Transformations. My sister the realtor says two-tone only works with large, higher-end kitchens. What do you guys think?
And while we’re on the subject of kitchens, check out the Betty Draper kitchen in this estate sale house in Hillsdale, NJ:
http://www.trulia.com/property/3073357319-292-Magnolia-Ave-Hillsdale-NJ-07642
Janella says
Very impressive! I love the kitchen canisters – my mother received the same as wedding shower presents in 1962 and I still use them. Unfortunately I no longer have the paper towel dispenser; I remember it going at a garage sale when I was a kid. ):
Good job all around!
Annie B. says
Yours is one fabulous home! Congratulations to you both.
Your Formica is of the same pattern my parents chose back in 1964 for their first house. I wonder if you might know the name of the pattern? I’ve seen it only this one other time.
I’ve been a lifelong fan of avocado. In fact, in 1964, I almost persuaded my folks to paint the trim of their house avocado. Might’ve actually worked with its orange-y old brick.
Your kitchen is ……. Holy Guacamole…….great!
Jay says
What a great house! You folks are one talented creative duo. I like green for the home – inside and out. I find it amazing that the original countertop and flooring were underneith and could be salvaged. Nice thrift shop finds. Alas, I make the rounds of Good Will and the Re-Store but usually come up empty. I do have a trio of Adrian Pearsall tables but they were my parents. Best wishes for many happy years in your home.
Pam, where are you today? No post?
Julie P. says
I had the perfect avocado dishwasher for your kitchen. I also will soon have access to an avocado double oven and electric cooktop from a house I recently sold. Too bad you aren’t in the Pittsburgh area. They would be perfect for your kitchen!!!
Jon Hunt says
Oooh — I’m certainly not gonna let THAT go — we might be able to arrange to have them shipped to us! Don’t throw ’em in the rubbish bin, definitely talk to us first! flyingsauceronline@gmail.com.
Dan says
(most) Vintage ovens are wonderful appliances. I find that their thermostats are more accurate, and that they tend to be better insulated. The General Motors era Frigidaires are particularly good. And they are no less energy efficient than most new models.
That said, they do have asbestos insulation. But it is covered by the steel outer shell, and there should be no reason to open that part up.
Just remember, if the oven doesn’t work, first check to make sure the element is plugged all the way in, and then make sure the feature on the clock for programmed cooking is not turned on. (usually, that means setting it to “manual” or “off” – depends on the manufacturer)
Mary Elizabeth says
Also, Dan, most of the old electric ranges (I had a 1960s one in my St. Charles kitchen in my first house) have snap-in burners and oven coils. When mine went bad, I went to my local appliance store with the old coils and the numbers on the stove, and they were able to sell me replacements that worked. The models of electric ranges haven’t changed that much since the 1950s and 60s, unless you get a glass-topped range. And gas ranges never really wear out but if a repair needs to be made, have the professionals at the gas company do it. Either way, I would advise people (as Pam would) to get a professional to evaluate what needs to be repaired.
Patti Cannan says
I too have access to an avocado dishwasher. I’ll email you pics.
Melanie says
Love. Love. Love.
You guys did a great job on that kitchen. The wall mounted phone in green is a fantastic find!!!!
MissTrixi says
OK everyone! I am so overwhelmed with the responses here. Thank you so much! This was the most fun (and amazing project) I’ve/we’ve ever taken on. I have greatly missed working in the home interiors industry, and I have loved (nearly) every minute of this project. Thank you, all, for the kudos. And especially thanks to Retro-Reno Pam for running such an uber cool site that has both helped and inspired us along the way! I want to do this for a living!
Even our 12 yr old daughter has gotten into it. She went from eye rolling and grumbling with every weekend visit to the local thrifts, salvage and ReUse Centers, to becoming a fan of the retro lifestyle. She wants to have parties to ‘show off’ the house. Apples from trees, I tells ya 😀
It’s very fitting that this post happened this week, as Sunday marks one year since we left a friend’s MCM time-capsule gem only to come home and start pulling up that pesky bit of our own flooring. We were just going to look and see what lay underneath. That’s all. Really! We were lucky, and would have ran for the hills if there was the slightest hint of asbestos or lead lurking underneath any of the layers. We’re both about DIY, but NOT DIY-ing. Safety first!
A few quick notes on some of the above questions (sorry if I miss anything – there’s so much GREAT feedback here!):
*The template for the stencil was made out of solid plastic stencil sheets from Michaels Crafts. We just mimicked the pattern from our atomic bar light that’s in the bath (not really pictured…sorry 😮 ), and used a finer tip artist knife to cut it out. I used gold acrylic fabric paint, which was very easy to clean-up if I had to step away for any length of time. If it dried onto the stencil tools, I just peeled it right off and kept going. It took the better part of a day to do the stenciling – but even that was fun!
*The wallpaper came out much better when it dried (the close-up was taken when it was very wet). We ‘water proofed’ it with spray-on Mod Podge (is there a better label/font around? Even their packaging is retro cool!). A lot of scrap bookers sell vintage wallpaper by the yard, and many are willing to make an offer for their entire stock. Atomic patterns in vintage are very hard to come by though, and it took me months before I found what I was looking for.
*As for color – I love color! I have never been one for keeping it neutral. If you can’t surround yourself with your favorite colors, then you aren’t really living in your home, you’re just visiting it! All of the colors in the living room were inspired by that crazy floral oil painting in the picture with the bottles (which are actually made out of wood dowels and metallic gold planks slipped into the notches). The fact that our living room is now TARDIS blue pleases us greatly.
*Any time we had to ‘cheat’ and buy new – we went for items that were actively being manufactured in the 60’s/70’s. There were a couple cheats here and there (the rug in the living room is from *cough* Target).
For finishing the office, I want to go disco, lava lamps and love beads. That vinyl chair demands for nothing less 😀
Thanks, again, for letting us share our story Pam. And for reading and supporting and tagging along the way to everyone else 🙂 I’m loving the house I live in!
Even our wee Dachshund, Lilly, likes it. And she said ‘thanks for the compliments’ too 🙂
XO
Trixi
Becky W says
Excuse me while I gush but Jon and Trixi are very dear friends of mine and I flippin’ LOVE THEM. It warms my heart to see all the love in the positive comments that have accumulated here in just one day. OK, moving on. I know that this reno project has been a real labor of love and one that they have been insanely committed too. I’ve been obsessively following the progress via photos on a couple of those social networking sites, but how awesome to see the full deal here. I have an extreme chair/sofa envy and I would kill to own any of the (bargain!) chairs and sofas they own. The ‘Tardis blue’ on the living room walls is a brave choice, it packs a punch and it really works. I’m glad that they didn’t hold back and go for any ‘safe’ options in any element of the design and lay-out. I want more info on some of the wall-art! I agree with Jon too that the seventies really began in ’67! I always enjoy looking for the smaller details and I love the wooden(?) vases in the living room. And that fireplace? WOW!
Is that McCartney on the cover of Life magazine? And of course what reno would be complete without a copy of Smile lurking in the background? Although the overall vibe is late 60s/70s, I also like the little MCM touches that I can see. I think that is a perfect outlook in renos anyway: choosing style elements from more than one era. The house is so pretty from the outside too. Gotta go now, because I’m booking flight tickets to Minneapolis…apart from amazing interiors, I happy to know that Jon & Trix can plan a damn good party. 12 out of 10, you guys. Love!
MissTrixi says
Thanks, doll! The one who got married at Graceland, of all places, should know! 😉
xo
Peggy says
Good on you!!! Love your mid mod furniture and your groovy house. I cant beleive you managed to save those orginal features. And…what you said about the “lets sell this dog” reno…man, people just dont have a clue! love it!
Ann-Marie Meyers says
Congratulations Jon and Trixie. Your hard work has gotten you a lovely home.