


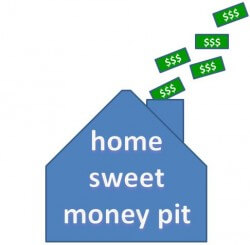
Bathrooms are the smallest rooms in the house, but they pack a lot of utility into every square inch, so they can be complicated — and expensive to remodel. I thought it would be fun haha to compile a list of every element of a bathroom remodel for which you need to plan, budget and spend. I am going to take a first run at the list based on my experience with several bathroom renovations — but welcome your additions, as I may not have been hit with every possible expense. Here goes:
Permits and testing
- Building permit
- Electrical permit
- Plumbing permit
 Lead testing, as required
- Asbestos testing, as required
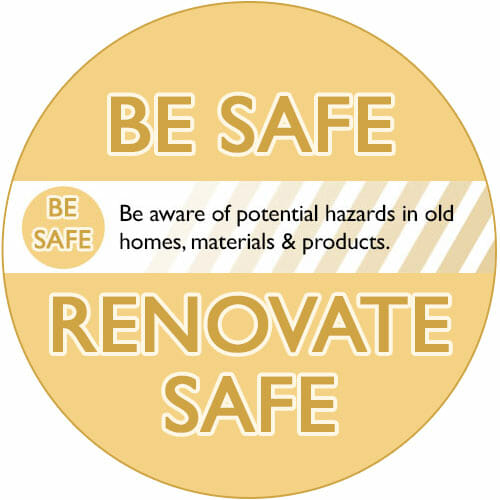
- NOTE: See our BE SAFE / RENOVATE SAFE page for more information on potential hazards in vintage homes before you dive in! This includes my May 2016 story, Understanding potential lead hazards in old porcelain enamel bathtubs and sinks and ceramic tile of any age
Demolition
- Contractor bags
- Dumpster, if required
- Disposal fees
- Surcharges for lead abatement, if required
- Asbestos abatement, if required
- Wood rot
- Mold
- Old plumbing
- Bad wiring
- Bug infestations (we just found a nest of carpenter ants while the walls were open on my office renovation — $350 exterminator, cha ching)
- Anything that’s not to code that you weren’t anticipating.
- What else?
- Wood for framing
- Insulation
- Vapor barriers
- Energy efficiency sealants
- Window(s), if required
- Door, if required
- Drywall
- Greenboard/concreteboard for under tile
- I always use professionals who give me a bid, who bring the stuff, and give me a bill when it’s all done. Their costs usually include cost of permit and inspections. If you move your plumbing, costs are higher than if you keep your plumbing where it is. Also, if you have an old house, it’s probably wise to bring in a licensed plumbing contractor in any case — now that you have the walls open, have them take a look at everything and if it’s necessary to repair and replace so that the house is good for another… 50 years … well, suck it up and do it.
- I always use professionals who give me a bid, who bring the stuff, and give me a bill when it’s all done. Their costs usually include cost of permit and inspections. If you move your electric, costs are higher than if you keep your electric where it is. Also, in old houses, you may need to do some rewiring or upgrading to the wiring anyway — see plumbing section above regarding doing a complete inspection and any necessary maintenance/repairs now that you have the walls open…. Actual electric thingies to consider include:
- Lighting around sink
- Lighting center of ceiling
- Lighting above tub/shower
- Exhaust fan (In a tiny bathroom I like combo lighting/exhaust fan above tub/shower). See Kate’s research and the fans she bought for her two bathrooms.
- Timer for exhaust fan on its own switch.
- Electrical outlets and switches.
- Sink
- Sink legs or vanity and vanity top
- Different hardware for vanity, if required
- Repaint vanity, if required
- Faucet and associated parts
- Toilet
- Toilet innards
- Toilet seat
- Grab bar by toilet – or at least consider the framing so you can add one later.
- Tub or shower pan
- Tub/shower faucet set
- Grab bar(s) in tub/shower area – or at least consider adding the framing (thanks Stubenville for this suggestion)
- Where else to put grab bars or the framing for them for the future: Consult with pros. Sorry. We’re all getting older every day — and even if it’s not an age thing, grab bars are great if you hurt your back, etc.
- Towel bar in tub/shower, if required
- Shower curtain rod, or shower door
- I always like to add a diverter to a handheld shower head
- Handheld shower head
- Towel bar for bath towels
- Towel bar, ring or hook for wash towels
- Towel bar or hook inside tub/shower for washcloth
- Robe hook for back of bathroom door and maybe also by tub/shower
- Soap dish in tub/shower
- Toilet paper holder
- Medicine cabinet
Tile and finishing
- Floor tile or other flooring material
- Grout for floor tile, or adhesive for a resilient floor.
- Wall tile
- Grout for wall tile
- Caulk to use at tile edges, on tubs, on sinks, etc.
- Shower pan tile (if less slippery surface is desired)
- Grout for shower pan tile
- Mortar to apply tile
- Sealer for floor tile. Some ambition people also seal their wall tile
- Liner strip, if desired
- Bullnose in same or contrasting color
- Tile-in soap dish and/or toothbrush holder for above sink, if required
- Different floor tile for shower pan, if required
- Recessed shelving forms, such as Tile Redi (there are other brands, too) and any unique tile pieces required to edge them
- Marble threshold for shower pan, if required
- Marble or other type threshold for bathroom door, as required
- Wood trim for windows and doors
- Wood trim for floor if wall is not going to be tiled
- Primer for drywall
- Primer for wood trim (if trim is to be painted)
- Conditioner, stain, finish for wood trim (if trim is to be stained)
- New cover for heat and air conditioning vent?
- Paint for walls and trim
- Wallpaper
- Wall size, if wallpaper is used
- Window treatments
- Shower curtain or doors
- Shower curtain rings
- Coordinating towels and rugs
- Soap dish for vanity
- Shelving and artwork for walls, as required
- Wastebasket
- Plunger – After all this time, money and grief, you’ll want a clean start.
Hey, if thi$ checkli$t doe$n’t make you want to Love the Bathroom You’re In, I don’t know what will.
 Want to noodle bathrooms more? Check out my three videos about my blue bathroom renovation:
- Video: My blue bathroom, basic design concept.
- Video: My blue bathroom, some design tips that turned out really well
- Video: My blue bathroom, things I’d do differently *the video that went viral*
What potential or for-sure expenses did I miss, dear readers?
Or, what bathroom remodeling expenses caught you by surprise? Do you have a nightmare that you need to process and forewarn? How about ideas that saved you lots of money? Bathrooms as Money Pits: That’s today’s topic.


Annie B. says
I am SO loving the bathroom I’m in – warts and all.
pam kueber says
🙂
Jana says
Just finished a bathroom remodel and the big surprise for us was the extra work when using black grout. Had no idea the tile guy would be here for days on end. Love the results, but it cost more than using white grout.
Lynne says
In every remodel of any room, we always remember the old saying:
Measure Twice, Cut Once
Gwen says
During a remodel of a 1925, pier and beam house bathroom:
1. Found wood rot all around the toilet when we pulled up the old tile. The rot involved the floor joists so we replaced/added more of those. We replaced all of that and then came back with more concrete supports (mini-piers?) under the bathroom = $1000.
2. While we had the exterior wall open we added bat insulation and Tyvek. I know you already have insulation on the list, but I assumed that was insulation in the interior walls. We did that too, and insulated extra for sound as the bathroom wall was shared with a bedroom = $300.
3. My bathroom included a wonderful built-in vanity with triple mirrors. The silvering was a mess due to age and humidity. After getting a price for resilvering, I decided to replace them altogether (cheaper and better end-result). This involved removing the trim that was holding the mirrors in place, which involved about 7 layers of paint and therefore affected the rest of the mirror framing. After stripping, sanding and repainting, replacing the mirrors, purchasing, cutting, priming and painting the new trim strips, I added supports to the 6 vanity drawers, repainted the entire vanity and added new/old hardware (which I also had to refurbish). Total cost of the vanity was about $500 and I did most of the work.
In December I purchased a 1955 home with one original bathroom in great condition. This is my first home built on a slab. Before purchasing the home, I paid for a plumber to scope the pipes. We found two breaks in the cast iron under the slab. My purchase negotiations included re-routing or repairing the plumbing which the seller did – at a cost of $6700. I got the house for my original offer. Last week I found termites – your next forum perhaps?
Charlotte says
What a handy list! I am probably going to have to redo my bathroom (ugh – not happy about it!) and this is a good overview. One thing I most likely will have to do that isn’t mentioned here is a new subfloor. My ceramic tile flooring is cracked and there’s a dip in the floor, so my guess is that the subfloor is not up to snuff. I’d imagine that’s a pretty common thing that needs to be redone in older bathrooms. water + wood = misery
Meridith says
When we tore out some broken tile in our old bathroom, we discovered that the technique used to set tile in the 1950s was very different than what they show on TV today! They nailed wire mesh to the studs, then used a VERY thick bed of mortar to create the substrate onto which they laid the tile. It essentially makes your tile walls into walls of concrete that cannot be removed easily, but would be very handy in a tornado! Simply removing old tiles isn’t as easy as it is in newer homes because these suckers were built to last and last and last.
Also, don’t forget to add in your therapists bills when you realize that the tub, tile, and vanity that the previous owners had refinished in boring white was originally PINK and there is nothing you can do to save it.
pam kueber says
Great add, Meridith — that old technique is called “mud set” and yes — it’s built to last, so it’s doubly or triply or even more work to demo…
Jill says
That’s why I decided to not even try. I have plaster walls with those thick 1950’s 4″ tiles…black wall tiles with seafoam green trim…original 1950’s. I’m putting in a new floor (octagon-and-dot with black dots), an American Standard Skyline washstand with Retrospect sink, and a new white old-fashioned medicine cabinet. I was able to patch my green tub with Porc-a-fix filler and paint, got it to shine again with Bon Ami followed by a Magic Eraser, and it’ll be quite nice when it’s done.
Now my 1968 upstairs bath with the crappy sheetrock with the nail pops, the white-and-tan flecked tile and the olive green tub? That’s another story.
Barry says
Those walls are lathe and plaster. Mud set is cement that floor tile was set in. I have a Cerulean blue 1952 tile shower that needed re-tiling or major tile repair. I found a bathroom restorer who does the old school plastering. He reset the loose tiles and removed the old 8″ single shower faucets. Those were replaced by a Kohler thermostatically controlled valve and a new single handle faucet. My wife loves it. The modern temperature and pressure controls on the thick 50s tiles are the best of both worlds in my book. We had a few loose tiles around that match for some reason. Previous owner had set them aside. I suspect he did shower tile work in the 1960s or 1970s. The mosaic blue floor tile looks shabby. Not sure what to do. Need a new vanity too.
JamieAbe says
Ditto Meridith! When we moved in, our bathroom was pink and black. It would have been amazing but through the years had been sadly rehabbed in several ways. All the original fixtures had been painted black (could not have been professionally done), and there was overspray on everything. The all pink floor had vinyl tiles glued to it and to be honest the layout was weird. We tore out everything, lathe walls, wire mesh and all! But I was most looking forward to repainting that black tub. When the paint guy came and started stripping the black off, I was sick to see the most lovely shade of pink (with no chips what-so-ever). I couldn’t understand how/why someone would paint over that pink. Anyway, I couldn’t win the battle to have a pink bath again, but I have tried to stay as true to the house as I can.
Secret Design Studio says
As a professional designer I find that bathrooms are always the hardest to design as they have to do so much in so little space. If you realize you have made a mistake half-way through the job, or change your mind on anything it is always going to be expensive to rectify.
Nobody should commence a bathroom renovation until they have drawn up to an accurate and large scale (I prefer 1:20) the floor plan and the four internal elevations.
Is there enough room to hang towels, or do they drop down next to the toilet? Does the door swing open and hit the new toilet? Is there enough room to move to when you close the door behind you? Is there a power point near a mirror? Does the ceiling light mean that your face in the mirror is always in shadow?
If you are no good with dimensions, drawing scales and maths, then you need to engage somebody who is! The extra cost at the start will save money if you have to rectify your mistakes half-way through the project.
Mary Tatum says
My approach is similar to James. Everything will cost twice as much and take twice as long. Triple is probably more like it.
When we pulled up the carpet (yes, carpet) in our upstairs bathroom, we discovered the subfloor was basically powder. ewwww.
JamieAbe says
This past year we converted one of our bathrooms into a laundry room and completely renovated the other one in our ’56 ranch. We ran into an interesting dilemma when we took out the old vanities. We found that when they originally poured the foundation, they poured the bathrooms about 2 inches lower than the rest of the house. Then they set the tub shower and vanities before pour the sub-floor to bring it up to the same level as the rest. So, we had to pour more concrete to level out the floor before we could tile. I tried researching the reason for doing this, but could find anything. The only thing I can guess would be for drainage encase there was ever a flooded bathroom. It amazes me the amount of skill and thought that they used to put into the building process of these homes.
pam kueber says
Woah, that’s a good one! Let me add to the list: If you are adding floor tile where there was previously resilient flooring, you may need to add structure to the floor in order to support the weight of the tile.
FortiesFan says
Before the advent of thin-set grout, tiles were laid in a mortar bed that was usually ~2″ thick. The slab under your bathrooms was probably recessed to allow the tile to sit flush with the flooring that was to be used in the rest of the house.
JamieAbe says
Aww, makes sense…..thanks FortiesFan!
James Owens says
Hi Pam
Over the years I have developed a rule of thumb when it comes to home improvement jobs like this. Figure how much it’s going to cost and how long it will take and triple it. That way when it comes in at just double you feel better about it. Recently I’ve added to my rule, figure how many trips to the hardware store any given job will take and triple that. With an old house even simple jobs seem to expand.
Chris says
That’s my rule of thumb, too!!!!
Same with how long the project will take — however long my husband estimates, I multiply by 3!
It’s a magic number!
MIFroggies says
Always triple the cost. At least 7 bathrooms of experience attest to that.
Can I post my brown bathtub picture Pam, as an example of obvious Bathroom remodel woe?