
Taken together, I think these tutorials give a pretty good sense of what’s required to start… and finish, successfully:
- Probably the best source I found was a video tutorial featuring Ron Hazleman. Sometimes the best way to learn how to do something is to watch someone do it, and that is exactly what you can do with this easy to follow video.
- This detailed step by step from HGTV’s website shows pictures of nearly every step of the process.
- If you want to use a salvaged sink and a salvaged dresser, this tutorial shows how to make a unique bath vanity, complete with a tiled top, though the steps aren’t very detailed.
- This set of instructions from Knoji Consumer Knowledge website is very detailed, but is lacking in photos. Still it is worth a read because it makes some very good points about selecting the proper dresser.
- I did find another blogger who tackled turning a dresser into a bath vanity with great results. Her steps are brief, but some have helpful photos, and her end result is very well done.
- This last link on the website ehow, has brief instructions and no photos, but it has a detailed materials list and is very to the point.
Some key points for converting a dresser or buffet into a vanity
The main points I took away from reading these instructions and watching the video are:
- Try to pick a dresser that is close to the measurements of a standard bath vanity, especially the height. A standard bathroom vanity is usually 34″ high, including the installed countertop.
- It is easier to choose a dresser with doors — like a dining room buffet, rather than like a dresser — with drawers. A piece with doors will make it easier to work with the plumbing — you won’t need to remove the drawer boxes to make room for the pipes.
- Make sure to measure your space beforehand so you know what size dresser you need.
- It is very important to firmly attach the dresser to the wall, just as you would with a regular bath vanity.
- Cover the entire dresser with several coats of polyurethane to protect it from moisture.
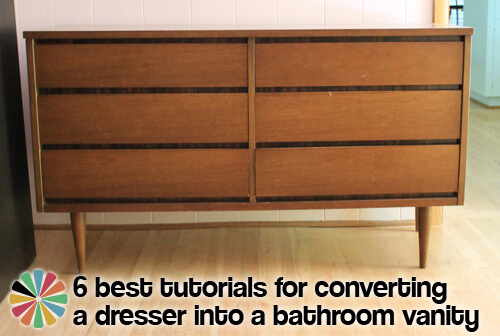
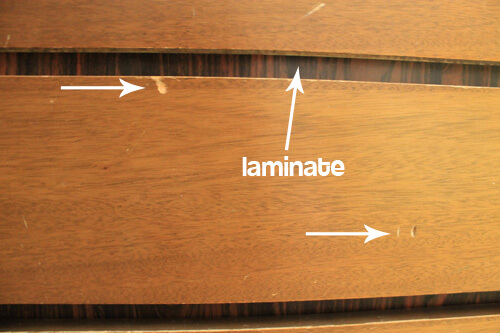
As far as my dresser goes, if I were to continue along with my original plan, I may have to do some refinishing or at the very least some touch up. My $25 Craigslist dresser is a little worse for the wear.
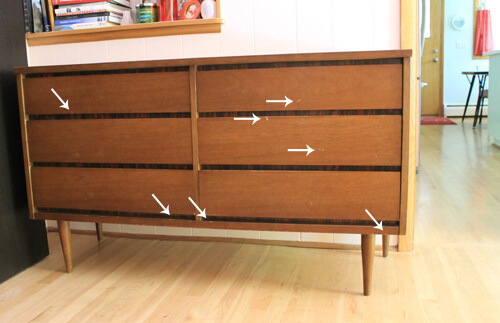

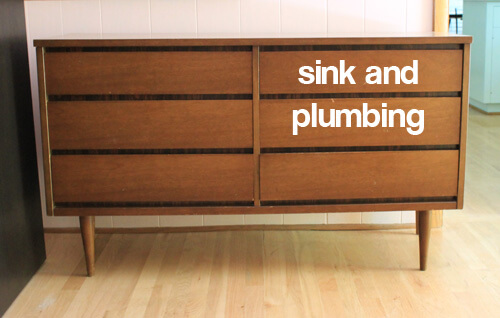
If I did stick with this dresser and plan for my master bath, I would likely have to sacrifice at least the top two drawers on one side–if not all three–to house the underside of the sink and its plumbing.
My other option seems to be either trying to fabricate a vanity myself, or pay a woodworker to make one for me. I’ve had limited experience building things out of wood, but I have also been studying our current vanity (which was an original custom built bath vanity) and it doesn’t look that complicated — my famous last words, right? The reality of the situation: It would be much better if I had a 48-inch dresser or vanity for the space. That would give the shower an extra four inches of shower width for my broad-shouldered husband.
If I did try to build a vanity, or hire someone to build it for me, it would likely look very similar to my Craigslist dresser. The coloring, the legs, the simplicity of the dresser are all exactly what I was looking for. If only it were a few inches narrower!






Melinda says
I find a multitude of mid century dressers at the thrifts and estate sales. Perhaps you can find a slightly smaller one that will give you the look and the space you need.
Then you can find another place for the current dresser or move it along to its next owner.
Emily Thorn says
Thank you, thank you, thank you. The way Ron Hazelton does it is great. Now I have to find a perfect dresser.
copperhead says
Nobody has suggested getting out a saw. It looks like you could cut that dresser so that one side would have drawers, the other could have a knee hole. Then scoot it what ever way you like and have room for half the dresser, your shower with the rest as knee hole and sink. Then get some curtain material that matches the shower curtain and window and make a little skirt. It could be fun to cover a little stool as well.
Rebekah says
Did you complete this project? I think I have similar furniture and am curious to see how it all came out!
Patti Cannan says
I’ve converted 3 dressers into bathroom vanities over the years. The first two were antiques, one victorian, one from the 20’s. My latest is a 1953 blonde veneered dresser with mirror. It too was scuffed up. I lightly sanded the worst part on the top and polyed it. My theory is, if you make it look too good, then everything else will look shabby 🙂 I used a clear glass vessel sink this time with a waterfall faucet. I cut/reconfigured the drawers to go around the plumbing so now all the drawers are still functional.
Lena_P says
Hi Kate, I just want to chime in with support for your homemade vanity. It just looks like a great way to personalize your bath, and if it doesn’t work you can rip it out later, right?
In regards to the shower layout, why don’t you run a shower curtain rod instead of walling it in? Keep the wall between the toilet and shower, and inset shelves for storage of shampoo et cetera, but between the shower and sink just have a shower curtain. Then your husband has as much wiggle room as he likes, and you can inject some great retro graphics with the curtain. It’s also easier to throw a shower curtain in the washing machine then squeeging tile, and it’ll make your shower brighter as well.
Basically, I wanted to suggest a way for the vanity to stay ;p Good luck whatever you do; I can’t wait to see the result!