

 There hasn’t been much talk of my bathroom remodel since I posted some of my finalized design decisions in February. But I have been hard at work! Believe it or not, the remodel has been in full swing since mid May — when my husband and I suffered through three days of difficult demo.
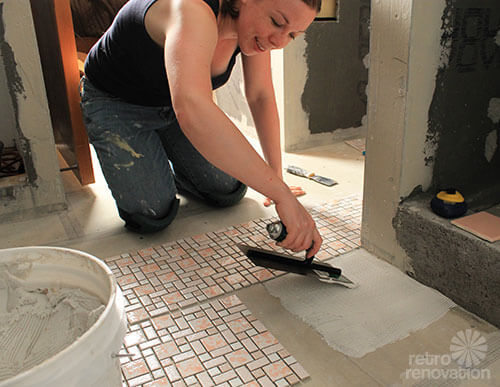
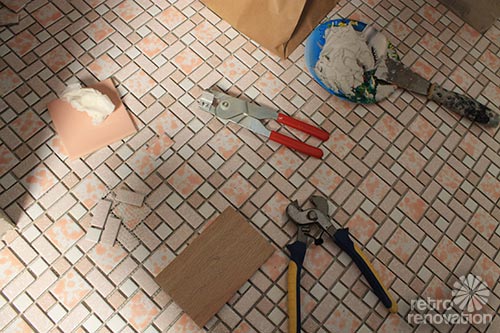
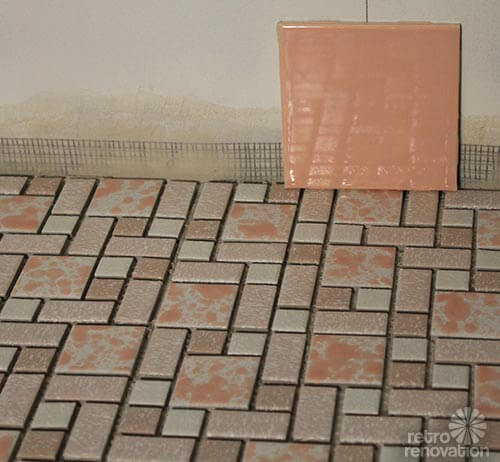
 Yes, we did a gut remodel, and I spent June putting in drywall, concrete board, getting the wiring done, etc. All of that hard work on what I like to call the “unpretty parts” has been worth it, because now it is time for the exciting part — installing pink tiles. With tile, trowel and mortar in hand, and knee pads on (a must) the installation of my Merola University pink mosaic ceramic floor tile has begun. As you will recall, we discovered and profiled this tile pattern — which is available in several color ways — because it’s been around since at least the 1970s — made in the same factory — and is easily accessible at Home Depot — and relatively affordable, currently at $9.26/s.f.
This post will not give you how-to or DIY instructions — that is for the experts (I did my own, extensive research). What follows are the highlights of my floor tiling experience thus far — along with a few things you may want to consider if you are going to be installing a mosaic ceramic tile floor of your own.
 Installing mosaic tile is not for the faint of heart. A few tips on getting started:
- Make sure you figure out the best tile arrangement for your room. There are plenty of places to read about how to do this, but basically, you need to find the center of your room and work from there.
- Take into account the possibility that your walls might not be totally square… and where you want your tile cuts to be. My goal was to have no tile cuts along the outside structure of the shower, since that area is most visible upon entering the bathroom. This took a little figuring, not only because it was difficult to find the center of my room, due to all of the jutting walls, closet and shower — but also because my initial center lines had to be adjusted to make sure tile cuts fell where I intended.
- It was much easier to figure out the tile layout inside the shower itself since it was a smaller rectangle shaped area.
- Once the first row was installed in each direction, putting down the rest of the floor went fairly quickly.
- Make sure your mortar is not applied too thick. You don’t want to fill the space between tiles where the grout will go — because then you will have to scrape it out — a pain, especially for random tile patterns. To minimize this problem, trowel mortar at a 45 degree angle to get the proper thickness, then knock the ridges back down with the other side of the trowel. That way the ridges of mortar don’t fill in the grout lines when you press the tiles into place.
- Make sure to lay your tile out in the direction you will be installing it to assure it goes in the right way. Somehow I ended up with two sheets of tile that are backwards. They are hard to spot, but I know where they are — which is one of the hazards of DIY renovations.
 Then came the fun part. Cuts. Lots. Of. Cuts. Cuts were not fun for the following reasons:
- After a while, the tile nippers kill your hands.
- When you nip tiles, they sometimes explode everywhere (safety glasses are a MUST).
- Figuring out the pattern — which color/shape of tile goes where — took a lot of concentration.
- It took me just as long to make the cuts and install the cut pieces as it did to put down the main bathroom floor (once the layout was established).
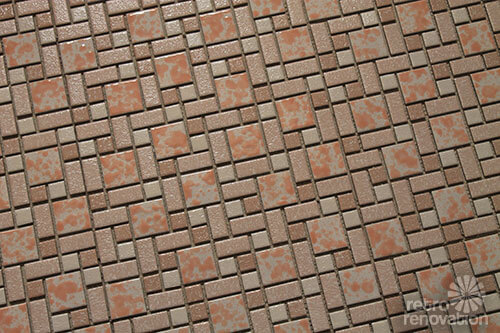
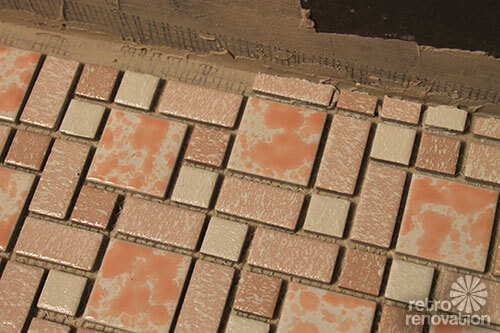 Here’s a close-up of some of my tile cutting and piecing fun. The worst tiles to cut were the 1 inch x 2 inch tiles that needed to be cut lengthwise. I used a scoring tool to score the tile lengthwise — not an easy task with the textured glaze — and then silently prayed while trying to snap it. One out of every five tiles was cut as intended. The other four exploded. Not fun at all.
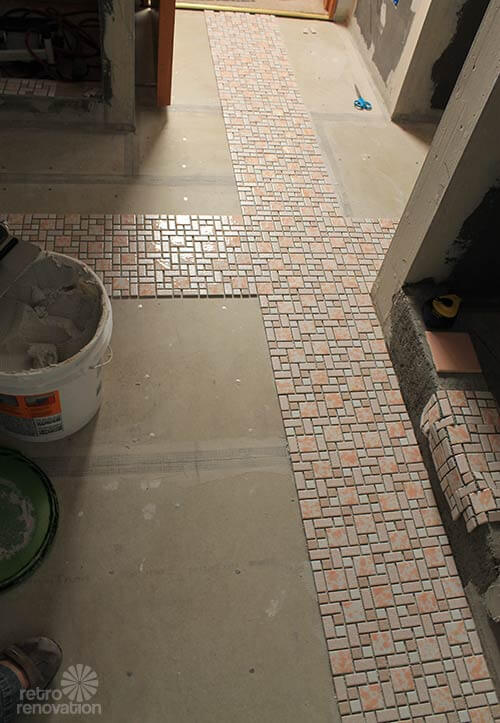
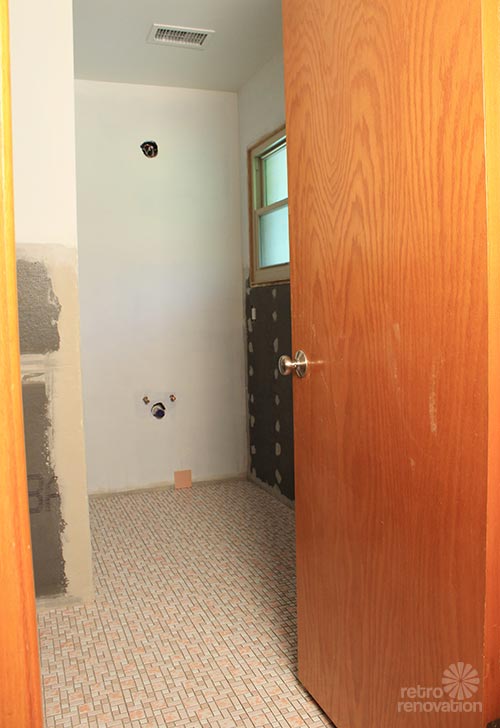
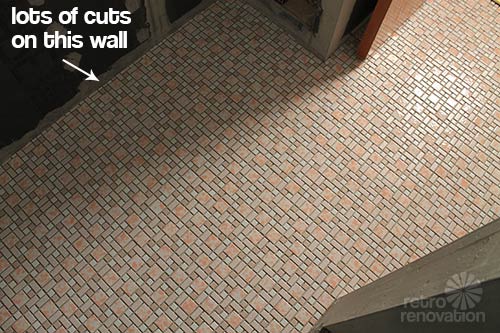 The outside wall of the bathroom had a lot of cuts. It took forever. Before starting this batch of cuts, I asked my adorable husband Jim to remind me exactly how much this tile makes me happy every time he heard me complain about cuts taking forever, tiles exploding and how badly my eyes were crossing from figuring out the pattern. By my estimate — he had to remind me about 342 times throughout the day.
 In the end, the tile floor turned out amazing. I love it so much it isn’t even funny. It makes me giddy and I find myself going to “peek” at it several times a day to make sure that it is really in my bathroom.
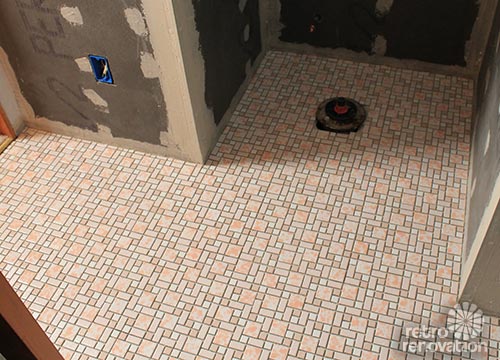 There is still some serious grouting to do. (Right now I’m debating between using SpectraLock Epoxy grout or traditional grout and it is stressing me out.) So this floor is far from finished, but so far, it is pure love.
 Of course there is plenty more to tile — like the 800 pound pallet of pink B&W tiles that are sitting in my garage waiting to be installed — but for now, basking in the joy of a pretty pink floor is making me happy. Stay tuned, there’s much more pink in progress.


mollie d says
a-mazing, I LOVE the tile!!
Julie L says
Amazing job Kate, this bathroom will look awesome when you are finished!
I have recently completed two bathrooms in my house! I remember installing tiles on Christmas Eve! I feel your pain, but it is completely worth it in the end!
-Julie xoxxoxo
Mary Elizabeth says
LOL We have a rule in our house about not installing anything on Christmas week, even if we got it for a Christmas present. This rule was put in force in the late 1980s as a result of my Christmas party guests coming in the front door to discover that our small garden was full of a cracked blue toilet (thanks to DH’s new install the day before when the dump was closed). My neighbor tried to disguise the horror by filling the toilet bowl with sprigs of holly and evergreen left over from wreath-making, but that didn’t help much. Now when one of us suggests any big project in late December, the other one merely says, “blue toilet planter,” and the other reschedules the project.
The trouble was, before we retired, we often both had vacation that week with time on our hands and we were always itching to do something.
Kami says
I completely understand what you went through installing that tile. We just finished laying out a much simpler (easier, so we thought) hexagonal tile, and the cuts were absolutely the worst part. Our old cast iron tub isn’t straight across the front, so we had to nip all of these weird shapes, and like you experienced, one out of every five tiles ended up okay. To me, mosaic tile is akin to purgatory. It’s where you atone for your DIY sins, lol.
Kate says
Ha! I like that comparison. 🙂
Chad says
I may be in the same boat a bit later this year! My tub is straight across the front and I have penny tiles for the floor, so I was just going to butt them against it. From reading this, I’m thinking of tiling the floor before I hang drywall, so I have enough play with where the tile ends to avoid cuts. I know none of us are professional tile setters or fortune tellers here, but does this sound right?
Taralyn says
We just renovated our pink, white, and gray bathroom about a month ago and used this same tile on the floor. It is my favorite part of the bathroom. So pretty!
Kelly L Swagler says
Hi Taralyn,
How has the tile worked out for you? I just ordered a sample and it seems a little slippery. Do you find it to be slippery at all?
Thanks
Kelly
Pam Kueber says
Hi Kelly, I am not 100% sure, but it may be that there are standards for slips/falls that a floor tile must meet. On issues like this I recommend: You consult with a properly licensed professional.
Sarah g (roundhouse) says
Love this tile, and it looks great! But serious question… Doesn’t one install wall tiles before floor tiles? It’s just what I’ve always seen done but correct me if I’m wrong or if it doesn’t matter.
Kate says
I’m not sure that it matters Sarah G — if you do the floor first you just need to be careful to cover it with something (cardboard/paper/plastic) so as not to get thinset/grout on it when you are installing the wall tiles.
Allen says
If you are putting in baseboard tiles you have to put the wall tiles (as well as the baseboard tile) first. If you don’t intend to use baseboard tiles and just use standard field tile then it doesn’t matter which goes up first. It will be a slightly different look whichever way you go.
Kate says
Thanks for clearing that up Allen. I’m not using baseboard tiles.
Allen says
I didn’t figure you were using baseboard cove tiles since you had laid the floor first. It sounded like you had done your research for your project well :).
Kate says
I have done extensive research — though I always worry that I am missing something, since I am not a pro. I loose sleep over stuff like this! DIY remodeling is not for the faint of heart — lots of determination needed!
Allen says
Yes indeed. Its hard to get all those i’s dotted and t’s crossed. The Merola Tile is my absolute favourite that is in production today. It looks so…right.
Sarah g (roundhouse) says
Oh goodie! I’m so glad everything is correct and on track for you. Both my bathrooms and the recent re-do at my moms had the baseboard tile so this all makes sense now.
I’ve installed a few mosaic tiles and I find that if you buy a ceramic cutting wheel for a dremel tool ( if you have one, if you don’t they always come in handy) and that works really well for small precision cuts. Especially when the little tile needs two cuts ( like cutting a rectangle out to fit around a corner for example). Much more control than the nippers offer.
Chad says
I think that sanitary cove base tiles are made with rounded edges to sit above the floor, while regular cove base tiles do not. I could be wrong – tile trim configurations are confusing – but I’m pretty sure they’re made both ways.
MikeD says
Sweet! Great work and it looks killer!
Looking forward to more updates
-Mike and LIndsey
Wendy in St. Louis says
WOW that looks fabulous!! I am going to tackle a mosaic backsplash soon – you give me hope 🙂
For others planning on working with mosaic, here is some good info on cutting with a wet saw – it is about glass tile, but the method he uses applies to ceramic mosaic too:
http://ceramictec.com/how-to-cut-glass-tile
And here is a forum with pros who can answer just about anything:
http://www.johnbridge.com/vbulletin/index.php
Sherree says
It looks absolutely wonderful! I cannot wait to see it all finished 🙂
Mary Elizabeth says
Bravo, Kate! I am so happy you finally got to put in the tile. I’m curious about how many square feet you ruined with the cuts. It’s interesting how much laying out tiles is like laying out a quilt, except your material is much less forgiving than cotton. 🙂
Since our identical University Pink tile was installed in the bathroom before I bought the house, it and the tub had to be the centerpiece around which we did the rest of the renovation. It’s interesting that while doing other work (installing the new toilet) and cleaning, we saw mistakes around the edges behind and under the toilet where the cuts didn’t go so well. But the beauty of this tile is that such mistakes just aren’t that obvious. After reading your tiling story, I’ve sat on the edge of the tub to see if the tile sheets at any point go in the wrong direction, and I just cannot tell. So I think the pattern is forgiving enough that it just doesn’t matter, and you will be the only one who knows.
Anyway, congratulations! You rock! And I’ve decided I will stick with hiring my friend the tile man to do any future jobs for me.
gsciencechick says
We just had black and white pinwheel mosaics installed in our hall bath. I did not DIY this, but our installer had to make a lot of cuts around the tub and also at the side wall. They used a wet saw vs. the nippers, but for small jobs I imagine just the nippers would work.
He recommended 10% more square feet to cover any odd cuts, breakages, etc. You can always keep a couple of extra sheets for repairs and return the rest. We bought ours at Lowe’s.
Kate says
I have several sheets left over even after the cuts. Always good to have extra tiles!
Kate says
Hi Mary Elizabeth — I’m not exactly sure how many square feet I ruined trying to cut, but if I had to guess I’d say it was definitely less than 2.
Mary Elizabeth says
Thanks. I’m thinking of buying some while it’s still available in case I need to make repairs. And with all my decorating and renovation projects over the years, I have bought extra everything! That makes the mistakes and later mishaps less frustrating. DH does the same, and he was just able to put down hardwood in some closets with leftovers from the living room floor.
miya says
Yeah for you Kate! I know how much planning it takes to get the initial layout just right. I have tiled many rooms over the years and still learn a new ‘trick’ every time. It is back-breaking work but worth the effort. I am a 50 year old female and started tiling 15 years ago when I wanted a backsplash in my kitchen. Me being the thrifty gal I am, was too cheap to pay anyone to do it, and my husband didn’t want to tackle it. I figured a tile guy was no smarter than I was, but just stronger, so I read how to do it and thus began my tile resume. I would recommend buying a $100 wet saw for all those cuts, it is worth the money and you will use the saw in years to come.
Kate says
Way to go miya! Girl power! 😉
I actually have a wetsaw in the garage (on loan from dear old dad) that I plan to use for cutting the wall tiles. I was afraid to use it for such little mosaic pieces though…
kate mckinnon says
Home Depot and other stores like that will also rent you a wet saw by the day, which is often easier/more sensible than buying one.