

 When reader Pat and her husband Bill initially moved into their 1951 ranch home, they weren’t fans of the original St. Charles steel kitchen cabinets, which were in rough shape after years of use. Pat priced out how much a complete gut remodel would cost and realized it wasn’t in her budget. After pondering her situation for a few years and discovering Retro Renovation’s stories about readers who had successfully refinished their steel kitchen cabinets, Pat knew that she could do it too. Now Pat says, “I’m so glad I lived with the “old” kitchen long enough to appreciate the quality of these vintage cabinets, they have as many pull-outs as the fancy new cabinets!”
 Pat writes:
Hi Pam,
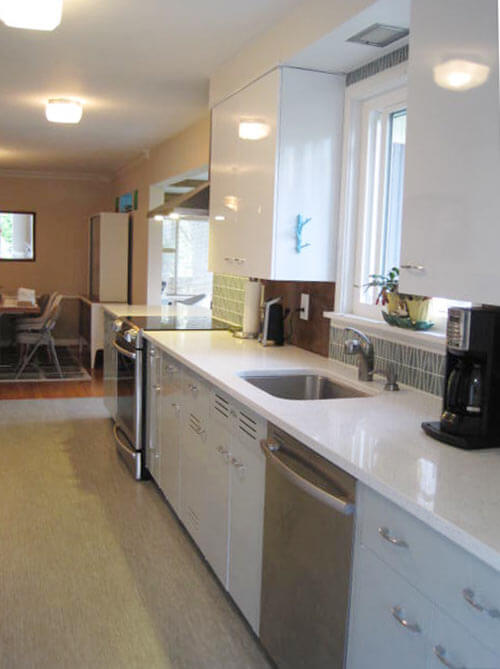
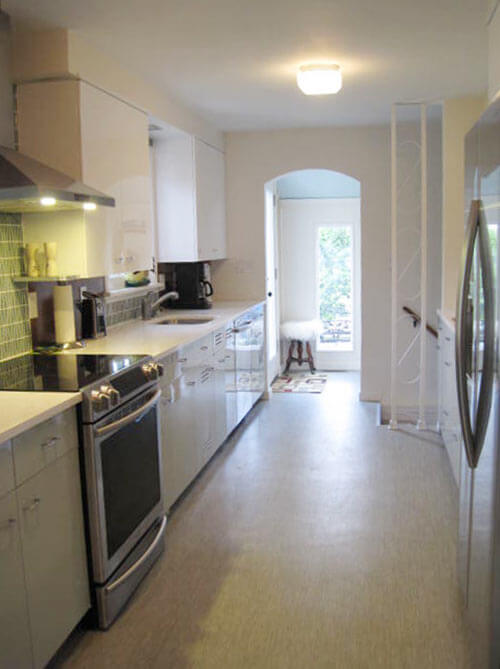
I wanted to share some pictures of our (finally!) completed kitchen remodel. We kept the basic floor plan, opened up a wall which allowed us to add in some additional St. Charles cabinets. It’s been a process, but I’m so glad I lived with the “old” kitchen long enough to appreciate the quality of these vintage cabinets, they have as many pull-outs as the fancy new cabinets!
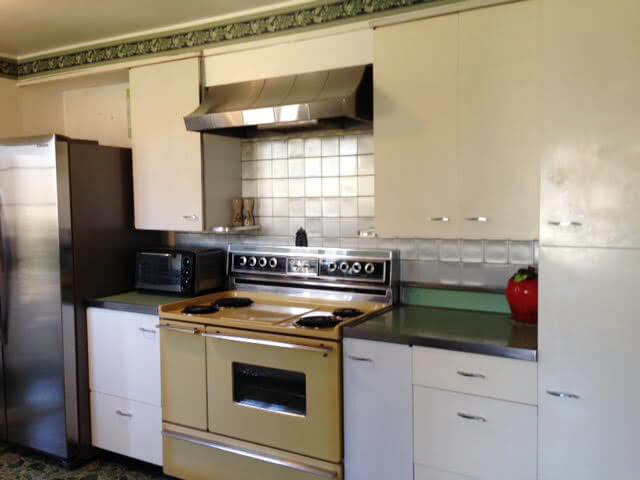
We bought this 1951 ranch about 4 years ago, from the owner that had lived here since 1956. The house had “good bones,”and is in a great location close to downtown. It has been an ongoing project, we have pretty much restored/remodeled most of the house. The great part of waiting on the kitchen remodel, is it allowed me to see the possibilities of reusing the original St. Charles cabinets. Yes, that process definitely took 2+ years! To be honest, when we first bought the house, I had lived in new construction homes, and I couldn’t wait to rip out the old kitchen. The bid to gut it and put in new was out of our budget, so I lived with it long enough to appreciate the quality & uniqueness of a steel kitchen. I have also grown to love the paneled wall in the living room I originally wanted to paint over or rip out. I’m not slave-ish to restoring to 50’s materials, but like to respect the original aesthetic of the home and make it work for our needs.

These cabinets are full of slide-outs, dividers, etc, I even have a vegetable cabinet, it has wire mesh baskets and slits in the door so your produce gets air circulation. (It’s the one closest to the sink.) The cabinets were still white, but had been brush painted over the years, and had some rust. If not for your website showcasing metal cabinets, I would not have had the vision to redo the kitchen with them.
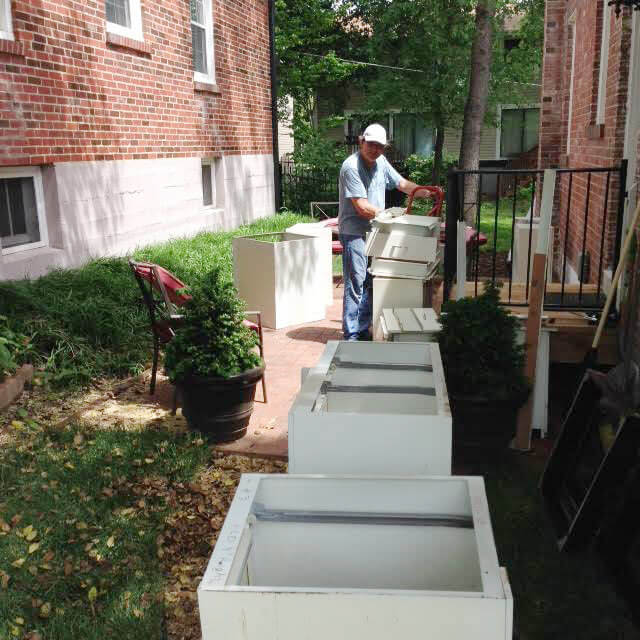
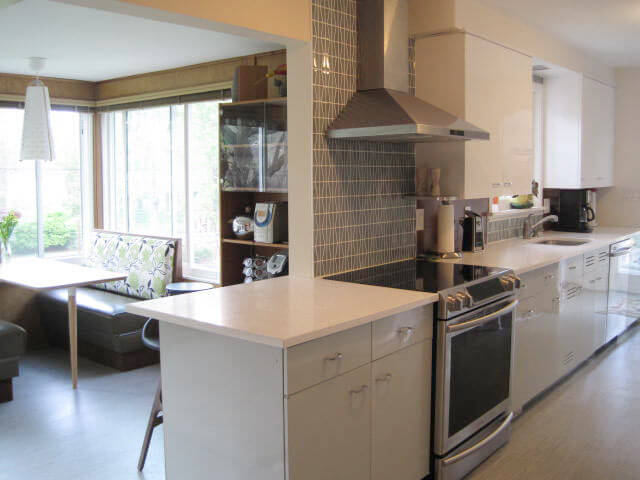
I had them powder-coated at Liquid & Powdercoat Finishes in KC, MO. (Thanks to a previous Retro Renovation post on a KC kitchen remodel, I found out about this great local resource.) I kept the same galley layout, but was able to incorporate an additional 4 cabinets by removing a corner wall & relocating the stove. It took awhile to find St. Charles cabinets, we ended up driving to St. Louis to buy some off Craig’s List. We did all the work ourselves, except for the drywall.
Luckily my hubby is super handy and willing to go along with my creative visions. I loved the little bits of history we uncovered – there was a 70’s & 80’s color palette hiding under all the layers.

I am attaching my vision board, it was my little go-to guide, although it didn’t turn out exactly like the vision board.

Inspiration for the color pallet was the starburst clock. I must admit it isn’t a George Nelson – just an old brass one I spray-painted in like colors.
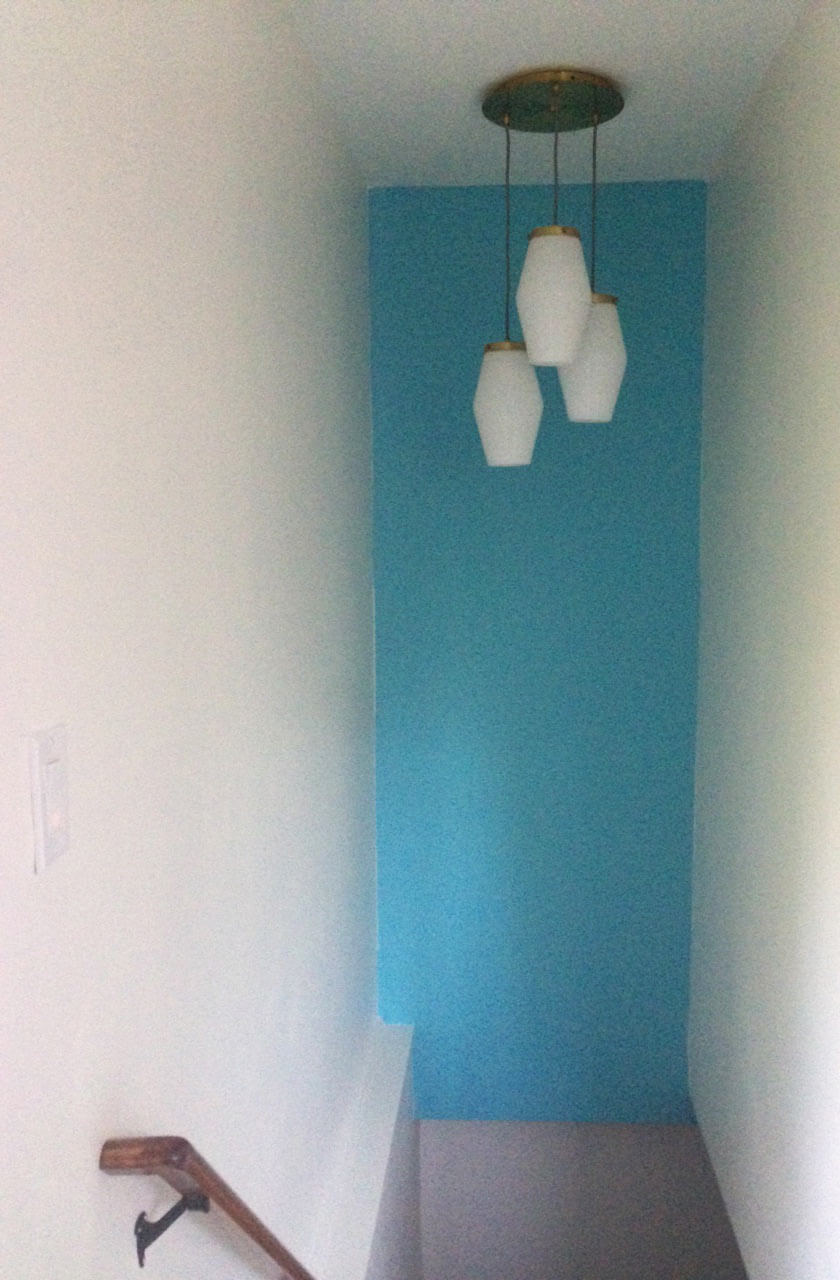
Another funny discovery – I did have to give up my swinging kitchen door, and when he removed it we noticed the original carpenter had noted it’s designation on the framing in pencil: “Baby-Slapper.” Removing the door from the basement stairs made a huge difference in visually opening up the space. Things I like best about the new kitchen: having 1 type of flooring throughout (did have 3 different floors) and the open stairs to the basement.
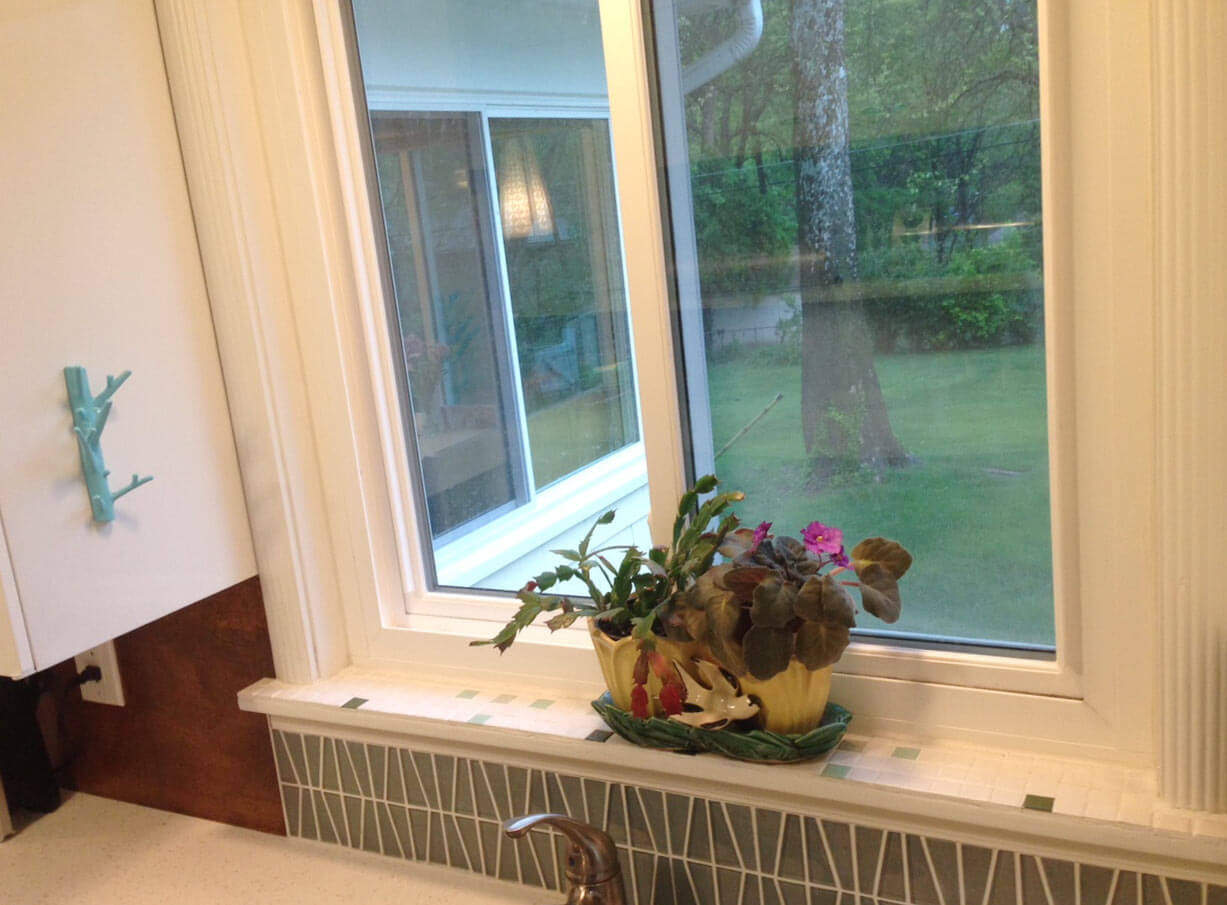
A few touches I kept are: the shelf by the stove with the salt & pepper is an original to the kitchen (with Green Linen Formica), and the original “confetti” tile on the windowsill over the sink. I really loved the color of the green linen, but the newer “linens” were just the wrong hue. And – I gotta be honest – I was tired of cleaning the stainless rim around the counter-top – I just wanted to be able to sweep everything into the sink, which is why I went with the quartz counter-top. It was fun to color match the “suede” color swatch from the 1950’s St. Charles color samples on your site.
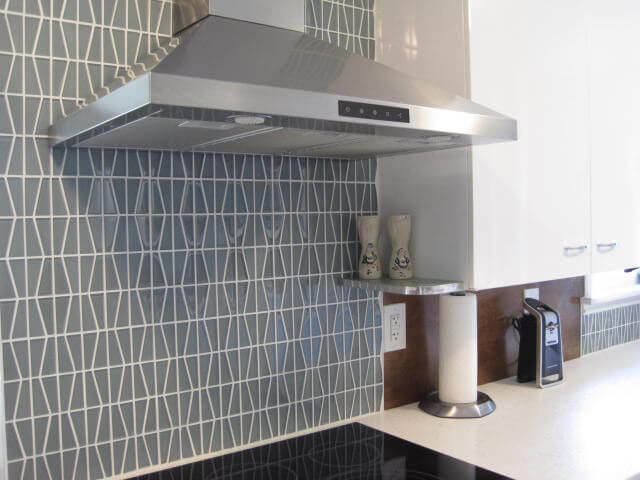
I used a combination of tile (in the wet/cooking areas) and wood in the kitchen because the tile was so darn expensive, but ended up liking the warmth the wood brought to the kitchen.
I included a few shots of the rooms adjoining the kitchen (darn project creep!) since we ended up working on them also.
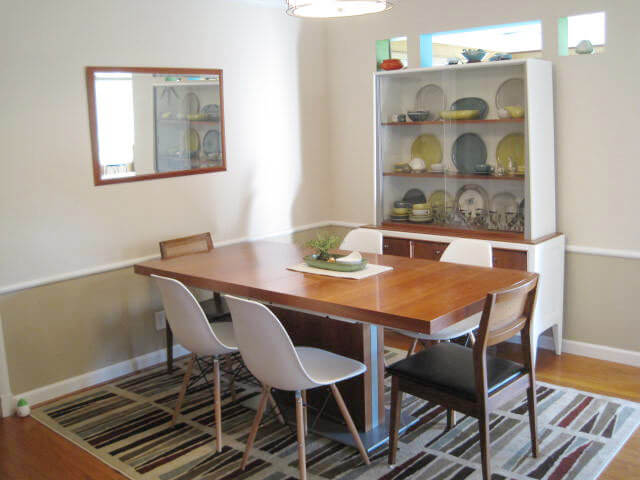

I added the little cut-outs in the dining room to add more natural light to the room.


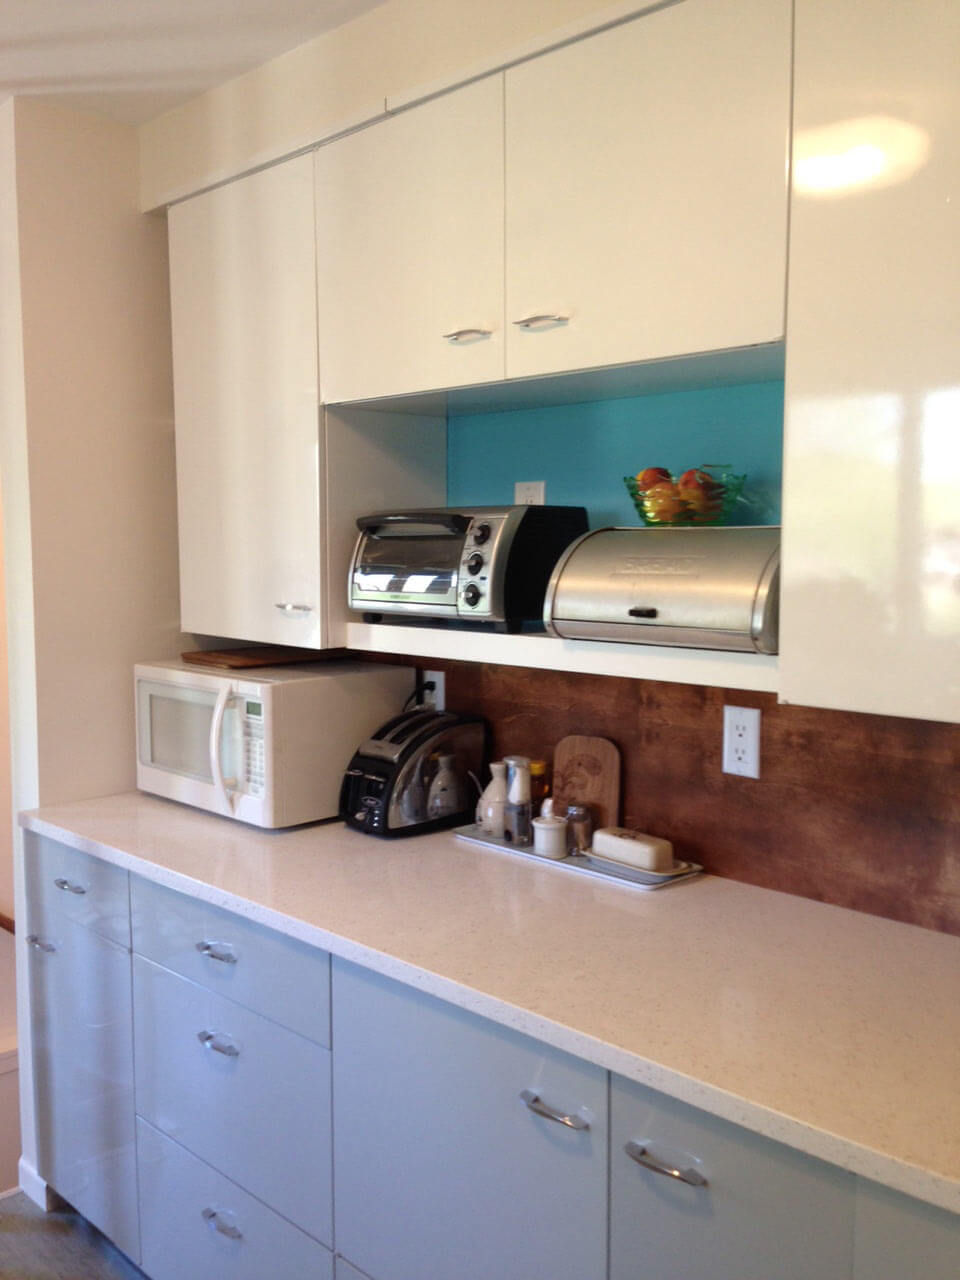
The office/booth room got a major scrub – we replaced the dropped ceiling tiles with sheetrock, replaced the jalousie windows and the birch paneling that was stained from water/condensation dripping from the jalousie windows… you know how it goes… where do you stop! We were lucky the original owner was a woodworker, and the built-in office furniture works great for us. I stained the birch paneling in the kitchen blacksplash the same dark color I used when I refinished the office furniture to tie it together.
Resources:

- Flooring: Mannington Paradigm -Par209 (Commercial flooring)
- Stove: Samsung Electric
- Range Hood: KBC Collection (Amazon)
- Tile: Tile Shop: Glass Water Napier
- Cabinet over fridge: Ikea (did you spot that?), white wall shelf, and stainless cabinet toe kick
- Light Fixture over stairs: West Elm Mid Century Glass Pendant
- Sink: Blanco
- Countertops: MSI Quartz in Iced White
- Cabinet finish: KC Liquid & Powdercoat Finishes
- Faucet: Moen
- Booth & ceiling fixture: Habitat for Humanity ReStore
- Light fixture over sofa: eBay
- Light fixture over booth: Ikea
Way to “Love the Kitchen You’re In!” Pat! Thanks so much for sharing your story, all the resources — and of course, your gorgeous kitchen — with us.


carolynapplebee says
i’m digging that mod green sofa!!!
Suzanne Jonker says
I love my circa 1960 St. Charles kitchen- they are built like a tank and hold so much in my galley kitchen. (when I cook at a friend’s house, I am stunned how little the new wooden kitchen cabinets actually hold, with their separate compartments- nothing beats the slide outs and the amount they hold.) Thanks for sharing this, as I am looking to repaint or powder coat my once yellow, that were painted cream. I heard powder coating sometimes warped the cabinets.
pam kueber says
See the story linked – there is a discussion of the warping issue; consult with pros on this.
Carolyn says
Ugh! Today’s wooden cabinets – from the front it appears you have such deep and wide storage until you pull open a drawer…that’s when you discover they used 3/4″ wood (instead of just over 1/2″) to make the drawer (are today’s folks standing on their drawers nowadays?!) plus make room for the slides. Truly something you see at “face value” – the drawer fronts suggest roomy but you only really get less than half of what you’d expect.
And shelves?! You can barely fit a box of Grape Nuts in your cupboards!
Ken Borne says
Another Beautiful kitchen, awesome job!!!
Kristin says
Would you please be willing to share how much the powder coating cost you? I’m in Columbia so pricing should be in the same general range.
Pat Jones says
around $3600.
That’s for 5 overheads, 12 bases & the pantry. But that also included 19 drawers – I had lots of pull-outs inside. Seem like alot, but these babies are like brand new inside & out – good for the next 50 years.
Tisha says
That’s cheaper than what I paid for about the same number of new mdf cabinets that aren’t of the best quality. A bargain, I’d say!
Kristin says
Thank you! My kitchen is much smaller so that gives me hope of affording it!
Johnny in KC says
Thank you for that. I have about the same # of uppers but double the amount of base cabinets. I wonder. Do you think it would be possible to only blast/coat the outside surfaces?
And another ?. I’m some pics the droor slides look like new? Did you replace any slides? And if so what did you use?
I have a few broken/missing wheels. And as far as I can tell the wheels do not come off. They are riveted onto the droors.
Pat says
Hi Johnny, My original cabinets didn’t have the plastic wheels on the drawer slides – they are metal on metal. I rubbed a block of canning wax on them to make them slide easier, then my husband gave me a tube of liquid silicone, which worked even better!
You are correct though, my St. Louis cabinets had the plastic wheels riveted on, which survived the stripping/painting just fine. I’ll bet there are some tips on this site on how to fix/replace your missing wheels.
Just my two cents – have the cabinets done both inside & out – I can’t tell you how happy it makes me to see the fresh, clean insides – and I bet any buyer would be looking inside the cabinets too – mine were pretty gross inside before.
jen says
This looks so awesome! It looks as modern as it does vintage, great job! That tile is gorgeous!!!
sherree says
It all looks wonderful! What a great job you did seamlessly mixing the old with the new. The way you opened up the basement stairs and added the cut outs in the dining room gave it a more mid century modern vibe. Did you already have the wrought iron divider or did you have that made?
Pat Jones says
He, he, that is actually an exterior (black) porch support from Lowe’s, I just spray painted it off-white to match the walls, I wanted it to visually disappear. I’m still watching my local Habitat for a cool mid-century piece of wrought iron, but needed something there for safety until the perfect piece shows up.
KL says
Love your kitchen (and the rest of your photos)! A total tribute to the benefits of updating with taste and thoughtfulness.
Sheri says
Beautiful ❤️ I live in Toledo, Ohio and my St Charles cabinets are on my to do list.
Mary Jo Sanders says
Beautiful kitchen. One trivial question though, how do you reach/replace the lights in the stairway?
Pat Jones says
ha, hopefully not a to-do for years – I used LED bulbs. I painted the walls by propping a ladder in the stairwell, and then REACHING. (do a lot of yoga to make it easier 🙂
pam kueber says
Oh my. Be safe dear readers. Don’t break your arm like I did!
Jen says
Love it! I’m surprised you were able to get the cabinets powder coated. I took in one rusted drawer from my St. Charles cabinets to be sandblasted and powder coated. The guy told me that he couldn’t powder coat it because of the plastic wheels; they would melt! But I suppose the outside could be powder coated, if not the inside??
Pat Jones says
I highly recommend working with a pro that has experience with metal cabinets – the vendor I worked with used media blasting (gentler and finer bead than sand) and slow heat to remove the finish. (inside & out) He then sprayed and slow-baked the new finish on – 2 coats – at a low temp so not to warp the doors. I removed most of the rubber seals before delivering the cabinets. The “new” St. Louis cabinets had the plastic wheels in a location I couldn’t remove, and they survived intact.
Jen says
Thanks for this info, Pat. I’ll have to look around and see what’s available here in the Salt Lake City area. The plastic wheels on my cabinets don’t appear to be removable; they’re vintage 1960. I don’t know whether that makes a difference or not!