

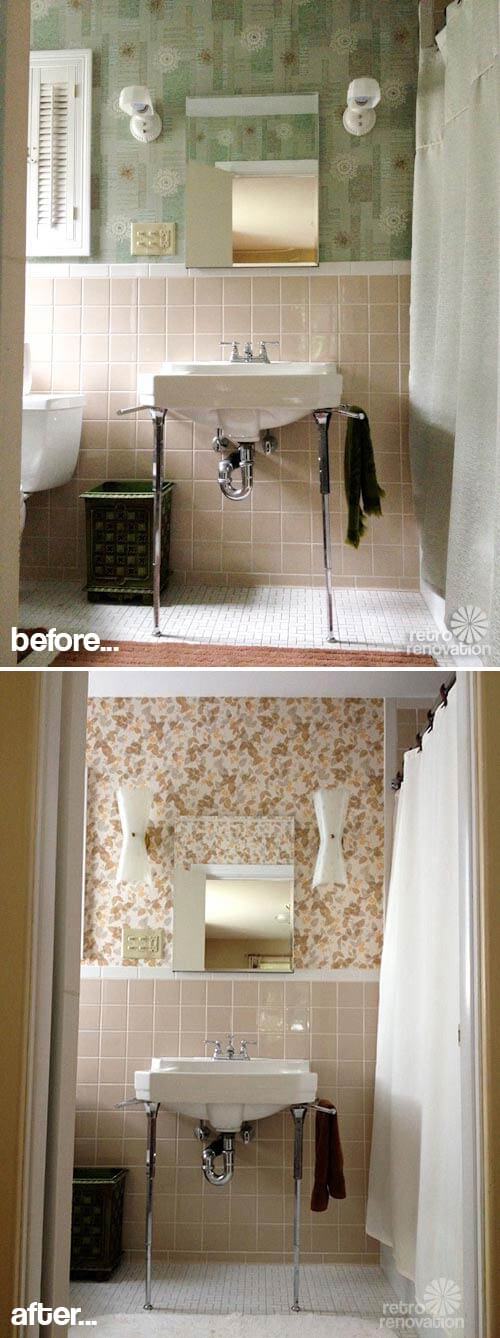
 While Kate has been hard at work on the epic task of gut renovating her 1960s bathroom, I tackled the much less ambitious — but amazingly gratifying — task of re-wallpapering my master bathroom. I know. I know. You like the “before” picture. Maybe better than the after. But the “before” wallpaper was falling off the wall after about 10 years of my using the bathroom like a sauna. So it had to come down. I found the replacement vintage wallpaper at an estate sale. One of the key things that I want to point out in this story: You can totally change the look and feel of a bathroom — just by swapping out the wallpaper. HUGE transformation. Oh, I changed the lights, too — using vintage fixtures I found for a steal. I ADORE my glowy new / old bathroom.
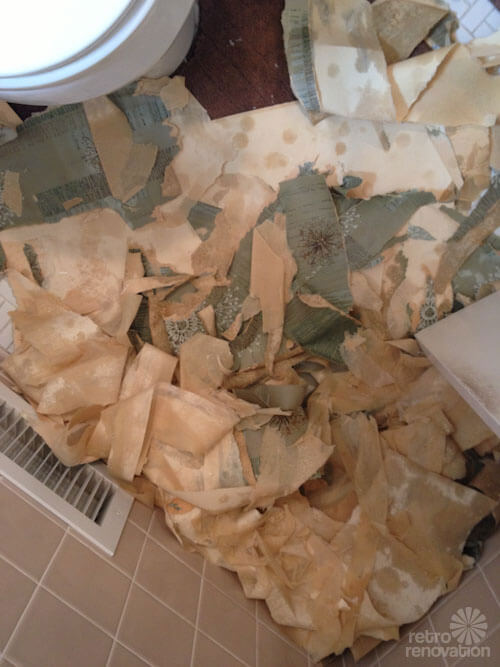
 Above: I used DIF to remove the old wallpaper. There was also liner underneath. The wallpaper was falling down from behind the liner paper. So I think the issue may have been with how the wall was prepped for the liner paper. Or, as I said, it could be that I use the room like a steam bath that no manner of exhaust fan can process fast enough. This latter hypothesis is most likely, I believe, since the falling down / peeling was happening most dramatically at the shower-edge.
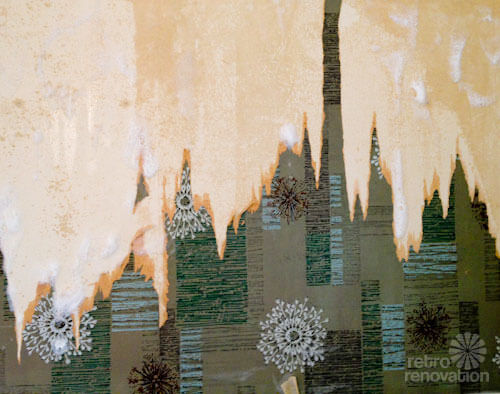
That last photo above is my decollage moment.
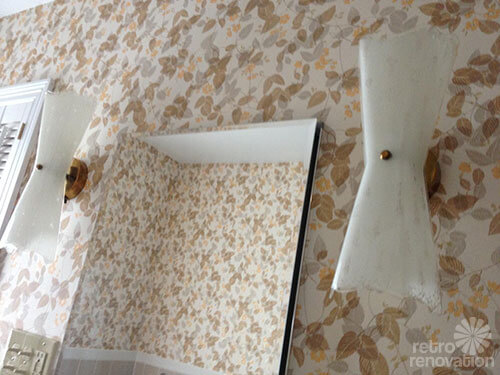
Above: I swapped out the Rejuvenation Selma’s that I originally had installed in the bathroom for these vintage lights that have a way more vintage-modern feel. I found these sconces at the Great Adams Estate Sale Be Still My Heart HERE and here and here and here and here and here. As you can see, before I blogged fulltime (when I had a “real” day job) I used to write shorter stories!
Another background factoid: When I first renovated the bathroom, around 2003, I still had in my heart’s desire that I wanted a Victorian farmhouse. Hence, the porcelain sconces. However, as my journey into the mid century design world progressed, I understood that my house had a much more mid modern feel. Those porcelain sconces were too ’40s for my space. I knew that someday I needed to replace them. When I switched the wallpaper, I remembered these gorgeous bow-tie sconces and dug them out of my attic lighting hoard. (Which is quite impressive, at this point.) I ADORE THEM.
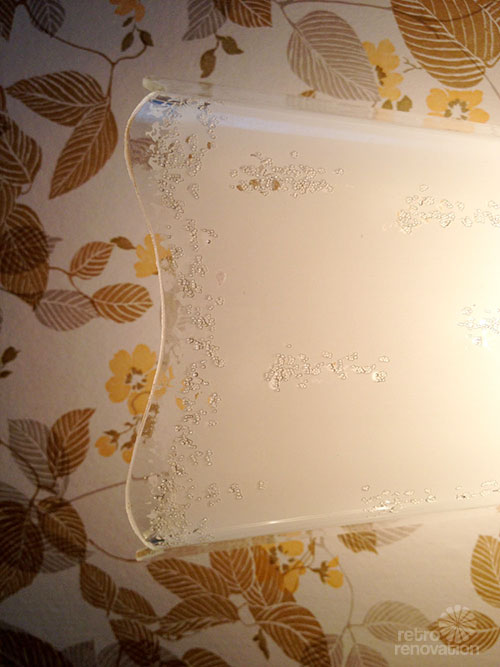
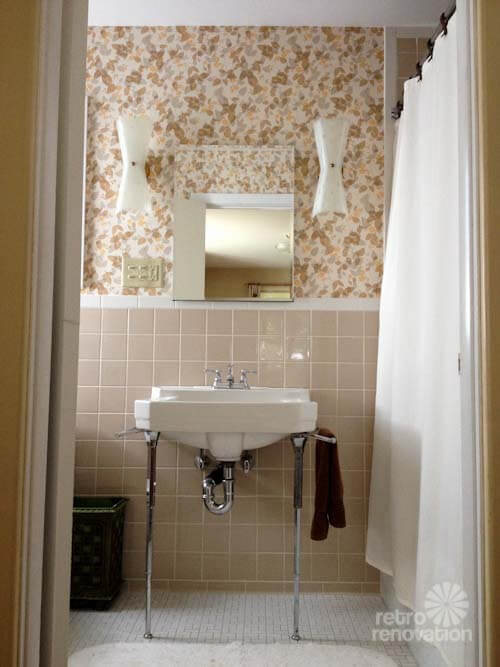 Like I said, this bathroom — with its beige tile and beige wallpaper … with just a dash of yellow and grey … and dreamy frilly frosted glass sconces — is just GLOWY. I went looking for a shower curtain, and found an ivory cloth number at Homegoods for $7.95. It has small, swiss dot woven texture.
 Seriously, I almost didn’t wallpaper. I almost just left the walls white. I have been super duper busy with all kinds of other things, and really, was not in the mood to dedicate the time for this project. I did it in stages over the course of several weeks (chaos all over adjacent spaces). Once the white size was up in two coats and as I procrastinated finishing the job, I almost decided to just paint over with white and hang some art and to heck with decorating complexity. But Kate — with her epic project — was shaming me. So I wallpapered. Finishing up this last piece — wallpapering — took about four hours a day for two days over a weekend. (It’s tricky in a small space with lots of cut outs.)
In the end, I am super happy I did it. The wallpaper makes me immensely overwhelmingly happy. Don’t ever try to talk me out of wallpaper again. Now, I think I really need to do the mud room.
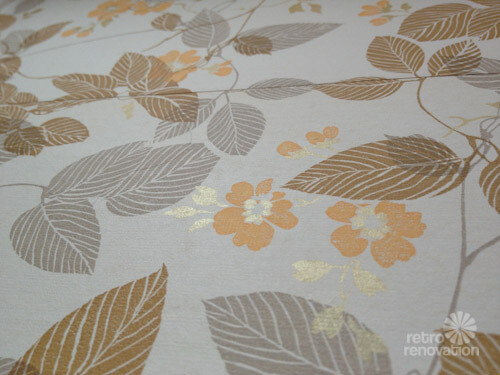 WHO would have thought you could put yellow and grey with beige? I am on the lookout for yellow towels to match. But this may be a hard one. The yellow has no acid tones. It’s kind of … butterscotchy. And YES: The leaves on the yellow flowers are gold metallic.
For this project, I just used the plain old DIF brand wallpaper adhesive — powder you mix with water. We’ll see how it holds up to my “steam room.”
Read this original story of mine about How to Wallpaper a Room in Vintage Wallpaper.
Now for my love letter to these bow tie sconces:
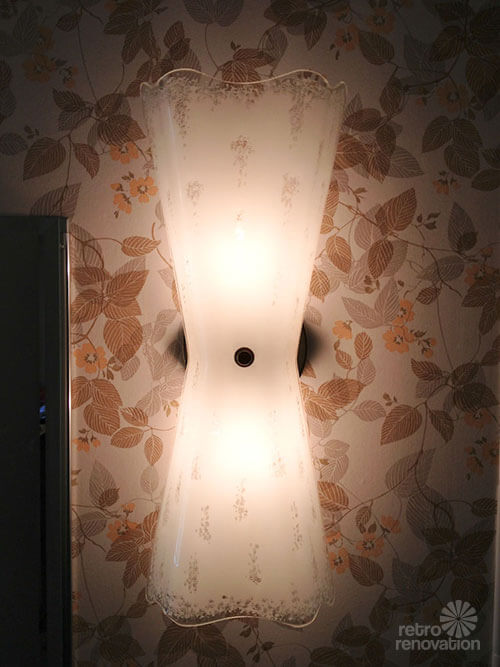
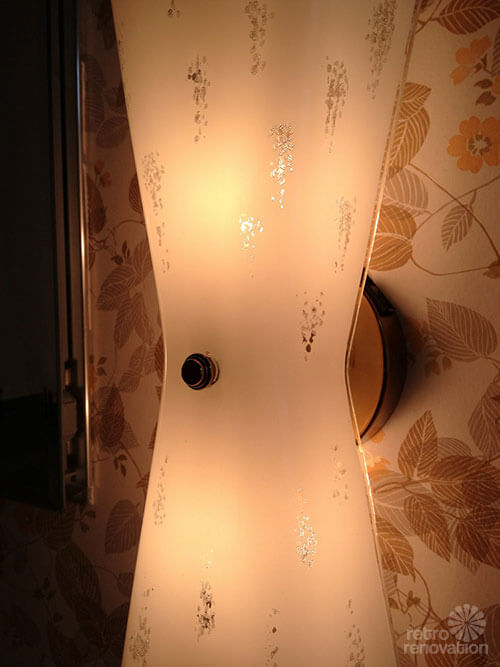
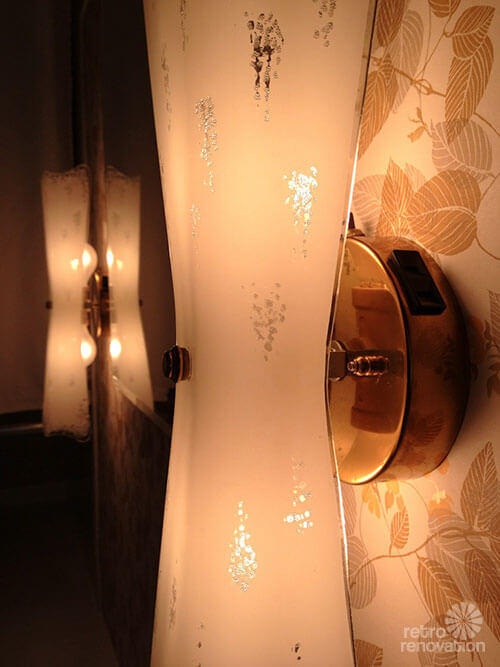
 Oh how I love you, you gorgeous gorgeous gorgeous vintage bow tie sconces. Certain ebay sellers want to sell you these days for $900 a pair. But I found you, forgotten and forlorn, in an old apple box in the garage of an estate sale house. All my greedy grubby dirty handed digging paid off. I found you. You found me. I don’t know who made you. But I know you are of wonderful stock. You are the most beautiful thing I have ever seen. I look forward to our many hours together. I love you.
P.S. Now I need a Stylebuilt trash can.
And, an update: Lots of folks asking about my sink. When we renovated the bathroom, I put a “wanted” ad on craigslist (or was it in the local newspaper? Maybe it was the newspaper, the internets weren’t so super popular yet). I quickly got a hit. Got the sink from a woman in Dalton who had it in her basement from a previous remodel. I paid $65. It included the legs and towel bars. I had to have the faucet rebuilt. The faucet is now gunking up again, and I really need to replace it. Now I know where to find retro-style centersets.
Getting these vintage wall-hung sinks is pretty easy, I think. The legs: Much more difficult to find, although I do see them vintage now and then. (I think they just got tossed in remodels.) If you want to buy chrome sink legs new, best source I know, for selection, is deabath.com. Note, the legs do not support the sink in any meaningful way, as far as I know. The sinks hang on wall brackets — you can also get these from deabath.com. If you are buying a sink vintage, be sure to get the wall brackets if you can, you will save some expense.


modernT says
I love the new bathroom! I liked the before bathroom until I saw the after–it looks gorgeous. I actually think it looks very fresh and modern, as well as vintage. I could see this in a magazine. Well done!
James says
In the master bath in our 1963 house, we have the same glossy beige tiles. The floor is the “textile” pattern with beige and white tiles. The fixtures are American Standard fawn beige. The tub sits in a tiled alcove with the glossy tiles across the ceiling as well as up the walls. Being leery of wallpaper in bathrooms, we painted the wall above the tiles chocolate brown. My wife wants to gut the bathroom and expand it into an adjacent dressing room. I’m standing firm- I’m saving this beige bathroom.
pam kueber says
Way to go!!!
tonya newton says
Please keep us up to date about the steam effect on the new paper. I’m having the same issues with my wallpaper in my bathroom. Not only is the new stuff peeling, but also the layers that were put on by the previous homeowners. I plan to use your method if it works.
BTW, your bathroom is gorgeous! I have that same tile in my kitchen.
pam kueber says
I have two other bathrooms that were wallpapered at the same time — they are not peeling (only lifting a bit at the seams). So I really think the issue is principally the steam effect I create!
Alice says
Hi Pam – nice job and glad to see one of your projects posted! I too have purchased vintage paper for one of our bathrooms (which has the original 1957 paper that just has not grown on me). I have been “nervous” about installing the vintage paper because I thought it may be more fragile than today’s paper. Did you find that to be the case?
pam kueber says
I can’t speak to today’s paper since so far I have only used vintage. But, no, I don’t think the vintage paper I’ve been using has been “fragile.” Once it’s saturated with wallpaper paste, it softens right up. When Denise and I did the office last year — you will recall we used 18 different vintage papers — similarly, we did not have trouble applying it.
denise says
No, no trouble…but we did have lots of fun!! I think you should have called me in for this project, too…um, to supervise and praise the spectacular job done! 🙂
Melissa Hansson says
Any advice on measuring for wallpaper in a room with lots of cut outs? My bathroom is tiny and includes the bath/shower walls on 3 sides, almost to the ceiling but not quite, a nice size window, a full size door, a shelving unit screwed in to the wall and a built-in vanity. With a traditional measurement for square footage, it looks like I need 6 rolls of paper, which seems excessive & will definitely be $$$$ expensive. What was your experience? TIA!
pam kueber says
I winged it. I had six or seven rolls and as I recall the repeat was not too tall. I knew it would be enough. I didn’t try to calculate. Sorry I can’t be more helpful…
Erin says
The sconces make the room – and loving butterscotch, lately! 🙂 Nice finds!
Lynne says
Pam, I am assuming your paper wasn’t pre-pasted and that’s why you used the DIF paste, but is the paper vinyl coated, or just paper paper? I have just paper paper in my master bath, and after 3 years, its starting to show some moisture defects. Was the old vinyl?
Chaucea says
“I know. I know. You like the “before” picture. ”
*chuckles* No, I really like the AFTER picture. That wallpaper ties the colors in the room together so beautifully! Very very nice, very elegant. 😀
Olga says
Pam,
Great Job!! The wall papering looks professionally hung! My mom used to hang wall paper and it takes being a perfectionist to get it right! I haven’t tried it but I certainly appreciate it done well!
And the scones are fab… truly fab~!
Retro fan!
oh Holland says
Not “bowtie” sconces — in this room they’re “butterfly” sconces! It’s gorgeous. And yes, I loved the former iteration, too.
Coupla suggestions: If the right yellow towels aren’t to be found, perhaps you can add a coordinating trim to white towels. (I’m fond of pompoms but I guess that’s more for show than serious drying off -!)
And if you have a scrap of wallpaper left over, it’d be nice to cover the switchplate so it blends in.