

 There hasn’t been much talk of my bathroom remodel since I posted some of my finalized design decisions in February. But I have been hard at work! Believe it or not, the remodel has been in full swing since mid May — when my husband and I suffered through three days of difficult demo.
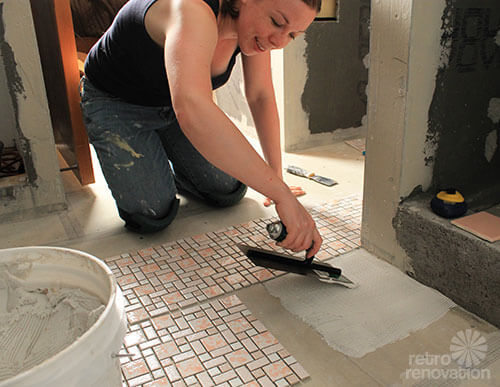
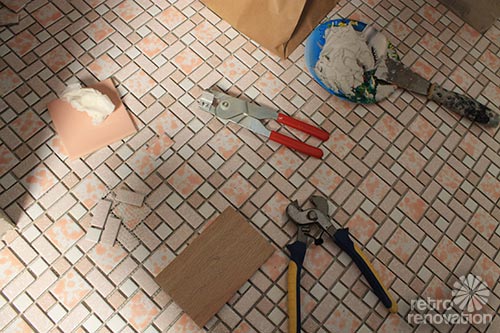
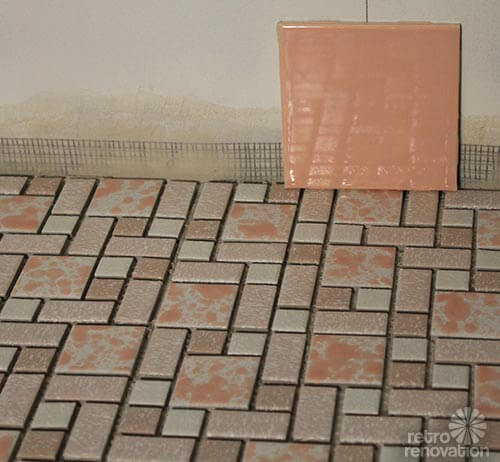
 Yes, we did a gut remodel, and I spent June putting in drywall, concrete board, getting the wiring done, etc. All of that hard work on what I like to call the “unpretty parts” has been worth it, because now it is time for the exciting part — installing pink tiles. With tile, trowel and mortar in hand, and knee pads on (a must) the installation of my Merola University pink mosaic ceramic floor tile has begun. As you will recall, we discovered and profiled this tile pattern — which is available in several color ways — because it’s been around since at least the 1970s — made in the same factory — and is easily accessible at Home Depot — and relatively affordable, currently at $9.26/s.f.
This post will not give you how-to or DIY instructions — that is for the experts (I did my own, extensive research). What follows are the highlights of my floor tiling experience thus far — along with a few things you may want to consider if you are going to be installing a mosaic ceramic tile floor of your own.
 Installing mosaic tile is not for the faint of heart. A few tips on getting started:
- Make sure you figure out the best tile arrangement for your room. There are plenty of places to read about how to do this, but basically, you need to find the center of your room and work from there.
- Take into account the possibility that your walls might not be totally square… and where you want your tile cuts to be. My goal was to have no tile cuts along the outside structure of the shower, since that area is most visible upon entering the bathroom. This took a little figuring, not only because it was difficult to find the center of my room, due to all of the jutting walls, closet and shower — but also because my initial center lines had to be adjusted to make sure tile cuts fell where I intended.
- It was much easier to figure out the tile layout inside the shower itself since it was a smaller rectangle shaped area.
- Once the first row was installed in each direction, putting down the rest of the floor went fairly quickly.
- Make sure your mortar is not applied too thick. You don’t want to fill the space between tiles where the grout will go — because then you will have to scrape it out — a pain, especially for random tile patterns. To minimize this problem, trowel mortar at a 45 degree angle to get the proper thickness, then knock the ridges back down with the other side of the trowel. That way the ridges of mortar don’t fill in the grout lines when you press the tiles into place.
- Make sure to lay your tile out in the direction you will be installing it to assure it goes in the right way. Somehow I ended up with two sheets of tile that are backwards. They are hard to spot, but I know where they are — which is one of the hazards of DIY renovations.
 Then came the fun part. Cuts. Lots. Of. Cuts. Cuts were not fun for the following reasons:
- After a while, the tile nippers kill your hands.
- When you nip tiles, they sometimes explode everywhere (safety glasses are a MUST).
- Figuring out the pattern — which color/shape of tile goes where — took a lot of concentration.
- It took me just as long to make the cuts and install the cut pieces as it did to put down the main bathroom floor (once the layout was established).
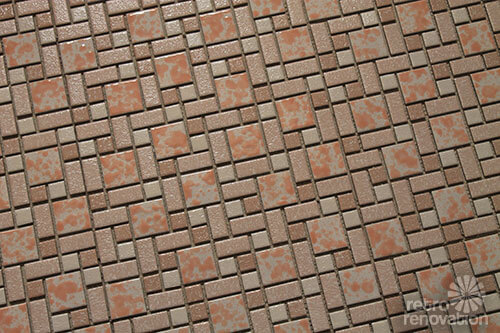
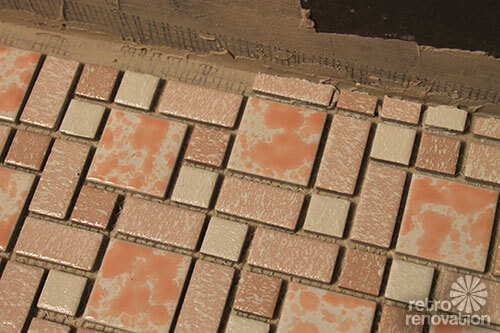 Here’s a close-up of some of my tile cutting and piecing fun. The worst tiles to cut were the 1 inch x 2 inch tiles that needed to be cut lengthwise. I used a scoring tool to score the tile lengthwise — not an easy task with the textured glaze — and then silently prayed while trying to snap it. One out of every five tiles was cut as intended. The other four exploded. Not fun at all.
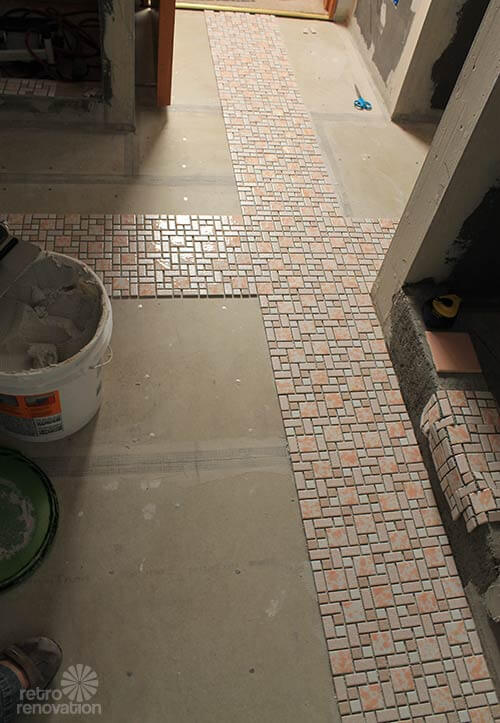
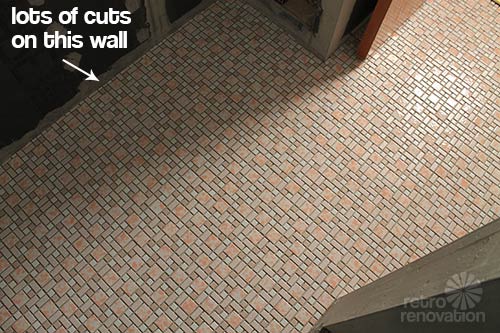 The outside wall of the bathroom had a lot of cuts. It took forever. Before starting this batch of cuts, I asked my adorable husband Jim to remind me exactly how much this tile makes me happy every time he heard me complain about cuts taking forever, tiles exploding and how badly my eyes were crossing from figuring out the pattern. By my estimate — he had to remind me about 342 times throughout the day.
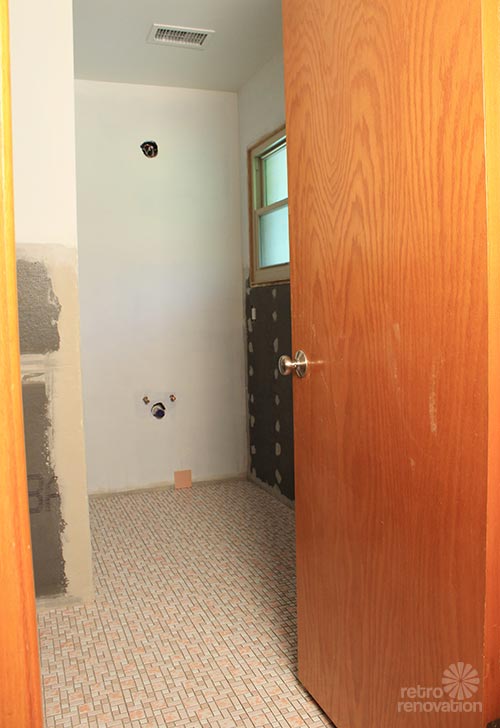
 In the end, the tile floor turned out amazing. I love it so much it isn’t even funny. It makes me giddy and I find myself going to “peek” at it several times a day to make sure that it is really in my bathroom.
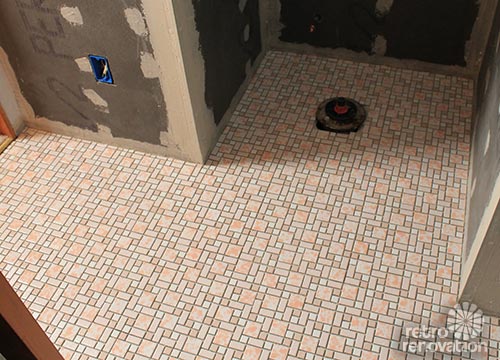 There is still some serious grouting to do. (Right now I’m debating between using SpectraLock Epoxy grout or traditional grout and it is stressing me out.) So this floor is far from finished, but so far, it is pure love.
 Of course there is plenty more to tile — like the 800 pound pallet of pink B&W tiles that are sitting in my garage waiting to be installed — but for now, basking in the joy of a pretty pink floor is making me happy. Stay tuned, there’s much more pink in progress.


Kevin Carney says
I admire your tenacity. As you stated, installing mosaic tile, especially on a floor of that size, is not for the fearful. You did a great job!!!
Kate says
Thanks Kevin! It was quite a job, but it turned out wonderful!
Katie says
HELP! I know this is a long shot but we somehow measured incorrectly for our guest bath and our tile guy has already started the project. Currently the wait time for delivery on both Home Depot and Overstock.com is at least a week. I know that many folks on here have utilized the University Pink Mosaic and I wonder if anyone has extra that I could get sent to me sooner? Or any hot tips on how I could get some ASAP.
Thank you!
pam kueber says
me no know but yum yum, I looked at your blog, and it’s gonna look great in your guest bath!
ScottG says
I’ve been following your bathroom renovation with interest and have decided to install pink University tile in my all-pink to pink/grey bathroom remodel. Before I put the tile down however, I was hoping that you could tell me what size of trowel you used for the thinset. So far, every book that I’ve referenced seems to have a different recommendation, so I thought I’d go straight to the source!
Thanks for all of your hard work on this site…it’s been crucial to my project
Kate says
Hi ScottG — so glad you’ve found out site to be helpful!
I’m pretty sure I used this 1/4″ x 3/16″ V notch trowel: http://www.menards.com/main/flooring/tile-stone/tile-installation-maintenance/tile-installation-tools/m-d-building-products-premium-v-notch-trowel-1-4-x-3-16/p-1851051-c-6599.htm
The important thing to remember when you are installing this type of mosaic tile is to not put so much thin set down that when you press the tiles into place, that the thin set oozes between the tiles and “grouts” them. You do not want that to happen, because then you’ll have to carefully scrape out all of the excess thin set before it dries (much more difficult to attempt afterwards!) and it is a real pain with tile patterns like this that do not have straight grout lines. When I was putting in my mosaic floor, I first used the notched side of the trowel to get the proper coating of thin set applied to the floor, then took the flat side and lightly knocked down the grooves a bit to minimize the “oozing” when I put the tiles down.
Hope this helps and good luck installing your floor! 🙂
Ronda says
Kate, this is fantastic! I have done minimal tile work and it was a lot more difficult than I thought it would be the first time I tried it. I’m in awe that you did this! It is amazing, and from my perspective, worth the blood, sweat and tears. 😉 I can’t wait to see the pink tile with it. You rock! Ronda
Jamie D. says
Great job! This looks fantastic!
If you’re still undecided on grout color, I will throw in my 2 cents. Darker is easier to maintain. We did a similar mosaic tile in our bathroom reno (custom Daltile, based on one of your patterns in a Design Dilemma feature) and I initially wanted to use a very pale gray. I took the advice of many many Facebook friends and instead went with an almost-black charcoal. It looks fantastic and really makes the pattern pop. And hides the dirt. 😉
It does not, however, hide any unfortunate toothpaste or soap splatter. But I can live with that, that’s easier to clean than grime buildup.
pam kueber says
The “warm white” grout on the floors in my two bathrooms is the bane of my existence. Within in a year or two the “warm white” looked like “cat piss.” Sorry for my french there.
Kate says
No worries Jamie D., spoiler alert — floor is grouted — and I didn’t go with a light color. Story soon! 🙂
jay says
Oopsie! Kate, wonderful job! My apologies, somehow I skipped over this post. I will go back several days to see if I missed something and usually one pops up. I occasionally drop in on Mr Modtomic and then jump to your blog. Your yard is really shaping up nicely.
Mark says
Looks great!
My 2 cents on the grout, use the epoxy grout! You will thank yourself later, much easier to clean and the color is more uniform.
Great job!
Margie C. says
One thing you might want to do (if you have the room in the hallway) to make your small bathroom seem bigger is to reverse the way your door opens, from opening into the bathroom to opening out into the hallway. I did this with my peach & yellow bathroom (featured on your website in the past) and it made all the difference in giving a bit more room in there. In your case, I can see that there’s space for the door to open into the bathroom, but I can also see that maybe you could fit in another towel rack or a heated towel rack (!) or even just a picture inside that little entry. Just a thought. I love your tile and the look is just great! Congratulations on *all those cuts*!
Kate says
Hi Margie C. — I thought about reversing the door, but since the bathroom is off our master bedroom, it would be opening into the bedroom. We have closets and a large chest of drawers on either side of the bathroom door opening, that would be obstructed or hit when the door was open — and when the room is not under construction or being used, we tend to leave the door in the open position, so I really think it is best to leave the swing as is. Good thought though!
Charles says
Looks awesome, Kate! I went to do my first solo measure for my Interior Design internship today, and it was in a late ’50s Big Brothers/Big Sisters. The bathrooms had this EXACT (vintage) tile on the floors! One of the employees said that you probably couldn’t get tile like it today, and I had to share your story. 🙂
Kate says
Very cool Charles!:)
MsKittyMuses says
Wow Kate, it’s beauuuutiful! I keep bookmarking all of your stories on this adventure because A. my husband and I are looking at having to remodel our main bath and install one in the basement, and your DIY is inspirational, since I want to do as much of it ourselves as possible and B. I’m determined to convince my husband that he really DOES want a pink bathroom, at least for the basement! He’s already agreed your floor looks amazing!
I know you don’t want to give out any advice on your DIY, but do you have any particular websites/resources that have been crucial to you in your research? I’ve done lots of drywall and small plumbing projects, but tile makes me nervous! I know if we can manage to do it ourselves though, it would save us $$$.
Keep up the fantastic work!
Kate says
Thanks Ms Kitty Muses!
Yay for your husband liking the pink floor! If he won’t do totally pink you could easily put in this pink floor and do white or beige tiles on the walls (since both colors are in the floor itself). That way you can have your pink even if he won’t go totally for it.
As far as tiling resources, I’ve found johnbridge.com and floorelf.com to have a lot of good information, as well as answers to specific questions that might arise in the comments/forums. Also, go to the library and check out a few books on how to do tile work. I read several books first (can’t remember the names) and then used the websites listed above to answer my questions…
Good luck!
MsKittyMuses says
Thank you so much!
There is so much info out there on the webs, it’s hard to filter down what’s relevant and helpful, and what’s people just kind of winging it. We’ll definitely talk to people at our local stores when the time gets closer, but I want to have some knowledge going into it so I know what the heck I (and they) are talking about. We’ve also found a local used book store that’s great for finding how-to house books. Tiling will be the next on our list!
I appreciate it!
pam kueber says
And be sure to Renovate Safe. Work with your own properly licensed professionals to determine the materials in your house including all the layers so that you know what you are working with so that you can make informed decisions.