

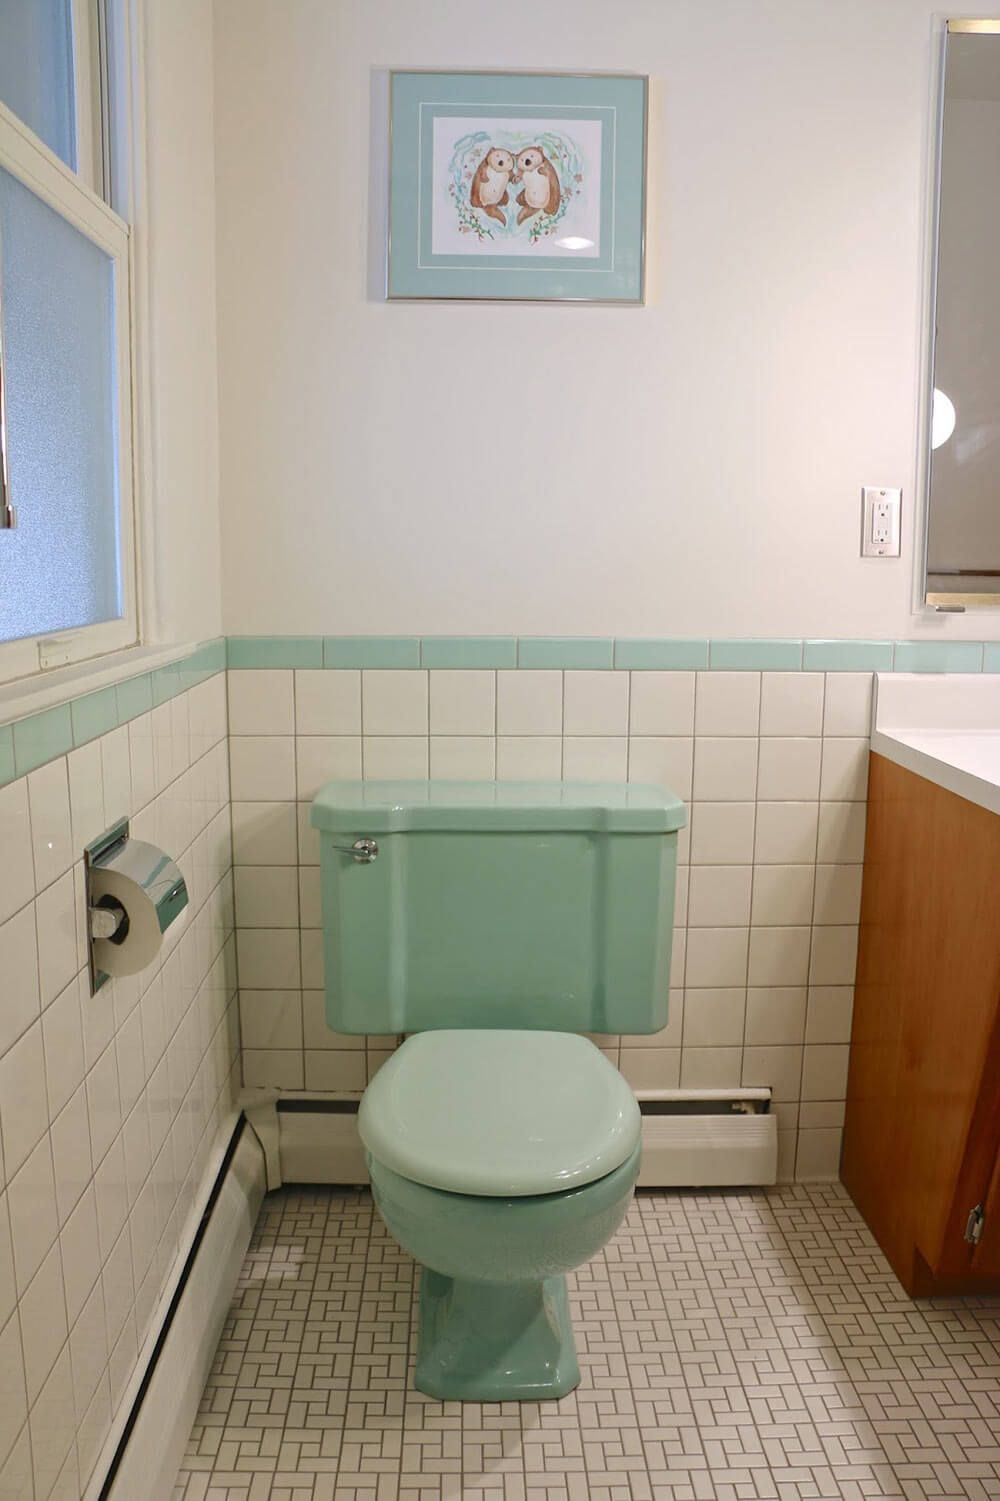
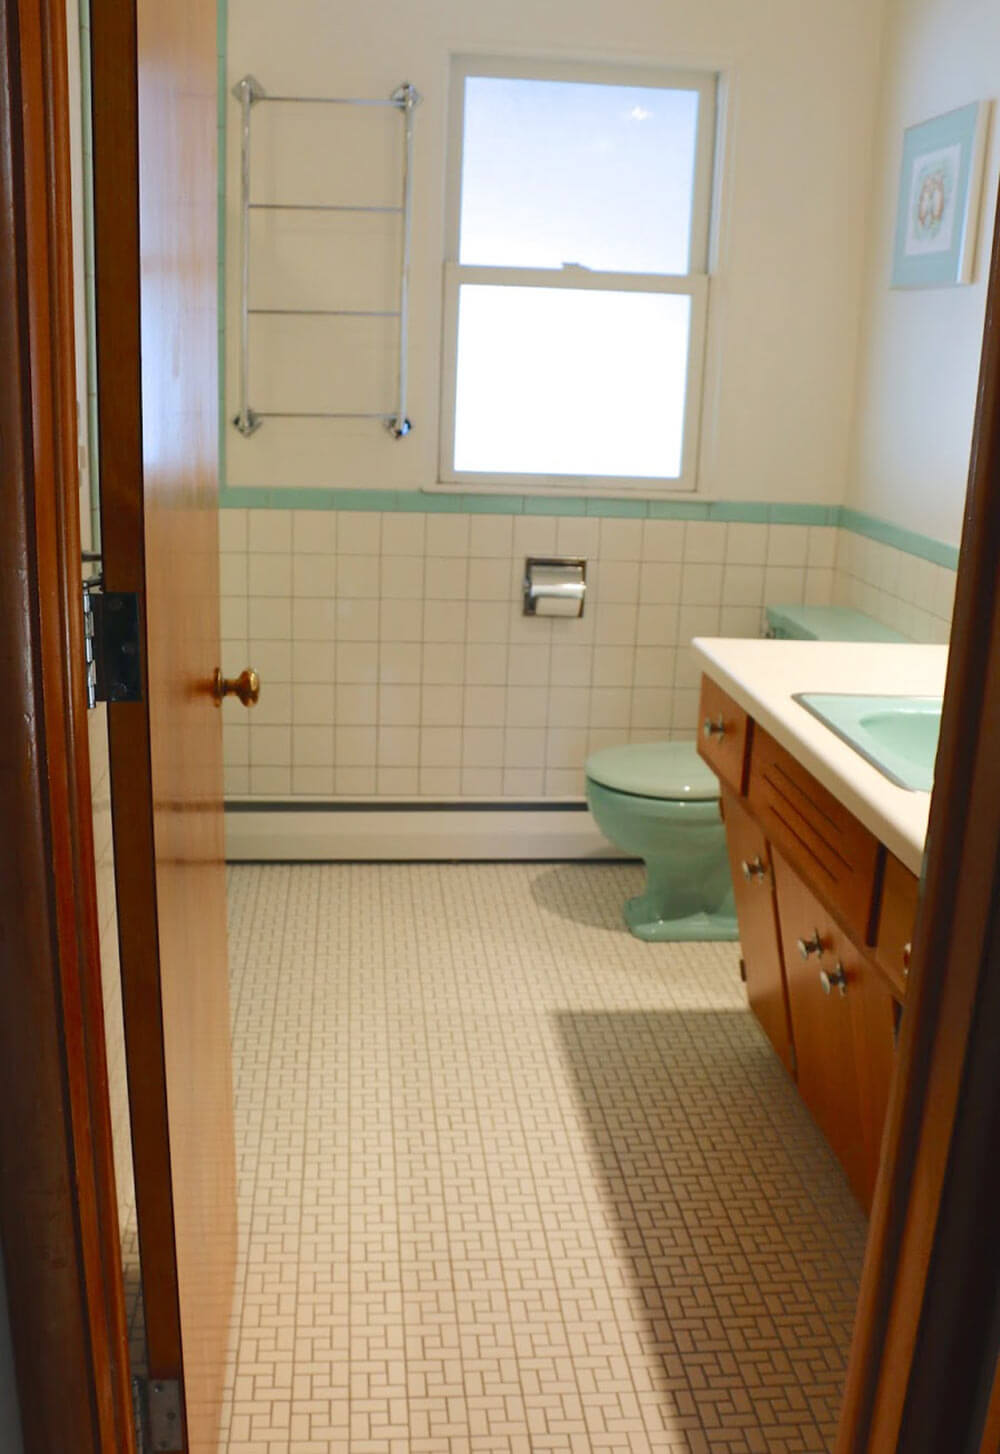
 Donna and Steve waited 18 months after moving into their 1957 ranch home before tackling the renovation of their main bathroom. The original soft blue-green Rheem-Richmond tub and toilet were in great shape and could be reused, but they would need a matching vintage sink, new wall and floor tile, and a new vanity. So a gut remodel — which ended up including a memorable adventure to the famous World of Tile liquidation sale — was in order. Of course, Adventures in Remodeling don’t usually come cheap — and we get Donna’s hilarious calculation: The cost of “unobtainium” — we love it!
Donna and Steve were able to source most all of the elements for the new bathroom using resources found here on Retro Renovation.
And most of them sound pretty affordable: The wall tile is plain white Daltile. The flooring, American Olean Chloe. The sink and even the laminate countertop are from craigslist. Steve designed the vanity and had it custom made. As with most of the stories we do here, we asked for a complete list of resources, and Donna generously sent them along — they are at the bottom of this story. Thank you, Donna.
 The real stickler item, though: Donna and Steve wanted the bullnose trim tile to match the Richmond-Rheem fixtures. After comparing their original qblue-green fixtures to every known tile manufacturer under the sun — including our go-to B&W Tile — they had almost given up on finding a match — until they read about World of Tile. But wait! While waiting for Chippy to produce a tile match for their aqua green, the couple heard that World of Tile was closing its doors! But… Donna and Steve were planning a vacation to the East Coast. Could they divert a portion to attend the World of Tile liquidation sale (November 2014) — and possibly score some tile for their project? Yes! Adventure: On!
- Finding wall tiles to match the original features proved to be a challenge — one that Donna chronicled over on her blog Mid Century Make Under.
How much did their World of Tile treasure hunt cost?
Thankfully, the pair did manage to find the perfect tiles (and a few other things) at the WOT liquidation sale. Donna wrote all about it in her hilarious blog post The True Cost of Unobtanium.

 Excerpt from the blog post:
We’re all familiar with unobtanium, right?
From the Wikipedia:
“…any fictional, extremely rare, costly, or impossible material … needed to fulfill a given design for a given application.”
Color-matching tile for the bathroom has been our most recent unobtanium quest. We long ago gave up on trying to find enough in a perfect color to do everything, and were just hoping to find some accent pieces to relieve the (planned) solid white. Which is why we found ourselves in a New Jersey hotel at 2am on Friday, hoping to get a couple hours of sleep before visiting the World Of Tile liquidation sale.
We frequently talked about needing to make the pilgrimage, but when faced with the store’s closing, the urgency ramped up considerably, and we decided to squeeze in a side-trip to already-planned vacation. However, this meant that while we only had a 3-hour drive (instead of 10) there were some other expenditures, adding to the “true cost” of our treasure.
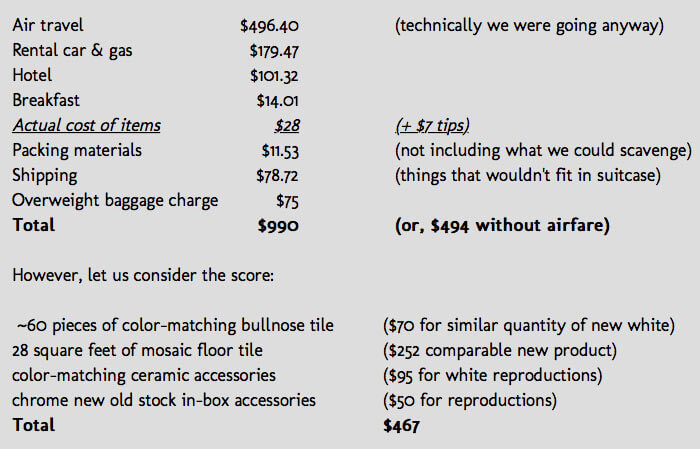 Our favorite part of their story is the chart (shown above) that Donna made to illustrate the true cost of the great tile bargain that the couple managed to score at WOT.
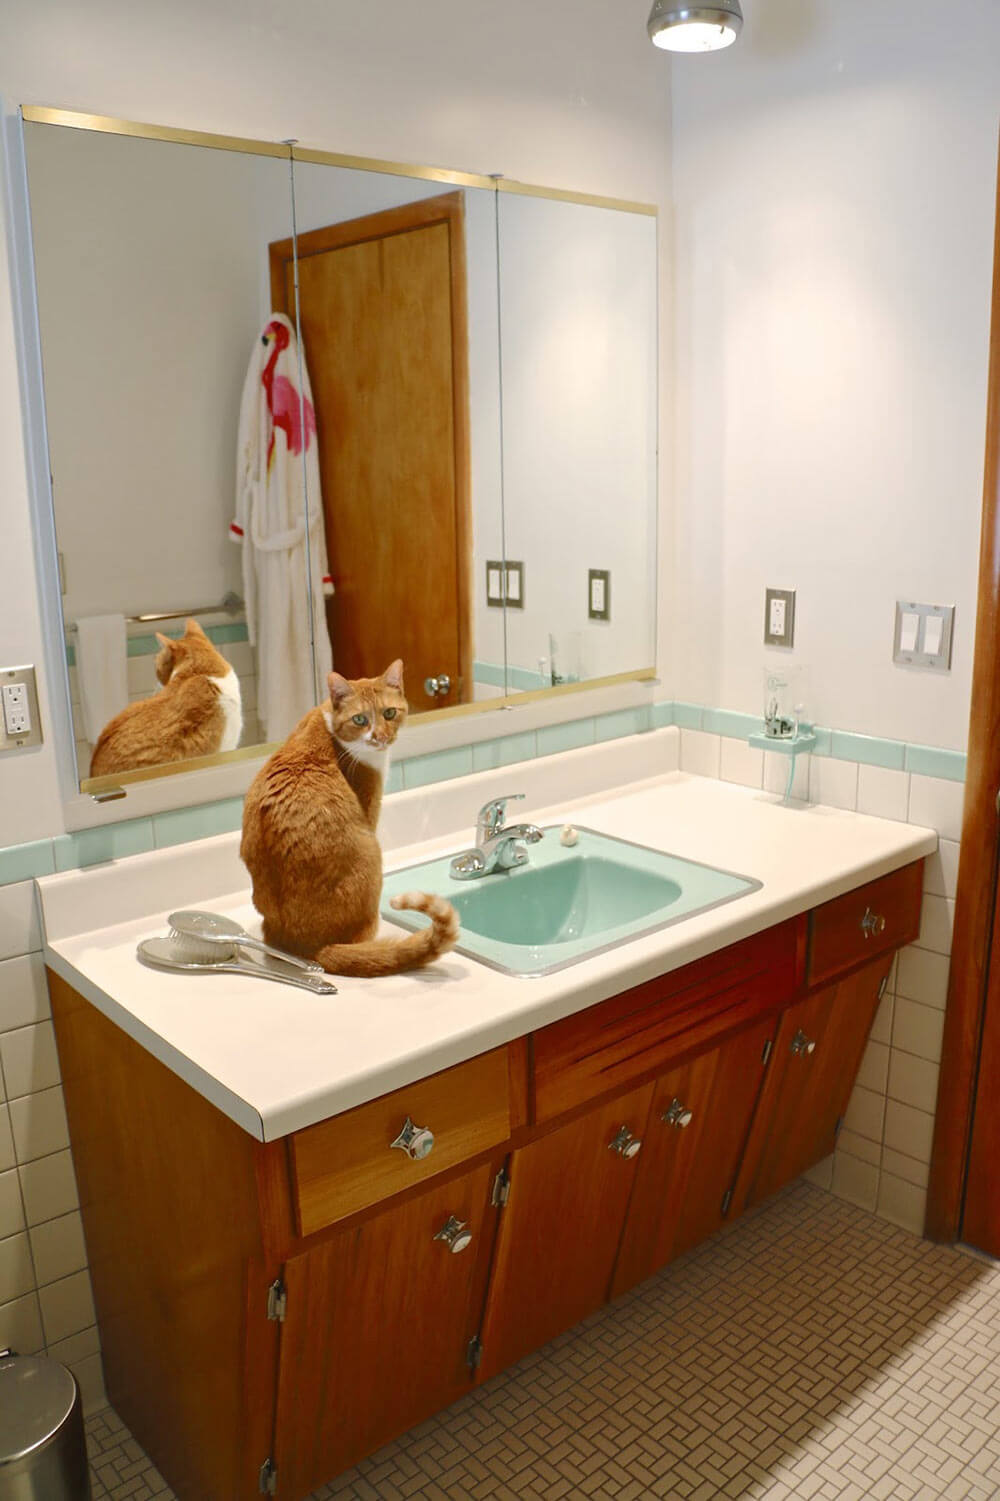
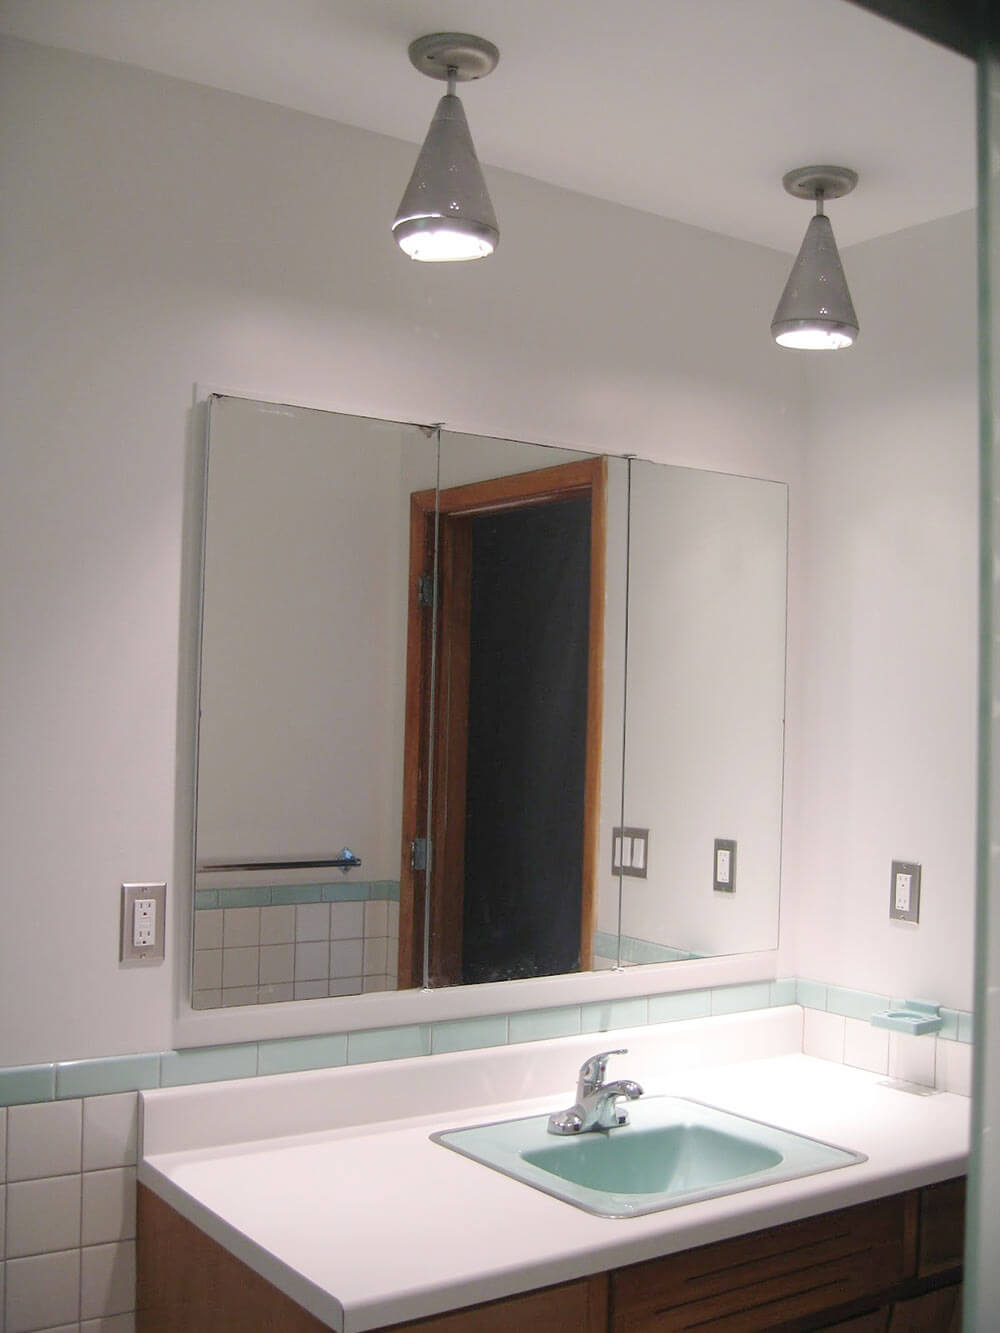
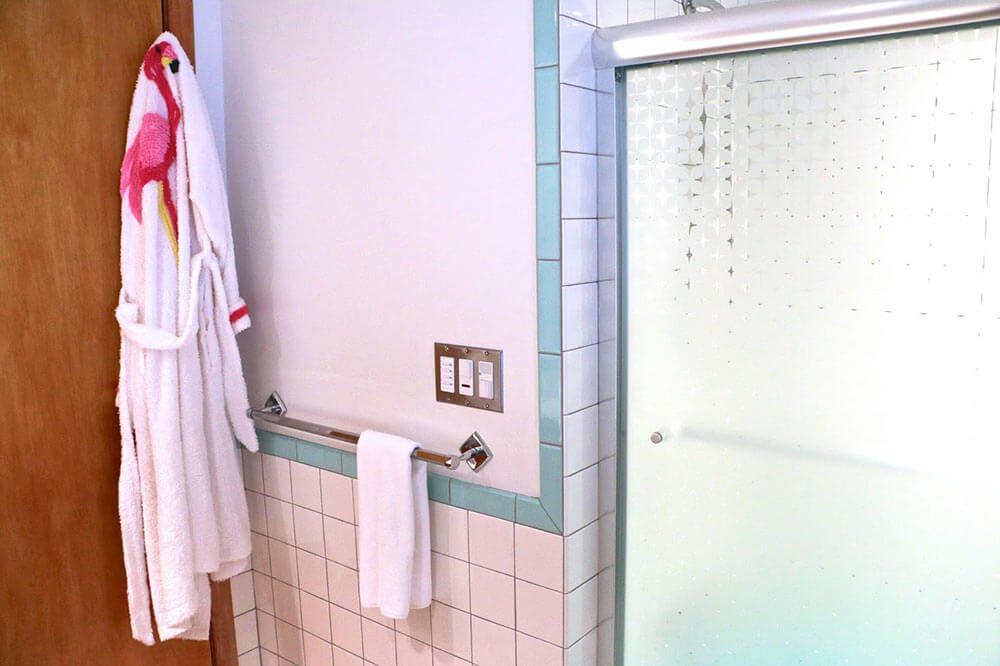
After the Adventure and once all the treasures were in hand, the bathroom came together beautifully:

List of resources used in Donna and Steve’s bathroom remodel:
- Tub and toilet – vintage, original to the house
- Toilet seat — Bemis Classic Colors Ming Green
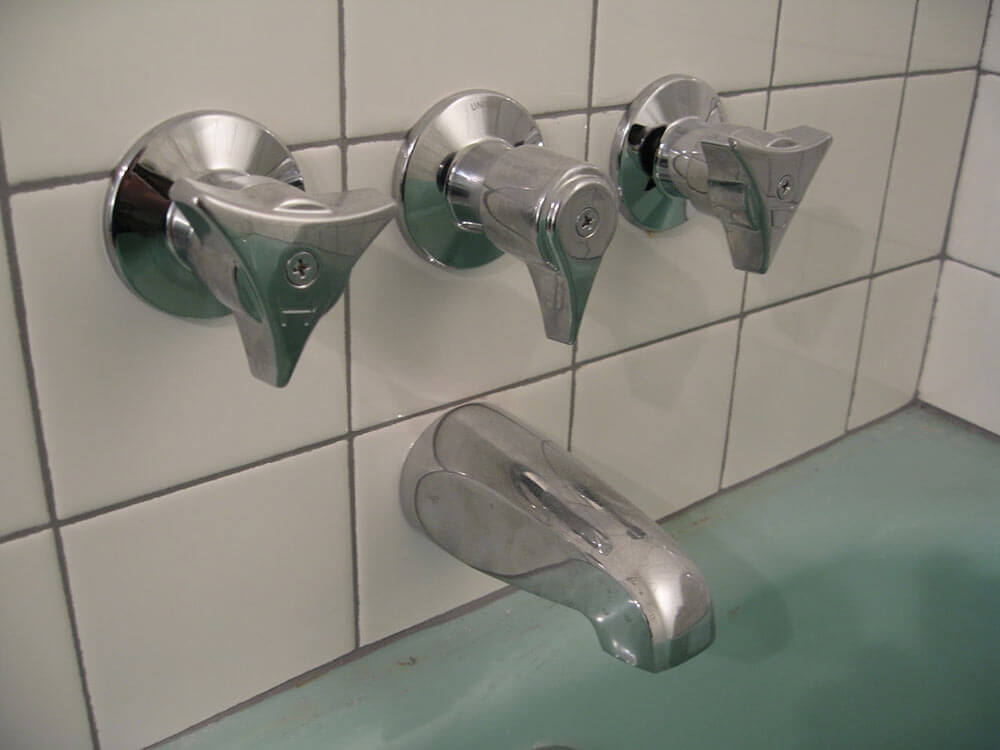
- Tub faucet — Union Brass 530 three handle tub and shower valve from Locke Plumbing
- Sink – Craigslist
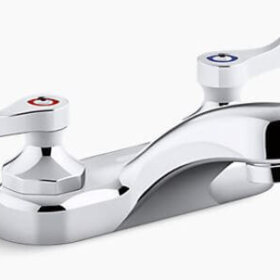
- Sink faucet — Foundations 4 inch centerset single-handle bathroom faucet in chrome
- Countertop — Craigslist acquired for free, but then cut down and finished by the contractors
- Medicine cabinet mirror — ReStore Habitat for Humanity
- Shower door — Sterling ‘Starscape’
- Hall-Mack Aristochrome accessories — salvaged
- Hall-Mack Towel Ladder — salvaged
- Vintage cone lights over vanity — salvaged
- Vanity — Custom made from Steve’s design (based on Chris and Angela’s bathroom vanity)
- Cabinet knobs — dish cabinet knob and backplate from Rejuvenation
- Aqua trim tile — World of Tile Liquidation sale find
- Special accent tile in shower — World of Tile Liquidation sale find
- Ceramic bathroom accessories — World of Tile Liquidation sale find
- Wall tile — Daltile Semi-Gloss in White 0100
- Floor tile — American Olean’s CHO1 Chloe in Satin White
- Grout — CEG-Lite in Delorean Gray
- Recessed shower light — 6″ shower trim with fresnel lens
- Shower niche — Redi Niche Triple Recessed Shelf
- Paint — Sherwin-Williams Snowbound
With this epic bathroom renovation finally complete, what’s next for the dynamic duo?
Donna writes:
With that put to bed, we will sign contracts tomorrow for our kitchen makeover, featuring salvaged custom-color St. Charles cabinets (ETA mid-2016).
Never a dull moment in Retro Renovation land!
Never a dull moment indeed, Donna and Steve! Thanks so much for sharing your renovation — another stellar example of how doing things The Hard Way can pay off! — with us. It looks fantastic.
Link love:
- Follow Donna’s blog, Mid Century Make Under


Ali says
First off, the vanity turned out super terrific. It truly looks original.
Second, the breakdown is awesome. I call these kinds of trips ‘adventure costs’ but unobtainium works too.
The only problem is that WOT closed right before we closed on our house. These WOT stories make me so sad! I so would have been there, 6 hour drive and all.
Nate says
Wow, I love the reno! I think that the 2 recently featured green bathrooms are turning me towards a different color. I’m more of a blue/aqua guy myself but now feel that my mind has been opened to green.
The vanity is definitely a show stopper. I’m surprised that no one has asked this yet. What type of wood was used and how was it finished? (Stain color/poly/etc.) Are there more detailed pics somewhere that I could peruse?
db says
Hi Nate, thanks for your compliments.
The vanity is mostly birch plywood with solid doors, if I recall correctly.
We applied several (five or more, in some spots) coats of Retro Renovation favorite, Bulls Eye Amber Shellac, to achieve the color; and then topped it with a couple coats of clear Helmsman Urethane.
We do have some pictures the unfinished vanity here:
http://midcenturymakeunder.blogspot.com/2014/11/how-to-prepare-for-renovations-s-style.html
Carolyn says
Oh, man! Birch wood!!! Our 1958 Liberty travel trailer is all birch and it’s just… OMG I have no words! We’ve had it over 16 years and here I’m still gushing. A lot of it is water damaged but what isn’t – oh my, my. Your hands reach out to touch it – I’ve got no more superlatives.
ineffablespace says
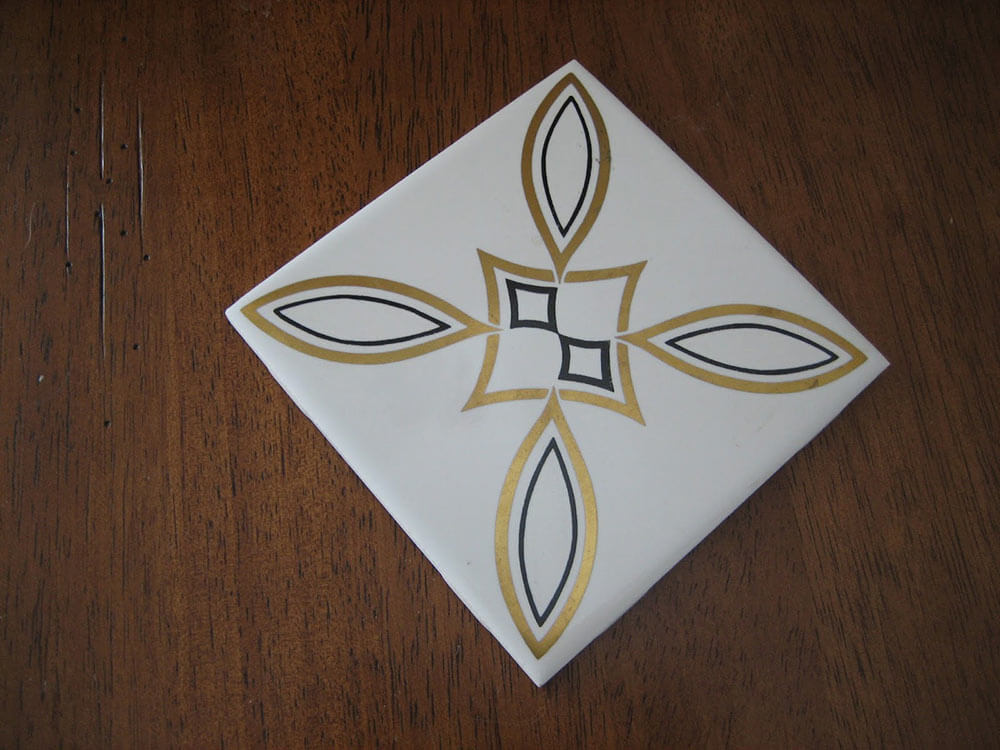
Also, what was the existing tile that formed the octagon-dot pattern? Was that tile or some kind of wall material. Was that salvaged for anything?
pam kueber says
I saw tile like that at World of Tile. I’d say: 1970s.
db says
The ‘original’ (to us) material on the lower part of the walsl was indeed tile – the thin kind with mesh backing to make sheets of the octagon pattern. Agree with Pam on the estimated date. It came down very poorly, and was not salvaged.
We did attempt to save the white-with-gold-ribbon sizzle strips, but had about 75% breakage. So, we have a bunch of broken pieces, if anyone is interested!
Paul says
Please may I have some broken sizzle strips? I want to see the design in person, and I am designing a bathroom which will use sizzle strips.
Trudi says
Perfection! Before I read the story I looked at the photo, thought it was the original, and couldn’t imagine why they wanted to touch a thing in that perfectly preserved room!
Stephanie says
This is just stunning. The vanity is beautiful, and the green tile was worth all the effort, because it just ties the room together. You did a wonderful job!
Jay says
Very nice, but Ugg! another large bathroom. Glad to see green baths, twice in one week. It’s also nice to hear that someone found what they were truly looking for at the WOT closing sale. After seeing this lovely bath and Kate’s I am now of the opinion I should have white walls with green trim as all green would suck the light out of the windowless bath. This is great inspiration and I admire your tenacity in seeing this project through to its completion.
Robin, NV says
Clearly we need an uploader so everyone can show off their green potties!
Kristen says
Beautifully done bathroom! I love the consistent attention to detail that retro renovators have. The tally of costs to get the WOT pieces is fun documentation to look back at!
Debbie in Portland says
“Actual cost of items” made me laugh ’til I cried. 🙂 I LOVE this bathroom remodel (and also how the cat coordinates so beautifully with the wood)!
ineffablespacd says
I love the canted vanity.
I don’t think we are allowed to install three handle shower systems in my location any longer. I had a really difficult time finding a single handled pressure balanced shower system that had the vintage look I wanted. I’ve used the Kohler Triton in a couple baths, (which was designed back then), but if you want pressure and temperature control it’s a really difficult task to find something that has that mid century look.
Cara says
If your bathroom looks vintage, how would anyone know that the 3 handle shower faucets weren’t original?
Carolyn says
It seems to me, the re-dos flow much more smoothly with the help of supervisors (handsome cat) due to their unique perspectives.
I live in the town where your toilet seat was made (Bemis – Have a Seat).
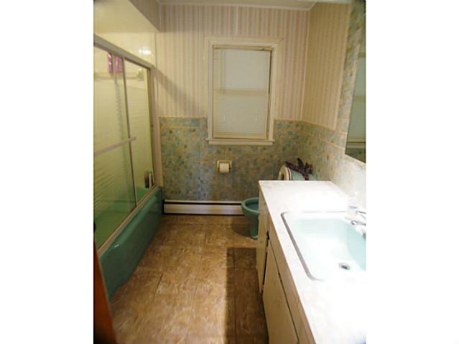
Did you gain considerably more floor space from the custom vanity? It looks a LOT better than whatever that white box was in the Before.
More lessons learned here: Vacation? or Road Trip? All depends on how you frame it. Found something really cool but not enough? Augment with lots of easy-to-find to highlight. Document for future reference (drive vs. air travel + shipping, on budget vs. over budget calculated by regretting having done it ($) or regretting having not :>( .
Pam and Kate, I’m glad you had us weigh in on “Doing it the Hard Way and highlighting with people who have done one or the other or melded the two.
Kudoes Donna and Steve!
db says
Hi Carolyn, thanks for your kind words.
-Did you gain considerably more floor space from the custom vanity?
A small amount, maybe 6″ extra space between the side of the vanity and the commode. The depth of the new unit is about the same, but the height is a little taller than the previous white box.
The biggest difference, with regards to space, has been removing the soffit/bulkhead – it doesn’t really add space, but it makes the room *feel* so much bigger!
SB says
Carolyn,
His (HC) supervision skills are unsurpassed.
The vanity did give us about 8in of “additional” floor space but the real benefit is how much larger it makes the bathroom feel.
Thank you for your comments! We’re tickled that it turned out so well and that Retro Renovation is available as such an amazing resource!
Steve