

 We gave a sneak-peek of my 1960s bathroom remodel — really, just a “refresh” — when we showed the countertop — our new Retro Renovation® Delightful Jade from our new collection with Wilsonart. Today: A look at all the changes I made: New tile floor, new vanity, new sink, new countertop, all topped off with a new coat of paint on the wall.
Unlike my master bathroom, which was suffering both in condition and layout, necessitating a gut remodel that ended in a pink potty paradise, my mint green (or is it ming green?) hall bathroom was still going strong — it had just a few “problems.” Instead of tackling all of the issues in one swoop, I’ve been working on this 1960s bathroom remodel over the last few years bit by bit. This slow transformation is good for my budget — allowing for me to pay for things as I go — and also good for giving me the proper amount of time to weigh my options and pick just the right materials.
Key updates in my 1960s bathroom remodel
 To begin, I fixed the bathroom vent fan, incorrectly installed by my home’s second owners, which I discovered had not been venting properly for the past 18-20 years. With this problem solved, it was time to correct all of the problems that likely occurred from moisture damage over the years: regrouting the moldy and missing the shower tile, replacing the crumbling vanity and top and replacing the floor tile which had started to come loose and was cracked and scratched from years of use. I also chose to remove the shallow cabinets over the toilet and towel bar, because I never really put anything in them and visitors occasionally would bump their heads or shoulders on the cabinets. [It’s bad feng shui to have protrusions hanging over your head when you are doing ‘normal’ things like sleeping or…. sitting, Pam points out]. I also think the room feels bigger without them there. Eventually, when I find it, I’d like to put some vintage wall art or a painting on that wall.
I had already decided that I wanted to build another retro style vanity out of oak plywood with tapered, midcentury style legs like I did for my retro pink 1960s bathroom remodel. I originally wanted to put in a vintage green sink, but after years of searching, the retro decorating gods still had not sent one my way, so I decided to use a much more easily found white sink. That left two crucial decisions to make: What floor tile and countertop should I use for this affordable bathroom renovation?
Retro Renovation® by Wilsonart ‘Delightful Jade’ boomerang countertops
 In the midst of my flooring and countertop search, Pam and I were deep into our collaboration with Wilsonart to recolor their retro boomerang laminate patterns.
- Samples of our new collection are now available, and the laminate is available for purchase. See our launch stories here!


 When the colorways started getting closer to their final forms in this bathroom remodel, I realized the ‘Delightful Jade’ colorway we were developing would go really well with my original American Standard green bathtub and green wall tile. I love all the colors in our boomerang laminate collection, but ‘Delightful Jade’ is my favorite by far, so I’m super excited that I found a place to use it in my home.

 Luckily, we finalized the color just about the time that I needed to fabricate and install the countertop for my green bathroom, so Wilsonart kindly sent me a complementary sheet of ‘Delightful Jade’ boomerangs to use in the bathroom. We used the photo of me with the countertop in our media launch — it was great to be able to show one of the new laminates installed!

 The verdict — I absolutely love it. Every guest I have had over to the house since I finished renovating the hall bathroom has remarked about how much they like the countertop — whether they are into retro decor or not. Plus, how many people can say they not only fabricated their bathroom countertop, but also helped to create the color way?
Merola’s Chrystalline mosaic floor tile in pistachio – perfect for my retro bathroom update
 Once I had decided to use the green boomerang laminate countertops, I had to figure out what floor tile to use. In the past I had been toying with the idea of using Merola Tile’s light green hex, light green squares, or some self-assembled pattern created from their green and white tiles. Even though both the hex and 1″ light green square tiles from Merola tile were nearly a perfect match to my original green tiles and tub, there were a few reasons that I hesitated to use them in my bathroom. First, I feared that since the bathroom is quite small and has no window or natural light, that too much green — green tub, green floor tile, green countertop — would make it feel overly dark (see our story on Light Reflective Values — LRVs). Second, though I liked the 1″ hex tiles, I didn’t feel like they were quite right for my 1962 ranch and would instead feel more at home in a house with a slightly older vintage.
 At this point I had just about decided to go with a plain, 1″ square mosaic tile flooring when we broke the story about new midcentury style floor tile options from Classic Tile. Though they didn’t have any green in the collection, the tiles reminded me of the pink Merola University tile that I used — and LOVE — in my pink bathroom, so I headed over to the Home Depot website to see if Merola Tile had any new releases. Sure enough, I found Merola’s Crystalline Square in ‘Pistachio’ which looked like a cousin to the pink University Tile in my pink bathroom.

 I ordered a sample and found that the pale green glossy floor tiles meshed nicely with the original green found in my tub and wall tile — they appear to be a lighter tone of a similar minty green. I also liked that the pattern had white tiles in it that went with the white sink and toilet and with the white salt and pepper original wall tiles. I had my reservations about the textured greenish tiles at first, but I soon realized that they read as more of a beige color than a green, especially when placed next to a more saturated mint green, so I decided to go for it and install this floor tile.
 I grouted the tiles with the same Natural Grey SpectraLOCK Epoxy Grout that I used in my pink bathroom (which is now no longer available through Lowe’s and must be ordered online) with fabulous results. Just like the medium grey made the light pink, beige and white tiles in my pink bathroom pop, it also acted as a strong backdrop for the green and white tiles on the Crystalline Square floor pattern. Plus, as Pam says: Use a gray grout of this intensity and it will likely never look any dirtier than it looks when you put it in.
Building a bathroom vanity to suit my 1960s bathroom
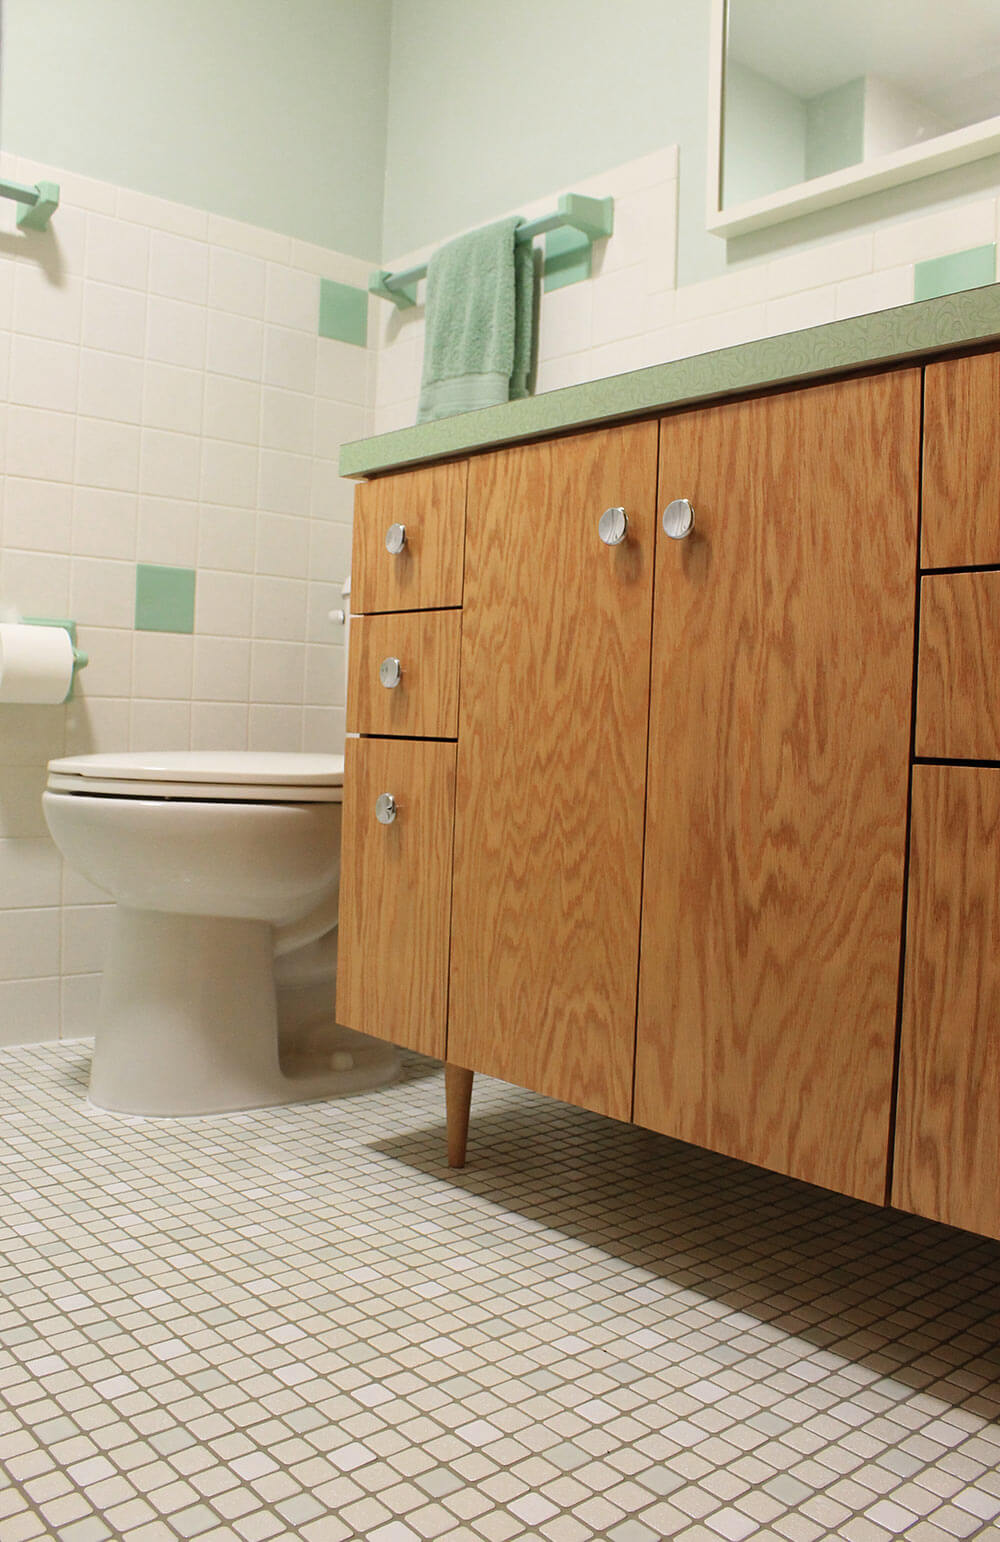 I built the vanity using the same materials and methods that I used to build my master bathroom vanity — including 6″ tapered oak McCobb style legs from Tablelegs.com (disclosure: a new advertiser). For those who are wondering, I found the quality and customer service from Tablelegs.com to be exceptional.
I used the same easily available, inexpensive, retro style cabinet knobs that I used in my kitchen — sans backplate this time — on the vanity.
Sink and faucet appropriate for a 1960s bathroom

 Initially, I was planning to use a white vintage cast iron sink with hudee ring that I found for a mere $4 at my local Habitat for Humanity ReStore, but when it came time to clean up the sink and ready it for installation, I noticed there were several chips and pits in the finish that would likely start to rust in short order.
Remembering our stories about where you can buy sinks with hudee rings today, I decided to order a new, steel Bootz Daffodil oval lavatory sink with 4-inch centers from HD Supply with the coordinating Vance Industries-made Hudee Ring. The sink and hudee ring were affordable, and Pam wondered about the quality and feel of the sink.
Here’s my two cents: The sink is an inexpensive, mass-produced product and that is evident, especially when you look at the underside of the sink, which had clear caulking rather sloppily applied where the plastic overflow drain was attached to the steel sink body. This was not a deal breaker for me, though, because this portion of the sink is hidden inside the vanity cabinet, and I have had no issues with any leaking. The sink is much, much lighter than a similarly-sized cast iron sink, which is not necessarily a bad thing. The lighter sink was much easier to install into the countertop, because it was simply less weight to hold up while simultaneously trying to tighten the hudee ring clips. When the water in the sink is running, or if you tap on the sink with your fingers, it makes a different sound than you would expect from a heavier duty cast iron sink. This also was not a deal breaker for me. All in all, if I wanted a new retro-style hudee ring sink and was on a budget, I would buy a Bootz steel lavatory sink again. I have faith that this sink will hold up for many years to come.
- TIP: If you want to order one of these Bootz sinks, read our original story for all our tips for putting together the entire package including hudee ring.
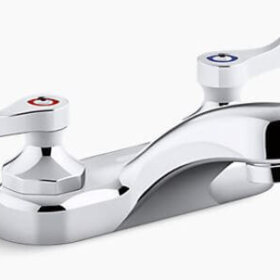
 For the faucet, I knew I wanted a 4″-center, chrome, low arc, midcentury styled bathroom faucet and I didn’t want to spend a fortune on it either — I spent all my money on building the pink master bathroom! Remembering our story about 14 four-inch center bathroom sink faucets suitable for a postwar bathroom, I went through the list and decided on the Pfister Pfirst Series Centerset Bath Faucet, which I purchased through Home Depot for an affordable $30. Again, I was concerned about the quality of this faucet due to the low price; however, I found the faucet to be easy to install, and it seemed quite good quality for the money. It looks great, cleans easily and the handles are easy to turn. I would say that the piece of clear plastic along the bottom of the base of the faucet, which is barely visible, does detract from the look a bit and the faucet feels ‘lightweight’ but I have had no issues with leaking or otherwise after six months of daily use.

List of 1960s pink bathroom remodel resources:
- Countertop: Retro Renovation® Delightful Jade boomerang laminate, part of our new Retro Renovation® by Wilsonart® collection
- Sink & hudee ring: Bootz sink with Vance Industries hudee ring ordered through HD Supply
- Faucet: Pfister Pfirst Series Centerset Bath Faucet in Chrome, Home Depot
- Floor tile: Merola Tile Crystalline Square in Pistachio, Home Depot
- Grout: SpectraLOCK Epoxy Grout in Natural Grey, available online through FloorLife.com
- Wall color: Sherwin Williams SW 6190 Filmy Green, a nearly perfect match to the mint green tiles on the floor
- Vanity legs: 6″ oak McCobb wooden legs from Tablelegs.com
- Cabinet knobs: Liberty 1.5″ polished chrome cabinet knobs, Home Depot
- Toilet: Gerber Viper Ergoheight Elongated Toilet in white, DecorIsland.com (I love my pink toilet so much that I bought the same one in white for my other bathroom!)
Kate’s pink bathroom:

- Want to see more of Kate’s handiwork? Read all her stories about her remodel that created this pink 1960s bathroom remodel.


Bethany says
It looks great! I’m currently doing a partial renovation of my 1955 green bathroom and I think we have the same green bathtub! The owners before me decided to to glaze white over top of the green tub and when the glaze started chipping I knew I had to return it to it’s original green glory. Getting all the glaze removed was not an easy task but it is well worth it :). Love the laminate/vanity! I also only have recessed can lights in my bathroom and it is way to dark. Do you have any suggestions of retro inspired sconces that plug in? Not sure I have the funds to hire an electrician to run wiring just yet.
Linda says
Perfect! I’m keeping all these notes so when the time is right, I will replace my hall bathroom sink, countertop, and faucet with the above products. That’s my plan! I’m not too confident on my carpent y skills to tackle a whole new cabinet, but I don’t really need to. (Happy dance!)
I apprentice all your research and ideas. You gals are simply fabulous! One more thing, I loved your fashion news on your outfits. You both look very smart and cute in your choices. Keep up the awesome work! XO
rue says
You really did a fantastic job. Love the green!
rue
Judy H. says
I love every single square inch of your bathroom! I want your vanity to be my vanity! The Delightful Jade boomerang makes me SO happy! You did one magnificant job!
Joe Felice says
I still prefer the pink one, but this one is very cool and peaceful. My favorite thing is the raised vanity. When does pistachio become mint, become jade, become aqua? That is the question. Hopefully, Kate plans on putting something on the walls.
connie says
There was a perfect green original sink, for an old house being renovated in Texas, either HGTV or DIY Network. They found it at a store that stocked old appliances. The owner refused to keep it. Maybe you can find the episode. Two sisters who bid on old houses and move them elsewhere, This happend to be their Grandfather’s original home. Their Father didn’t let them use it
Scott says
Its quite beautiful and I think you are being far too modest referring to it as a refresh. I tend to get way too sentimental about houses but I think its really amazing when you can make a room exactly what you want while some of the original elements get to live on.
Kate says
Aww thanks Scott. It does feel like just a ‘refresh’ after the total gut remodel of my pink bathroom!
Mary says
I didn’t see any lighting in your bathroom and I’ve been looking for guidance/ideas on that. I didn’t see a window in your bathroom either which is what is making lighting choices so hard for me. Do you just have an overhead light? A post on adequate lighting when the bathroom has no natural light would be great! I love my pink fixtures and have protected them all these years. Now I want to do a refresh of the mirror and lighting I have. Help!
Kate says
My green bathroom has a light on the fan and two recessed can lights above the vanity that were installed by the previous owners.
tammyCA says
Looks so nice & minty fresh..the jadeite boomerang perfect..good choice for the lighter floor as it would seem like an all green floor & not having natural light would cast a Frankenstein-y green glow in there. Now when can you come do my bathroom? ????
Kate says
hahaha why does everyone say that to me Tammy? 😉
Karin says
Kate your Ming green bathroom looks fantastic. Thank you so much for all the resources. Everything co-ordinates perfectly. I have the same speckled 4 by 4 tile in my bathroom’s shower area. Did you pop out the odd speckled tile and add that green 4 by 4 tile, or was that done by the original homeowner? I’m thinking of trying something similar.
Kate says
Karin, the wall tiles are original. I did have to replace/add a few new speckled white tiles around the vanity and underneath it (which I got from B&W tile). I’m not sure if you could pop out a few tiles to add green ones without breaking the tiles next to it, that would be a difficult and nerve wracking job I think!
Karin says
Thanks Kate for your reply about the green tile. I’m not going to pop in that green tile-too scary. The speckled tiles are in my shower and bathtub enclosure. I wasn’t fond of them when I moved into my 1971 condo, but they grew on me after I saw several bathrooms with them on this site. Thank you for the resource for replacements. If I don’t find them here in Toronto, I know where to order more. Thank you.